Earthquake Testing Structures with Glue

I have always been curious about structures. It wasn't too long ago that I was fortunate enough to be able to build my own shop. It was during that build that I began to think about – how well are all these houses built that we live in? When you are faced with building your own roof you tend to think about the beam and rafter placement, the deflection of certain woods and how to fasten together the whole thing. So with this in mind I set out to create a little test, and answer the question whether it is reasonable, or necessary to use any adhesive in home construction.
Hypothesis
My hypothesis is simple: A structure that is reinforced with glue at the nailing joints, wall connections, foundation and roof will be much stronger in the event of an earthquake, hurricane or other more typical stresses such as snow loads. The basic tenant I am going into this with is that when two boards are attached, with any mechanical fastener such as nail, or bolts you multiply the number of fasteners to obtain the total friction and strength of the bond. When you use an adhesive, spread out evenly along those two boards the stress is distributed in a manner that creates a more unified and stronger bond than any mechanical fastener could, no matter how many fasteners are used. The only variable is the length of time the bond would last, which is a test for another time.
Method
My method was to have two structures built with miniature framing lumber, on foundation plates of plywood that, while identical in every way were distinguished by the addition of yellow carpenters glue at all the joints, including the sills which connected them to the foundation plates. The foundation plates were divided in half to simulate the movement of the earth. The structure itself was designed to be 1/12 scale. For simplicity the wall studs, roof rafters and ridge beam were all based on 4x6 lumber, and the spacing was nearly 4 feet on center. While this is not a typical application it is difficult to cut, and nail framing lumber that is too small. In any event it would make no difference because both structures are designed the same. The finished framed structure is 16 feet x 20 feet in 1/12th scale.
Testing Method
There were two main tests applied to the structures. The first was a sheer test where, using a clamp I applied pressure to one of the foundation plates while the other plate was fixed to the bench top. The goal was to simulate an earthquake, or other ground disturbance that moved laterally.
The second test was the equivalent of a projectile test, like when in a hurricane a piece of loose lumber is sent flying into a nearby structure at high speed. I set up a ball to swing into the 16 ft side where the top wall plate meets the ridge beam of the roof.
Results
Not surprisingly the glue helps enormously to make the structure very rigid. But there were a lots of surprising results on both the glued and non-glued structures.
Non-glued Structure
Even though using 5/8” brads to simulate 16d common nails was not perfect, the structure remained very much intact after both tests. If there were any inhabitants within the building they would have survived without any roof rafters falling.
The sills, being fastened with 3/4” screws to simulate j bolts into a concrete foundation were strong enough to resist the movement of the plates, while the brads connecting the wall plates to the sill plates were weak enough to bend. The result was that the sills cracked and the walls were able to float along the cracked sills freely. One of the walls caved in slightly as the sill twisted the adjacent wall and the brad nail wall-to-wall connection became weak.
Overall the foundation plates were pinched at one end due to the fact that the far sill failed and forced the plates to move, levering against each other.
Glued Structure
The thorough application of glue at the sills connecting them to the foundation, and the additional glue added to the wall plates formed a nearly solid beam running all along the base of the structure. This was one of the substantial differences in the two structures. While the nailed building relied on those single points of contact to connect to the foundation plates, the glue formed solid beams which were very firmly in place. When the clamping force was applied the building transferred all the energy into one single point on the sill and cracked it completely, separating the wall and sill from the foundation.
In terms of the rest of the structure, the walls and roof system were nearly intact. Only during the projectile test did anything break, and then is was completely demonstrating the rigidity of structure and the upper wall plate cracked through, while in the rest of the wall not a nail was disturbed.
Conclusion
In terms of survivability, both structures performed properly and did not fail completely.
In terms of repair, the non-glued building needed substantial repairs to the walls, roof and most of the foundation connection.
On the glued building much of it was left intact, except the substantial failure of the long-side sill and wall plate, which would be much cheaper and more manageable.
If you have any comments please leave them below, and remember this is not a perfect scientific test. It was for fun and meant to be informative.
DIY Making Baby Groot from Guardians of the Galaxy
DIY How To Make your own Baby Groot
In this short tutorial I take you step by step how I was able to make the baby Groot from the end of the Guardians of the Galaxy movie.
Materials
- 3 inch square piece of mahogany or other hard wood
- 12 gauge wire
- Dark stain spray
- Cloth
- Twine
- Marker (green)
- Bowl for Groot to sit in
- Moss or other greenery
- Little beads for the eyes
Tools Needed
- Band saw or coping saw
- Hammer
- Hot glue gun
- Chisel
- Sander
- Drill with ¼” bit
- Pliers
Method
Start by downloading the Groot template I created, or if you have a lot of artistic skill, create your own! Print and adhere the template to a piece of hard wood and cut out the pattern.
Using a belt sander round and shape Groot's head. With a file, chisel, or sandpaper, continue to shape his head and create the mouth, eyes and hair features.
Drill a ¼” hole in the bottom of Groot's head to fit the twisted 12 gauge wire of the body. Form the body by using some pliers to get the shape you need.
Cut strips of fabric and hot glue them to the wire structure. Then using twine and hot glue fill in the body.
Attach the head to the body and spray Groot with either a stain or a paint. Let dry and sand where necessary.
Using markers or paint create the green strings around the figure. Hot glue the eyes and then affix to a board or bowl. Top the bowl with moss or other greenery.
Conclusion
This is a really great project if you don't want to dress up for Halloween, you can just carry around Groot!
Building a Tile Tray with Marble and Mahogany
In this video I really wanted to show something I have been wanting to integrate for a while: tile. I also needed a tray for coffee in the morning, or a little bit of whiskey in the shop so it was just a perfect project to do with scraps.
I had some plywood scraps, a few pieces of 1 x 2 mahogany I cut up a while ago, and some marble tile from the chess table I made last year. It was just about enough to get together a small tray. I cut a piece of ½” plywood 11 ½ x 9 ½ inches. The next step was prepping this piece for tile. I use a product called red guard. It is a sealer that goes on pink and dries pretty quick to a deep red color. It is often used on bathroom projects in the shower/tub area. I have used this product on some outdoor tile projects and it works very well.
You just paint it on, let dry for an hour or so, and then get started cutting tile. I planned on cutting marble, which is a very soft stone, so I added some water to the wet saw and measured out how many pieces in a running bond pattern I would need for the size plywood I was using. A wet saw is a pretty inexpensive investment (~ $125), but it is obviously not for everyone. I have used it quite a few times for tables, including my coffee table, side table and I tiled my entire kitchen (floor and walls).
So after I cut all the tile I needed some mortar to attach the tile. In a previous video (Building a Fire Pit) I made my own mortar to lay the brick. Well this time I need a lot less and the mix I used is a little different.
The following are volume relationships. Typically you would use mass measure but for amounts as small as I am using for a tile tray you need to use volume.
Mortar Ingredients
- 3 parts sand (sifted, > 0.5 mm particles)
- 1 part portland cement
- 1 part lime (calcium hydroxide)
Method
Just mix the ingredients together very well and add small amounts of water at a time. You want to create a paste, too much water tends to crack when it dries.
I made some layout lines on the plywood with a pencil then I back-buttered each small piece of tile and placed each piece down firmly and left a 1/16” gap between each piece for grout.
I left it to dry over night. The next day I miter cut the 1 x 2 mahogany carefully on a manual miter box. If you go slow they work pretty well. I turned the tray upside down to pre-drill and attach the mahogany with some 1 ½” screws. A couple pieces of tile fell off. I cleaned up the dried mortar, made up a new batch and reattached them while the mahogany pieces were in place.
Next up was to grout the tile. Even though I had to reattach a few pieces of tile I did not wait overnight. It will work out fine.
Grout
- 4 parts stone dust
- 1 part portland cement
- ½ part lime
- red, brown and black pigment to color the grout
Just like the mortar add a little water at a time to form a firm paste.
I used some painters tape to protect the wood from the grout. I waited overnight for the grout to dry and then cut a few thin pieces of mahogany to cover up the plywood base. They were attached with glue and 5/8” brads.
Sealing the Grout
I used unwaxed shellac to seal the grout. Using a shop towel I applied thin coats over the tile and waited about 2 hours for it to dry.
To finish the box I made a couple of handles from another piece of scrap mahogany that was a little lighter and attached them with a screw and some glue. I then coated the wood portions of the box with a 4:1 mix of linseed oil:wax and buffed it dry.
Making Elsa's Tiara from the Movie Frozen
Making Elsa's Tiara
First, I started out with making a basic mold of my head with a piece of wire. I transferred this to a piece of paper and also sketched out the other parts to cut out. This template is available free for downloading on my website. (Download the template for the Elsa Tiara)
Next, I glued the paper to a piece of 1/2 inch plywood and cut out the pieces on a band saw, but you could also use a jigsaw.
Then I sanded the individual pieces. And then attached everything with hot glue. Once it was dry, I sanded the entire tiara, making sure to round the front line where all the pieces are connected and also the sides.
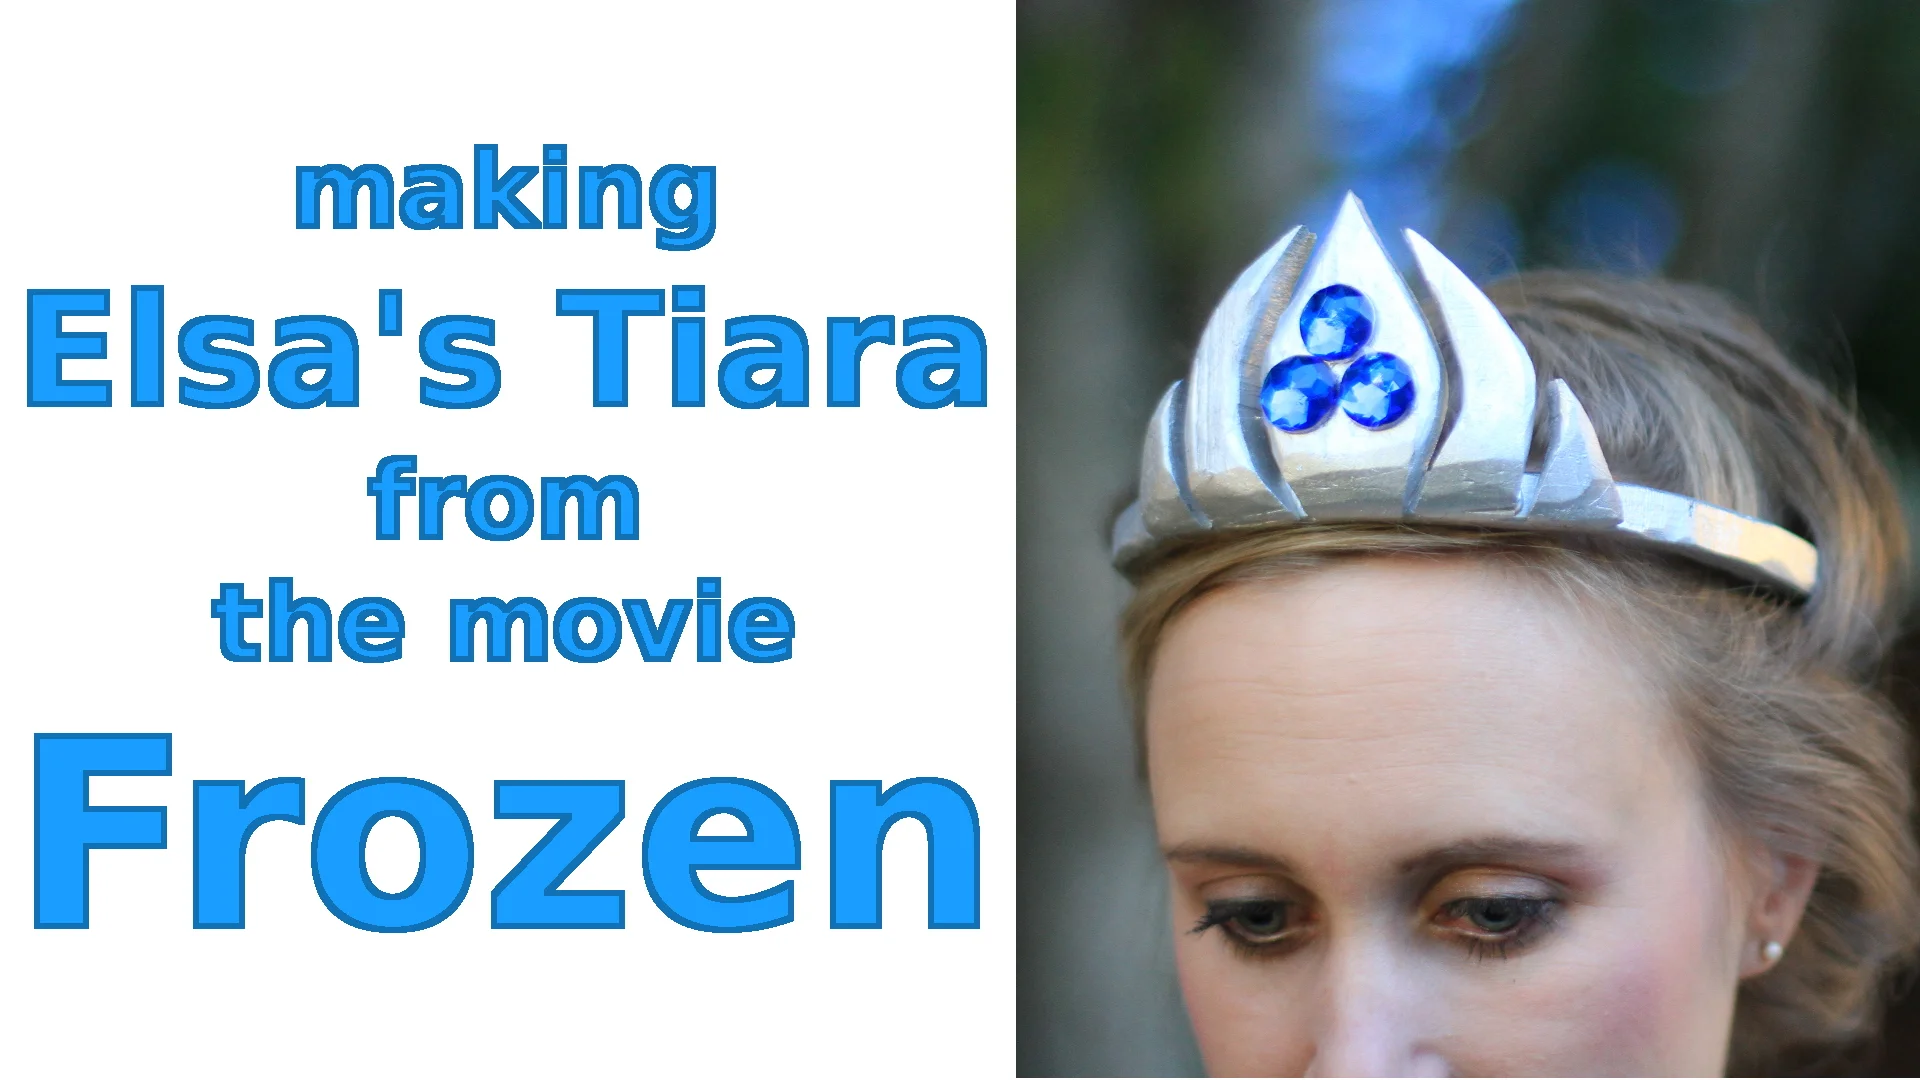
After that I painted the tiara with metallic oil paint which I had on hand, however you could also use a spray can. Last but not least, I hot glued on some plastic jewel embellishments to complete Princess Elsa's tiara.
This is a really fun simple project that anyone can do, and it costs just a few dollars and scrap plywood.
Building Thor's Hammer for a Costume
Instructions to Make Thor's Hammer
Wood Purchase List:
1 half sheet - ½”, 3/8”, or ¼” plywood – you either go for weight reduction or strength, your choice. I used ½” plywood. ¼” would be better for children. In case any mistakes are made it is good to have a little extra around
1 - 2 x 2, or 2 x 4 ripped in half or 1 dowel 1 1/8” - 2' long


Cut List:
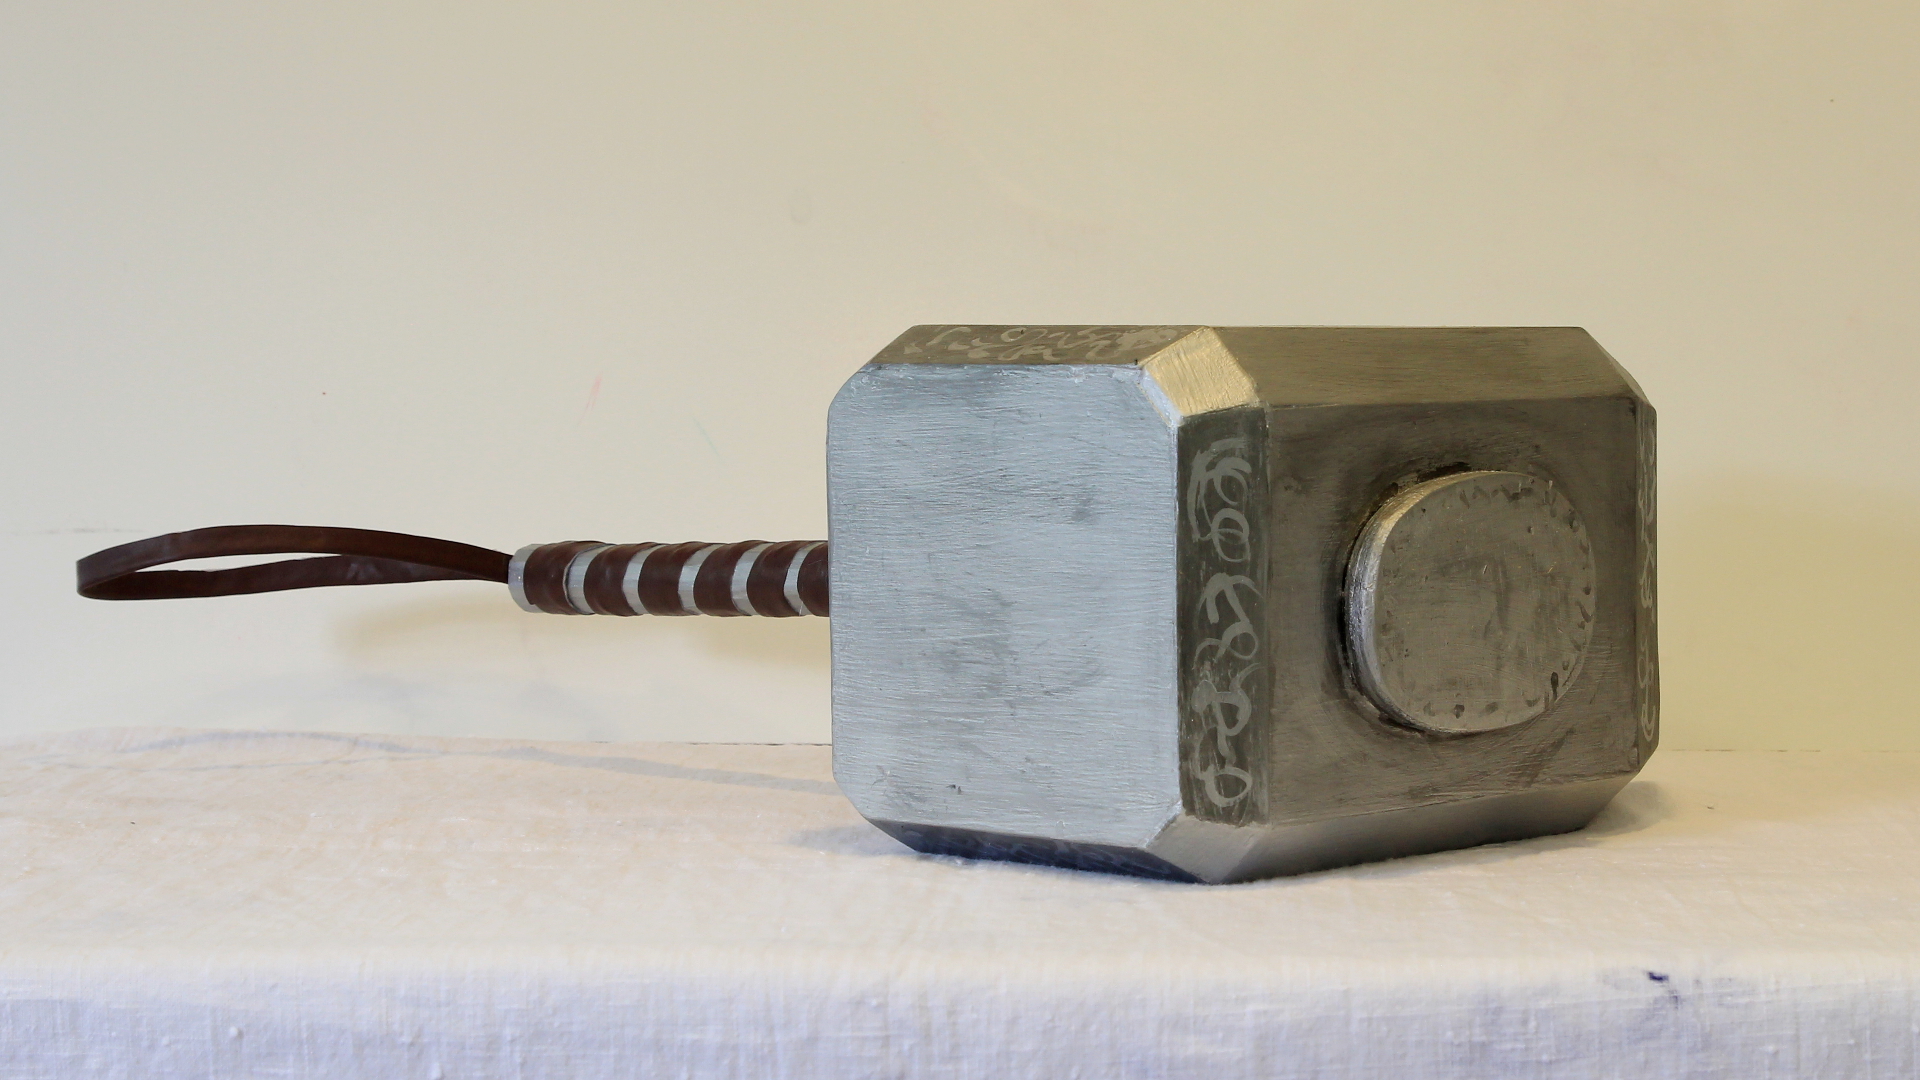
Four faces ripped 22 ½ degrees on the long side – 8” x 5” - (as measured on the long bevel)
Four thin post pieces ripped 22 ½ degres on the long side – 8” x 1 1/8” - (as measured on the long bevel)
Eight pieces 5 1/8” on the long side, compound mitered 11 ¼ degrees and beveled 22 ½ degrees on each side
Eight pieces 1 ¼” on the long side, compound mitered 11 ¼ degrees and beveled 22 ½ degrees on each side
Two pieces 6” square mitered at 45 degrees on all sides and then cut all 4 points of the square 45 degrees at ½”
One 2 x 2 rounded to 1 1/8” approx 14” long, depending on your size
One 4” piece of 2 x 4 for attaching the handle inside the hammer
One oval 5” x 3 ¼” at the extremes made of ½” plywood
Other materials:
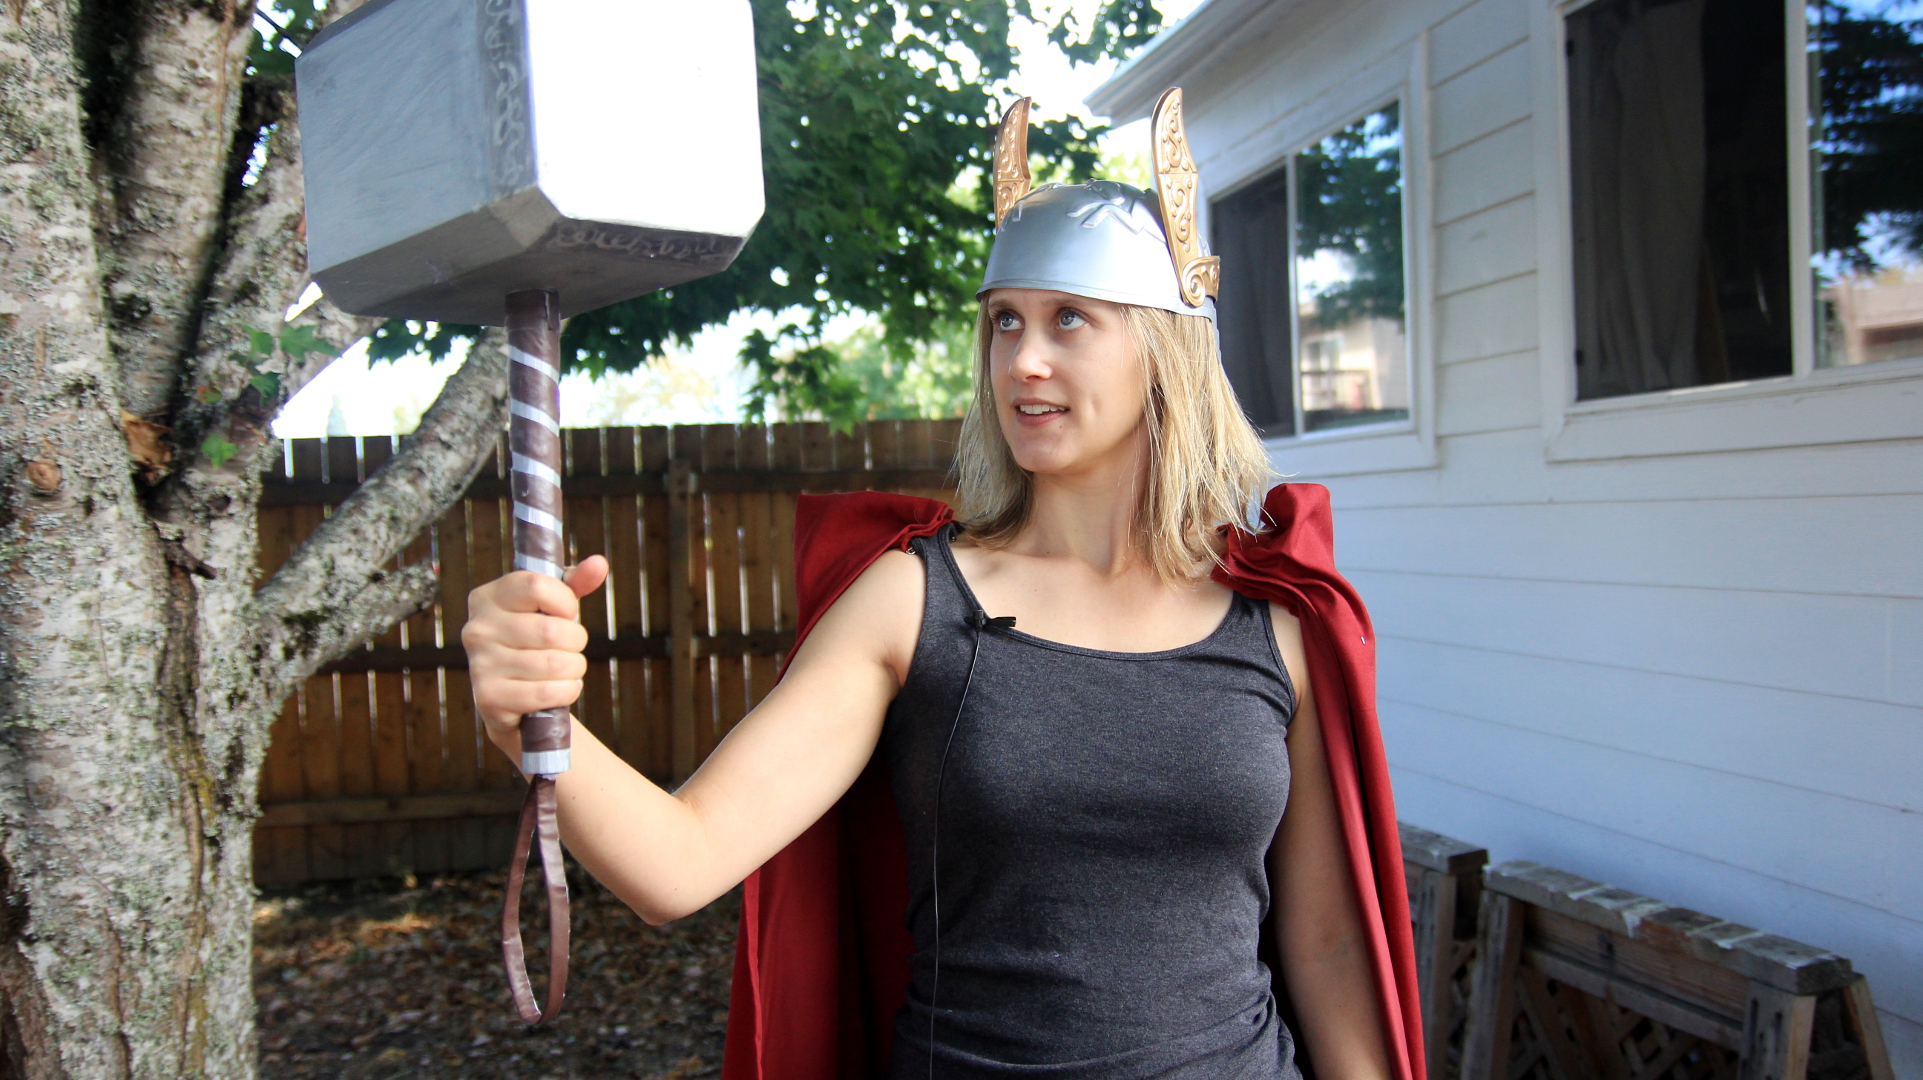
approx 30” of vinyl that simulates leather for the handle covering
metallic paint, spray or brush, latex or oil
black paint, brush, latex or oil
a tack for the bottom of the handle
hot glue gun
small paint brush for the symbols, mixing black and metallic
Tool List:
Table Saw
Miter Saw
Power drill with a 1/8” bit and a 1 1/8” spade bit
Jig Saw, coping saw or band saw
Hammer
Sand paper or Sander
Hot glue gun or carpenters glue & brad nailer (hot glue is much easier)
note: You can't really avoid these tools for this project
Method:
Creating the main faces and basic box:
Set your table saw fence to 5” and your blade to 22 ½ degrees, and rip down the ½” plywood. The final top bevel width of the wood will be 5 ¼”. Cut 4 pieces to 8” on the miter saw.
Repeat the operation, but set your fence to 1” and cut 8 pieces to 8” on the miter saw.
Drill into one of the larger faces in the very center with the 1 1/8” spade bit to make room for the handle.
Use a hot glue gun to glue up the 8 pieces to use as a guide for the rest of the build.
Creating the side faces:
At the table saw with the fence still at 1” rip numerous pieces with the 22 ½ degree bevel on both sides. The lengths should be about 2' to handle easily on the miter saw.
Set your compound miter saw to a 11 ¼ degree miter and a 22 ½ degree bevel. With the bevel down cut the 2' beveled piece from above anywhere on the end to start the angle. Once that cut is made take the piece over to the box you have so far and place the piece on the long side of the box (see the video for a visual) to mark for the cut. Using a bevel hand tool really helps to line up your cut at the miter saw unless you have a laser.
Repeat for the 8 long pieces and then the 8 small pieces.
Use hot glue to attach all the small pieces to the sides of the hammer box. Make note that we have not yet cut the two face covers so that we have access to attach the handle.
Cut a piece of 2 x 4 four inches and drill a 1 1/8” hole in the center.
Cut the dowel or any 1 1/8” handle to 14 inches (or whatever fits your hand better) and put it through the hole in the bottom of the hammer box, and then place the part of the 2 x 4 that you cut at 4 inches inside to cap the handle. If everything fits then remove it, add yellow glue and secure the handle to the box by drilling a 1/8” pilot hole into the long grain of the 4” piece of 2 x 4 and either side of the handle, use a 2” drywall screw to secure it on either side.
With the handle attached securely we are ready to cut the final two pieces of the hammer to close it up.
On your table saw, with the blade set at 45 degrees and the fence set to 5 1/2", cut a 6” square. Once you have the square keep the blade angled and tilt your table saw's miter gauge to 45 degrees and knock off a ½” of each of the 4 corners. Repeat one more time.
Attach the final pieces with hot glue.
Using a jig saw, coping saw or band saw cut an oval approx 5” x 3 ¼” and hot glue it to the center top of the hammer.
Finishing
If you desire you can fill in any gaps with spackle or putty. Let dry and sand smooth.
Add the metallic paint. A few coats are suggested. Color and design are up to you. See the video for how I managed it.
Handle Covering
Cut the vinyl to about a 1 inch strip, approx 20” long. Wrap around the handle, when satisfied attach with hot glue.
what was left after the pumpkin test...