Darbin Orvar

Building & Making on Youtube

Darbin Orvar - Girl in a Shop

My adventures in building, diy, construction, testing and finishing.

Filtering by Category: DIY,Building

DIY Making a Rustic Fall Theme Sign & Collab

DIY Fall Themed Sign Made w/ Milk Paint & Collab with April Wilkerson

#womeninwoodworking

This simple DIY project is a great example of just how easy and affordable creating your own holiday decoration can be. With a few fence boards I had lying around from last year I was able to put together a beautiful and original fall-themed sign in just a few hours.
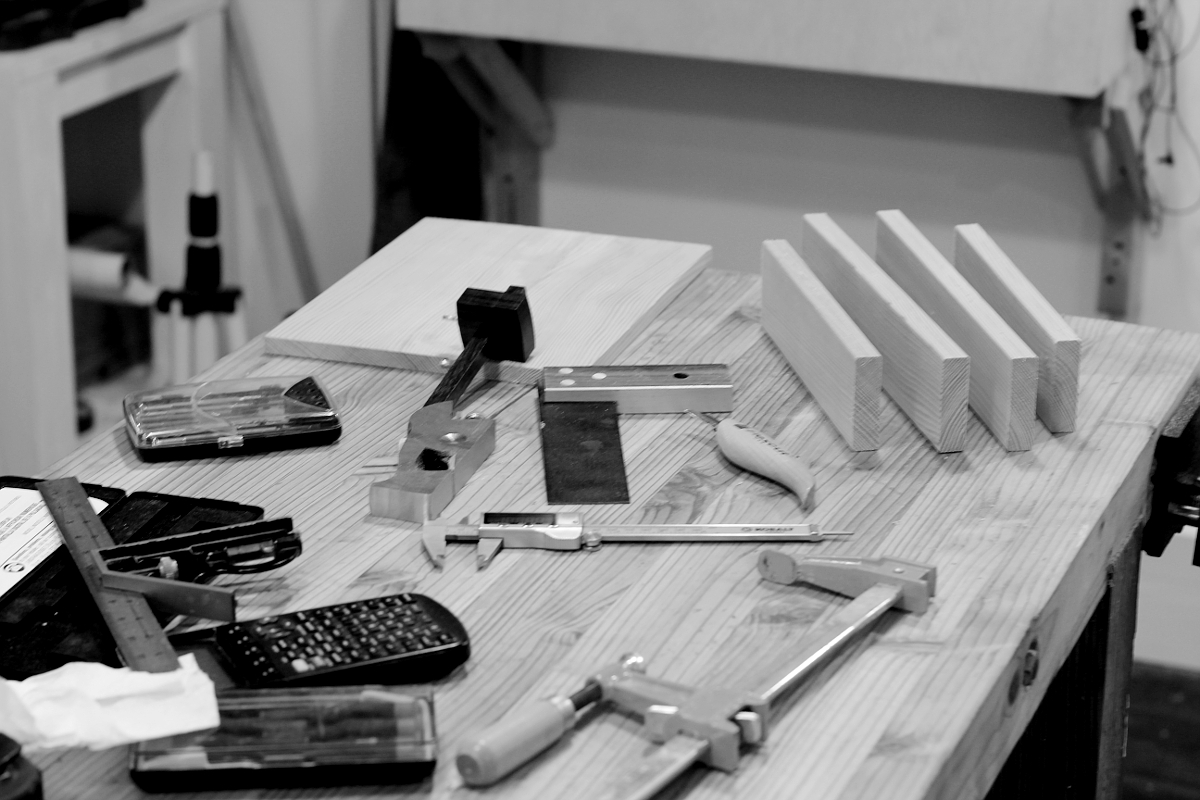
Step 1: Assembly.

Grab some old, or new cedar fence boards. Home Depot, Lowes or your local hardware store has these type of boards year round, and they are very inexpensive. I used of 1 x 6 inch boards, but use what you have.

Cut List:

  • 4 @ 30 inches long
  • 2 @ 20 inches long

Place the four cut at 30 inches on a table and the two cut at 20 inch across the top and bottom of the boards when placed side by side. Get some exterior nails, or screws that are about 1½ inches long and attach them on an angle to draw the boards together through the 20 inch boards that make the back.

Step 2: Sanding.

Sand a little with 150 grit paper just to knock off any sharp areas.

Step 3: Making the Milk Paint.

Milk paint expires quickly so I used just enough for this project.

Ingredients:

  • 2 cups of Milk Powder (the kind from the grocery store)
  • ¾ cups water
  • 1 teaspoon Type S Lime (Calcium Hydroxide)
  • 1 tablespoon white pigment

In a blender, or whisk and bowl, mix together all the ingredients and blend until smooth. You can then use the paint right away.

Step 4: Painting the sign.

With milk paint there is no need to use any primer so if you use a common paint brush you can paint the board white just like any latex paint. It goes on glossy and dries within 2 hours in typical conditions. If you want more coverage you can add another coat or just leave it a little rustic.

This type of water-based paint will raise the grain so you should do a light sanding before you write the letters with pencil.

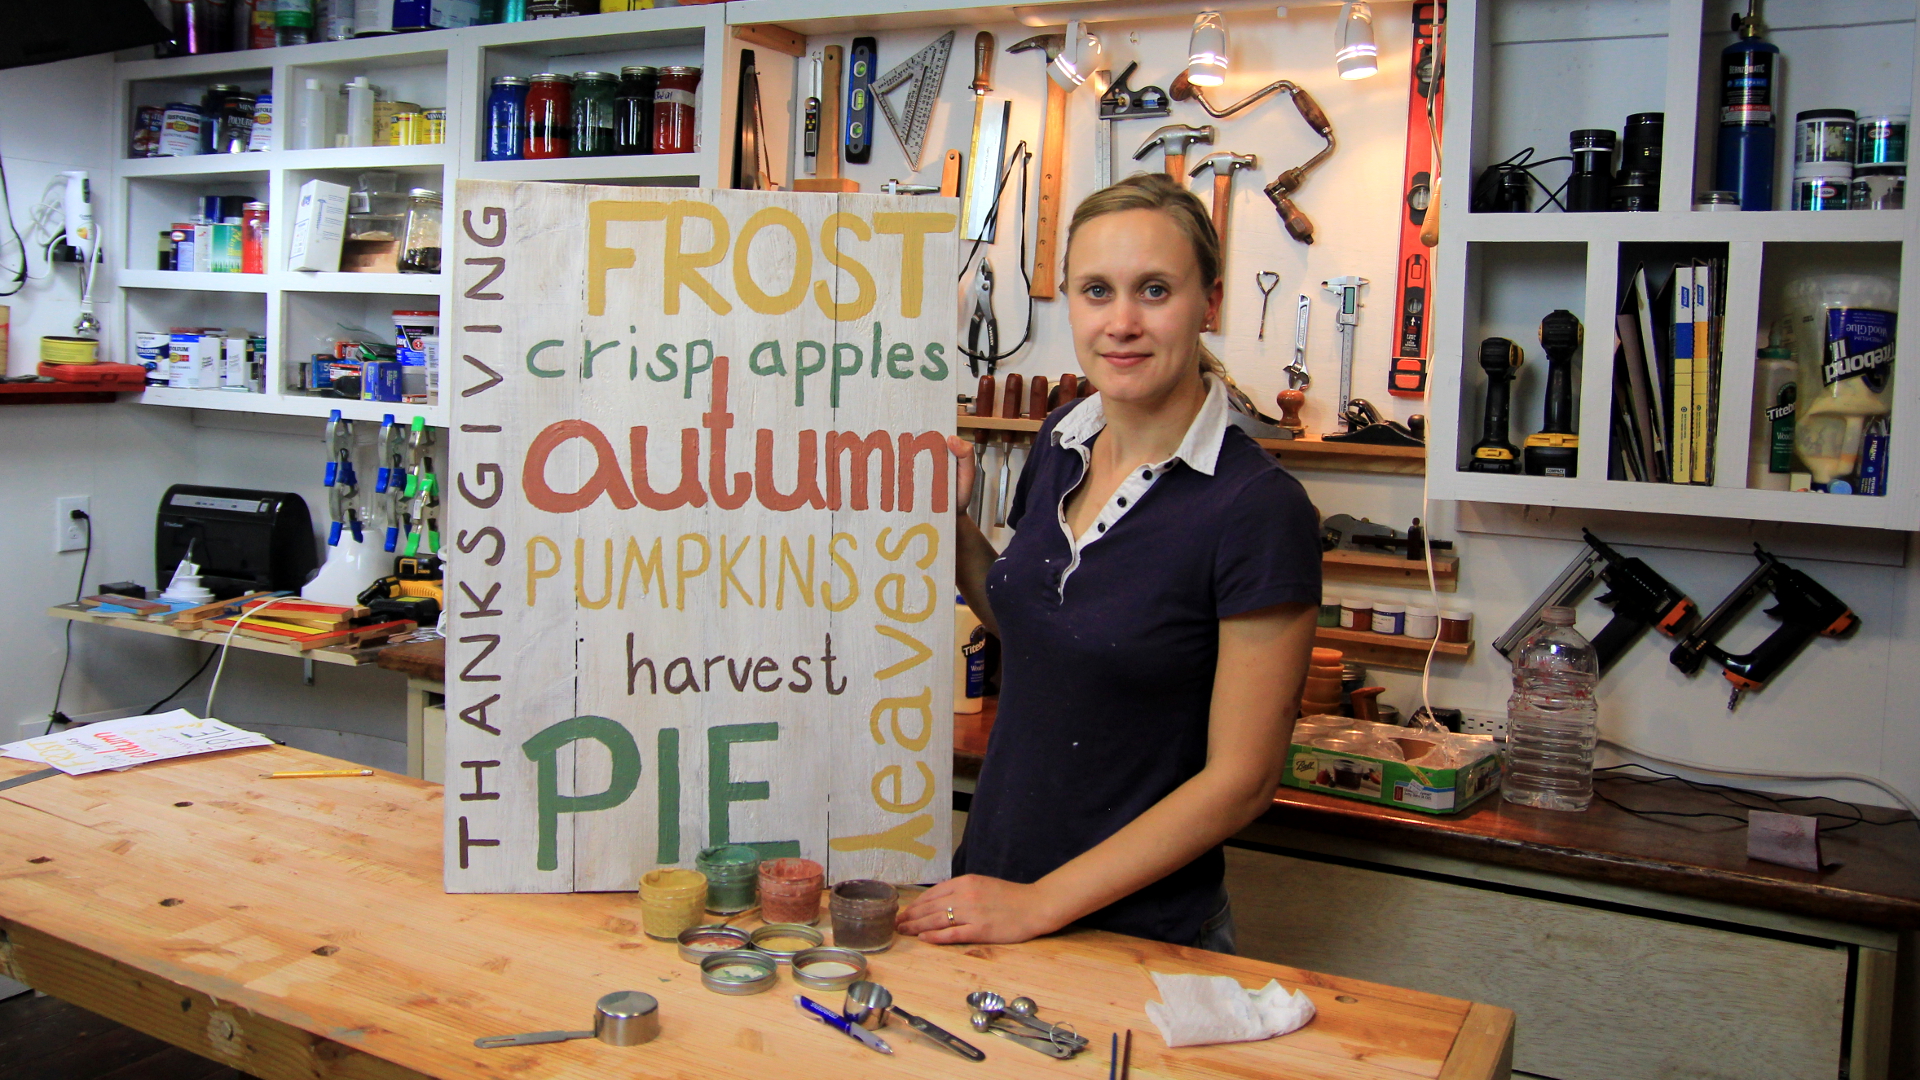
Step 5: Coming up with the word design once the board is completely dry.

using paper and markers to work on the design

This is your choice. When I set about choosing words I was trying to fill the board. I first used markers and paper to get an idea of the relative size and spaces that would be needed and what words I wanted to use. I then used a pencil to sketch the letters on the sign to make it easier to paint on top of.

Step 6: Taking the base white paint and separating it into small mason jars to add pigments.

After I was through with the white paint for the base, I had four 4 ounce mason jars which I used to pour 2 ounces of paint into from the blender. In each jar I added the pigments I wanted to create the colors I would use to paint the letters. I added about 2 teaspoons of pigment to each jar and thoroughly mixed the pigments. You can paint the letters right away. Note that milk paint goes bad in just a few days so try and make just what you need. It does not store very well.

I let the paint dry and completely washed the brushes in soap and water.

Step 7: Oiling the board.

Once the paint was completely dry I applied an optional coat of raw linseed oil. You could also use polyurethane, spray lacquer or shellac to protect your project. You could also just leave it as is.

I applied the oil with a brush, it soaks in pretty quick. Give it a few hours to dry.

I plan to leave the sign outside for the holidays. Milk paint with the calcium hydroxide is pretty resistant to the weather, so it should be fine. Adding some sort of varnish will definitively protect it more. I also like to use the cedar boards so that when it comes time to store the sign in the attic or garage it is resistant to rot and insects.

I hope a lot of people try these types of projects, and I want to thank April over at Wilker Do's for participating in this collaboration. Don't forget if you would like to share your projects with us use the tag #womeninwoodworking on facebook, youtube, pinterest, twitter and tumblr.

Don't forget to check out April's beautiful DIY pumpkins.

Building a Tiny Tiny House with a 2 x 4

Using Milk Paint on the Tiny House.

Using Milk Paint on the Tiny House.

A tiny house in the woods, hidden away from the world. That sounds like something I could get used to. A place to read, think and live, without the concern of others. Of course it's not so much a far removed dream at all, because there are many people who are actually doing that. Perhaps not moving out to the woods, but taking back control over their lives, and creating something for themselves that gives them more freedom.

People are taking back their skills. While you may hear on the news that people are unskilled – there are many people who are re-learning what their parents and grandparents tried to get away from while they hid away in the suburbs or packed themselves into the cities. Skills on how to build, grow food and live independently were seemingly lost to the industrial process.

There's nobody telling anyone to go and pick up that hammer and learn how to build a tiny house. They do it often because they want to take back their economic power. They don't want to work a job they don't necessarily love, just to keep up a standard they don't necessarily need. I think it comes back to freedom ultimately here, and people are revolting, it's just not very loud, or large.

I hope it stays quiet though, and underground. I think the danger would be to institutionalize these efforts. Under a false premise some want an authority involved to create laws, incentives and kickbacks to get people to do something they already are. But it is better to leave it alone. I love that people are trying new things, however I think it's when you want everybody to act the way you think they should, that it becomes a problem. I think we should watch out from trying to make a movement like this too formal, that's when you make it worse. The beginning is always better than the end.

When you build a house for yourself you are confronted with things you normally don't interact with. Most people are far-removed from the process of building and construction, they generally don't think about the forces that affect a house. Forces such as weights, wind and water, or resources like electricity are often left for another to think about. Building a house, building furniture – making anything really, is a journey in problem solving. Figuring things out as you go along, because you have no other choice.

When building your own house, you're in control, and for better or worse you don't necessarily have to conform to convention. In my tiny house model I wanted 24 inch centers instead of 16. It is funny how we tend to see the number of timbers as important but fail to realize the most damaging force affecting a structure is water. And then I also realize how I can fit 2 foot wide windows without needing headers, saving material and weight. As you can see in my 1/12 scale model, it definitely looks proportional. When building a structure you're forced to think of spacing - wasted space is unappealing as is wasted wood. It's appealing when things are in order, when it fits, and we usually just know when it does.

It's not that I think that using less material is good in and of itself, especially if you need it. But if you don't, then why waste them. Along the same lines – I don't think that living big is necessarily bad. As someone who does a lot of projects – you often need a lot of space to do things, and there is nothing wrong with that. Even though you can write a book in a tiny house – you can't necessarily build large things, piece a quilt together or paint large canvases. But then again, not everybody wants to do that.

In many ways, the individual does not need much to live and thrive. Every great thing started with a table and a chair. You can sleep on the ground, you can leave comfort behind, but you work at a table, sit on a chair, write with a pen, study books and observe the world around you.

Fundamentally, I don't want a world where anybody tells you what you should be doing, you should do what you want. And if you want to learn how to build your own tiny house and live differently from the way your parents did, you should, and that's just the kind of dynamic world we should want. I think this whole process is very much about learning and realizing that success is not necessarily income. So many people who have contributed great amounts to the world were not well off – it's much more interesting to be curious and learn things along the way. So in that sense – success is about knowing more so you can make better choices for yourself and your future.

So what does a structure mean to a human life? I think a home, a house, a place of your own, is so fundamentally important to one's happiness. If freedom is the control of one's self then you must have the space in which to exercise the self-control to be free.

While listening to the news, you sometimes get a sense that people are no longer interested in have a home. Well, maybe to some extent that's true, but perhaps only in the conventional sense. I think most people want something of their own, they might just not want a mortgage and the limited freedom that comes with a traditional life. The tiny house movement, while being focused on sustainability and one's environmental impact, I think when it comes down to it, is really about people taking control of their economic future, and taking back their skills and independence, striving to live more authentic lives.

If you would like to see how I built this tiny model home please take a look at my channel and subscribe:

http://youtube.com/user/darbinorvar

Making a Sheet Music Box & Using Tried and True Varnish Oil

Chiseling out the rabbet against the grain.

Chiseling out the rabbet against the grain.

Making a Sheet Music Box and Finishing w/ Tried and True Varnish Oil

I decided that I needed a little box to place some of my favorite sheet music. It was the opportunity I was looking for to try out an interesting finish. Tried and True Varnish Oil is thick, honey-like and a little tricky to work with.

A couple of years ago Chris Minick wrote a rather unflattering review and deemed it the worst performer in his round-up of wipe-on oil finishes. After using it I can see why he came to such harsh conclusions. It is a little weird. But I think weird in a good way. 

Before I rush into defending the finish let me give you a little background on the piece I am working on. I love to play the piano. I am not a professional, I just like to play and grew up playing for family all the time. Even though it has been a while I broke out my electric piano keyboard recently and wanted to practice up and needed a place to store some treasured sheet music.

Just for a little fun I wanted only to use hand-tools. Sometimes it is just zen-like to zone out to the process of building. In this case I figured it should be a simple box and using hand-tools makes that rather more effective. I don't want to make a box that is overly complicated that may take a few weeks, so I wanted simple straight-forward joinery. 

I thought rabbet joints made the most sense and they would simply be glued and held with some small brass tacks. That would be plenty to hold everything as the nails act as a reasonable clamp.

Measuring and laying out the pieces.

Measuring and laying out the pieces.

The box dimensions are pretty simple, just being large enough to hold some standard-sized paper.

Wood: CVG Fir

Cut List:

  •     2 @ 12 5/8”  x ¾ x 2 ½
  •     2 @ 9 ½”  x ¾ x 2 ½

    This is 1” x 3” nominal but this clear fir was actually 11/16” x 2 ½”.

  •     2 @ 11 7/8” x ½ x 5 ½, rip 1 piece down to 2 ¾”

    The ½” x 6 nominal was actually ½” x 5 ½. 
    This to be expected but you should really check to make sure what the true dimensions are.

Fasteners: Eight 1” brass tacks

I glued the bottom ½” pieces together to form the bottom of the box which is just large enough to hold a piece of standard 8 ½” x 11” paper.

When the rabbet cuts were with the grain I cut ½” x 11/32” joints. When the rabbets were against the grain on the 12 5/8” piece of wood the joints were cut 11/16” x 11/32”.

A little gluing, hand planing and chiseling, and in a few hours the piece is ready for some finish. After all the trickiest part of a project can many times be the finish.

When you pop the lid off the varnish it really looks like honey, and it has a distinctive smell. A rather natural smell, but it is distinctive nonetheless. Right off the bat the fact that this is a non-toxic finish is important to me. I don't like masks and if I wear some gloves it is because I want to rather than have to.

Some time ago I realized that many finishes go on much better when they are warm. By warm I mean somewhere between 100 and 140 degrees Fahrenheit, depending on your tolerance. So with this in mind I heated up about 2 cups of water using my portable induction cook top. I check it with a thermometer and when it hits 130 or so I take it off the heat and place as much finish as I think I need in a small mason jar and place it in the heated water. In just a couple minutes the varnish oil was much more workable, I then dipped in the rag and applied it liberally to the box.

Just about to apply the warmed finish.

Just about to apply the warmed finish.

It is definitely thick. As you apply it is feels sticky, but I just continued and really loved it. I believe the connection you feel with the box is as important as the final result. With this finish it warns on the container to apply “Very Thin Coats”, but as I continued I did not really heed this warning. I put on a couple of thick dabs and really rubbed it in. Maybe it is the choice of wood, or the heating of the mix or the vigorous way in which I rubbed the surface but as I continued the wood soaked it up pretty well.

Such a small item does not take very long to complete but I took my time and felt the tactile connection with the very smooth piece. I sanded pretty well to 220, so I think that was important, but you could have gone with 320 or even 180.

One of the notes in the piece by Minick was that after 30 days the piece was still not dry. I did not have this issue, I found that after a few hours in was reasonably dry and after 24 hours I could add another coat.

I followed the directions on the can and applied the varnish with a rag and then waited for a minimum of 60 minutes, although I think I usually waited over 2 hours. When I came back to it I used a clean cloth and in strong circular motions wiped away all the excess varnish. It is still very sticky but as you rub it off it has little trouble drying. My conditions for a proper dry are not ideal. My small shop is rather cold and it has been raining lately. It has been about 40 – 60 degrees Fahrenheit with nearly 100% humidity between the day and the night.

In the Fine Woodworking article Minick compared over a dozen products and I think that may be why he felt is was such a problem. Minwax Wipe-On-Poly is a very different product than Tried and True Varnish Oil. They are not even in the same world. Personally I would never use the Tried and True on a large piece. It is just too difficult to apply on a large dresser or intricate item. But on a table top in the kitchen, dining table, workbench, small chairs and many other flat or small items it would be a very top consideration for me.

I am not sure but there is something about it that appeals to me. The non-toxic nature, the thick honey consistency or just the smooth result, I am quite sure I like it and it feels real. I don't think I would choose this instead of a wipe-on-poly or brushing polyurethane for some applications, but you should remember that this does not smell, is non-toxic, can be applied in a kitchen, and repairs easily.

While the strange nature of the product is intriguing it should not limit its use. On smallish items that are not deserving of a rock-hard finish there is no reason that you can't use an oil that has a minimal film. Over the course of a couple days I applied and then polished three coats of the varnish oil and finally burnished the entire piece with 0000 steel wool.

I can tell you that after the three coats there is a minimal film, and certainly no gloss as you might wish with a lacquer or polyurethane, but that is the point to some degree. The speedy predictable application is often chosen in favor of the journey, and sometimes even in finishing the journey or connection you obtain can often improve the piece more than a dull repetition.

If you would like to see the video of the box being made and the finish being applied please visit my channel:

http://youtube.com/user/darbinorvar