Making a Sheet Music Box & Using Tried and True Varnish Oil
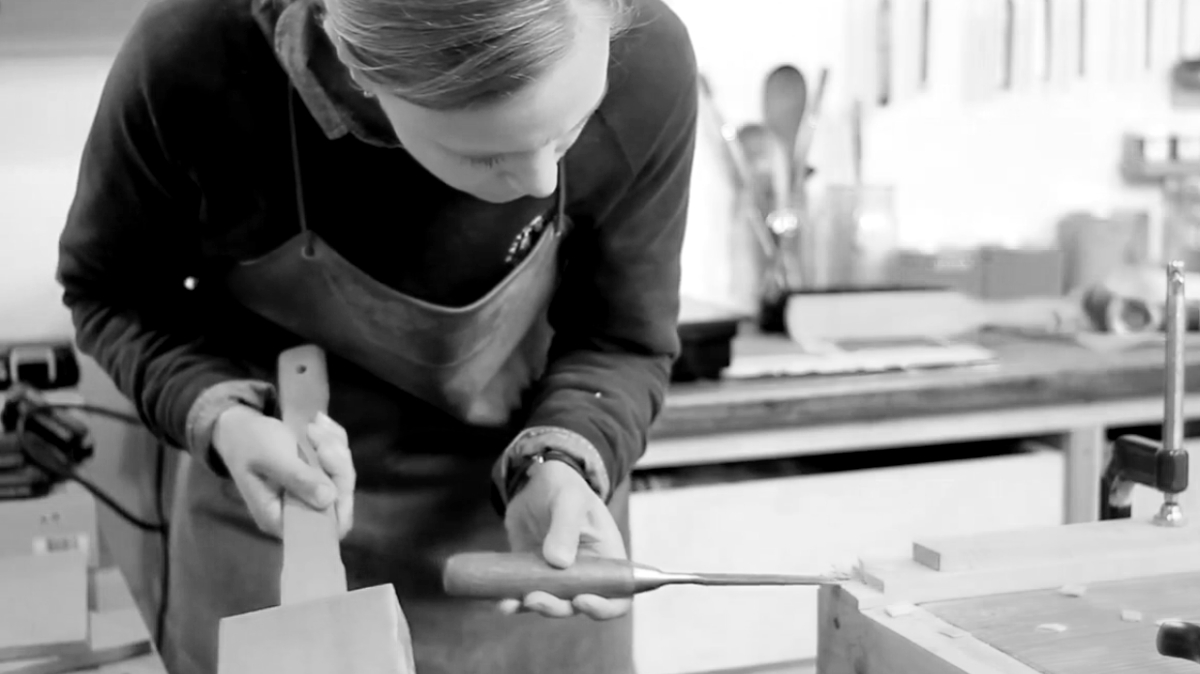
Chiseling out the rabbet against the grain.
Making a Sheet Music Box and Finishing w/ Tried and True Varnish Oil
I decided that I needed a little box to place some of my favorite sheet music. It was the opportunity I was looking for to try out an interesting finish. Tried and True Varnish Oil is thick, honey-like and a little tricky to work with.
A couple of years ago Chris Minick wrote a rather unflattering review and deemed it the worst performer in his round-up of wipe-on oil finishes. After using it I can see why he came to such harsh conclusions. It is a little weird. But I think weird in a good way.
Before I rush into defending the finish let me give you a little background on the piece I am working on. I love to play the piano. I am not a professional, I just like to play and grew up playing for family all the time. Even though it has been a while I broke out my electric piano keyboard recently and wanted to practice up and needed a place to store some treasured sheet music.
Just for a little fun I wanted only to use hand-tools. Sometimes it is just zen-like to zone out to the process of building. In this case I figured it should be a simple box and using hand-tools makes that rather more effective. I don't want to make a box that is overly complicated that may take a few weeks, so I wanted simple straight-forward joinery.
I thought rabbet joints made the most sense and they would simply be glued and held with some small brass tacks. That would be plenty to hold everything as the nails act as a reasonable clamp.
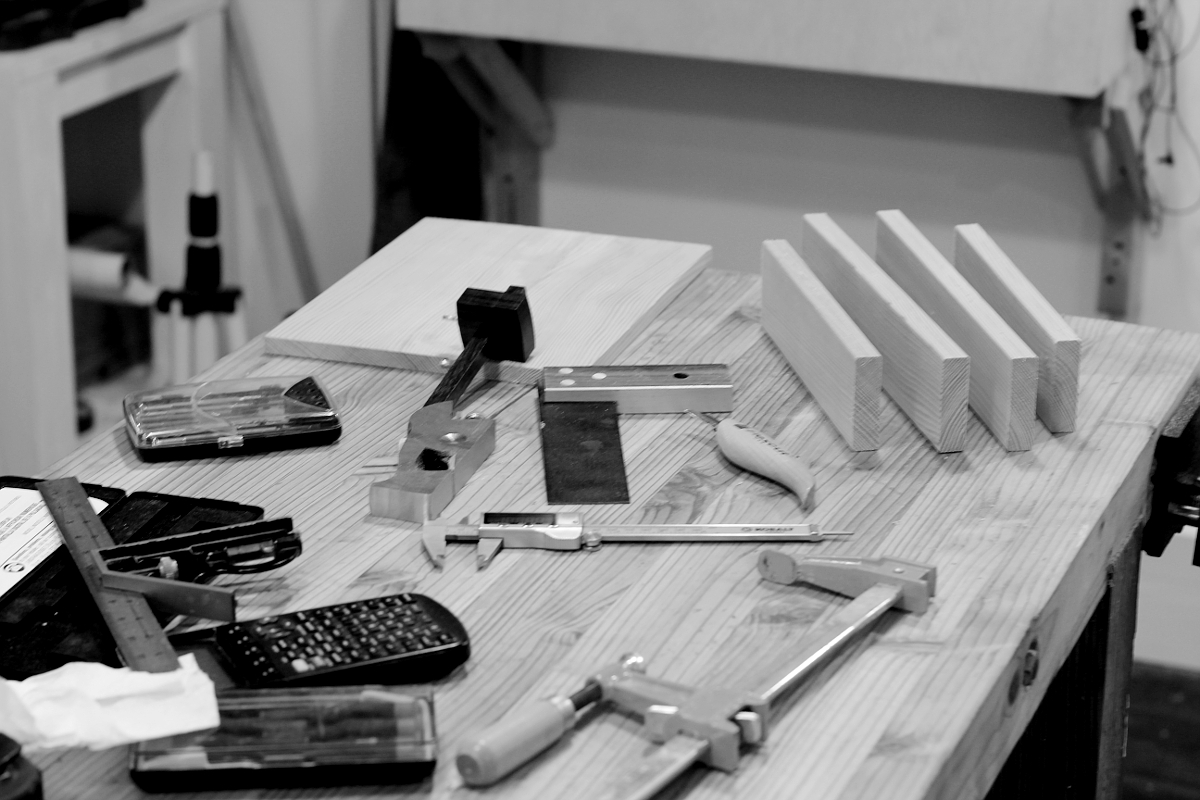
Measuring and laying out the pieces.
The box dimensions are pretty simple, just being large enough to hold some standard-sized paper.
Wood: CVG Fir
Cut List:
- 2 @ 12 5/8” x ¾ x 2 ½
- 2 @ 9 ½” x ¾ x 2 ½
This is 1” x 3” nominal but this clear fir was actually 11/16” x 2 ½”.
- 2 @ 11 7/8” x ½ x 5 ½, rip 1 piece down to 2 ¾”
The ½” x 6 nominal was actually ½” x 5 ½.
This to be expected but you should really check to make sure what the true dimensions are.
Fasteners: Eight 1” brass tacks
I glued the bottom ½” pieces together to form the bottom of the box which is just large enough to hold a piece of standard 8 ½” x 11” paper.
When the rabbet cuts were with the grain I cut ½” x 11/32” joints. When the rabbets were against the grain on the 12 5/8” piece of wood the joints were cut 11/16” x 11/32”.
A little gluing, hand planing and chiseling, and in a few hours the piece is ready for some finish. After all the trickiest part of a project can many times be the finish.
When you pop the lid off the varnish it really looks like honey, and it has a distinctive smell. A rather natural smell, but it is distinctive nonetheless. Right off the bat the fact that this is a non-toxic finish is important to me. I don't like masks and if I wear some gloves it is because I want to rather than have to.
Some time ago I realized that many finishes go on much better when they are warm. By warm I mean somewhere between 100 and 140 degrees Fahrenheit, depending on your tolerance. So with this in mind I heated up about 2 cups of water using my portable induction cook top. I check it with a thermometer and when it hits 130 or so I take it off the heat and place as much finish as I think I need in a small mason jar and place it in the heated water. In just a couple minutes the varnish oil was much more workable, I then dipped in the rag and applied it liberally to the box.

Just about to apply the warmed finish.
It is definitely thick. As you apply it is feels sticky, but I just continued and really loved it. I believe the connection you feel with the box is as important as the final result. With this finish it warns on the container to apply “Very Thin Coats”, but as I continued I did not really heed this warning. I put on a couple of thick dabs and really rubbed it in. Maybe it is the choice of wood, or the heating of the mix or the vigorous way in which I rubbed the surface but as I continued the wood soaked it up pretty well.
Such a small item does not take very long to complete but I took my time and felt the tactile connection with the very smooth piece. I sanded pretty well to 220, so I think that was important, but you could have gone with 320 or even 180.
One of the notes in the piece by Minick was that after 30 days the piece was still not dry. I did not have this issue, I found that after a few hours in was reasonably dry and after 24 hours I could add another coat.
I followed the directions on the can and applied the varnish with a rag and then waited for a minimum of 60 minutes, although I think I usually waited over 2 hours. When I came back to it I used a clean cloth and in strong circular motions wiped away all the excess varnish. It is still very sticky but as you rub it off it has little trouble drying. My conditions for a proper dry are not ideal. My small shop is rather cold and it has been raining lately. It has been about 40 – 60 degrees Fahrenheit with nearly 100% humidity between the day and the night.
In the Fine Woodworking article Minick compared over a dozen products and I think that may be why he felt is was such a problem. Minwax Wipe-On-Poly is a very different product than Tried and True Varnish Oil. They are not even in the same world. Personally I would never use the Tried and True on a large piece. It is just too difficult to apply on a large dresser or intricate item. But on a table top in the kitchen, dining table, workbench, small chairs and many other flat or small items it would be a very top consideration for me.
I am not sure but there is something about it that appeals to me. The non-toxic nature, the thick honey consistency or just the smooth result, I am quite sure I like it and it feels real. I don't think I would choose this instead of a wipe-on-poly or brushing polyurethane for some applications, but you should remember that this does not smell, is non-toxic, can be applied in a kitchen, and repairs easily.
While the strange nature of the product is intriguing it should not limit its use. On smallish items that are not deserving of a rock-hard finish there is no reason that you can't use an oil that has a minimal film. Over the course of a couple days I applied and then polished three coats of the varnish oil and finally burnished the entire piece with 0000 steel wool.
I can tell you that after the three coats there is a minimal film, and certainly no gloss as you might wish with a lacquer or polyurethane, but that is the point to some degree. The speedy predictable application is often chosen in favor of the journey, and sometimes even in finishing the journey or connection you obtain can often improve the piece more than a dull repetition.
If you would like to see the video of the box being made and the finish being applied please visit my channel: