Gift Guide from our Shoppe
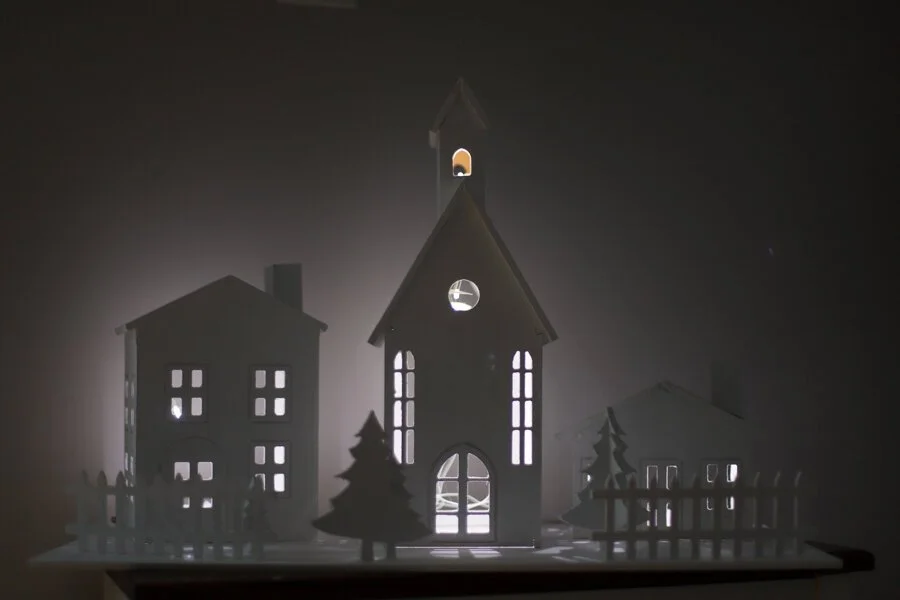
It's almost time for Christmas, and if you're looking for some special presents to give or make - I wanted to share some of the unique things we have to offer from our shoppe.
Everything we sell, we make and design in our workshop, nothing is made elsewhere. We have some favorite things that we always carry in our shoppe such as our wax polish, and then we usually introduce something new every now and then as well. This year I have a new tool, a beautiful awl. In addition to this we also offer many building plans, and I have collected a few here, that I think would be especially great for gift giving…
It's almost time for Christmas, and if you're looking for some special presents to give or make - I wanted to share some of the unique things we have to offer from our shoppe.
Everything we sell, we make and design in our workshop, nothing is made elsewhere. We have some favorite things that we always carry in our shoppe such as our wax polish, and then we usually introduce something new every now and then as well. This year I have a new tool, a beautiful awl. In addition to this we also offer many building plans, and I have collected a few here, that I think would be especially great for gift giving (no matter whether you're giving away the plan, or making the object in the plan to give away.)
So, here are our gift giving guide with objects and designs made in house:

Wax polish makes a great little gift or stocking stuffer - and it's suitable for anybody who either enjoys making things - OR likes to cook and spend time in the kitchen. We offer three different kinds of wax polish:
Made with 100% raw linseed oil and pure beeswax this is our go to finish for most woodworking related things. It's great for shop tools, projects etc...
Made with 100% tung oil and pure beeswax, this is a slight upgrade from the linseed. It offers a unique scent and cures slightly harder than the linseed. It's what we use on all projects of a slightly more special nature.
Made with food grade mineral oil and pure beeswax we use this polish in two areas: 1) In the kitchen on all wooden spoons, cutting boards etc. 2) In the shop on all metal tools and surfaces to prevent rust.

If you'd like to upgrade your wax polish purchase, then a wax pot is the way to go. Our wax pot is a take on the traditional grease pot that woodworkers always used to keep on their workbench. It's a small lidded box filled with mineral oil wax polish + one additional tin of wax polish for refill. This is tactile, classic and a very useful object to keep on your bench and constantly reach for.
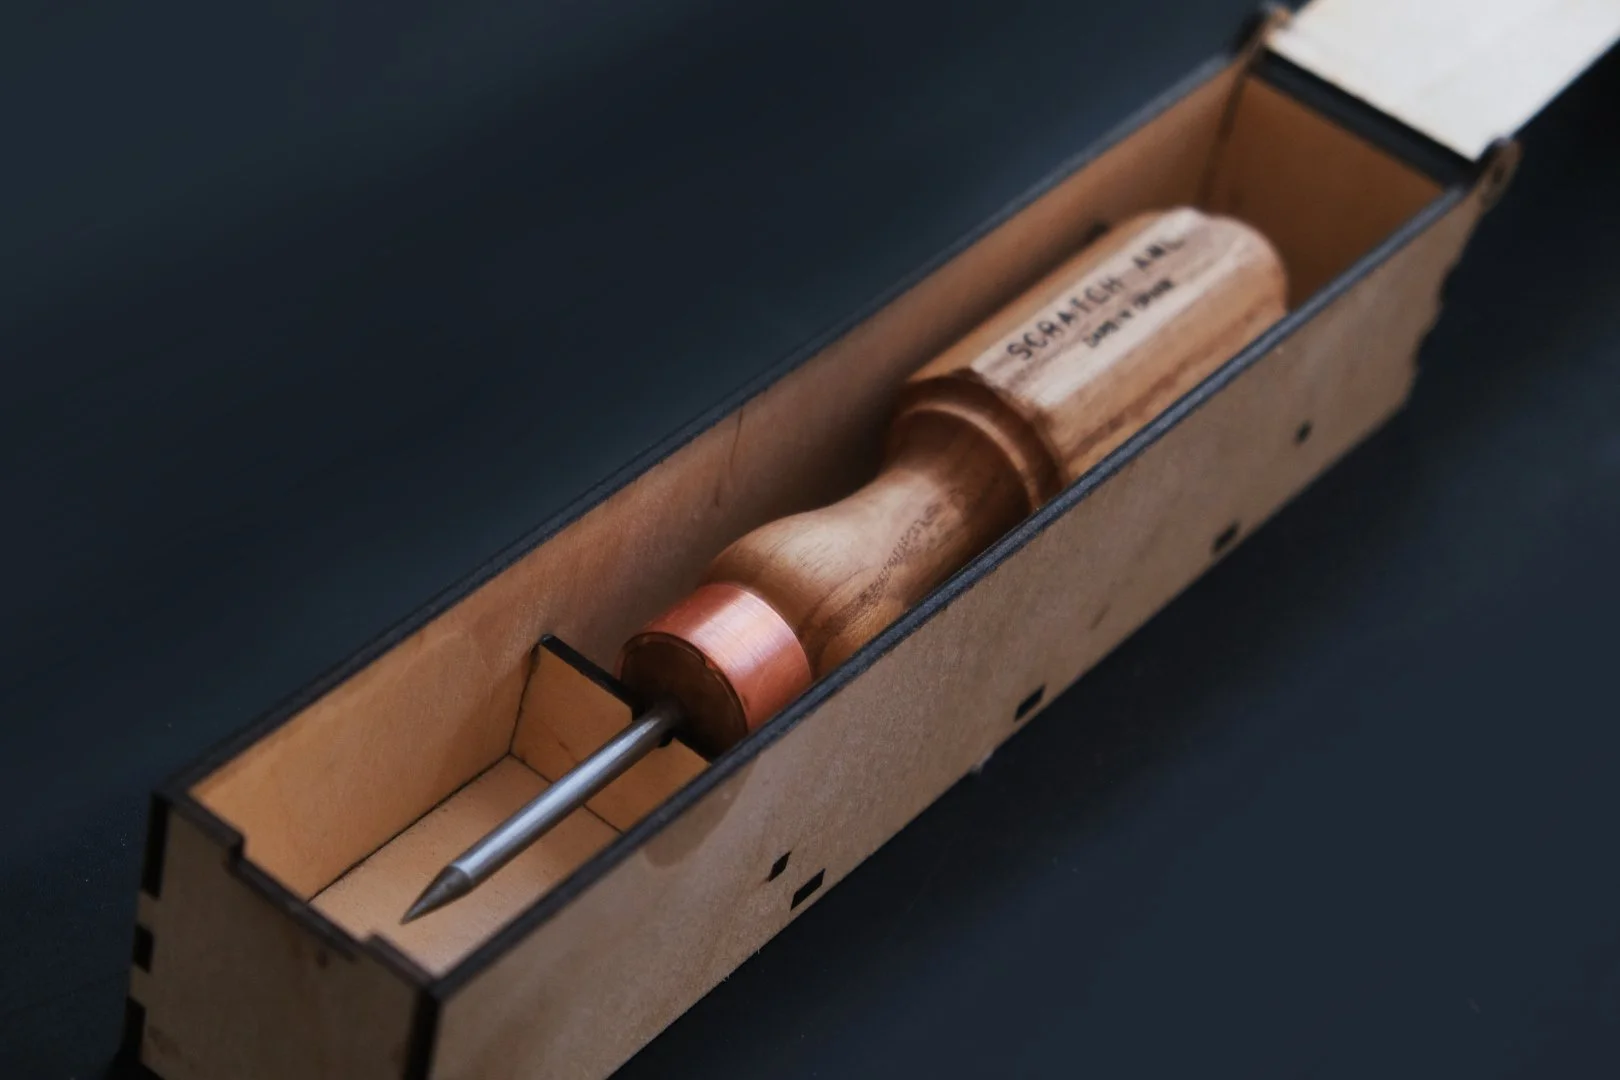
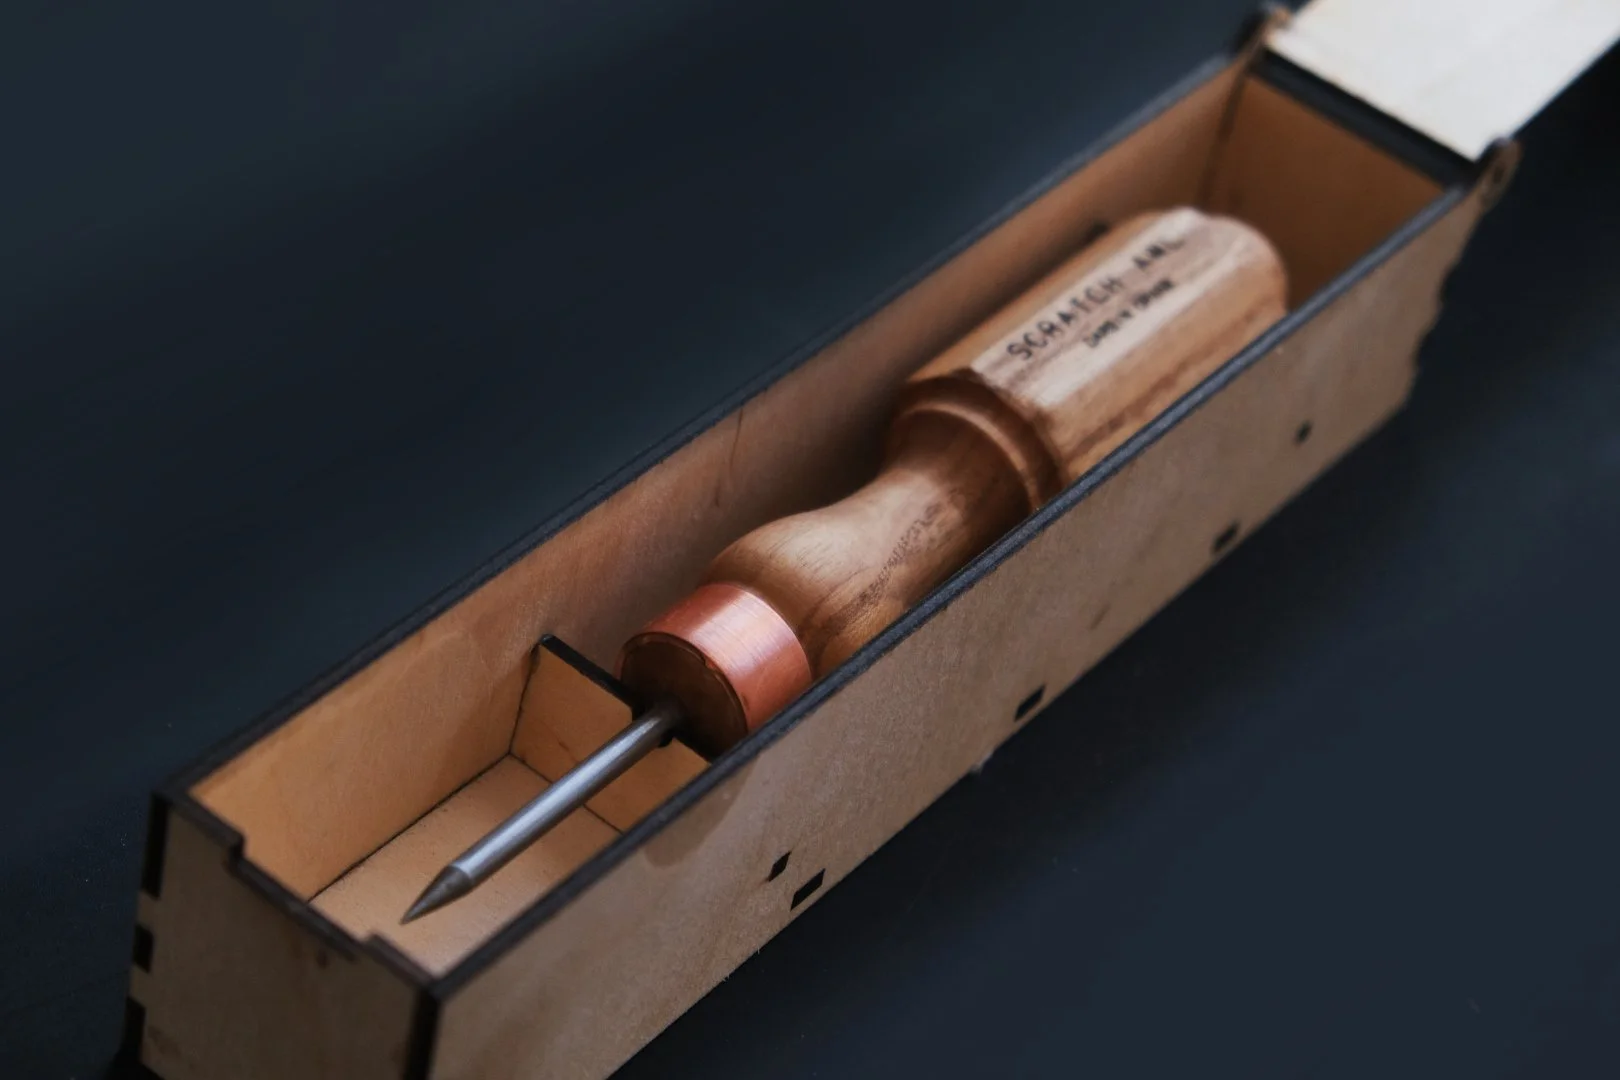
Many awls are quite dull and not very pointy. We were looking for an awl that held a great point and comfortable handle, so this is what we came up with. The handles are cut here in the workshop, and we use HSS steel which we work to get a sharp point. Ever since making these awls, we use them all the time - whether for woodworking, leatherworking or bookbinding. It has an excellent point and is very comfortable to use.
We also make a special keepsake gift box especially designed to hold this object which it comes with.
A classic toy, whether for children or fidgety adults. Our take on the spinning top is simple and traditional. It spins very well and is made in beautiful hardwood maple. We offer two sizes: A large one which comes with a special spinning dish, and a small one. Both come in specially made keepsake boxes to hold them.
---------------------------------
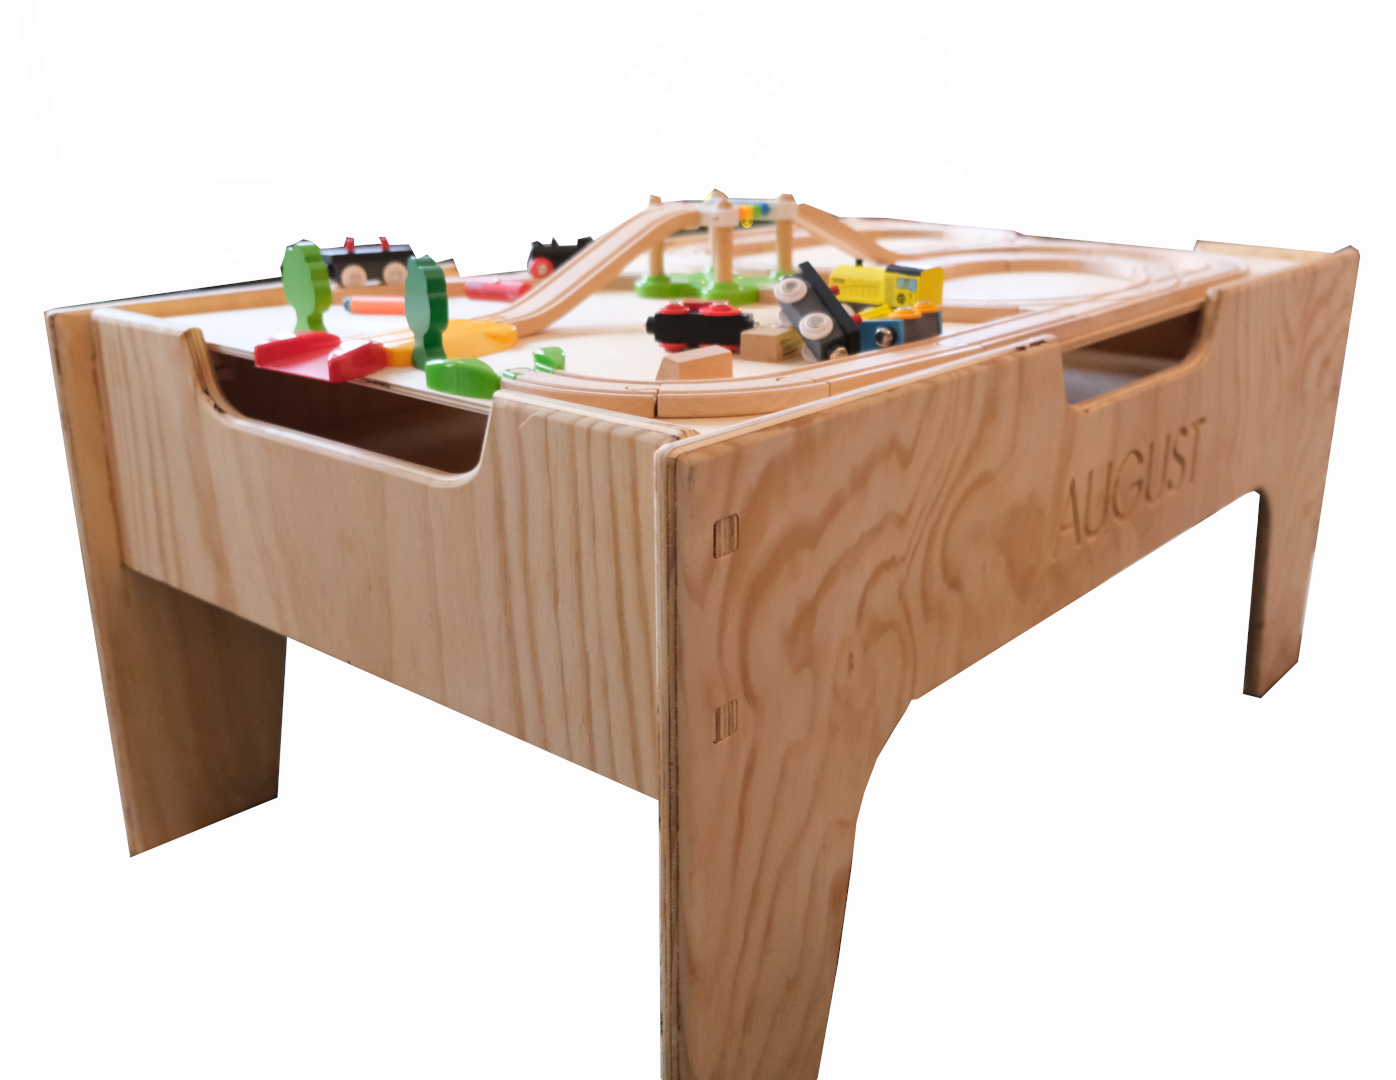
For any children in your life, this classic kids play and train table makes a perfect gift. In our building plan we offer .svg files if you want to cut it out on a CNC, as well as detailed diagrams and measurements if you want to copy the design onto plywood and cut it out with a jigsaw. The four sides interconnect with mortise and tenon design, and it features two removable shelves, one below to store things on, and one above to play on.

If your recipient is interested in bookbinding, you might have heard of just how expensive the tools are to buy, or practically impossible to find. We offer a series of building plans for classic bookbinding tools:
- book press, - sewing frame, - book vise + cutting tool. You can purchase each plan individually or get a discount if you get the bundle with all of them.
If you're looking to cut out some furniture on your CNC (or trace the design and use a jigsaw), we have three plans which I think would be great to make gifts from.
Using only 1 sheet of plywood, this desk features a modern and clean design. We use this desk every day and it's a personal favorite.
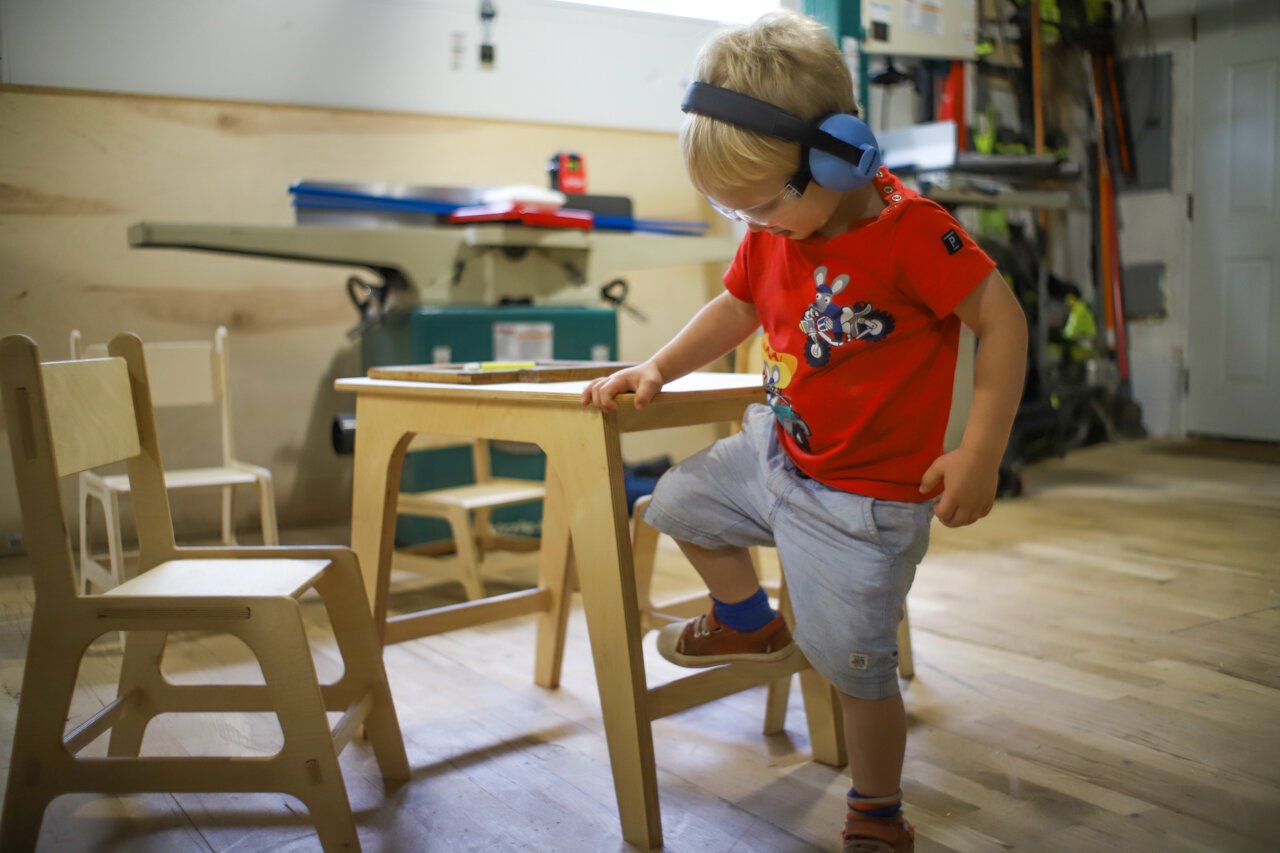
Mirroring the design of the adult desk, this kids version is great for kids anywhere from 2-6 years old. The chair and desk / table set is very versatile and can be used in a bunch of places. You can also make several two or three chairs for one table, to fit several children.
In our house, we have this design of a bookcase in several rooms. It's clean, practical and nice looking and feature interconnected joinery.
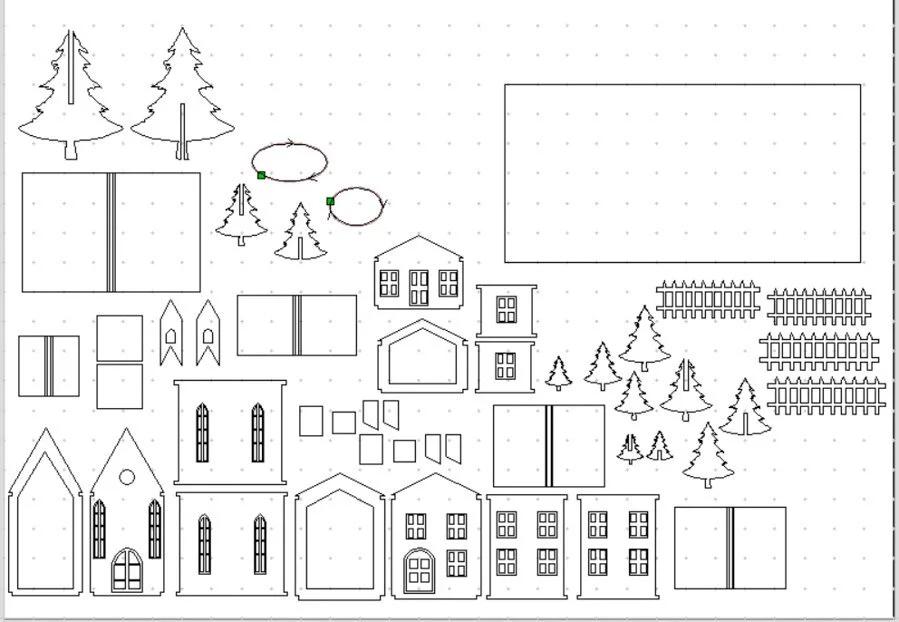
If you'd like to make some fun small houses to play with or display
Small designs
Finally some small building plans which I think make fun little gifts:
SHIPPING
If you’re ordering a physical product (all plans are downloadable PDF files), make sure to put your order in BEFORE Dec 15, 2024 in order to get it in time for Christmas.
A simple writing desk (video + building plan)
A desk like the one Thoreau would have used to write Walden—that was the inspiration for this project. In other words, something classic and back to basics, but still beautiful and functional. Sounds interesting? I cover everything in our latest YouTube build video and in a very detailed building plan (ideal if you’d like to build one yourself).

A desk like the one Thoreau would have used to write Walden—that was the inspiration for this project. In other words, something classic and back to basics, but still beautiful and functional. Sounds interesting? I cover everything in our latest YouTube build video and in a very detailed building plan (ideal if you’d like to build one yourself).
When it comes to furniture, it's often fun to try out new styles and techniques. However, for pieces that we want to keep in our homes and grow with, my preference is solid materials and classic designs.
This desk measures 30"(76cm) wide, 25"(64cm) deep and 29 3/4" (75.6 cm) high —not huge by any means, but just right for an adult or a growing student.

In terms of wood, we went with white oak because it's a personal favorite, and feels true to what might have traditionally been used. But really, any wood would work fine. If I were buying from the home improvement store, I might go with pine. For the joinery, we used dowels, but you could easily go with pocket screws or biscuits if that’s what you have on hand.
The desk has two drawers that slide on wooden rails (no need for metal drawer slides). We chose half-blind dovetails for the front of the drawers and box joints for the back. In other words, the fronts are solid and clear and only once you open the drawer do you see the joinery.

All of this—cut list, step-by-step instructions, diagrams, and more—is laid out in the building plan, available on our website. The video’s there to help you see the process in action and get a feel for how it all comes together.
I really like the idea of furniture that we can use for years and years and hopefully pass on to future generations. Not all pieces we build fit in that category, but I think this one does. Check out the video and plan on our website, and let us know what you think.

Unschooling with an academic focus
For a little over a year or so, we’ve been homeschooling (or rather unschooling) our 6 year old son. It’s been quite the adventure so far, and I from what I’ve gathered by meeting other homeschooling parents and seeing what people do online, I think we have a quite different approach. We don’t use a curriculum, and we don’t have a strict schedule. Everything is quite relaxed, yet at the same time we have rather focused lessons that are far beyond what other kids are learning in school, in terms of similar ages.
For a little over a year or so, we’ve been homeschooling (or rather unschooling) our 6 year old son. It’s been quite the adventure so far, and I from what I’ve gathered by meeting other homeschooling parents and seeing what people do online, I think we have a quite different approach. We don’t use a curriculum and we don’t have a strict schedule. Everything is quite relaxed, yet at the same time we have rather focused lessons that are far beyond what other kids are learning in school, in terms of similar ages.
If you’re curious about how we go about this, make sure to check out our latest video: Academic Unschooling - a Radically Different Approach
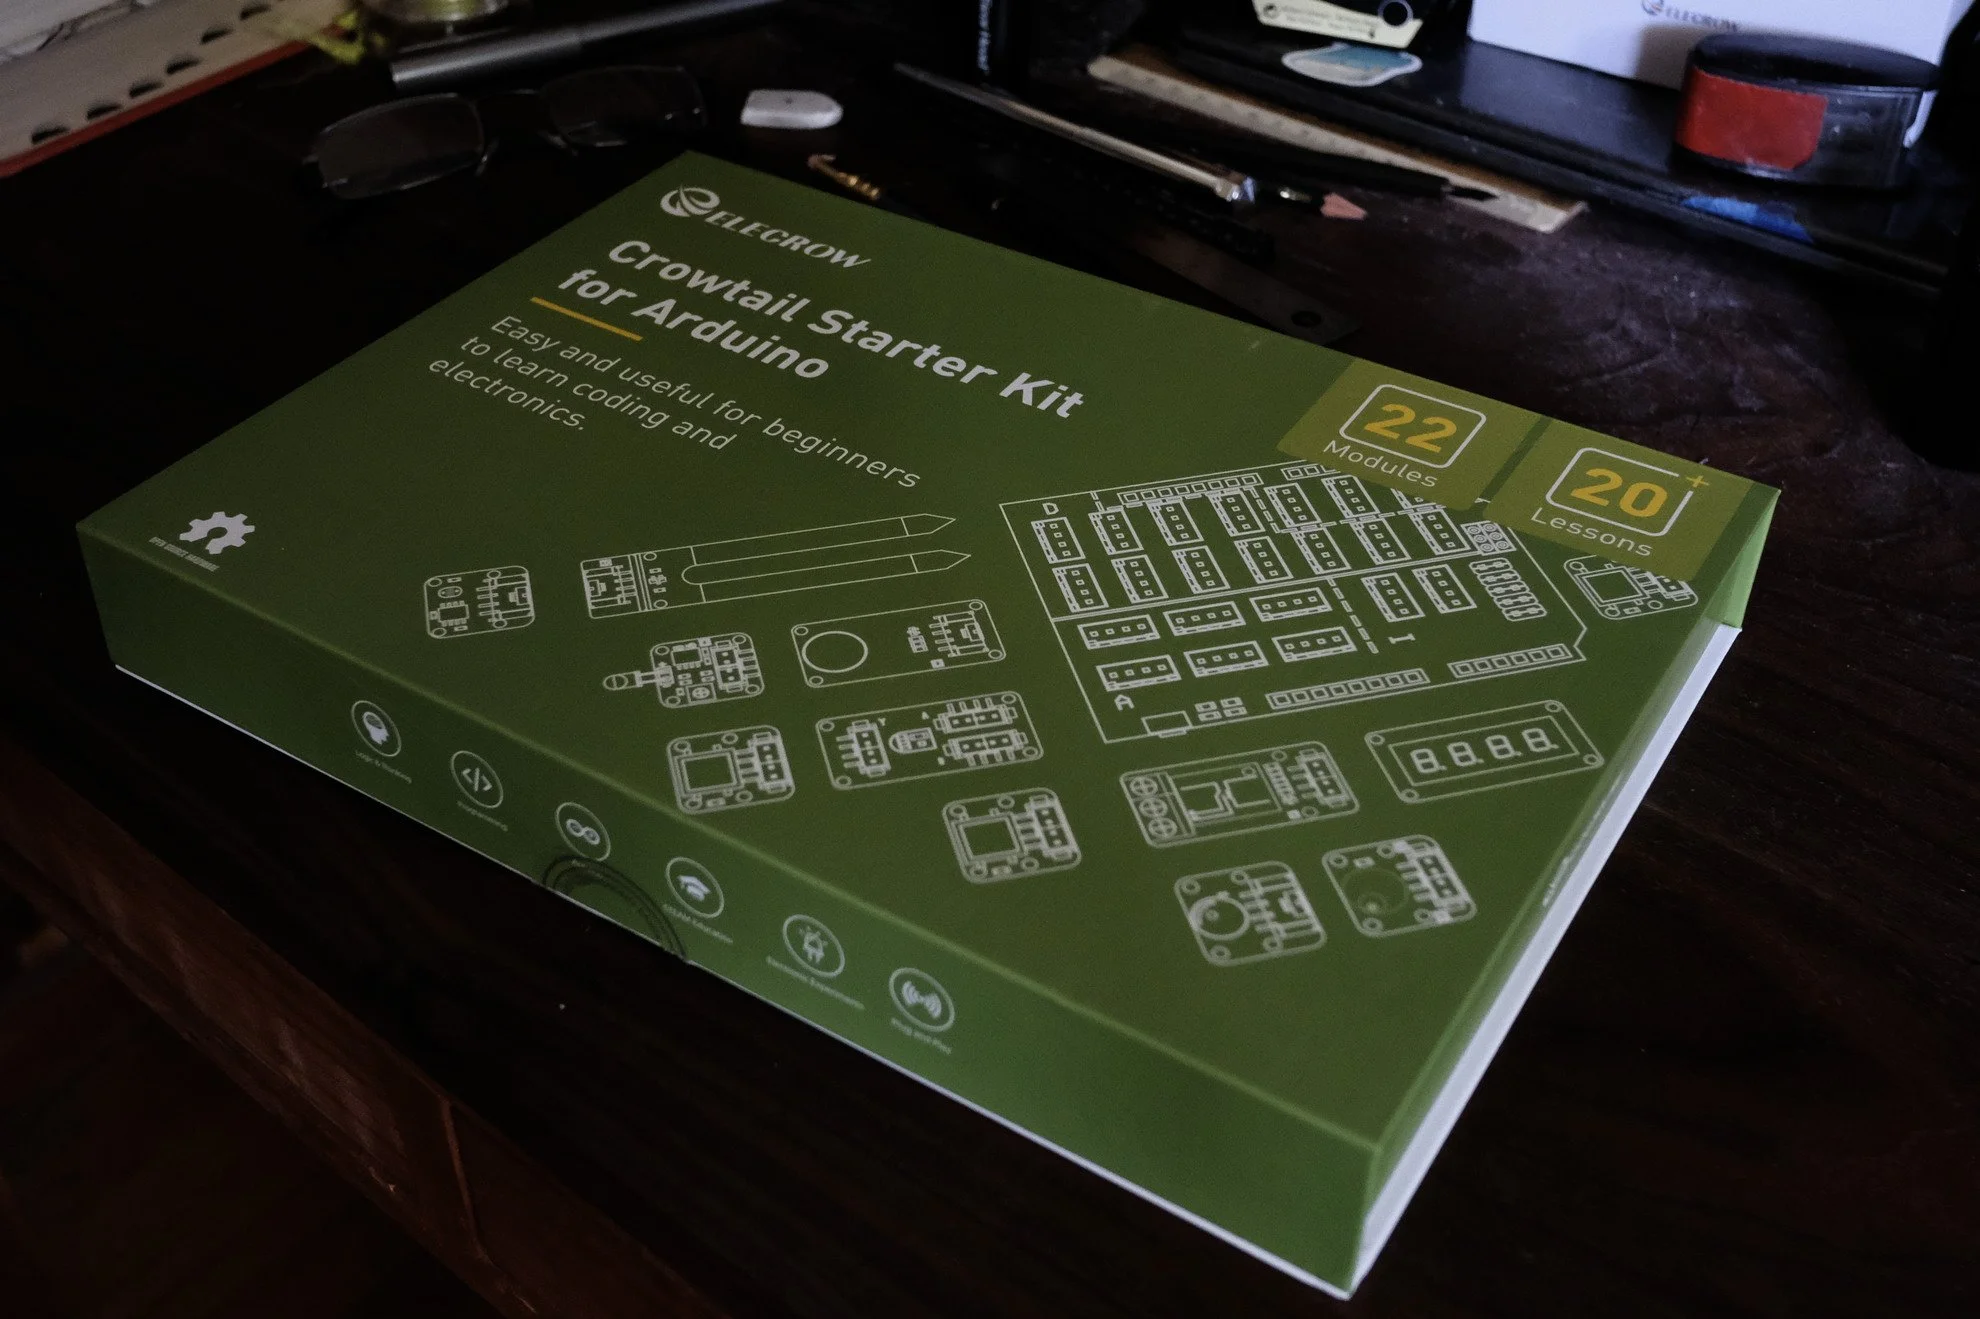
Arduino Starter Kit Review
I've been using arduinos and other micro-controllers for about 10 years now, for all sorts of projects. My son is now old enough to start him on some basic programming, and teach him to understand how you can use these little computers to control all sorts of sensors and lights with just a little practice.
I've been using arduinos and other micro-controllers for about 10 years now, for all sorts of projects. My son is now old enough to start him on some basic programming, and teach him to understand how you can use these little computers to control all sorts of sensors and lights with just a little practice.

Links:
Kit Link: https://www.elecrow.com/crowtail-starter-kit-for-arduino.html
Code Link: https://www.elecrow.com/download/product/SEA0001T/Starter_Kit_for_Arduino_Code.zip
You only need a basic computer to run the Arduino IDE (integrated development environment) which is free from Arduino, and in this kit there is a booklet that takes you through all the projects with the included sensors. I am using a raspberry pi 5 to do all the testing, but windows works fine too. The kit is pretty complete so you don’t need any other wires or components to get anything running, but you should download the code from Elecrow’s website to help you out.

There are quite a few lights and sensors included in the kits. I’ve found the rigid plastic makes it difficult to remove the components so be careful not to damage anything. In order for this kit to be easy for beginners they have constructed a “shield” that you can attach to the top of the arduino, which allows you to add components without a breadboard, or the need for any wires or cutting of wires.
While this does make it easier for beginners my son had a lot of difficulty changing these wires, as did I. It would be nice if this could be improved. You are not required to use these wires as the provided arduino is a “real“ unit and can be used with a breadboard, or in any conventional project you solder wires to.

My son had a good time learning how to use the kit and I think this is a valuable tool, provided someone is there to teach them and practice. You can’t learn this in a day. So while it is easy, you need to practice and work with this for sometime before you can advance.

The best way to use the kit is to go through all the projects and learn how to use the sensors, and there are a lot provided so you can really try out some different things.
Included sensors and accessories:
Button x1
Switch x1
Buzzer x1
LED(Red) x1
LED(Green) x1
LED(Yellow) x1
Logic AND x1
Logic OR x1
Logic NOT x1
Flame Sensor x1
Moisture Sensor x1
Touch Sensor x1
Relay x1
Light Sensor x1
Thermistor Temperature Sensor x1
Vibration Motor x1
Linear Potentiometer x1
Tilt Switch x1
Sound Sensor x1
4-Digit Display x1
Making a Predator Style Clock
You know how young kids often like to know how old they are? And if they're anything like my son, just the number five or six is not good enough. He wants to know his precise age.
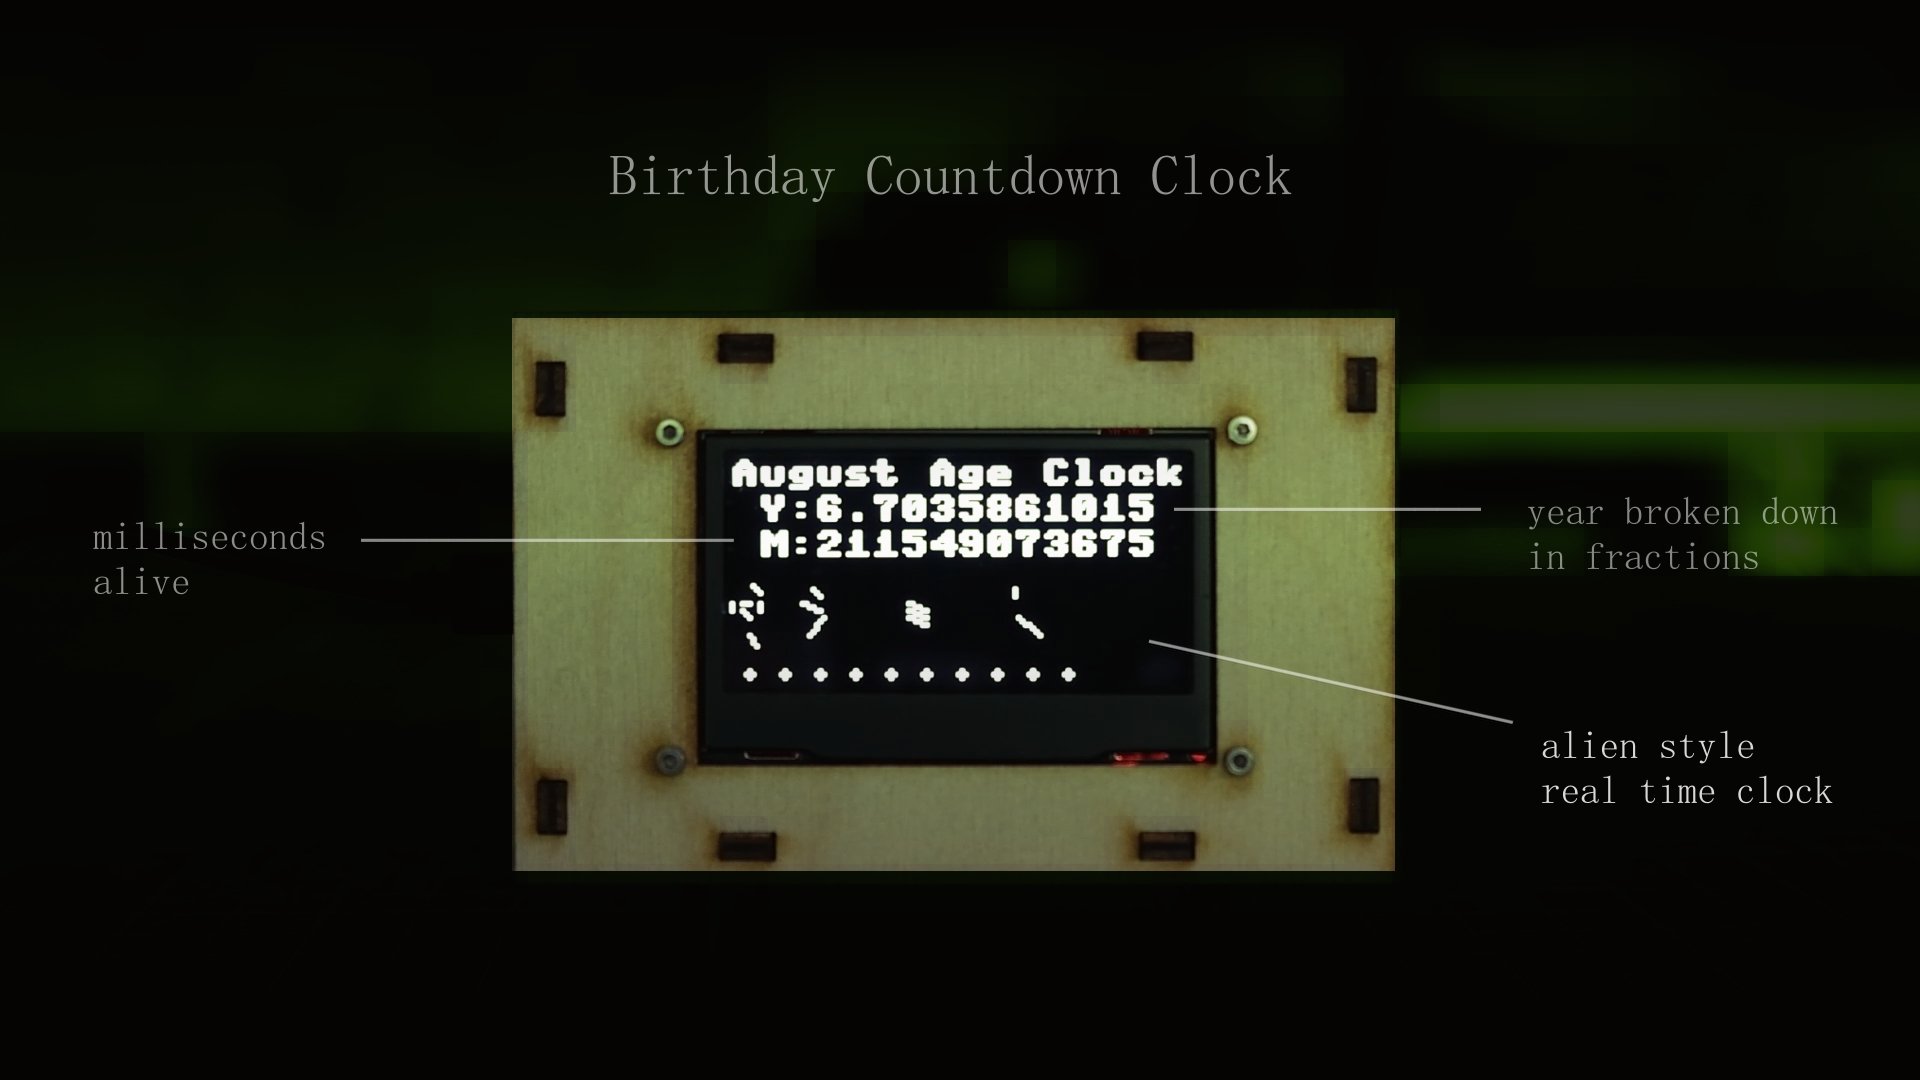
So we started thinking about how it would be neat to have a clock display that showed exactly how old he is all the time. And this clock would constantly be changing, because his age is never the same.

You know how young kids often like to know how old they are? And if they're anything like my son, just the number five or six is not good enough. He wants to know his precise age.
So we started thinking about how it would be neat to have a clock display that showed exactly how old he is all the time. And this clock would constantly be changing, because his age is never the same.
A few initial goals here:
the clock should be fun to look at
it should show changes rapidly
it should tell you exactly how old someone is
and a little extra add on:
why not also have it tell time in an interesting and visual way
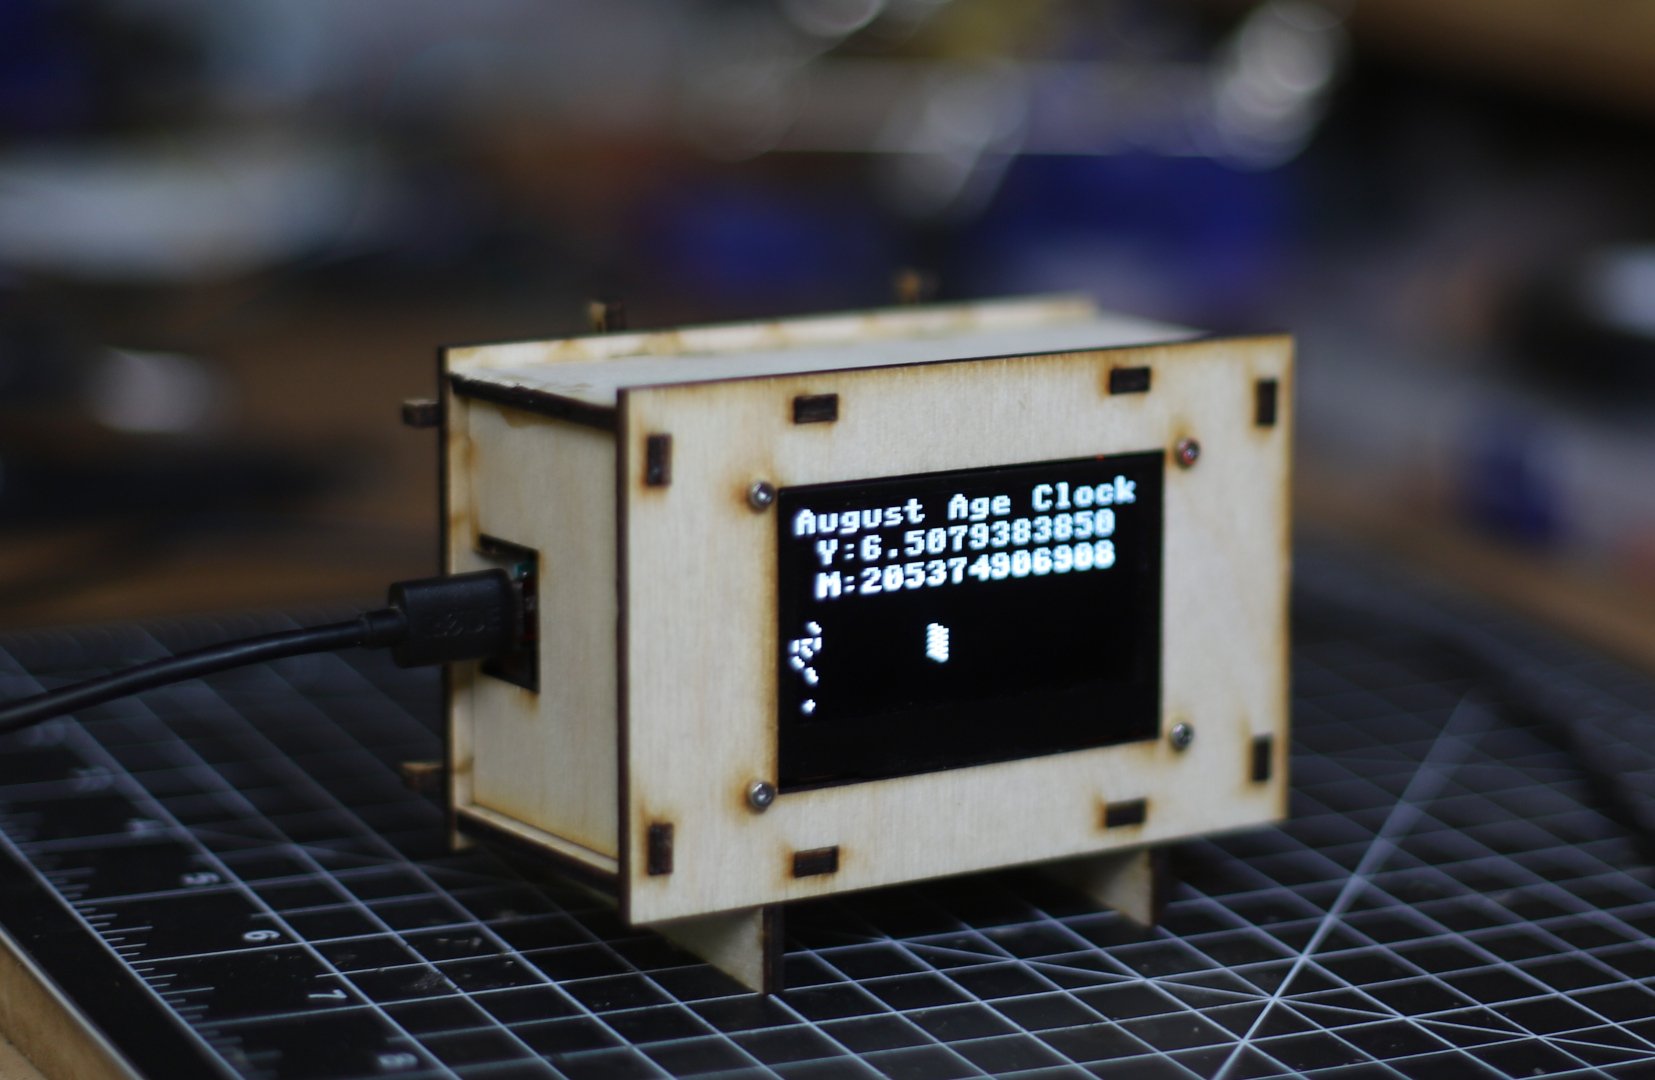
To tell time we decided to create a predator style movement of symbols that would tell time in a real way, if only you knew how to decipher it!
All of the process and everything involved is covered in our latest youtube video. It goes over what the clock is made of, how each part is broken down etc, and how it it works!
If you want to build your own predator style clock, we have a bundle with the code and the files to cut out the case : Predator Style Clock Box
Making a Leather Journal (Classic Bookbinding)
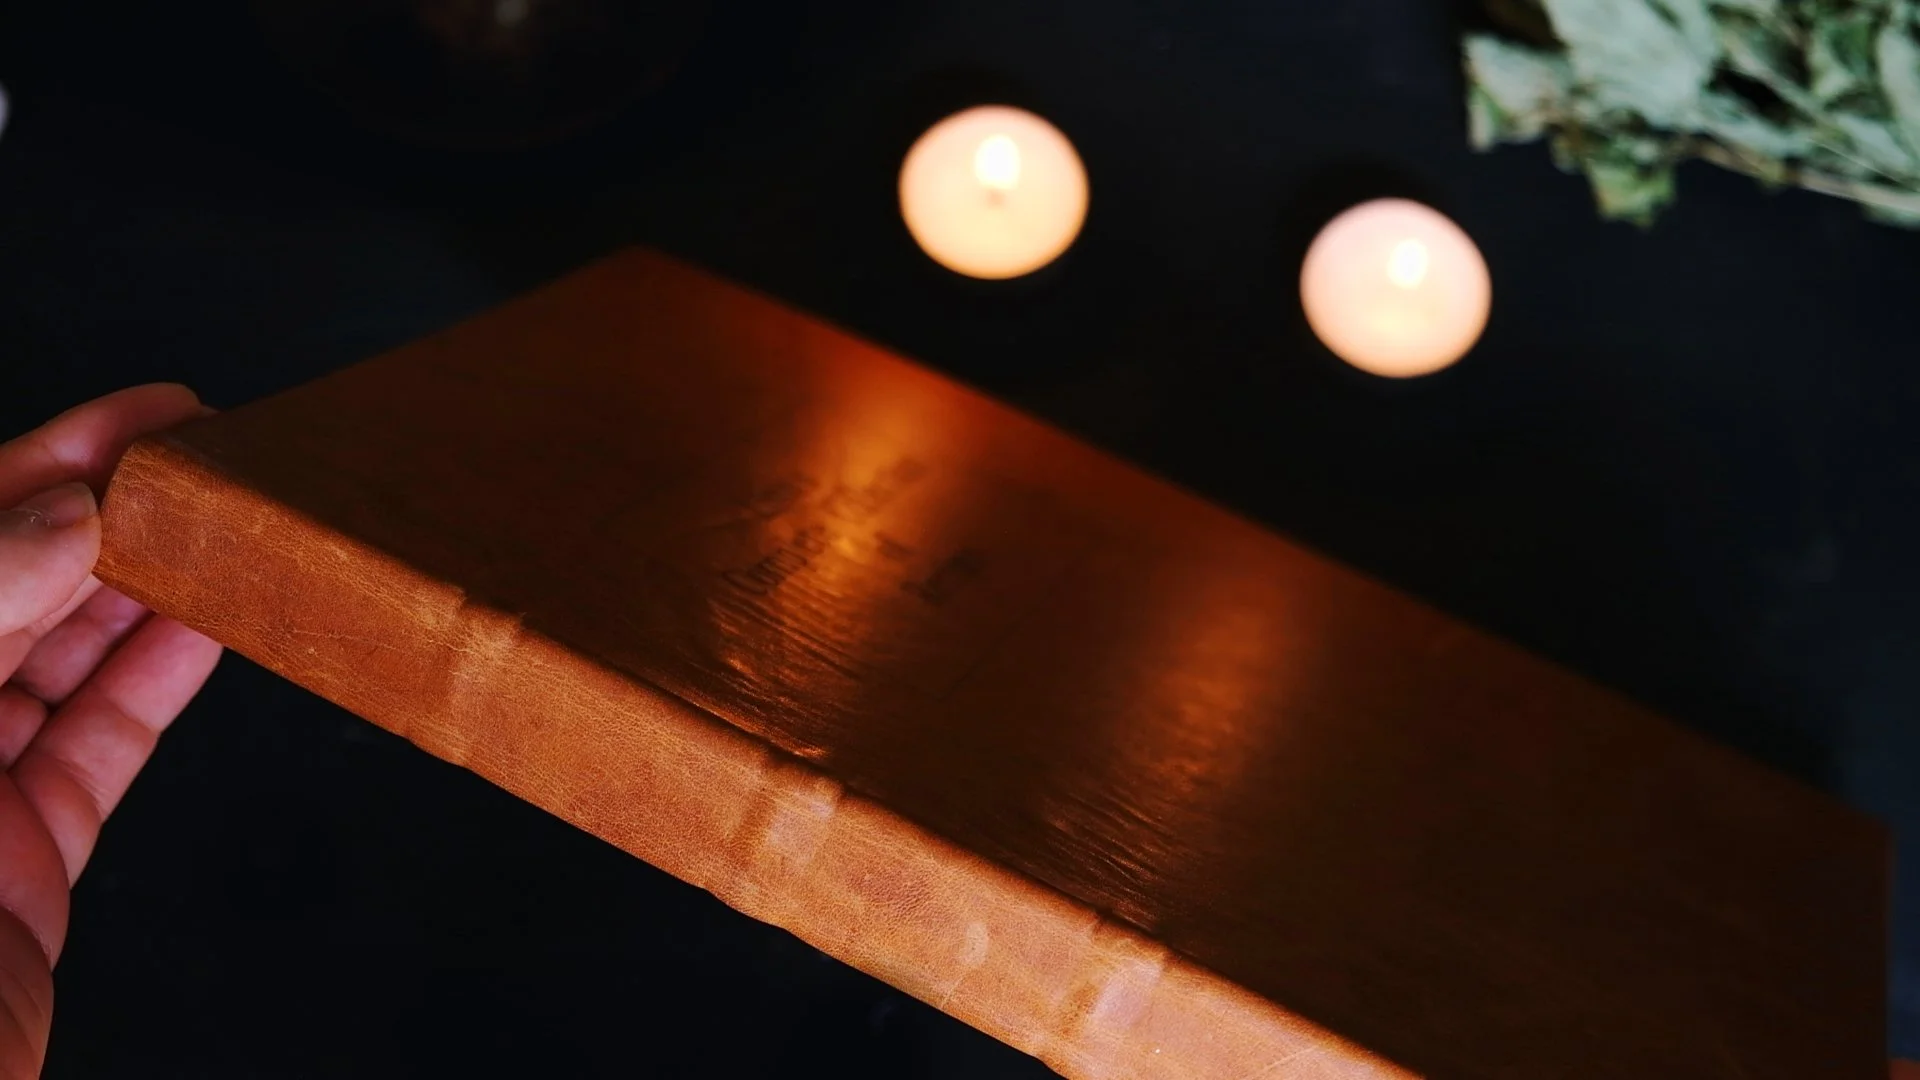
This is a blank leather journal that I’ve been making using our different bookbinding tools such as the book press, vise, plough and sewing frame. Let’s get into it! Making books in a classic way obviously takes a fair amount of time, however what you get in return is a custom book in every way: you get to pick the size, the type of paper, the cover etc…

This is a blank leather journal that I’ve been making using our different bookbinding tools such as the book press, vise, plough and sewing frame. Let’s get into it!

Making books in a classic way obviously takes a fair amount of time, however what you get in return is a custom book in every way: you get to pick the size, the type of paper, the cover etc… Now the purpose of whatever book you’re making most likely will impact your decisions. For a while I’ve been wanting a really beautiful and strong journal that I can gather all my favorite recipes in: so results from baking experiments, different fermentation ideas and family favorites. And the thing about a recipe book, is unlike a regular book which you might open once or twice, this book you’ll most likely open again and again and again, so strength really matters.

I wanted the book to be slightly oversized and I wanted a durable and beautiful cover. That led me to leather since you can easily wipe it off in the kitchen, and it ages in such a beautiful way.
To make the book, I’m using sketch book paper, and I’m using our sewing frame with linen cords which makes for an exceptionally strong construction. I’m not a professional bookmaker, I’ve made a few and I enjoy the process, but I’m definitely an amateur. So my process is not THE way to make a book, just one of them!
I hope you enjoy the video. If you’re interested in picking up any of the plans, you can check out the bookbinding section where they are all listed. You can either pick up one individually or get the bundle with all 4 plans at a discount.
Making (and Using) a Book Vise & Cutting Plough
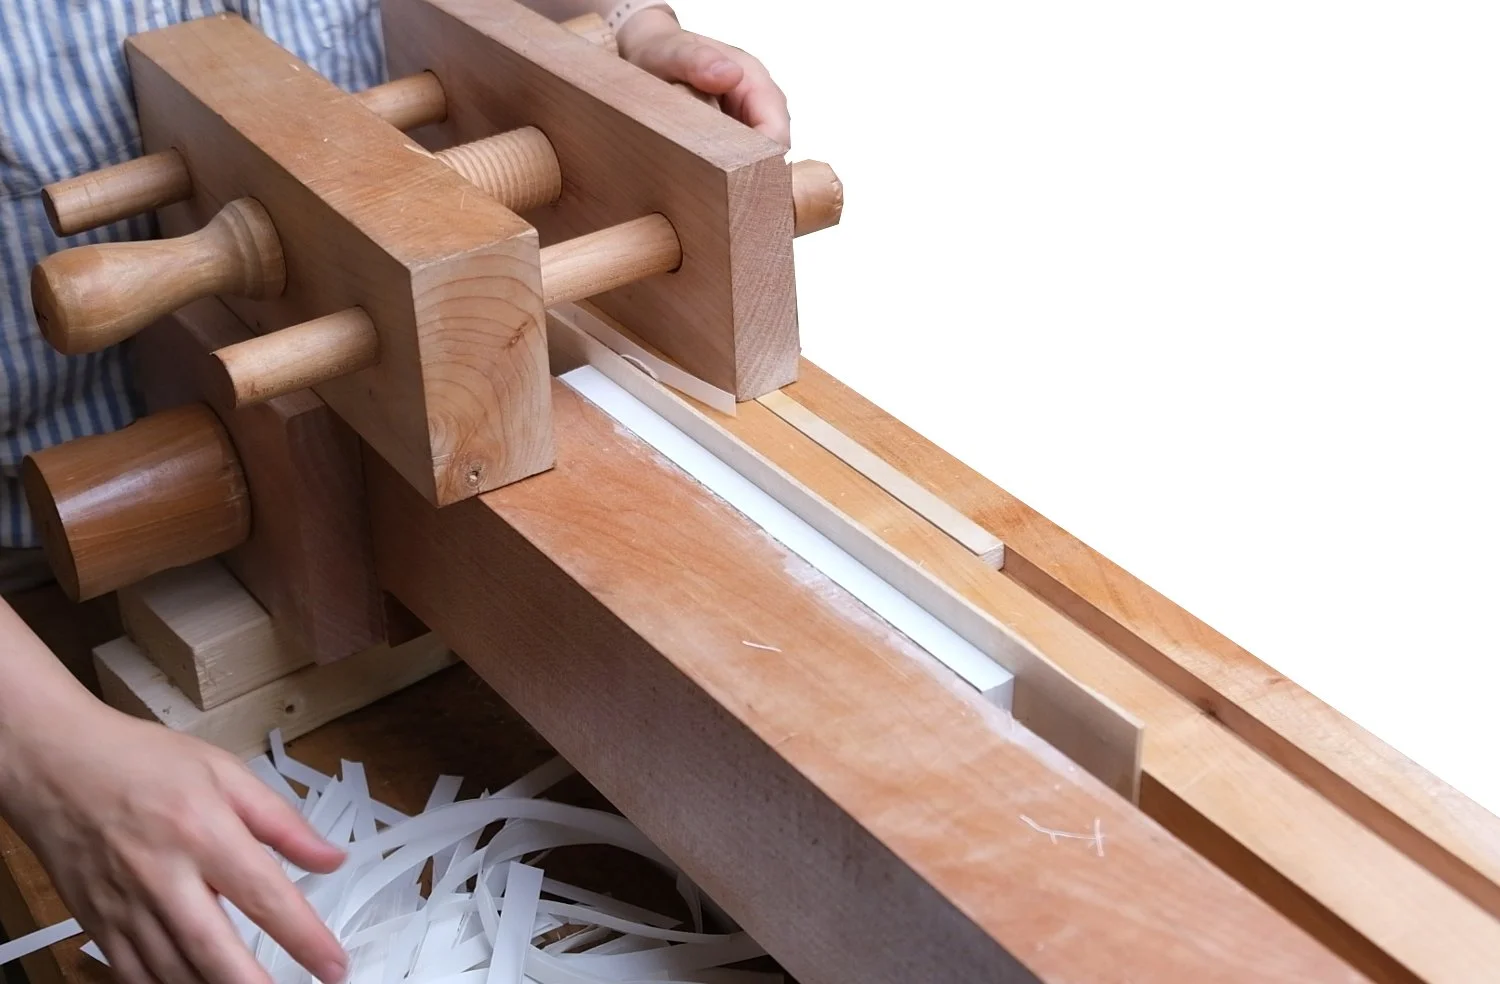
In the course of making a book, there’s one tool you use many times throughout the process, and that is a book vise. It’s what you use to hold the paper properly while marking, cutting, rounding the spine, gluing, separating the cords and more. Now while the vise is a great tool all on its own, it also works in conjunction with another tool: the cutting plough. If you turn the vise around, there’s a groove which the plough fits into, and now you can use this tool to trim the sides of the paper nice and crisp.


In the course of making a book, there’s one tool you use many times throughout the process, and that is a book vise. It’s what you use to hold the paper properly while marking, cutting, rounding the spine, gluing, separating the cords and more. Now while the vise is a great tool all on its own, it also works in conjunction with another tool: the cutting plough. If you turn the vise around, there’s a groove which the plough fits into, and now you can use this tool to trim the sides of the paper nice and crisp.
Now I have just made a detailed building plan that includes how to build the vise AND how to build the accompanying cutting plough. If you’re someone who’s been thinking about building these tools for yourself, then I think this plan will be very useful as it includes cutlists, step by step instructions and tips and things to think about.
This project is a part of our bookbinding tool series which also includes the book press and the sewing frame. All of these tools feature a classic design and wooden screws wherever applicable.
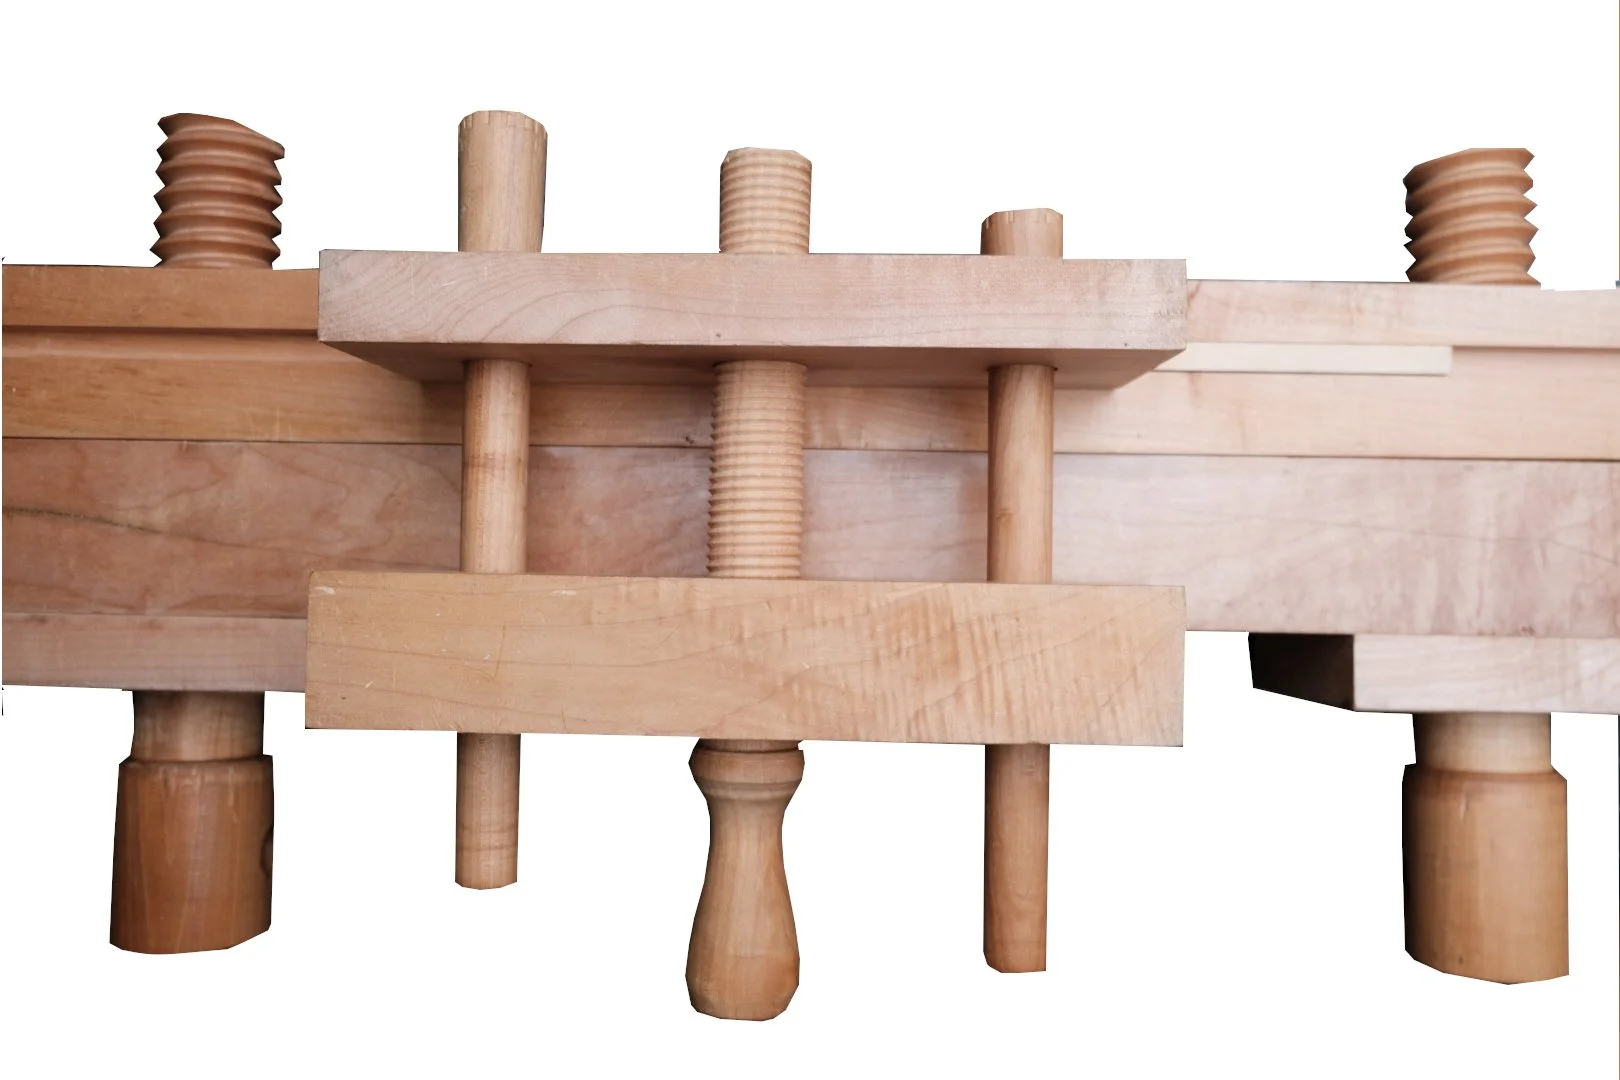
I think the vise is one of those tools which is pretty straightforward and obviously quite useful. The cutting plough is a less obvious tool. It features a blade, a wooden screw, two blocks of wood and two rods, and while running in the groove in the vise, it does such a great job of cutting the paper into crisp, beautiful sides. If you’re someone who happen to have a big guillotine in your shop, you might not need it, but for the rest of us, it’s a big step up from using a razor blade to cut the paper.
Make sure to check out the video which is all about these tools: how they’re constructed and how you use them. And of course, if you’re serious about building your own, then you might want to check out the plan.
Sewing Frame For Bookbinding + Plan
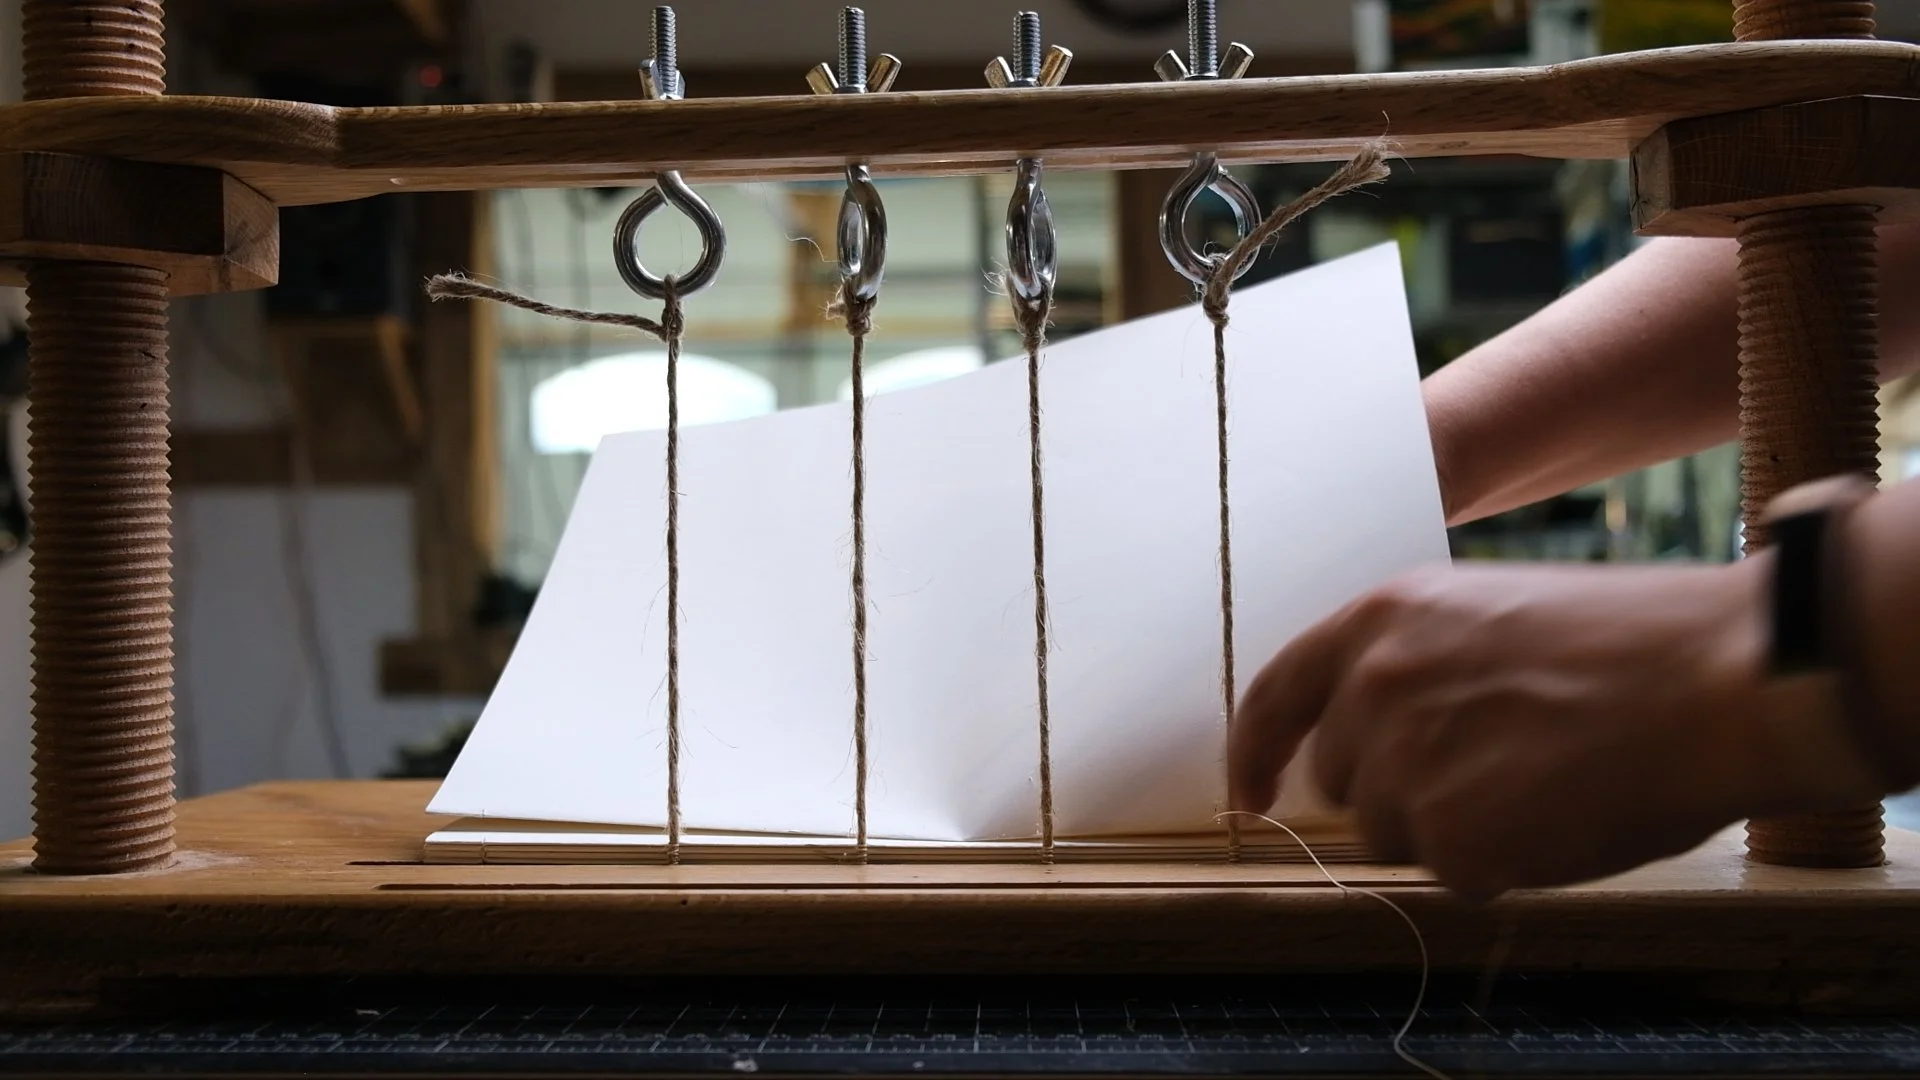
The sewing frame is a really interesting tool you use in bookbinding when binding signatures (or booklets) of paper together. In many ways, it’s like a jig that enables you to hold cords or tape taught while sewing your thread around the cord and in and out of the paper. Quite the ingenious contraption! And now I have a building plan of this project: Sewing Frame Plan

The sewing frame is a really interesting tool you use in bookbinding when binding signatures (or booklets) of paper together. In many ways, it’s like a jig that enables you to hold cords or tape taught while sewing your thread around the cord and in and out of the paper. Quite the ingenious contraption! And now I have a building plan of this project: Sewing Frame Plan
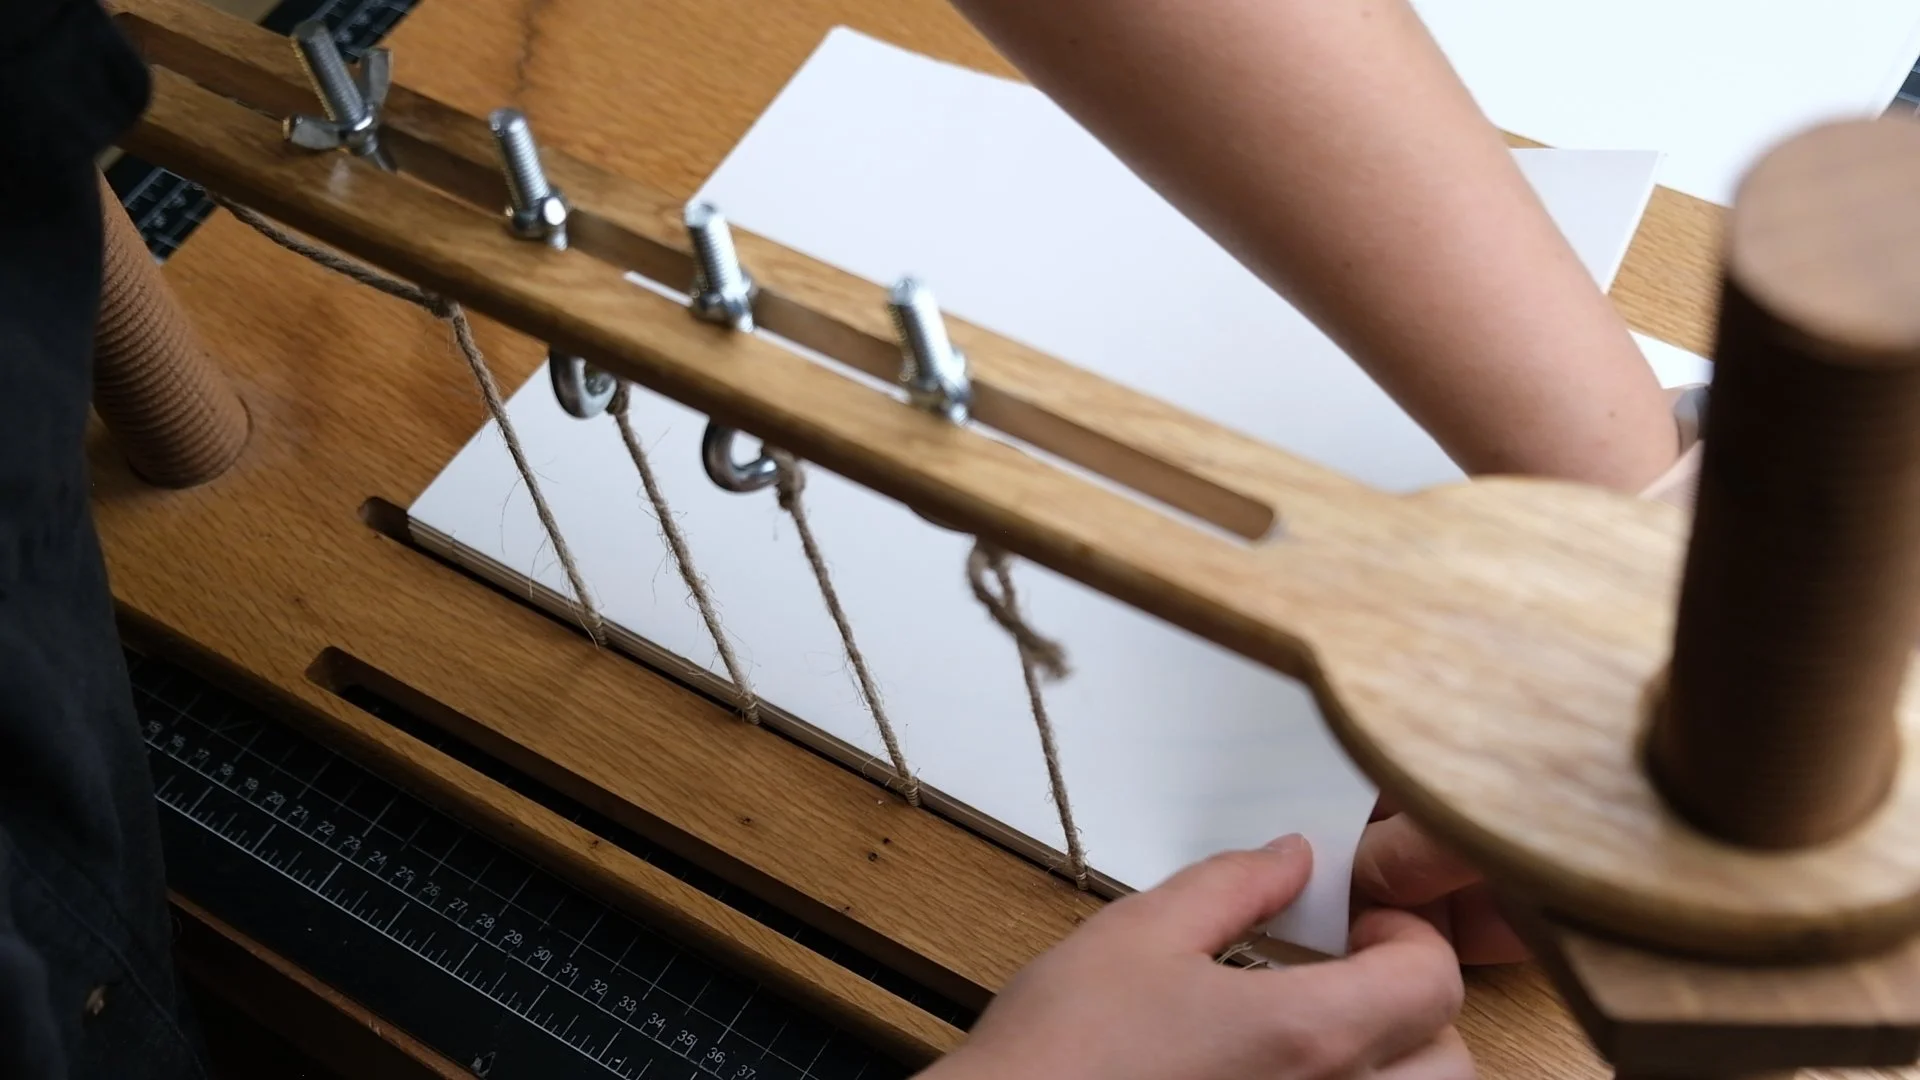
If you’re into bookbinding, this might have been one of those tools you’ve been wanting to get for a while. It’s not absolutely necessary to have sewing frame in order to bind books together, however it is exceptionally useful if you want to bind books together using this method.
So, lately I’ve been working on a building plan that goes over how to make one of these in detail - either using regular woodworking tools, or using a CNC machine. The plan goes over cutlists, all the steps, how to make wooden screws, how to use the unit etc….
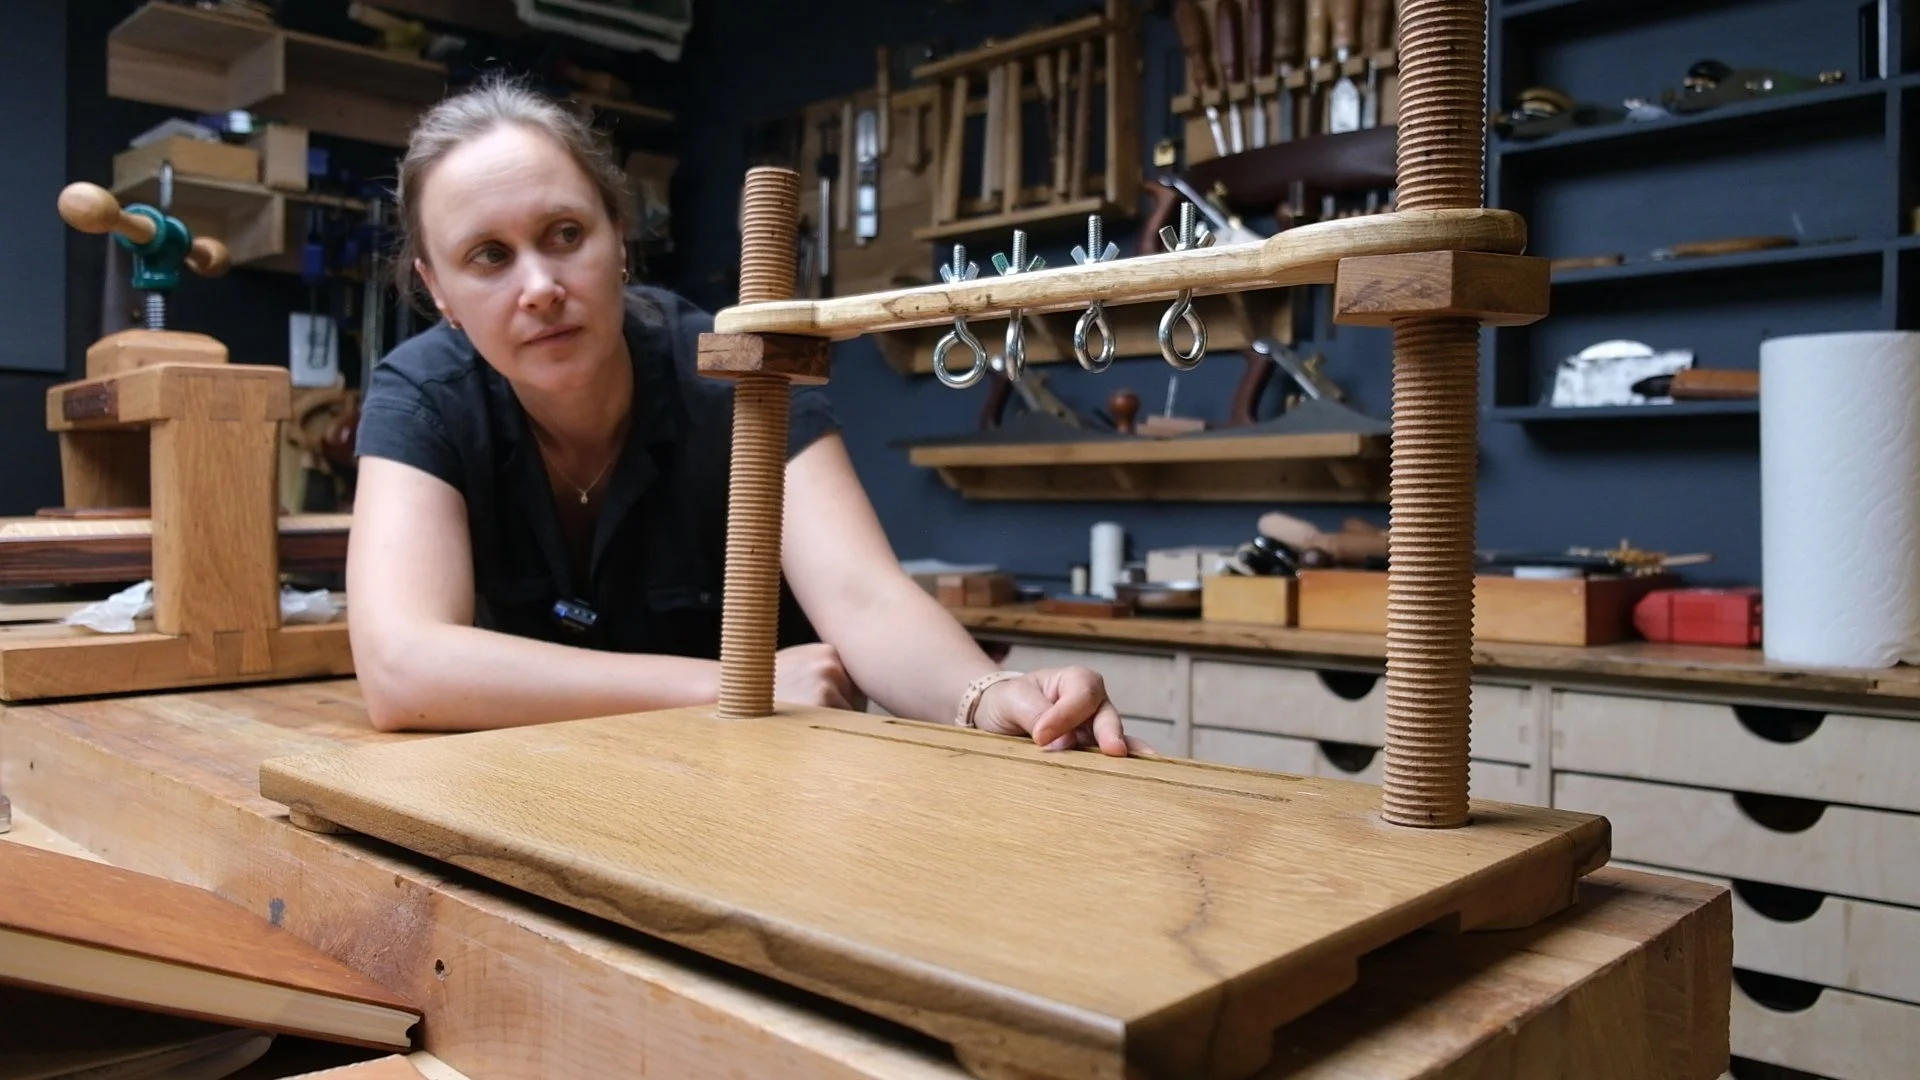
The sewing frame has been around a long time, and one of things about it, is it enables you to bind books together that are exceptionally strong and durable. I go over a bit about this in my latest youtube video which is all about how to make this tool, how to use it as well as a little background info and why this is a superior method when it comes to bindery.
If you’re interested in bookbinding, then you might also be interested in checking out my book press plan and accompanying video. Next up, I’m working on the book vise and book plough which enable you to hold the paper properly and to cut it nice and sharp.
All About the Book Press + New Building Plan
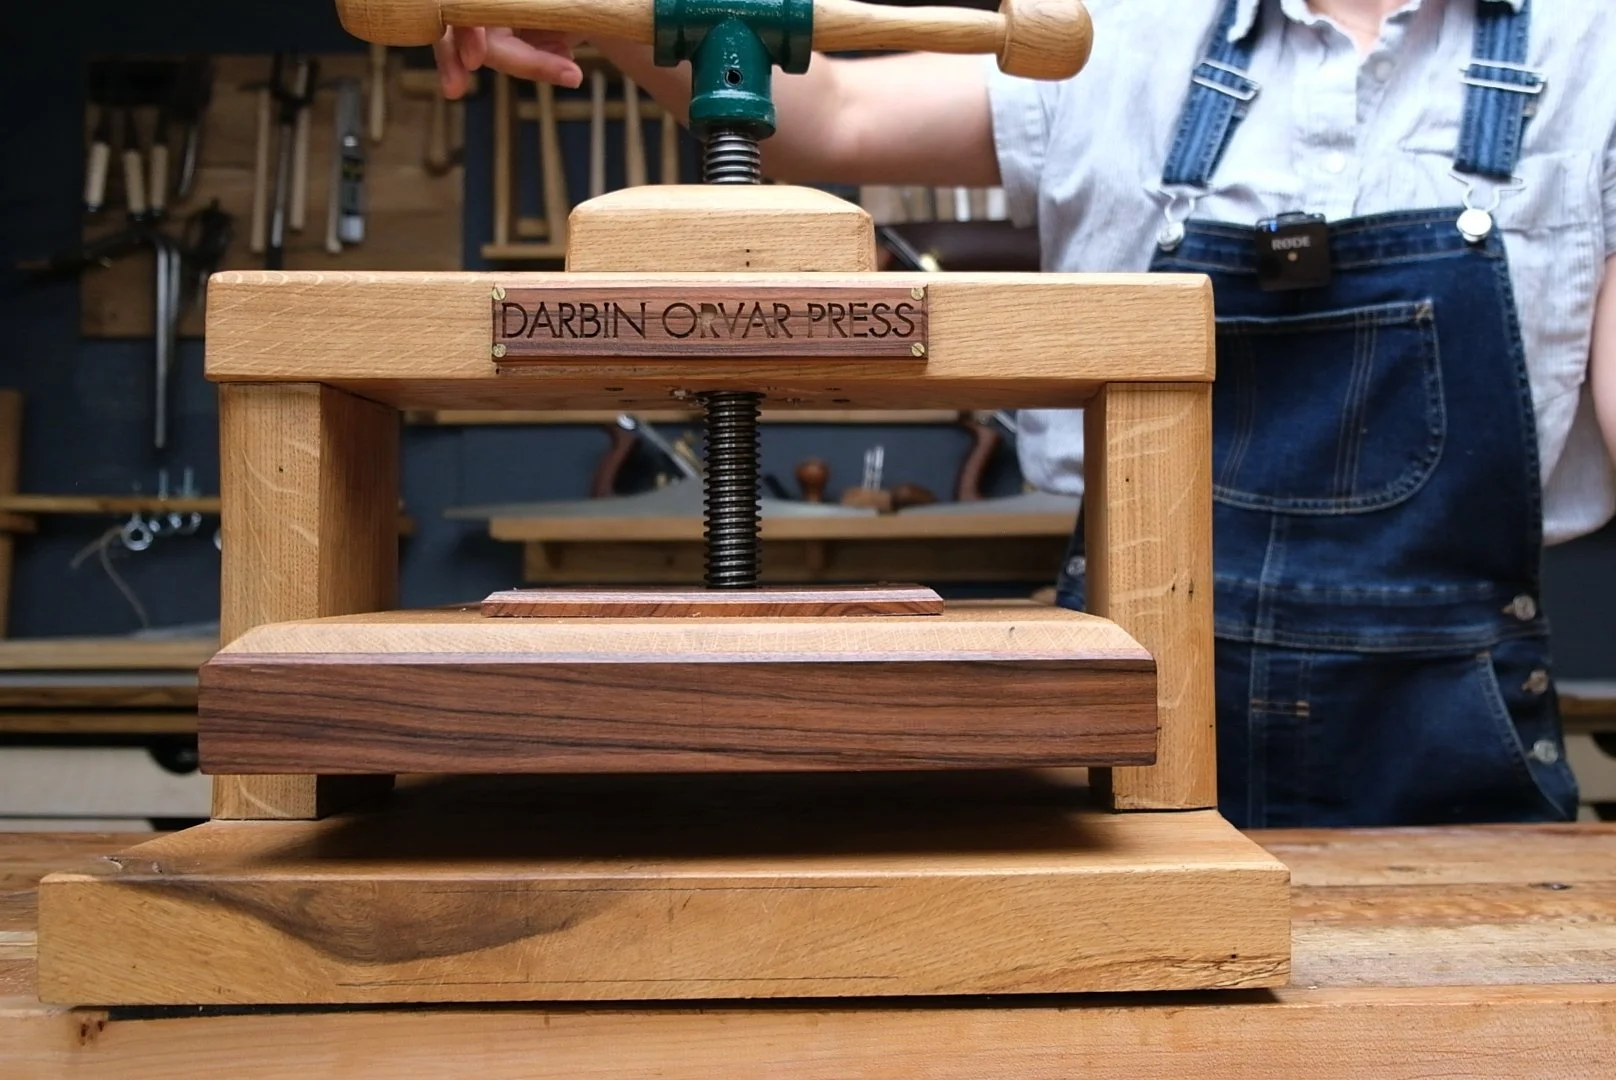
Lately I’ve been getting back into bookbinding which is such a fun and interesting thing to do. I love making my own books! Now, as I was starting to work on some projects, I was happy to get back to using our awesome book binding tools we made a while back.
The book press in particular is a project I often get questions about whether or not we have a building plan. Well now we do: BOOK PRESS BUILDING PLAN

Lately I’ve been getting back into bookbinding which is such a fun and interesting thing to do. I love making my own books! Now, as I was starting to work on some projects, I was happy to get back to using our awesome book binding tools we made a while back.
The book press in particular is a project I often get questions about whether or not we have a building plan. Well now we do: BOOK PRESS BUILDING PLAN
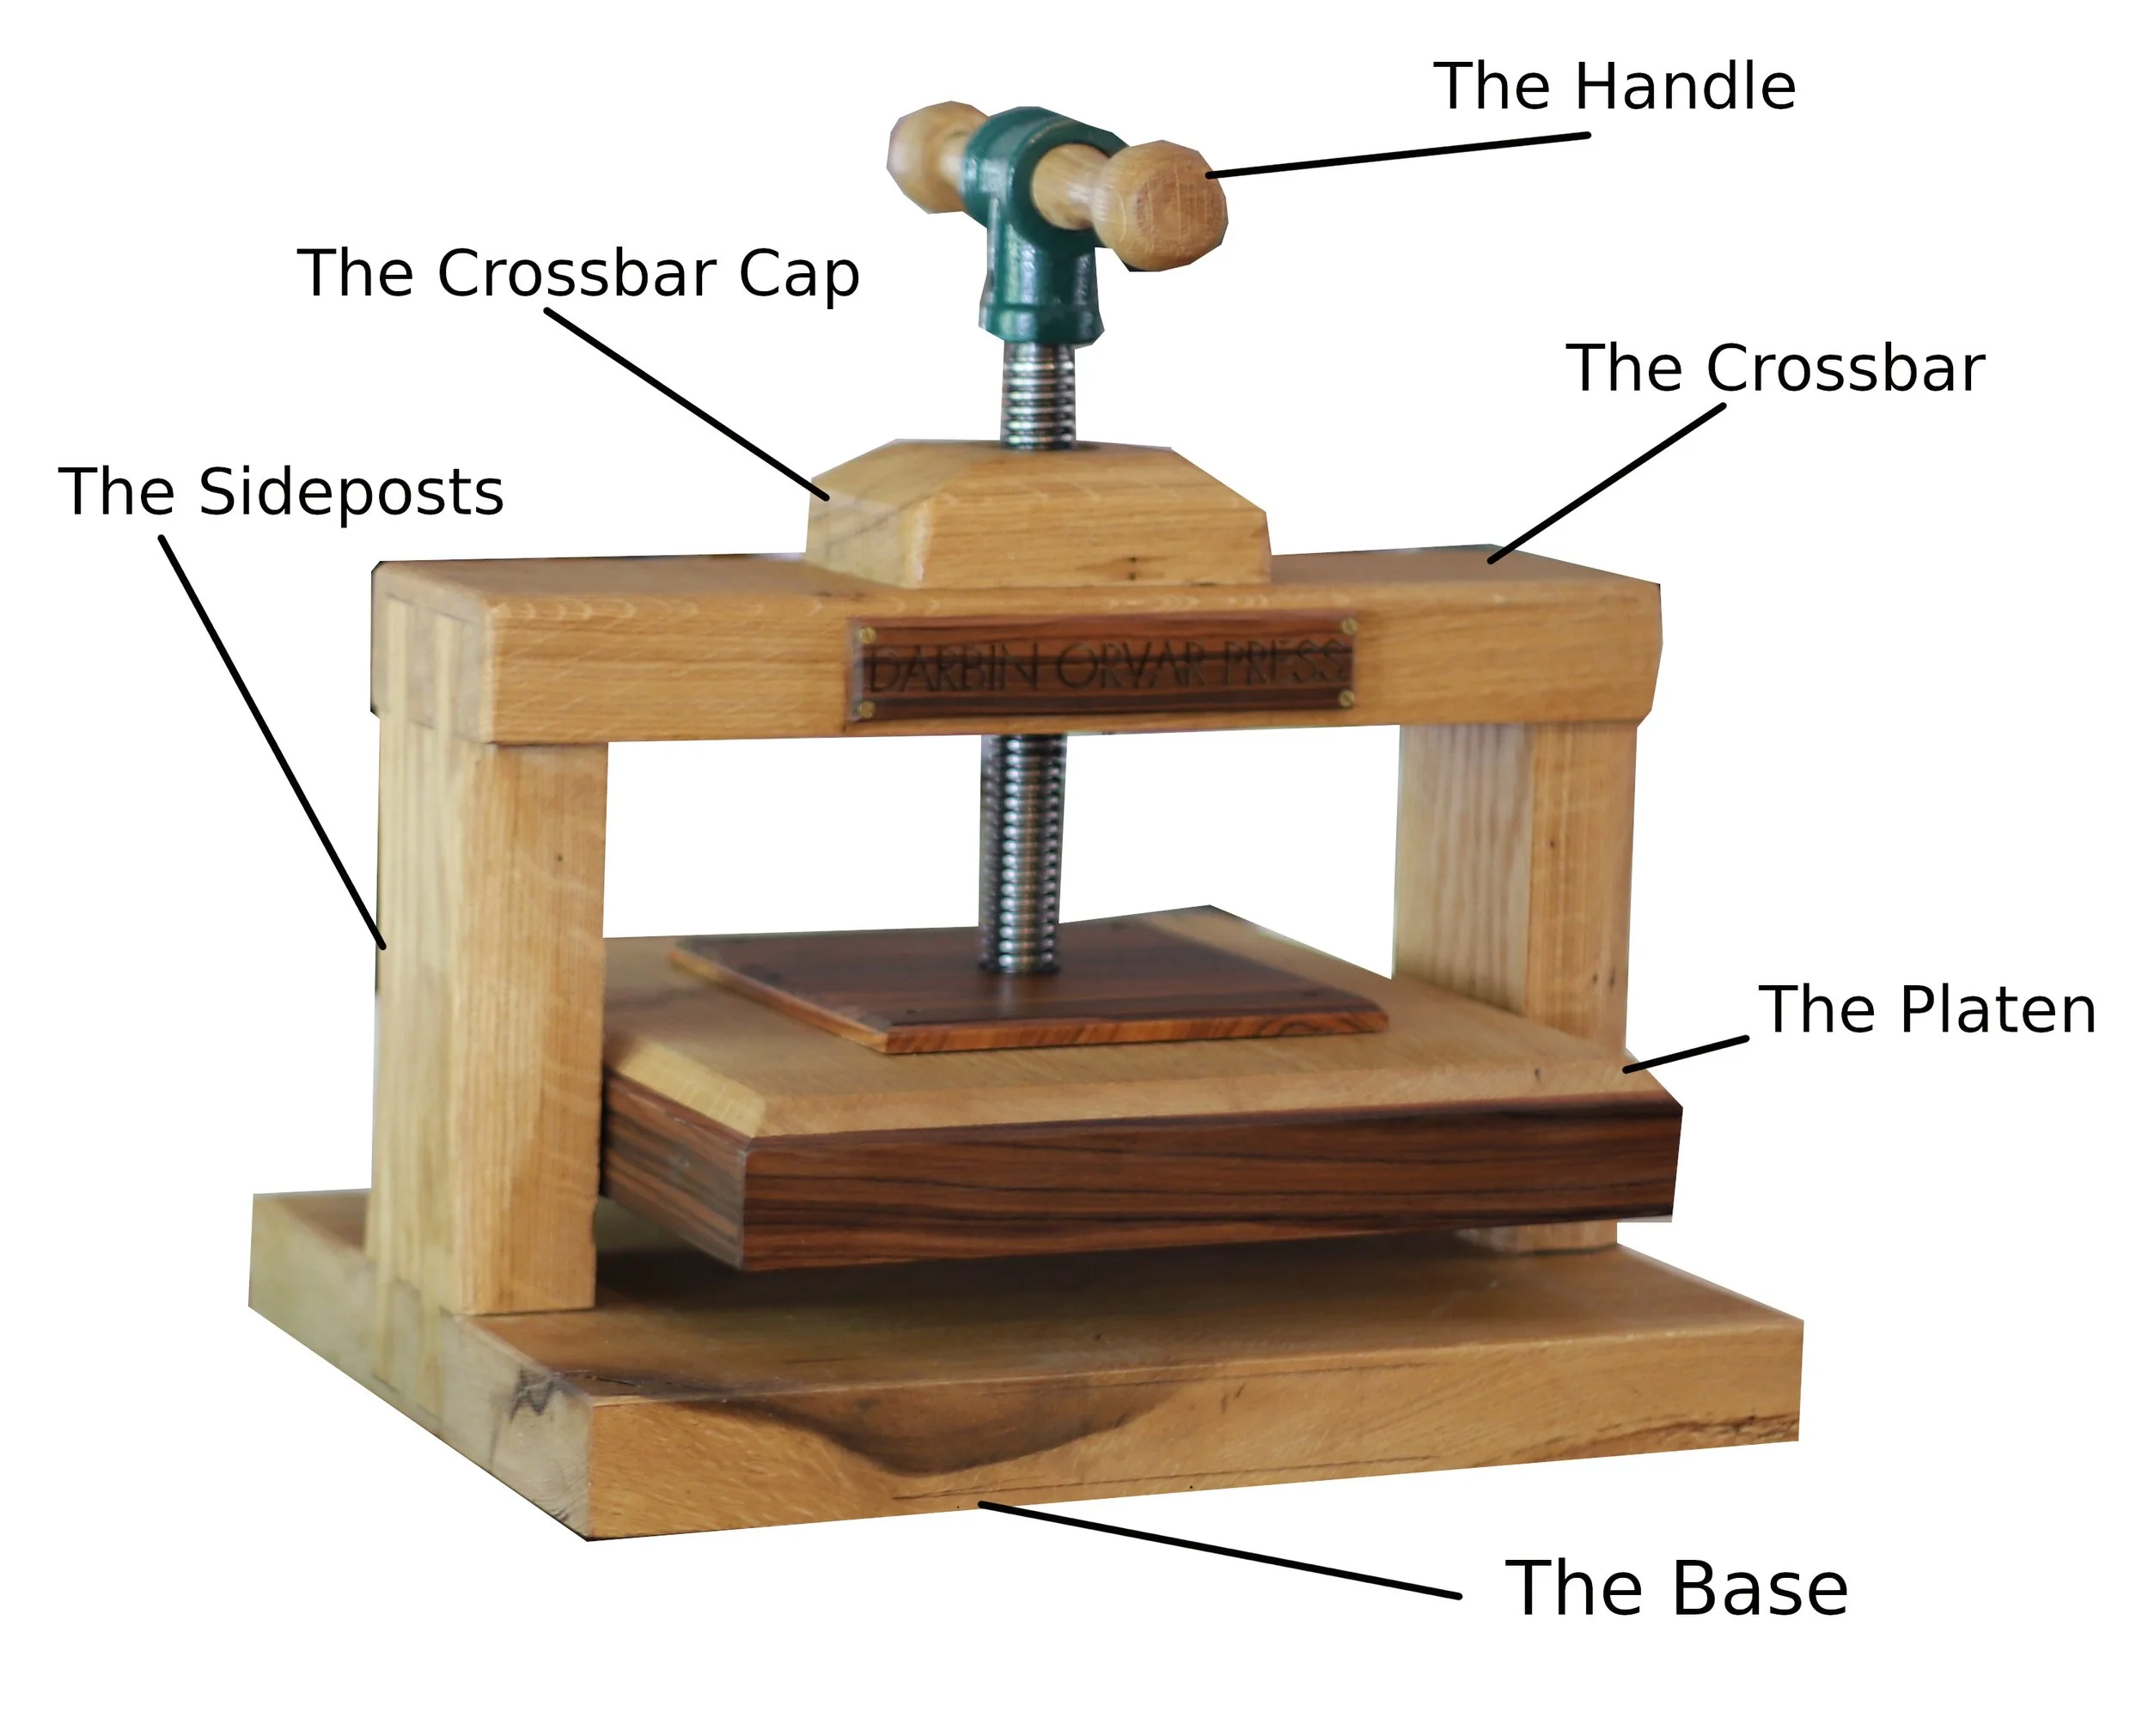
And I completely get it! If you get into bookbinding, you quickly realize just how important a book press is, and when you start looking around you see just how expensive they are to buy. If you’re able to woodwork, a book press makes a lot of sense to build!
So, for the last week or so, I’ve been working hard on creating a really detailed building plan complete with cutlists, step by step instructions, diagrams etc… I think it’s quite easy to follow and clear.
As I’ve reacquainted myself with the nitty gritty details about this press, I figured it would be fun to make an accompanying video going into the project as well as a little about simple machines, the screw, different types of threads, the construction etc…
I hope you enjoy it. And, if you’ve been thinking about finally building that press, now is your chance. Here is the plan: BOOK PRESS BUILDING PLAN
Let's Build an Outdoor Sofa!
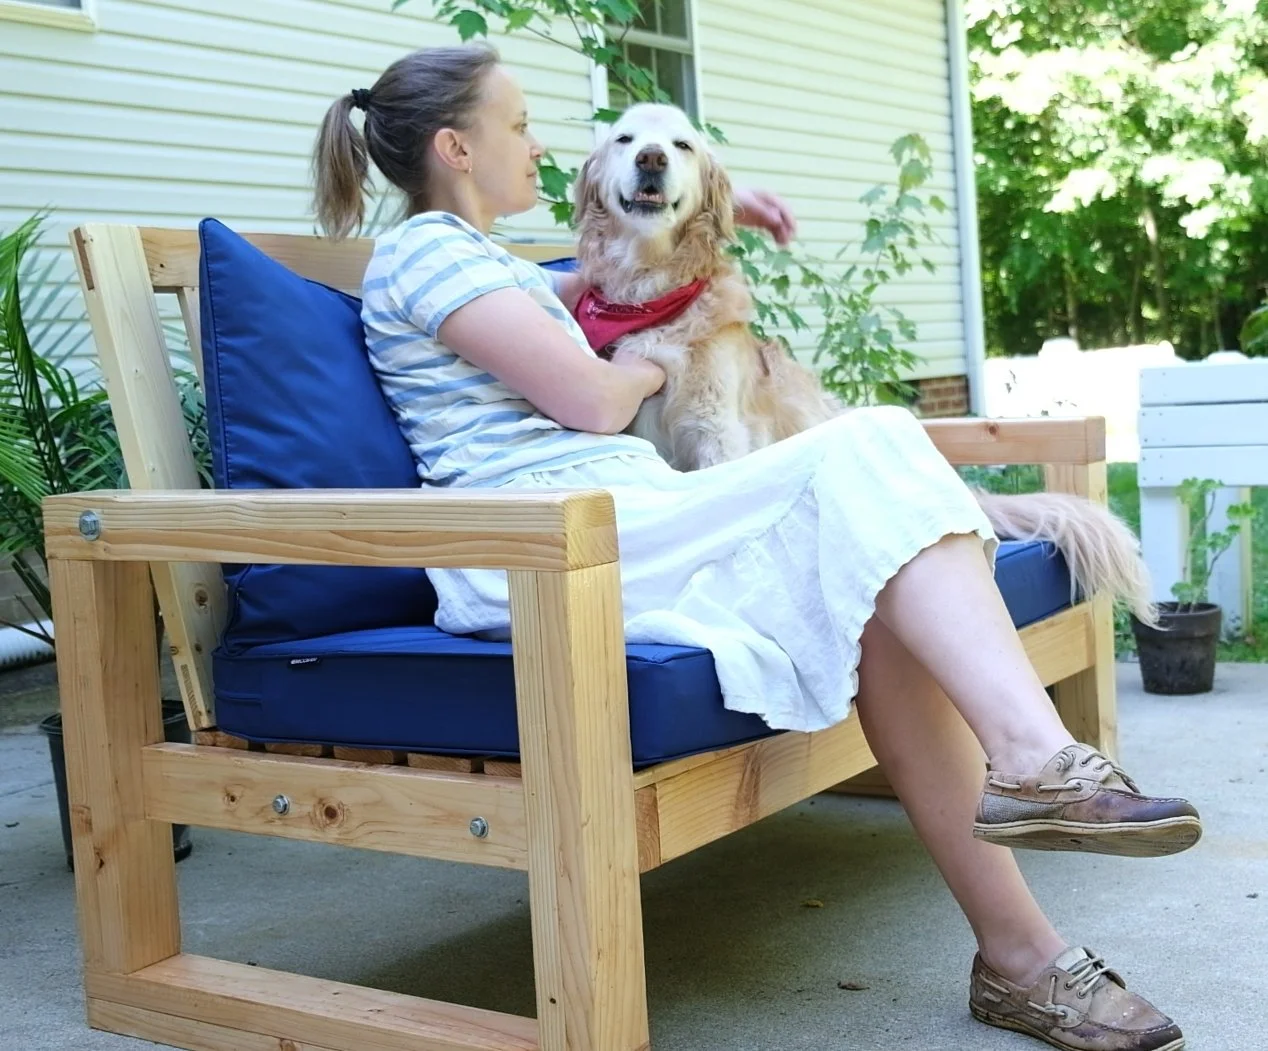
An outdoor sofa that’s good looking, affordable and easy to disassemble, that’s what we’ve here. This design features a modern style and measures 55” wide and 30” deep. It's a straightforward project resulting in a very useful couch to relax in outside. HHere is the building plan: Outdoor Sofa Plan (including step by step instructions, cutlist + scalable design files)

An outdoor sofa that’s good looking, affordable and easy to disassemble, that’s what we’ve here. This design features a modern style and measures 55” wide and 30” deep. It's a straightforward project resulting in a very useful couch to relax in outside.
Here is the building plan: Outdoor Sofa Plan (including step by step instructions, cutlist + scalable design files)
Here are the cushions that we used: https://amzn.to/3KsX8Zi
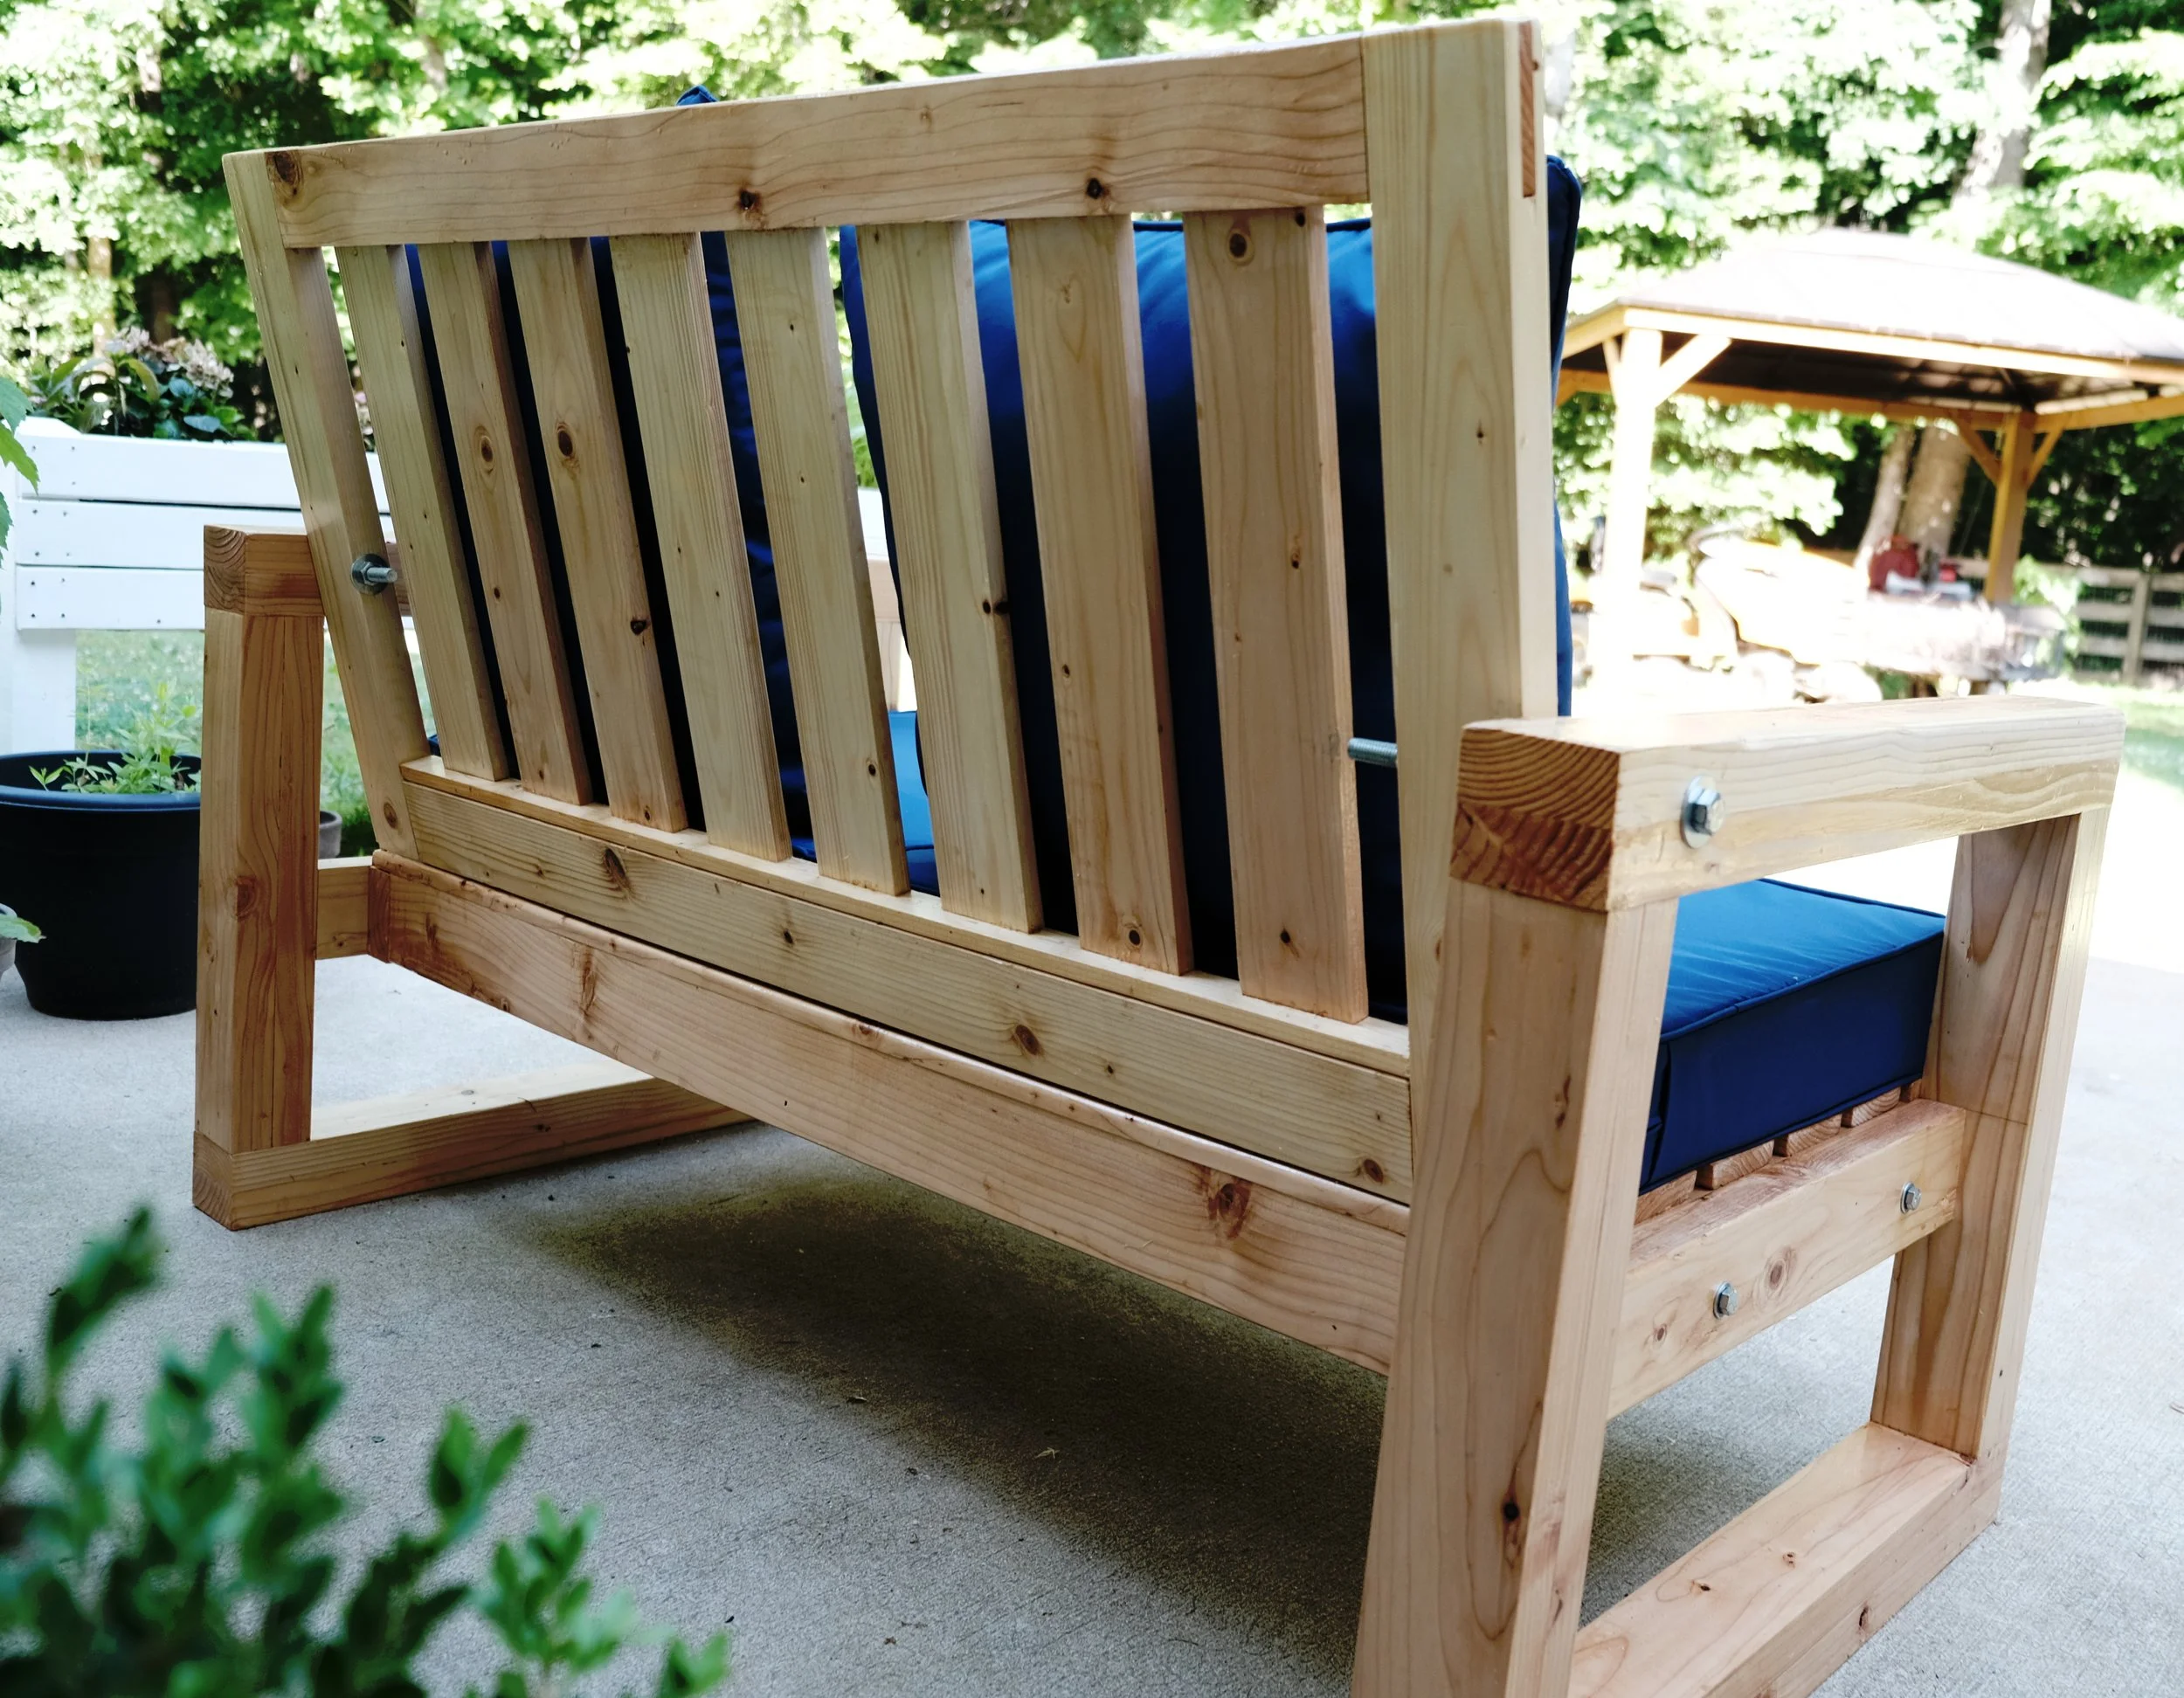
The sofa is made up of 4 sections. We've got the seat, the back and two pieces for the arms. These sections are all bolted together, so at any point you can disassemble to move, and easily assemble again.
In terms of wood we're going to need the approximate sizes of 2x4s, 4x4s and 1x4s. You can either pick those up, or do what we did, use only 2x4s, but then glue up and resaw. All in all we ended up using 13 2x4s.
How We Homeschool: a Box of Geometric Proofs
I always thought learning new things was fun, however it wasn't until we had a son and became responsible for his education that I have become more immersed in the concept of learning.
My child is 6 now and we have been teaching him things all along, ever since he was big enough to respond. I think that's the same for most parents who decided to take control over their kids’ education, whether or not they send them to school or decide to teach them at home.

I always thought learning new things was fun, however it wasn't until we had a son and became responsible for his education that I have become more immersed in the concept of learning.
My child is 6 now and we have been teaching him things all along, ever since he was big enough to respond. I think that's the same for most parents who decided to take control over their kids’ education, whether or not they send them to school or decide to teach them at home.

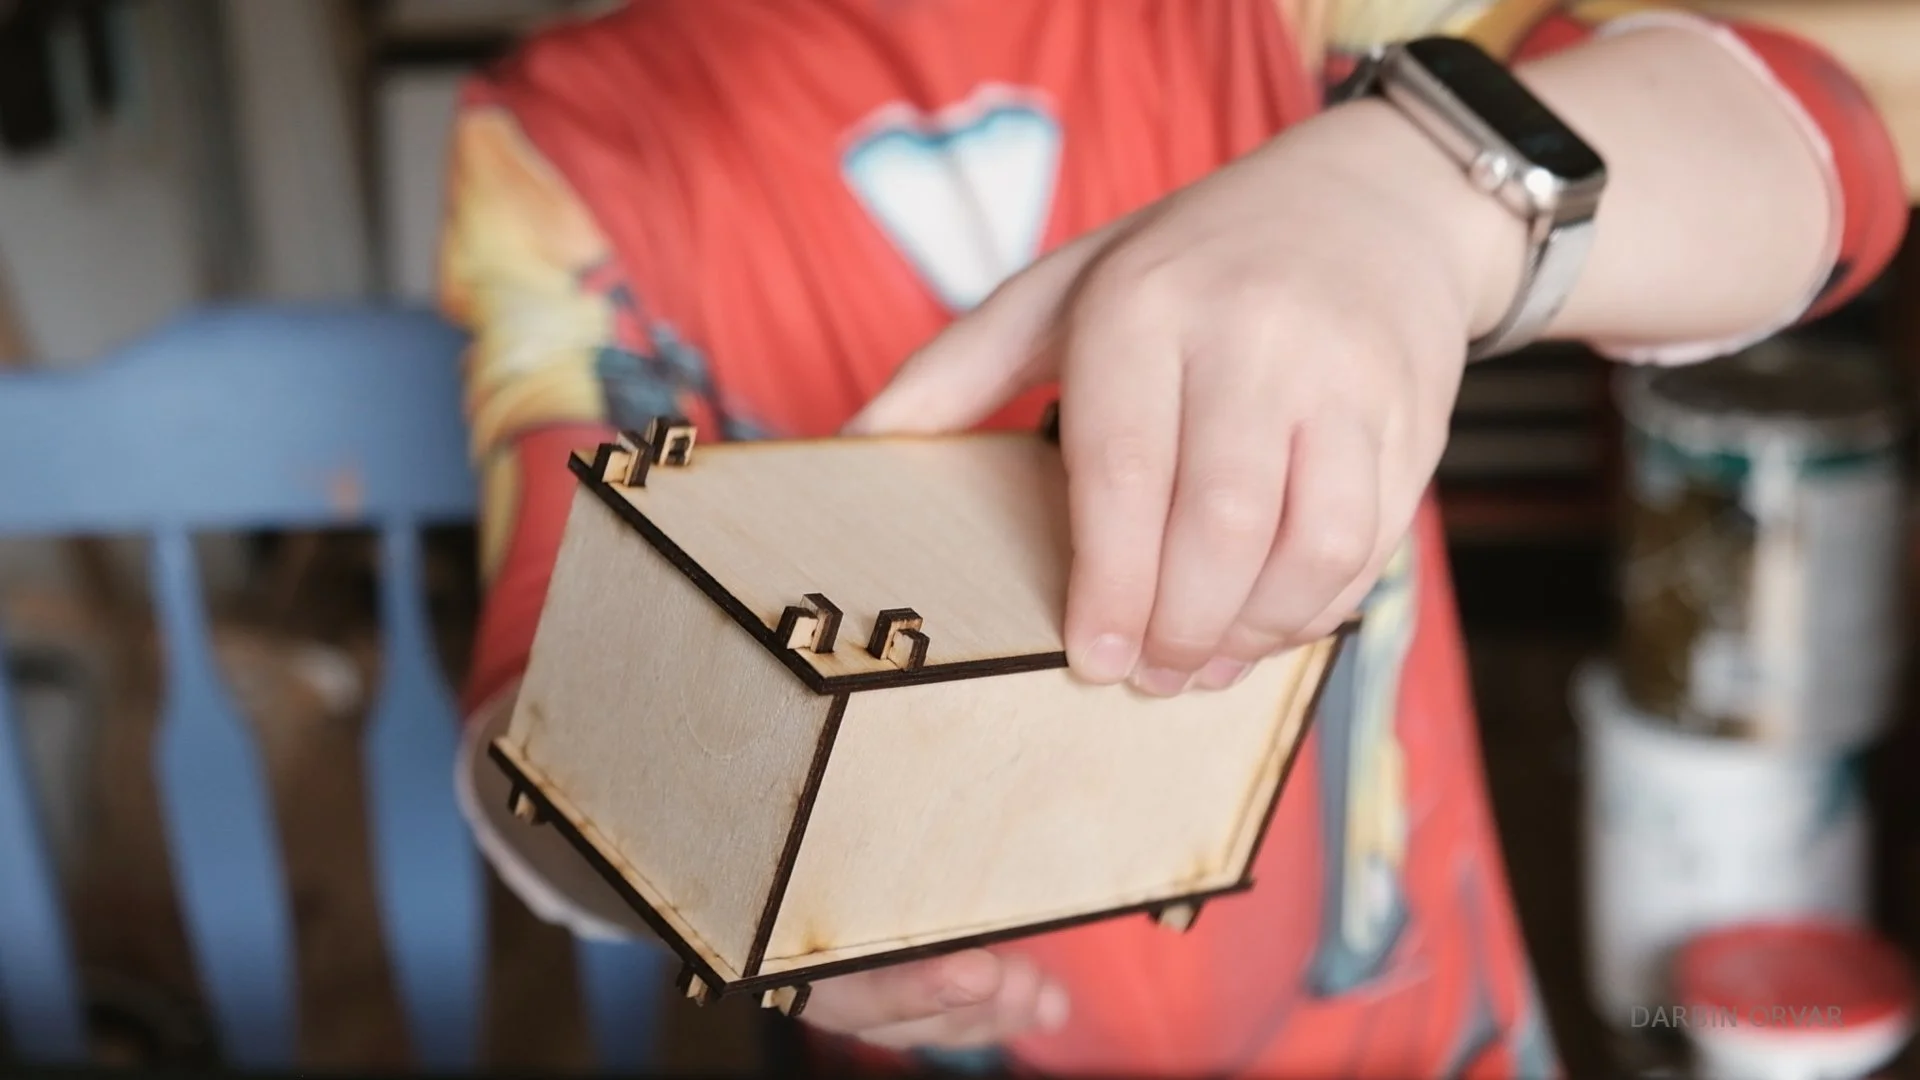
Since we have a shop full of tools, we often include him in projects and make projects for him. And the latest thing is this little geometry box. And I just thought this project was kind of fun, and I wanted to share a little bit about this aspect of our lives.
Inside the box we have a bunch of geometric proofs that you can use as a part of a lesson plan or just play around with. In the video I go over exactly what the different parts are and how we use them.
We don't follow a specific curriculum in our education here, he's been working on basic division and subtraction, now we're doing larger numbers and borrowing as you're subtracting, we're starting to do some multiplication. In general he is responding quite well to all these things, and always wants to do more math when it’s time for bed!
I love the idea of a little box that you take out for learning and play - I also think something like this could be appealing to other families who share similar philosophies when it comes to their children. If you have thoughts on what else to include in the box (make sure to watch the video), be sure to let me know!
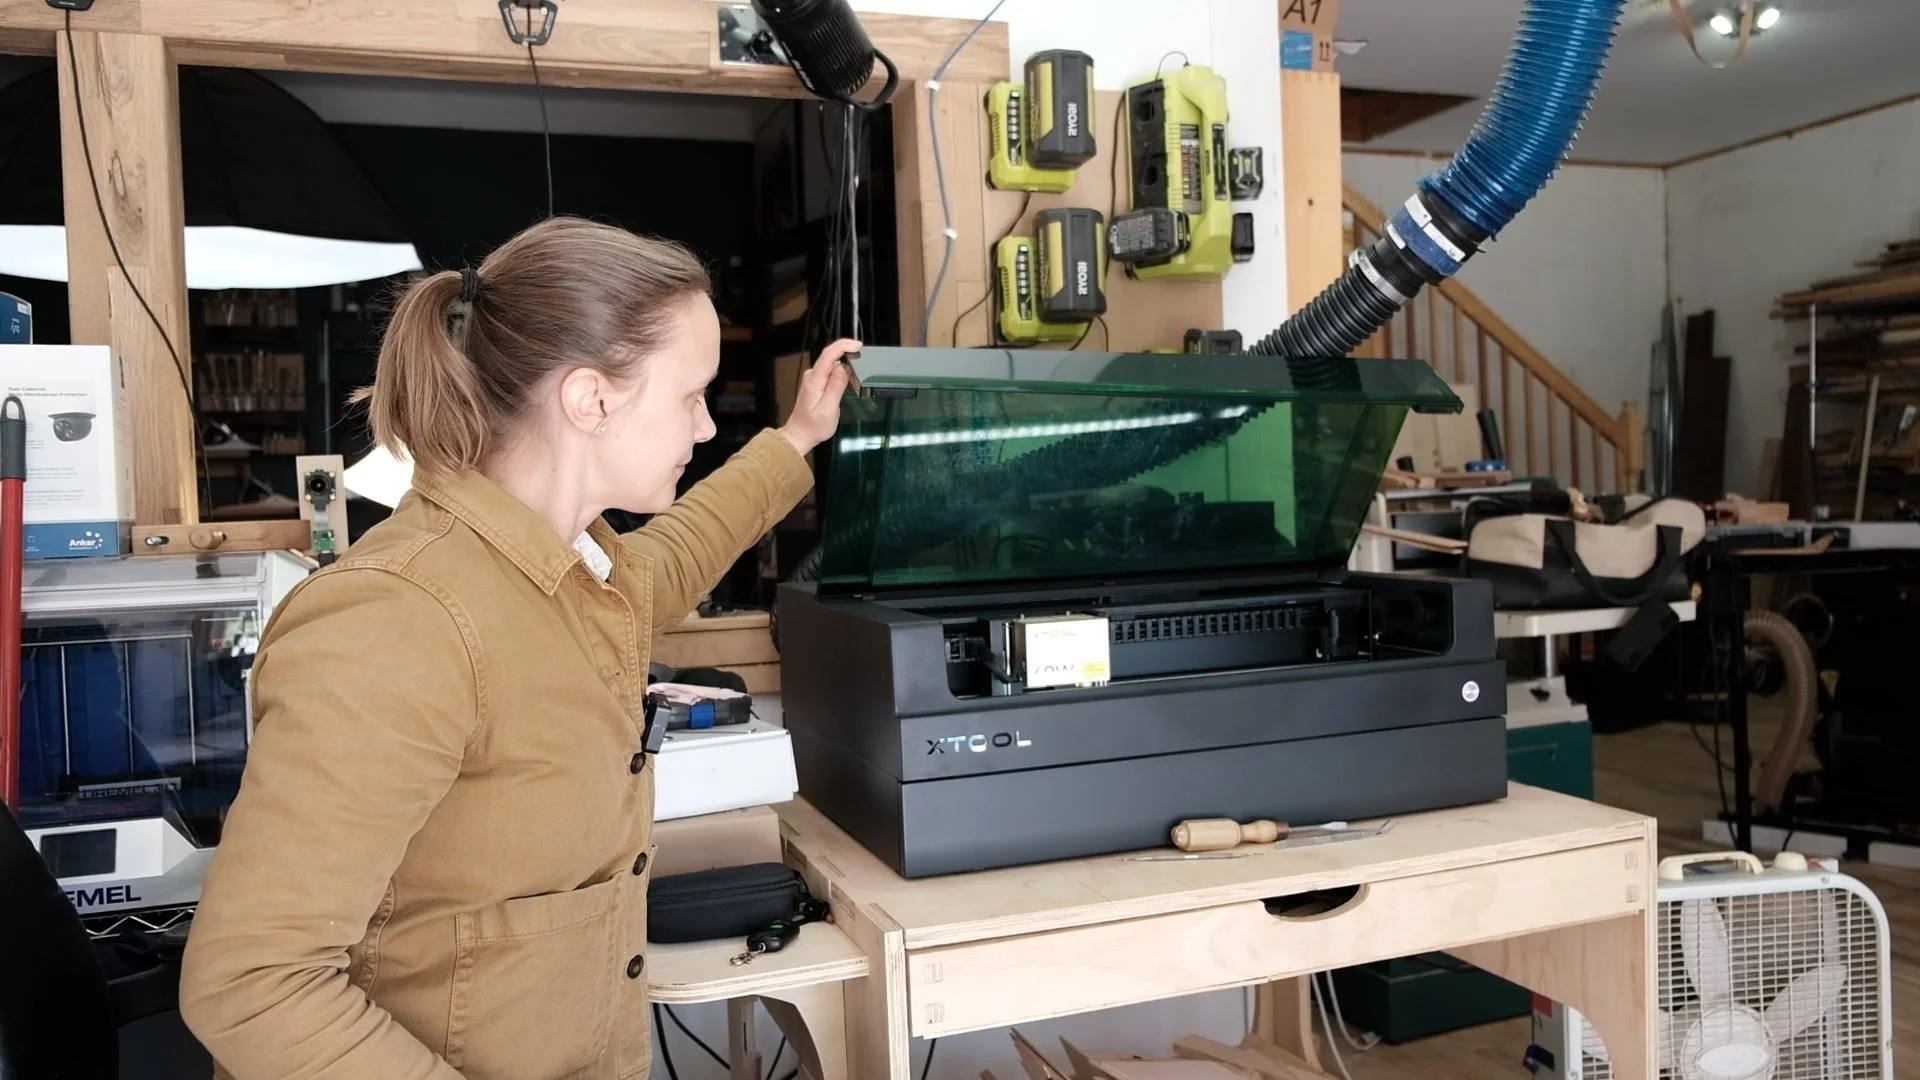
Favorite Tool in the Shop: XTool S1 Laser Engraver
If I were to start fresh with an empty shop, what would be the first tool I would get? Well, while I'd be tempted to say tablesaw (is there a more practical tool?), I think I would actually get a laser engraver to start with. For the past year now we've been working quite a bit with laser engraving and cutting, and it's such a useful tool for making small and precise things. Especially boxes, gears, models not to mention marking out different things. It's fast, fun and opens up a new world of possibilities.

If I were to start fresh with an empty shop, what would be the first tool I would get? Well, while I'd be tempted to say tablesaw (is there a more practical tool?), I think I would actually get a laser engraver to start with. For the past year now we've been working quite a bit with laser engraving and cutting, and it's such a useful tool for making small and precise things. Especially boxes, gears, models not to mention marking out different things. It's fast, fun and opens up a new world of possibilities.
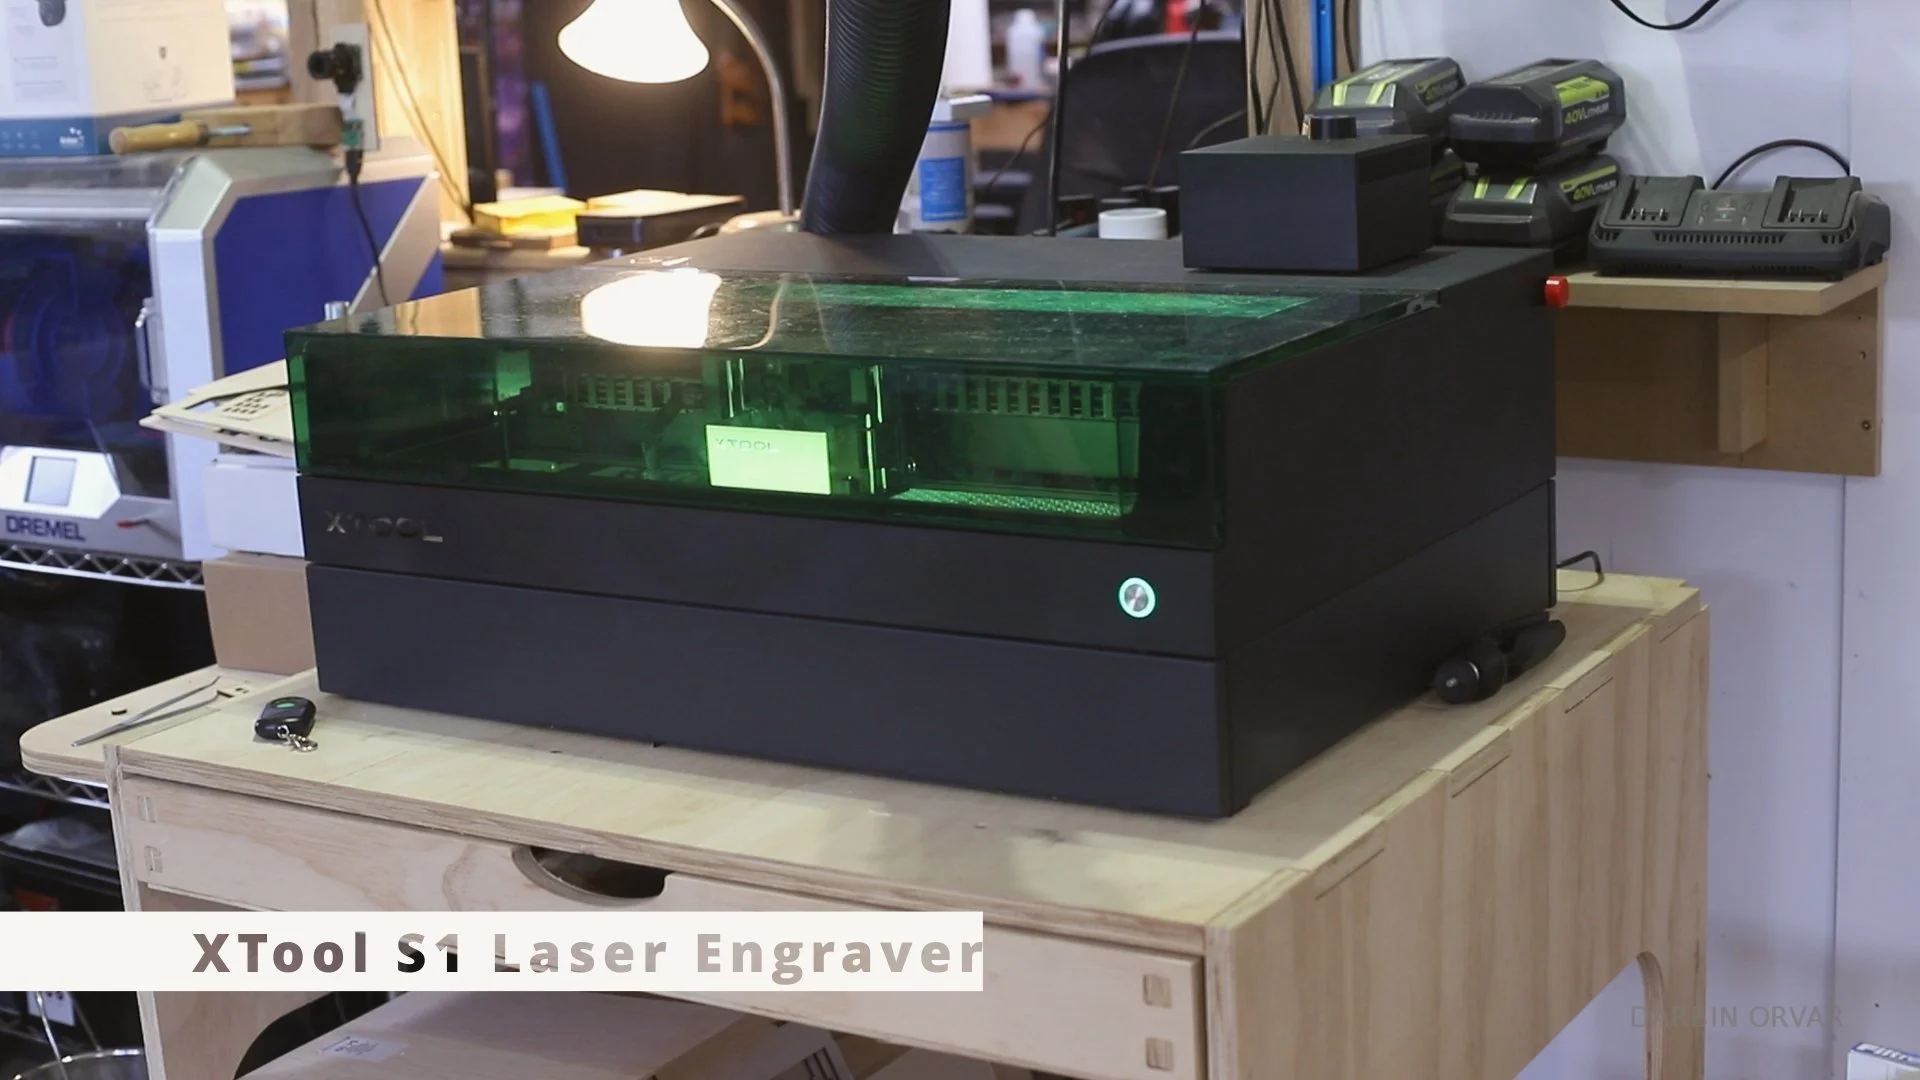
In my latest video I had the opportunity to review our latest upgrade in the shop - an Xtool S1 laser engraver. It's more powerful at 40w than our previous Atezr engraver which boasted 24w, however the main difference I would say, is the green cover.
With the cover down you can cut without having to wear glasses (which means other people can be in the shop as well in a more relaxed way), and there's a built in fan inside which will force the smoke and gases out wherever you position a hose.
There are other nice features in addition to this (great autofocus, selecting a precise area to engrave easily, safety features etc...) however the cover is actually my favorite.
Have you ever considered getting an engraver, or are you planning on upgrading? Either way I would check out XTool, right now they are having a trade in deal if you have a unit from a different brand, and you can get up to $500 in value towards a new machine.
I think one of my favorite aspects of using a laser engraver is just how fast it is to use. Whether you're prototyping or refining something, it's a lot faster than using a 3d printer, and a lot less setup than using a CNC.
Make sure to watch the video where I go over all the machine and what we've used it for.
DIY Wireless Alert Boxes (with plans + parts)
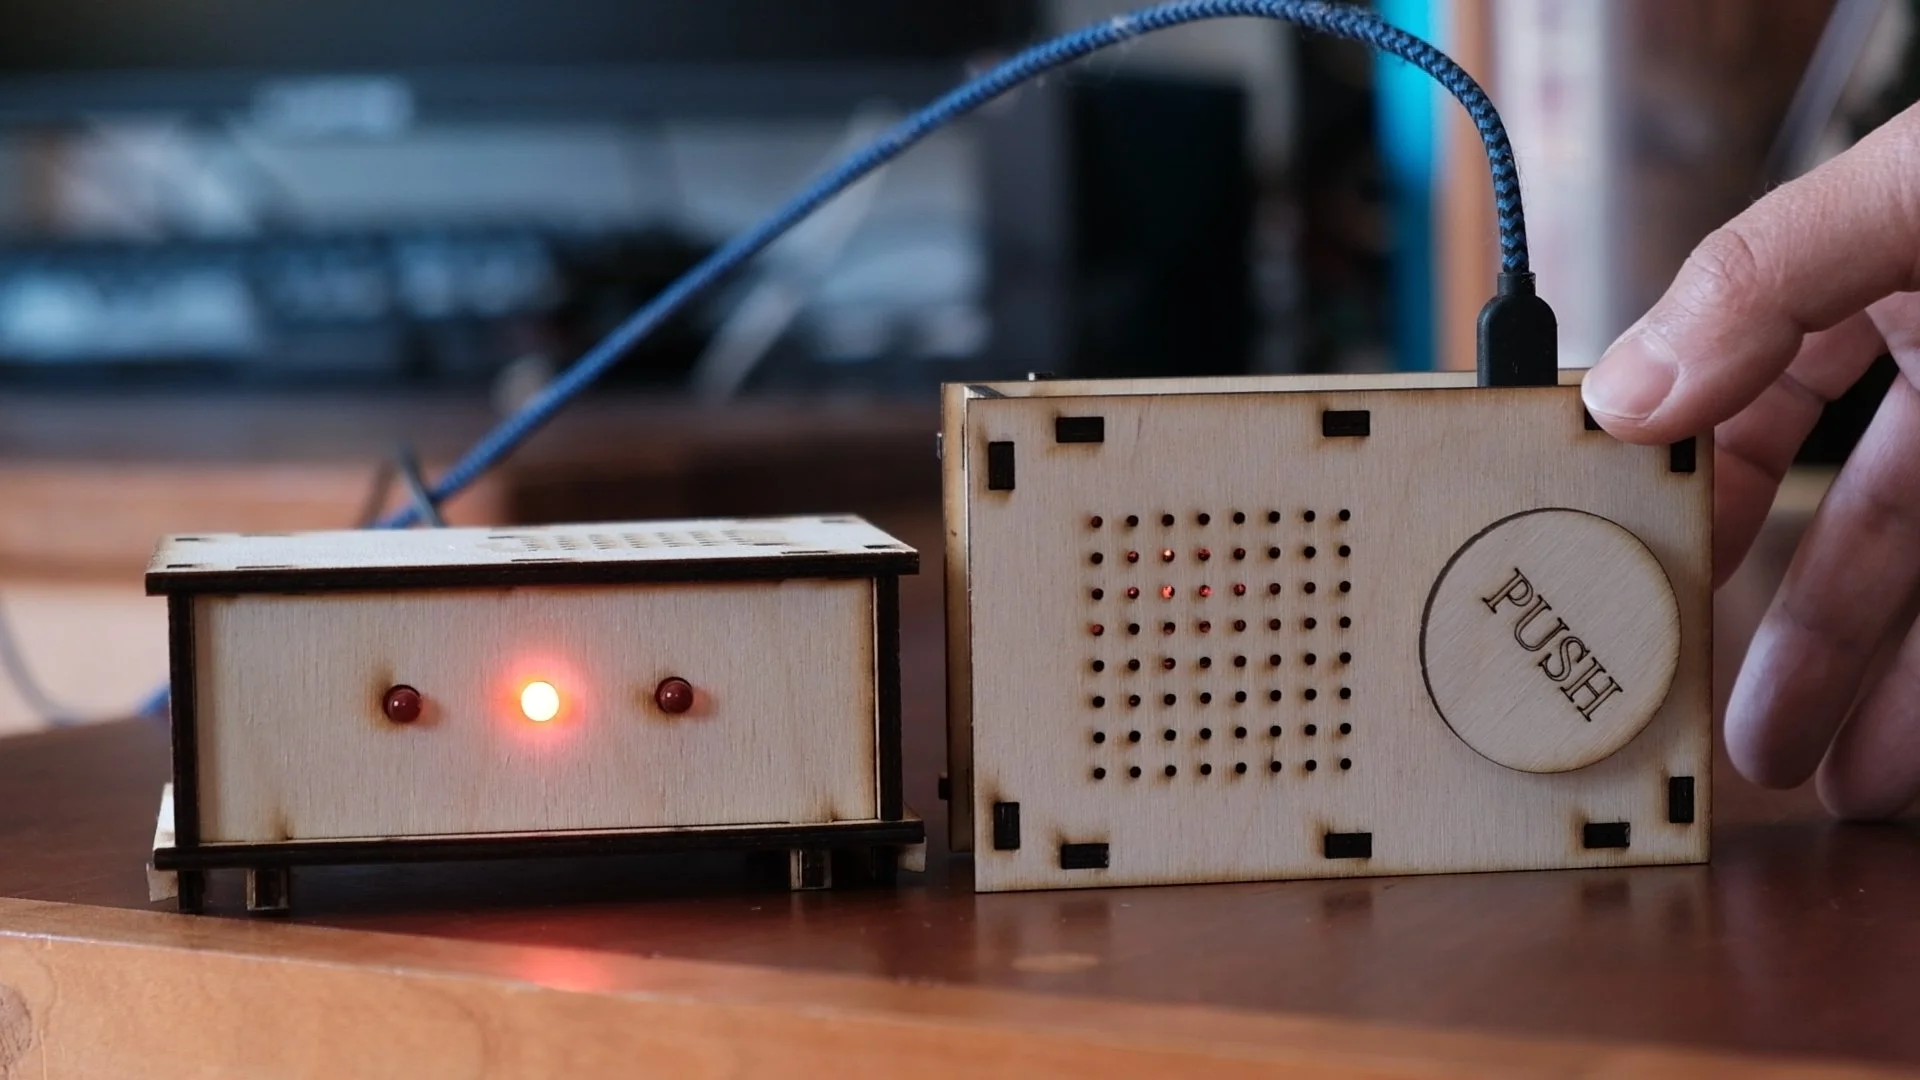
You push a button on a box in one location, and it activates a light and a buzzer in another. This is done over wifi, so you can place the boxes wherever you need them within that range. Where do you place them? One could be in your house, and the other in your workshop (so family members could contact you when needed), you can put them in different rooms of the house… there are lots of options.

You push a button on a box in one location, and it activates a light and a buzzer in another box. This is done over wifi, so you can place the boxes wherever you need them within that range. Where do you place them? One could be in your house, and the other in your workshop (so family members could contact you when needed), or you can put them in different rooms of the house… there are lots of options.
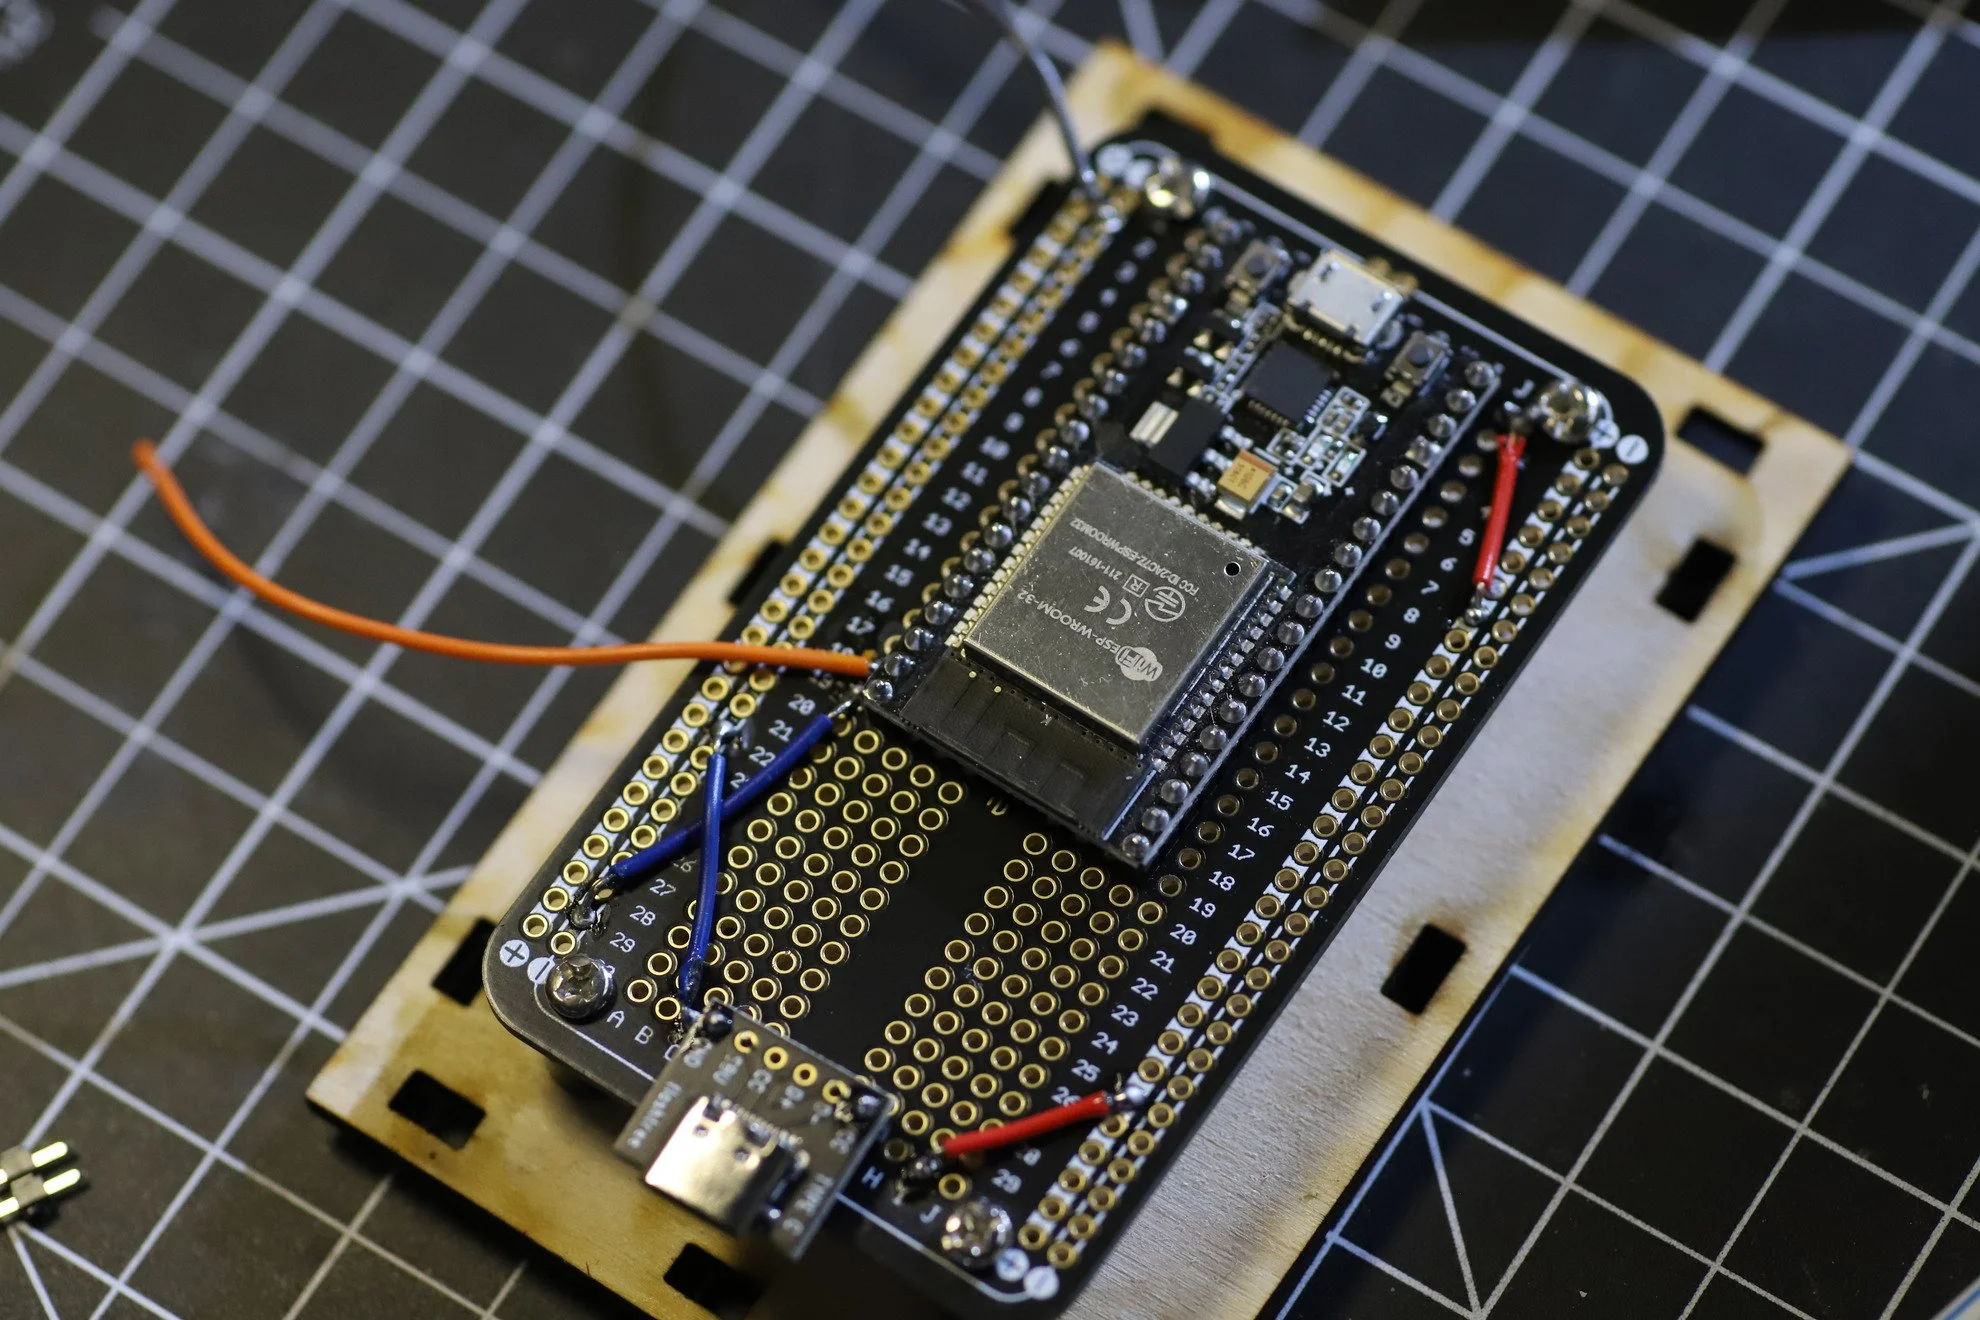
I’m using it so my kid (who doesn’t have a phone) can easily let me know when I’m working in the shop, and he needs me inside the house. It’s a pretty simple concept, yet very effective, and it can be used in a lot of ways. You could replace the button with different sensors, in which case the signaling box gets activated whenever a laser, temperature, pressure sensor is activated. In fact, you could build a whole little surveillance / alert system this way and make it as large or small as you wish.
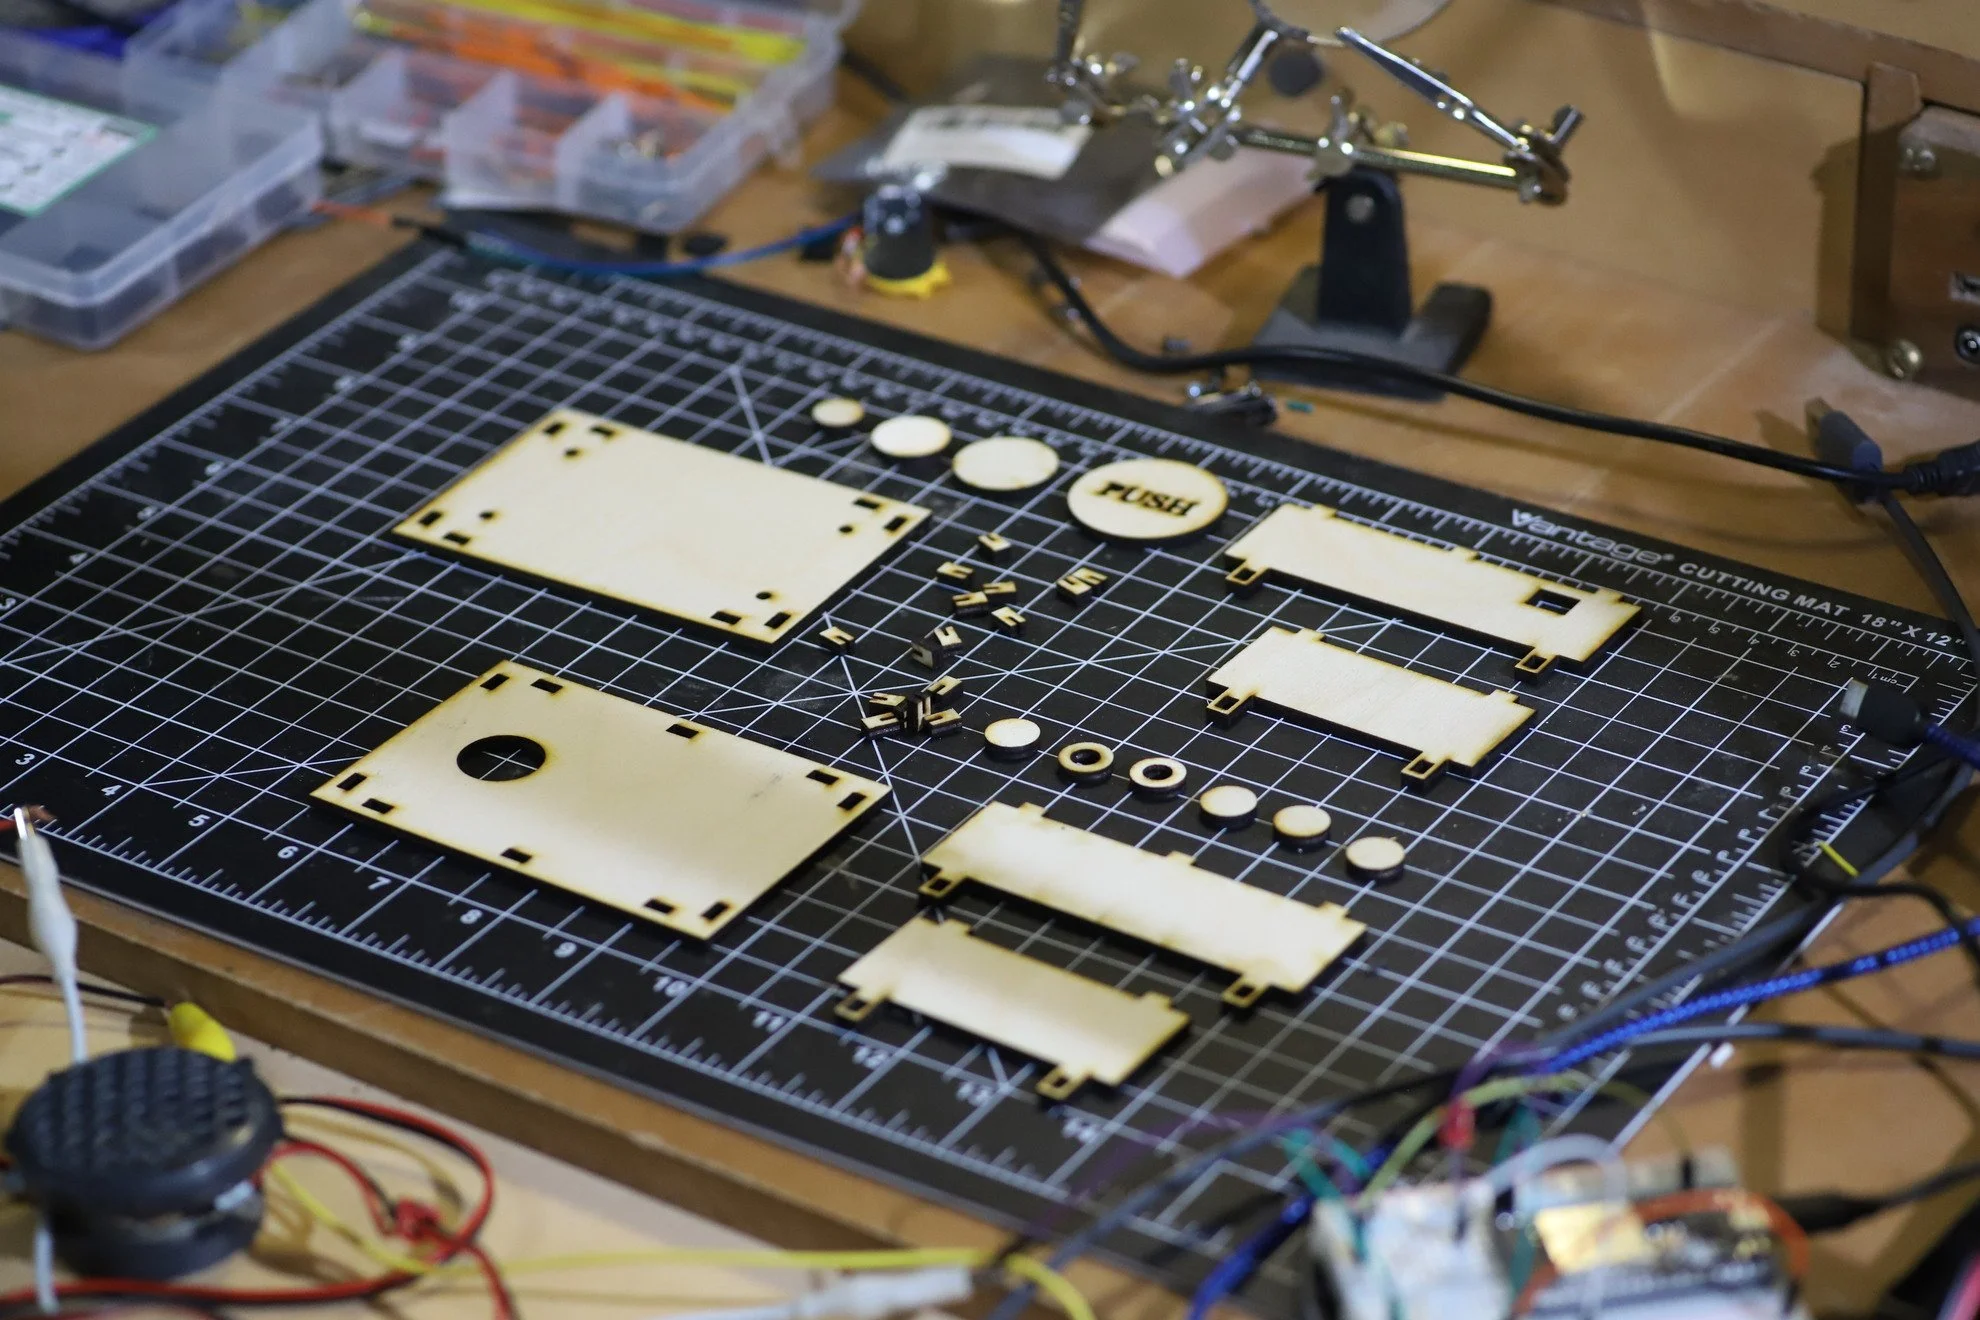
So, what do you need to make this? We’re using two ESP32 micro controllers and some other basic electronics. We’re also building two boxes which we’re cutting out on a laser cutter, and of course we need code to get it all to work.
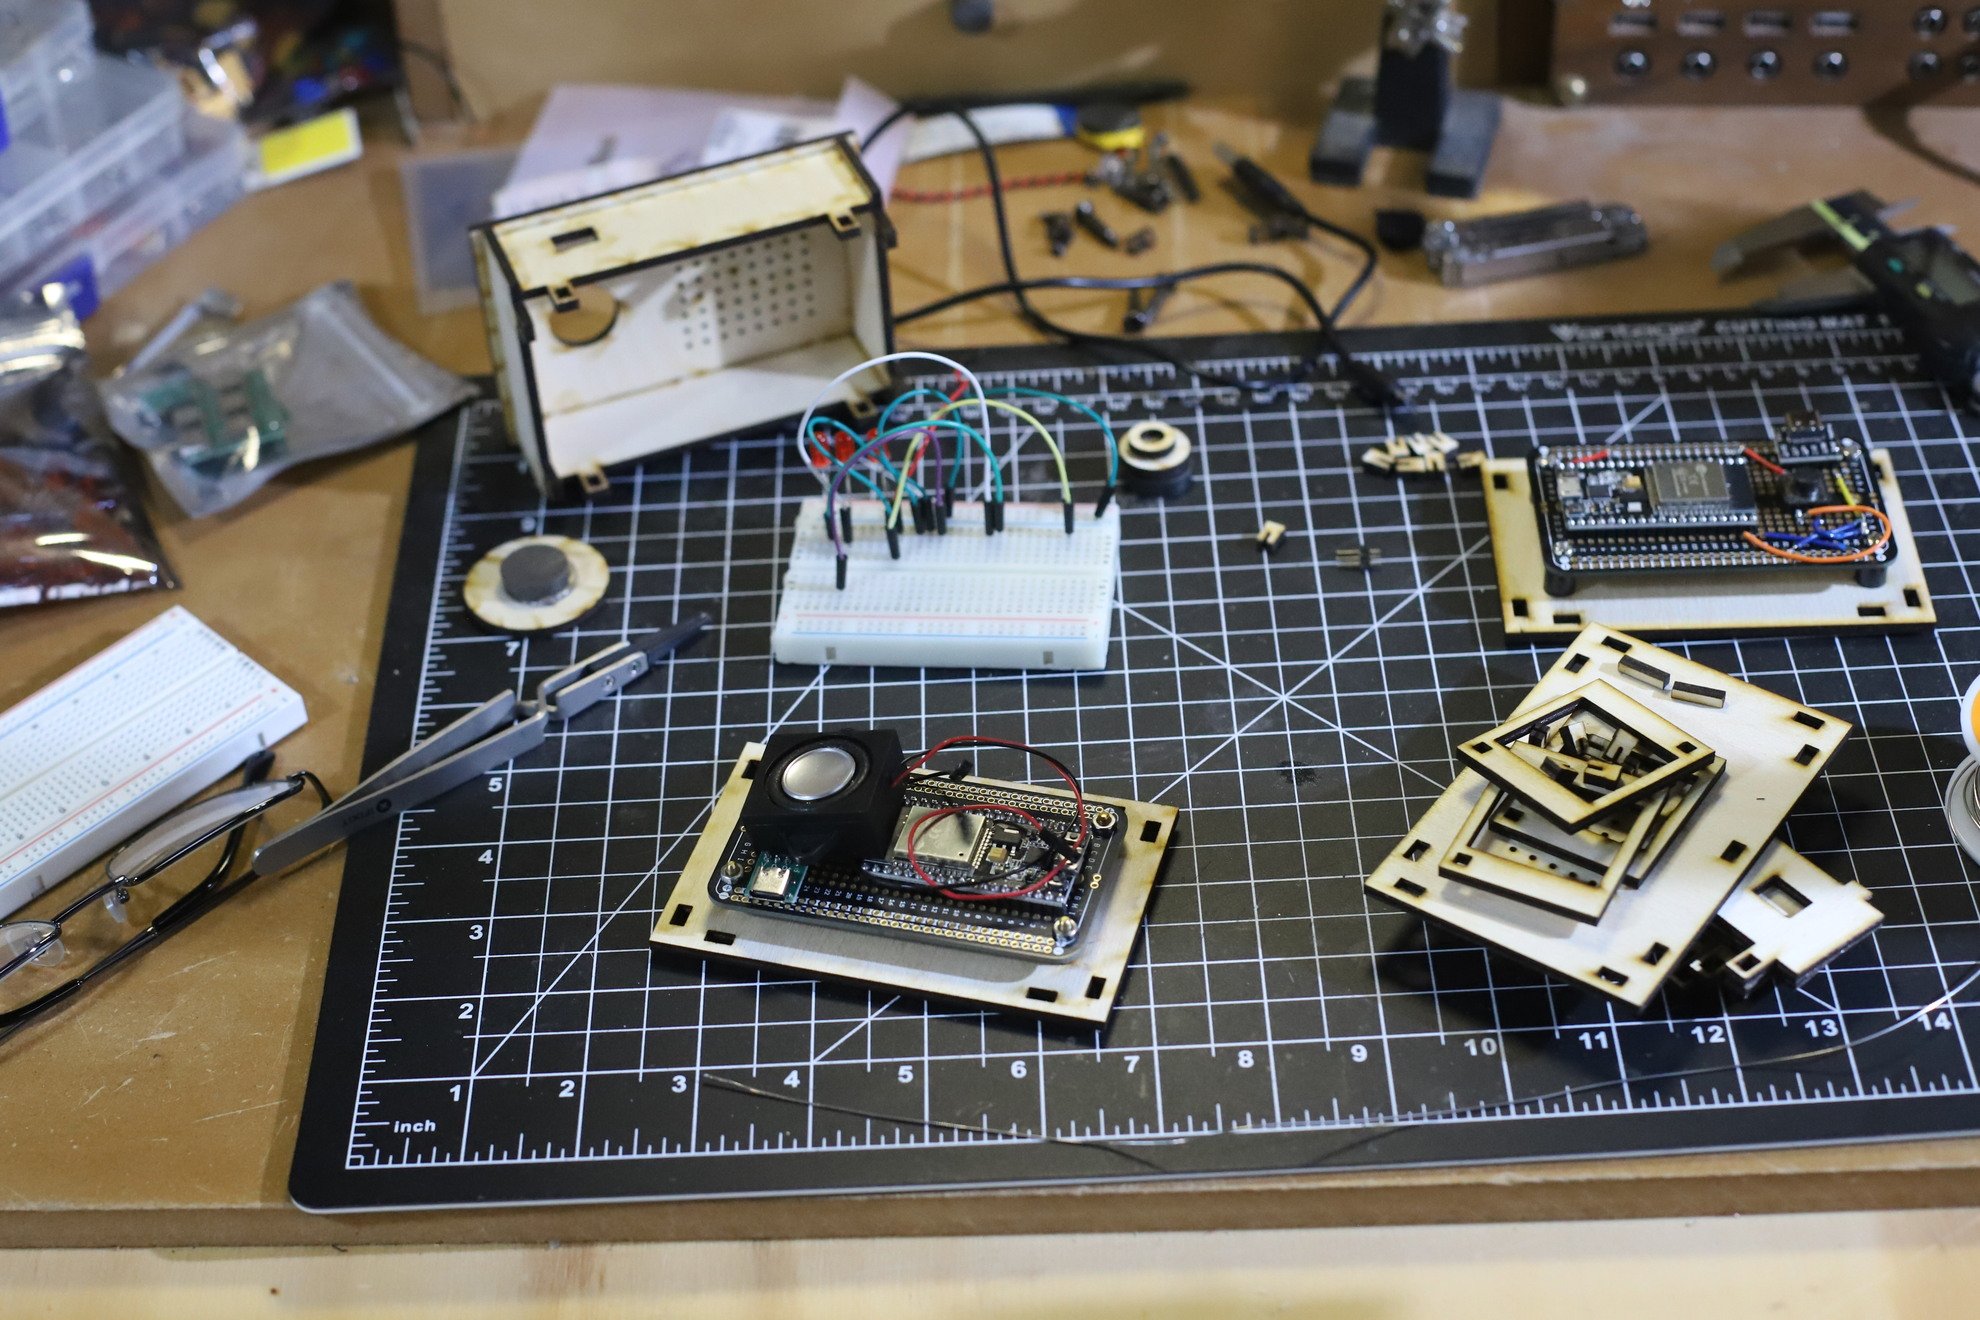
Here are the parts needed:
ESP32 - https://amzn.to/3Q2VIb7
Jumper Wires - https://amzn.to/3xrKW7F
Wires - https://amzn.to/3vFiGOE
Speaker - https://amzn.to/3xxJIrE
Solderable BreadBoards - https://amzn.to/4cYTWBt
Buttons - https://amzn.to/3Q3mNL7
1/8" Plywood - https://amzn.to/49zxCeX
xtool S1 Laser - https://amzn.to/4cV00ee
The Plan for the boxes
We have a plan for the lasercut boxes. In this digital download you’ll find the vcarve files, as well as PDF, AI, EPS, SVG & DXF formats. The plan costs $5, or it’s free if you’re a patron at the $5 level. Become a patron here.
The Code:
The code is divided up into two files, one for each device. Here you can download the code for free.
CLIENT FILE: Boot Client
SERVER FILE: Boot Server
Video
To get a better perspective on the process, make sure to check out the video!
Cheap & Efficient Garden Boxes
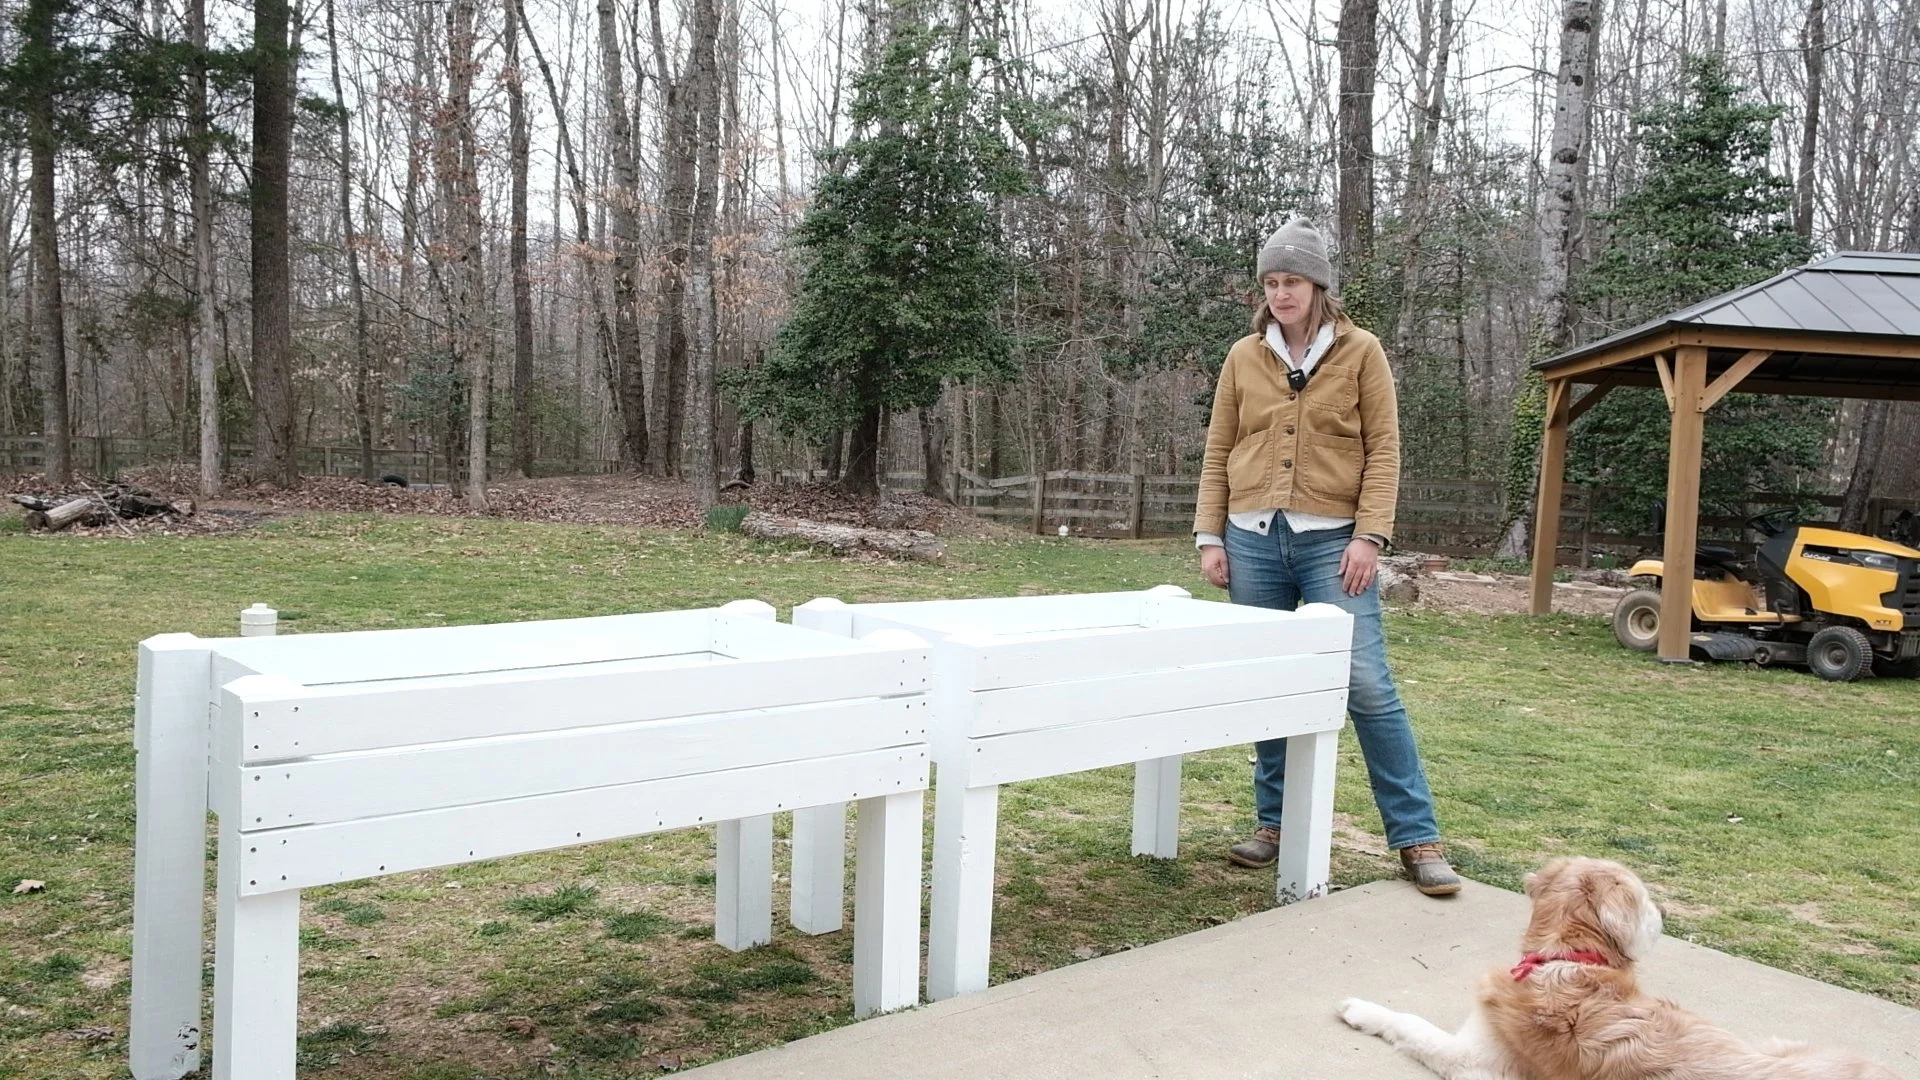
It's time to start thinking of garden projects! A raised garden bed is a great one since it brings the planting up (you don’t have to sit on the ground), you can control the quality of the soil, and it also looks really nice and can work as a divider in your garden.
For this project, we're going to go cheap and basic and resaw some 2x4s. I'm going to be using pressure treated wood which I will paint because it's what I had on hand, however you could just as easily use framing lumber.

It's time to start thinking of garden projects! A raised garden bed is a great one since it brings the planting up (you don’t have to sit on the ground), you can control the quality of the soil, and it also looks really nice and can work as a divider in your garden.
For this project, we're going to go cheap and basic and resaw some 2x4s. I'm going to be using pressure treated wood which I will paint because it's what I had on hand, however you could just as easily use framing lumber.
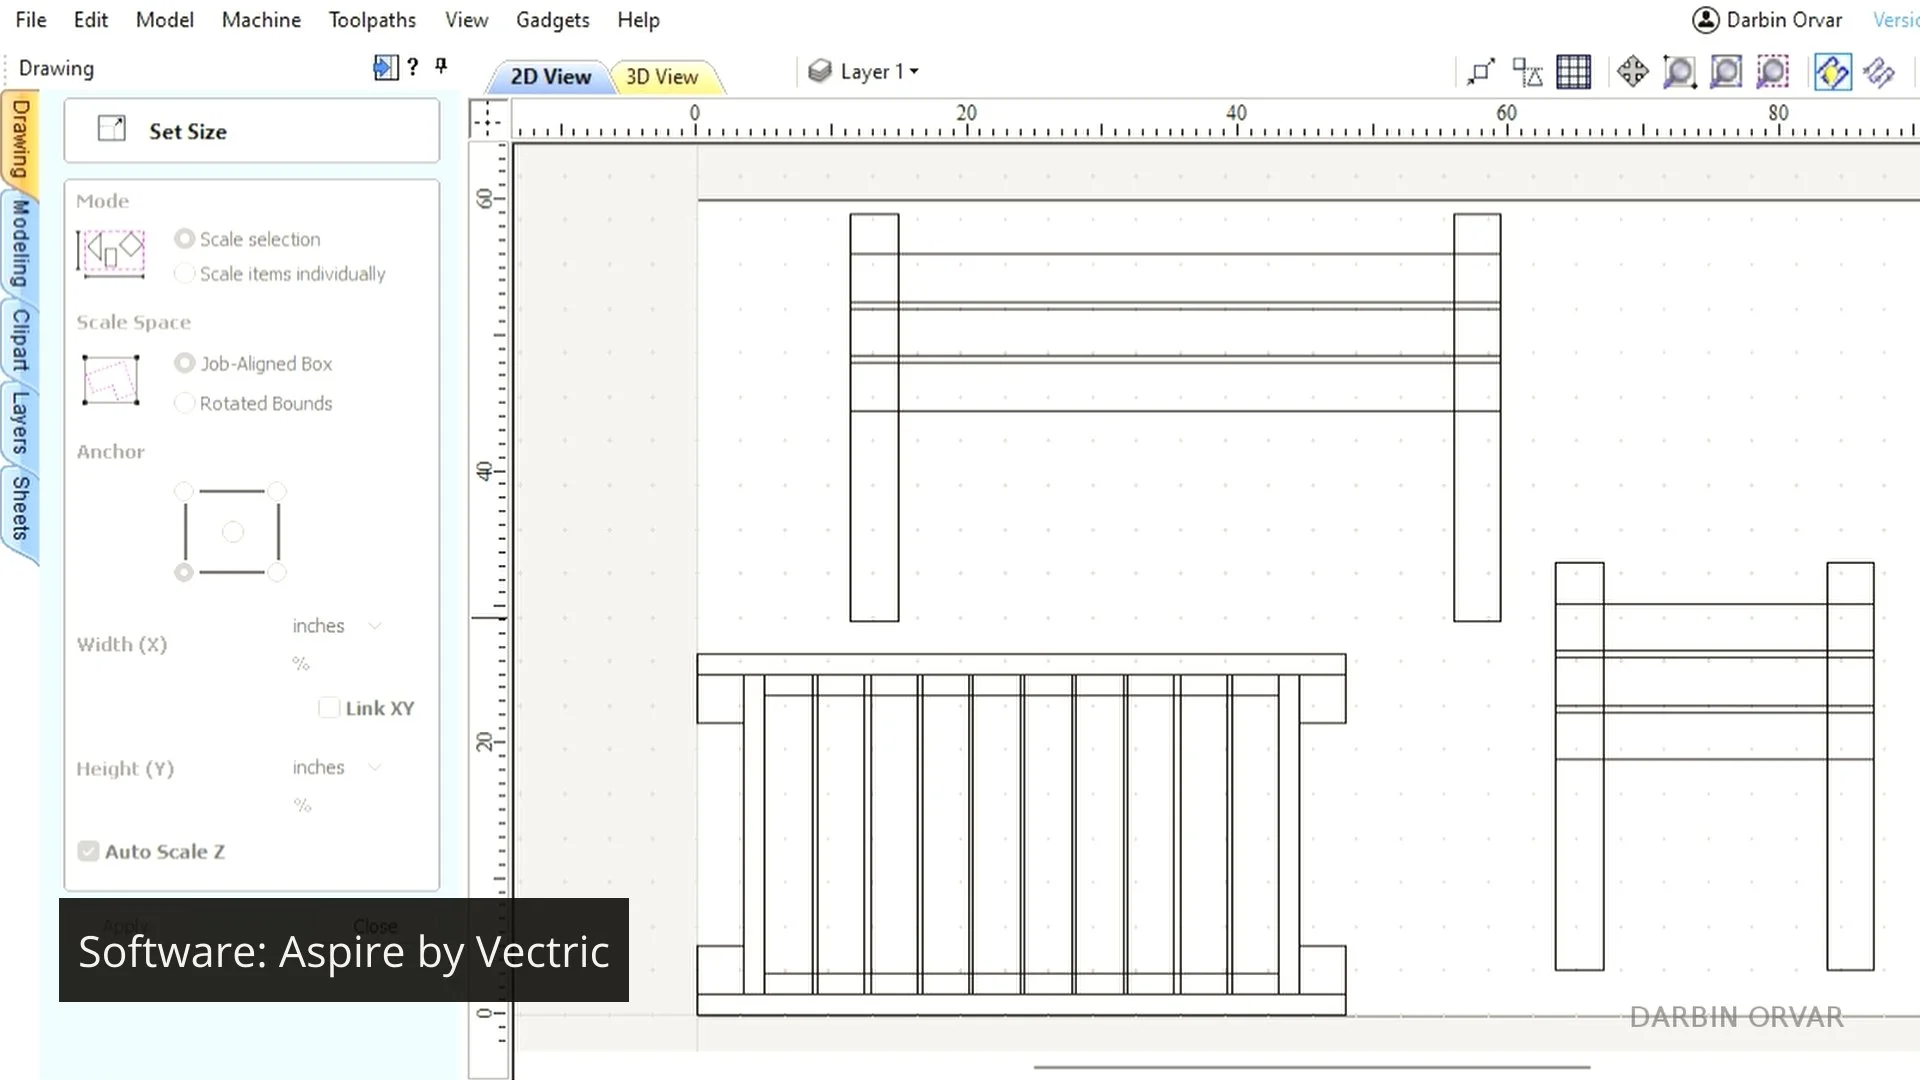
In terms of buying wood, you need 58 ft of 1x4s which you can get from 29 ft of 2x4s if you resaw.
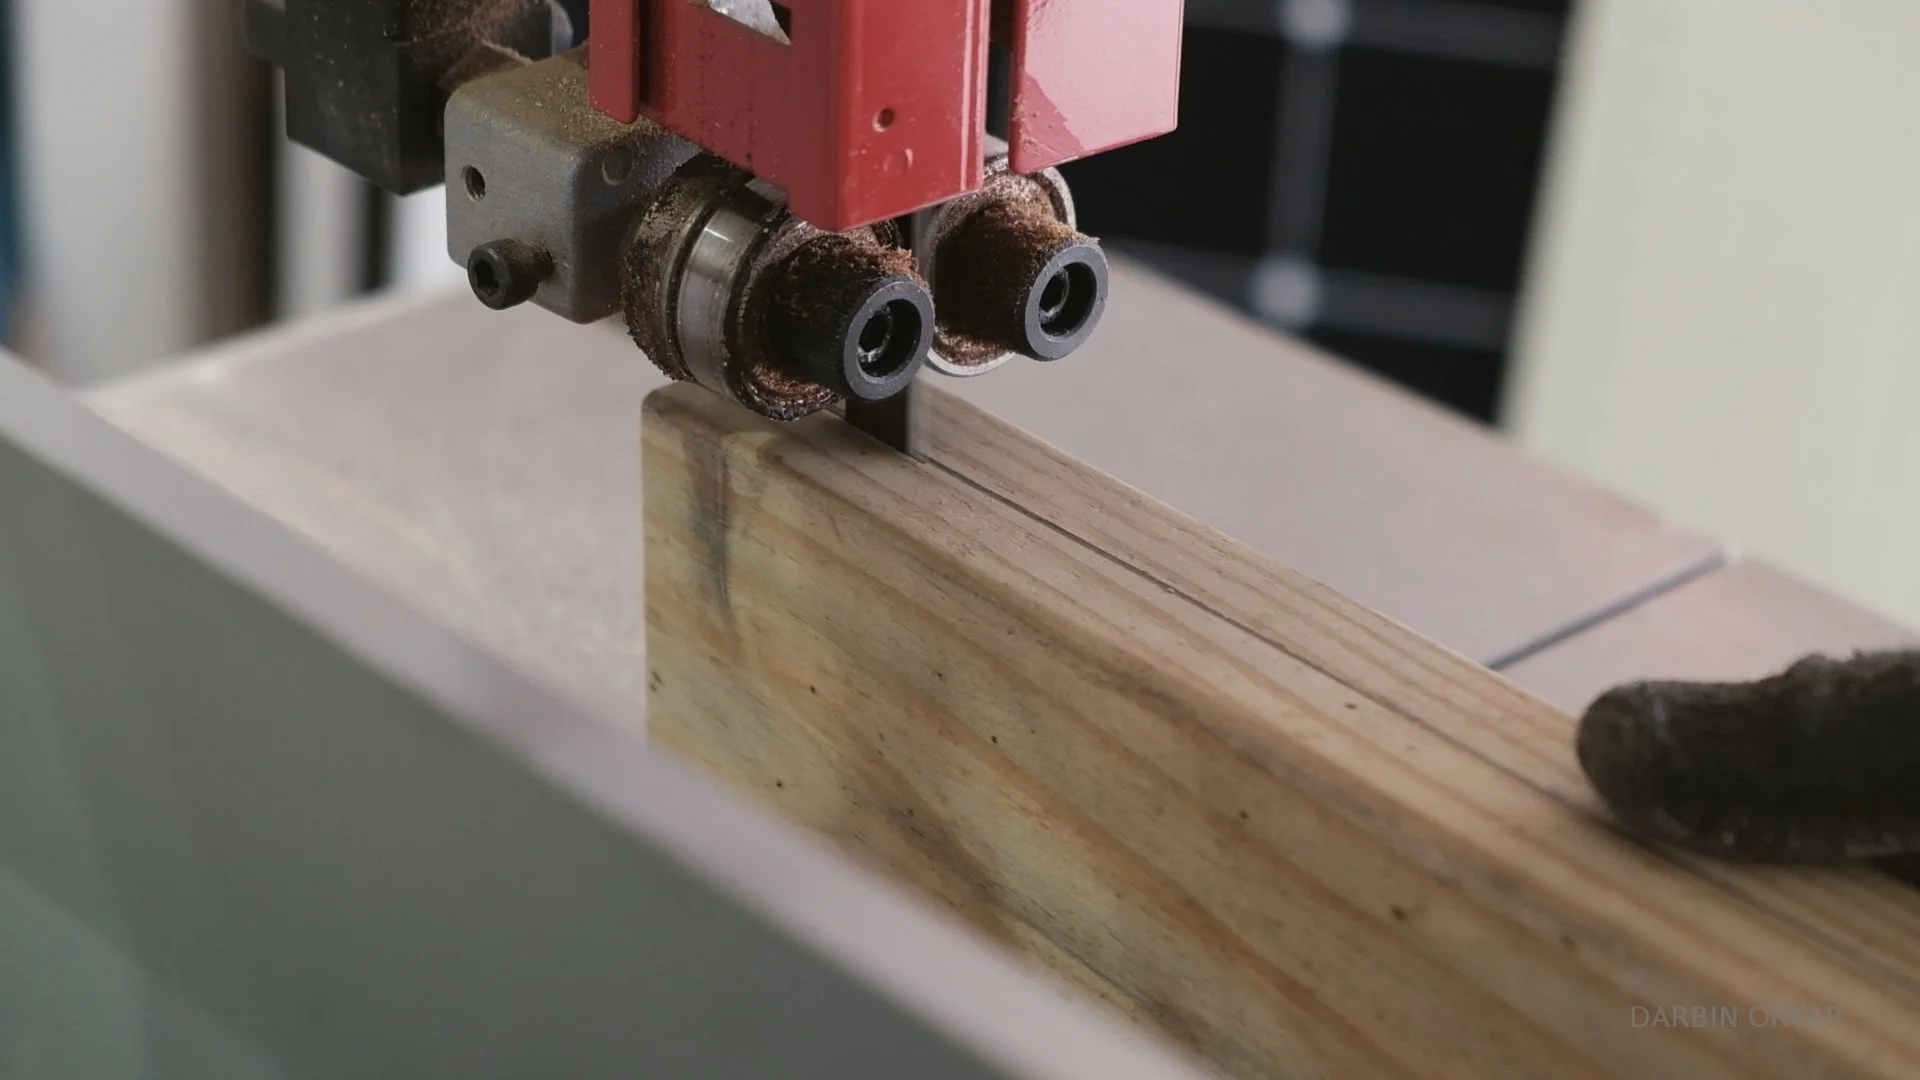
You also need 12 ft of 4x4 for the legs.
The finished planter measures 48 inches long by about 24 inches.
We have four legs, three boards on each side, two cleats and slats fen slats for the bottom.
Everything is connected with screws. The long sides wraps around the outside of the legs, the short sides on the inside.
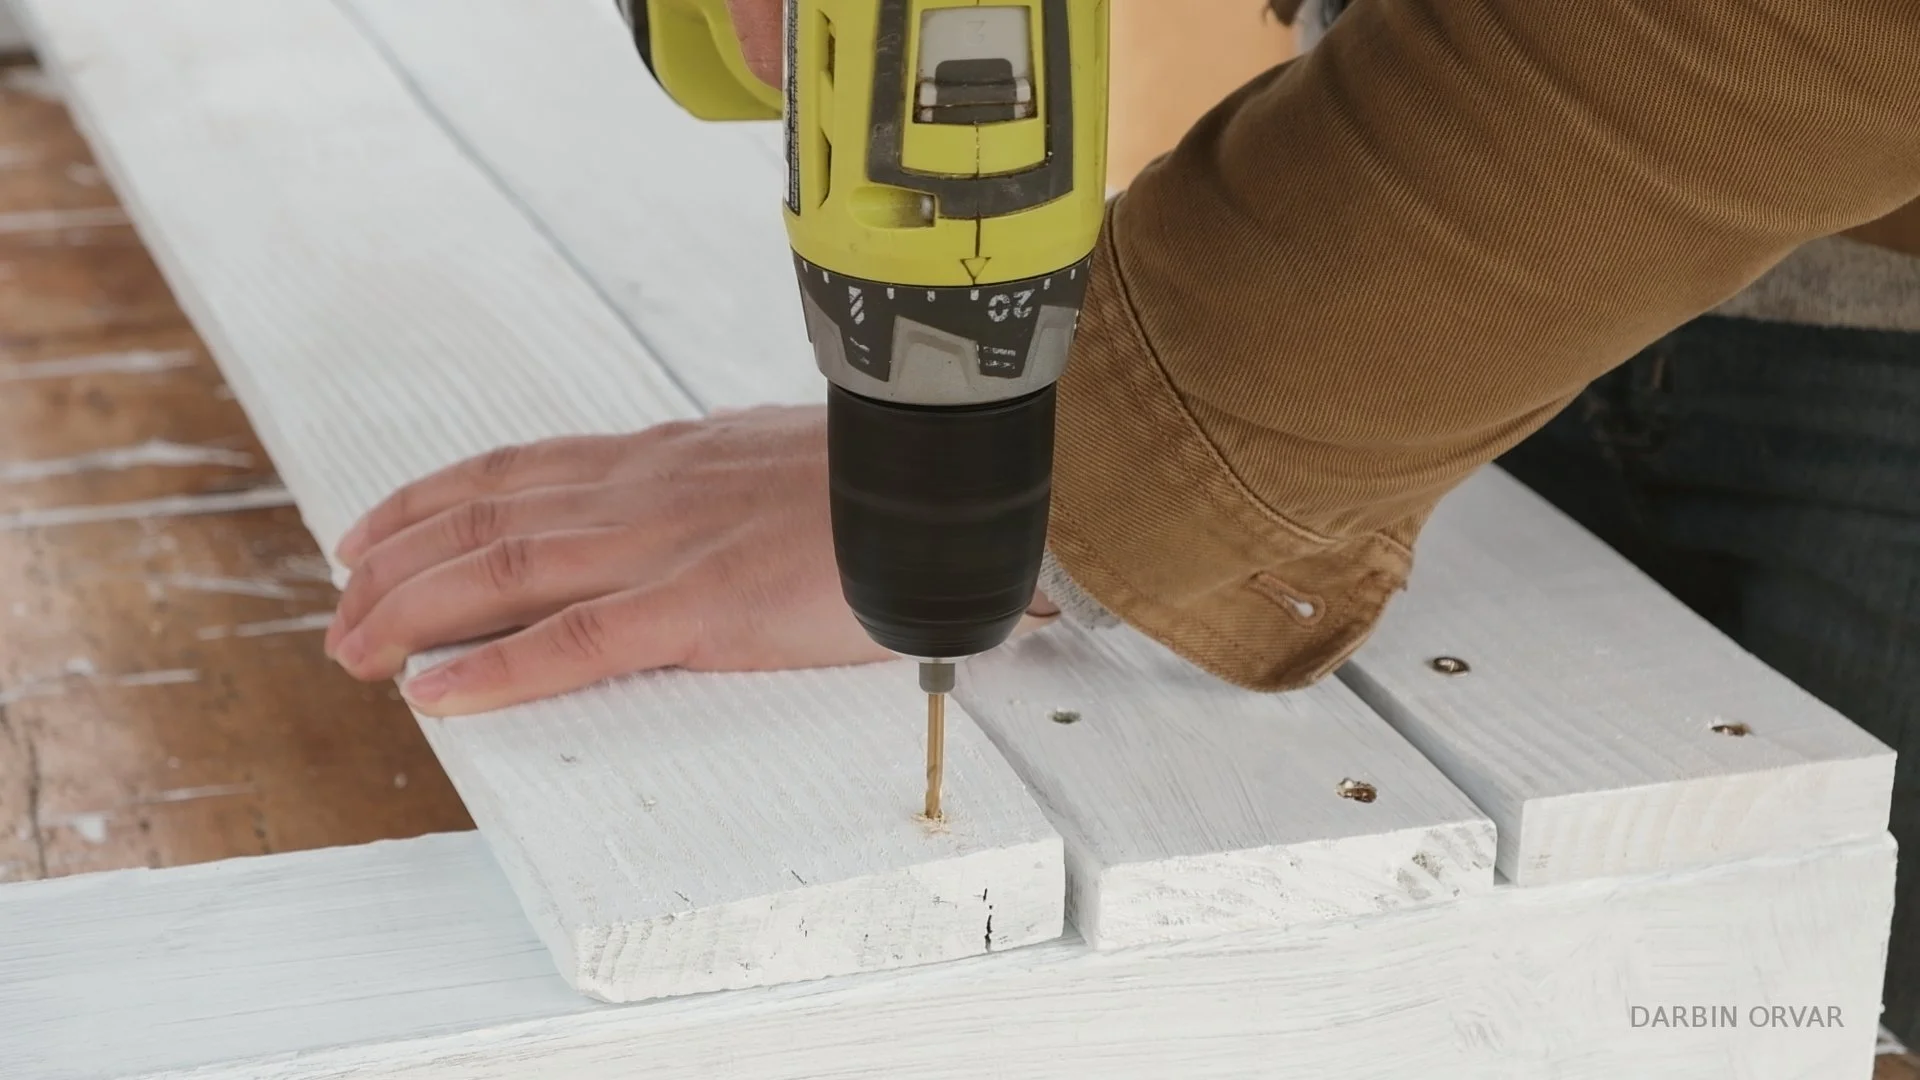
Cutlist:
#6 long sides out of 1x4: 3.5 x 48 inches
#6 short sides out of 1x4s: 3.5 x 23.5 inches
#4 legs out of 4x4s: 3.5 x 30 inches
#2 cleats: 1.5 x 1.5 - 38 inches long
#10 slats out of 1x4s: 3.5 x 23.5 inches
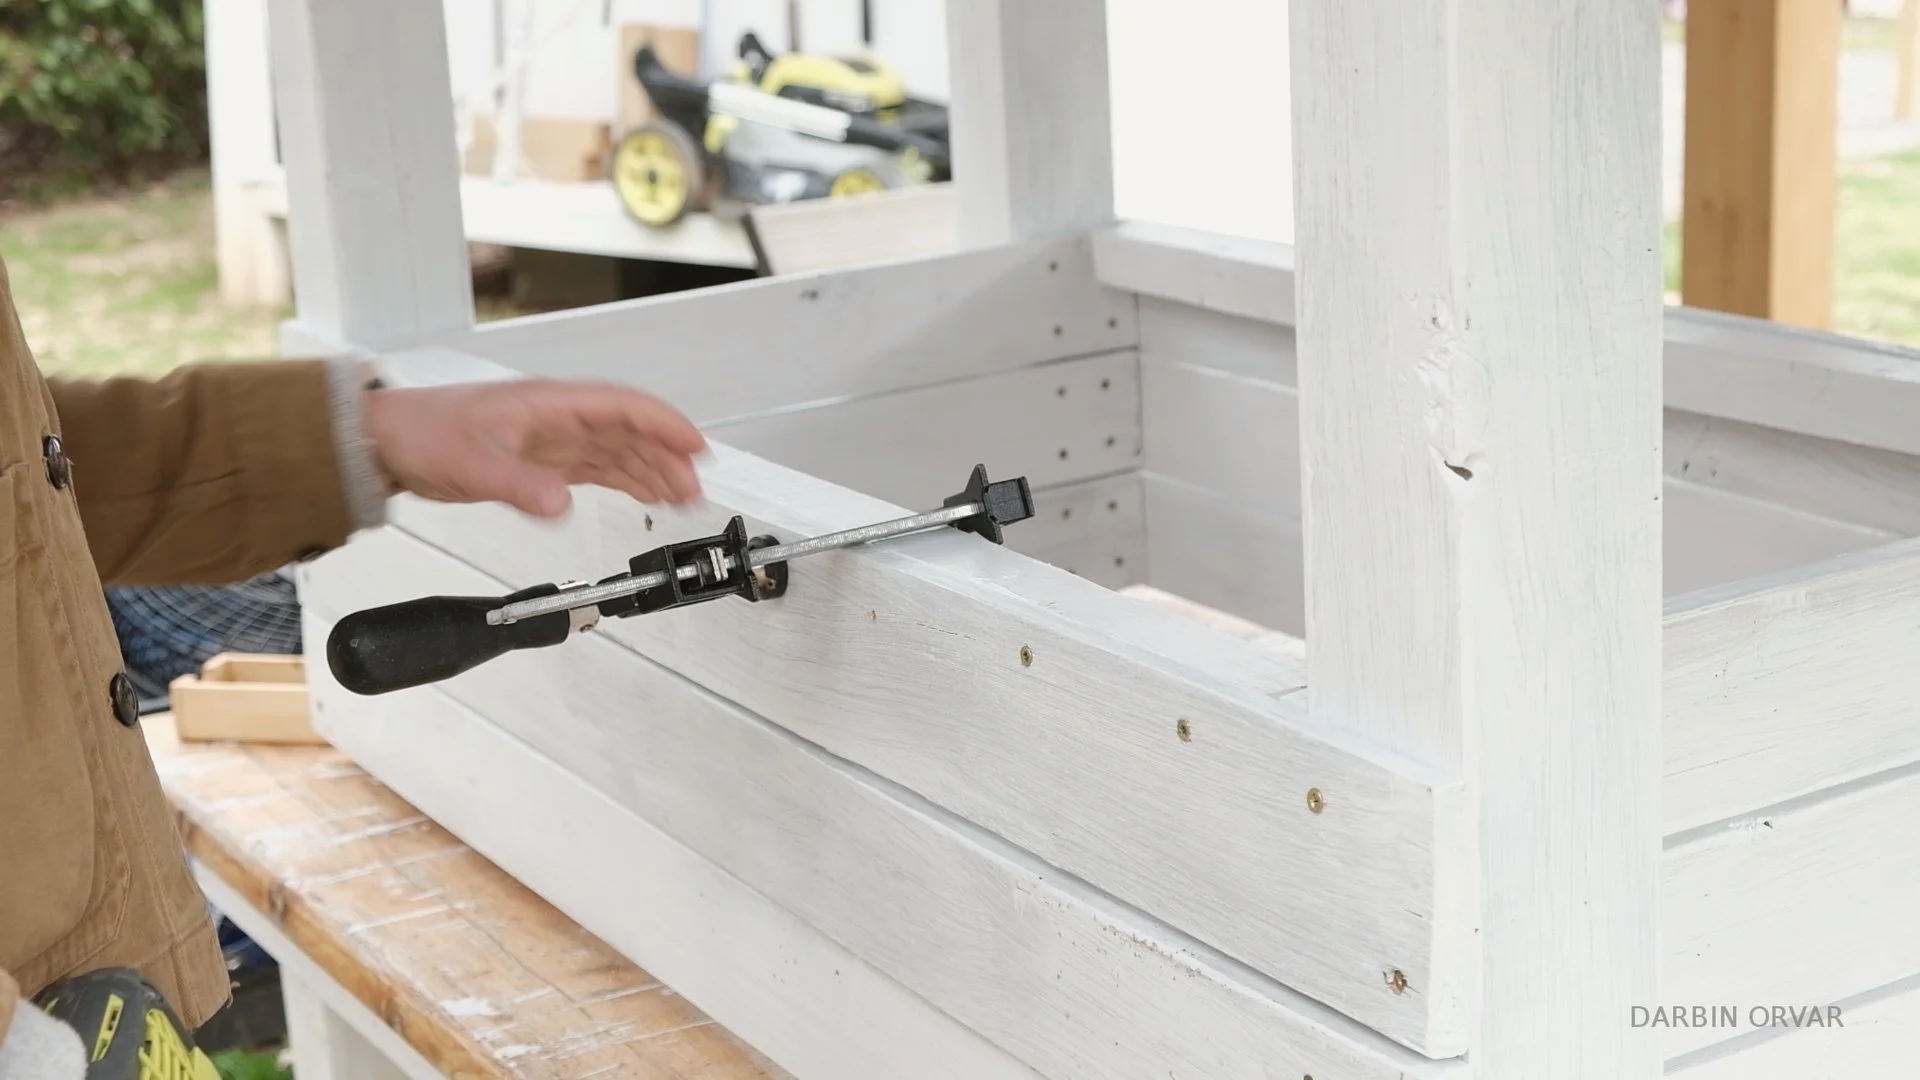
Method:
To start with, resaw the 2x4s if you’re working with that. Cut up all the pieces. Also, add a chamfer on all the edges on the legs for a nice look. I did a 33.9 degree angle about 5/8 inch from the top.
To connect the pieces together we’re going to be using screws.
The long sides go on the outside of the legs and the short sides on the inside. The cleat attaches to the bottom of the last rails and the slats rest upon those.
For a more in depth look as to how everything is connected, make sure to watch the video!
Restoring an Old Metal Vise
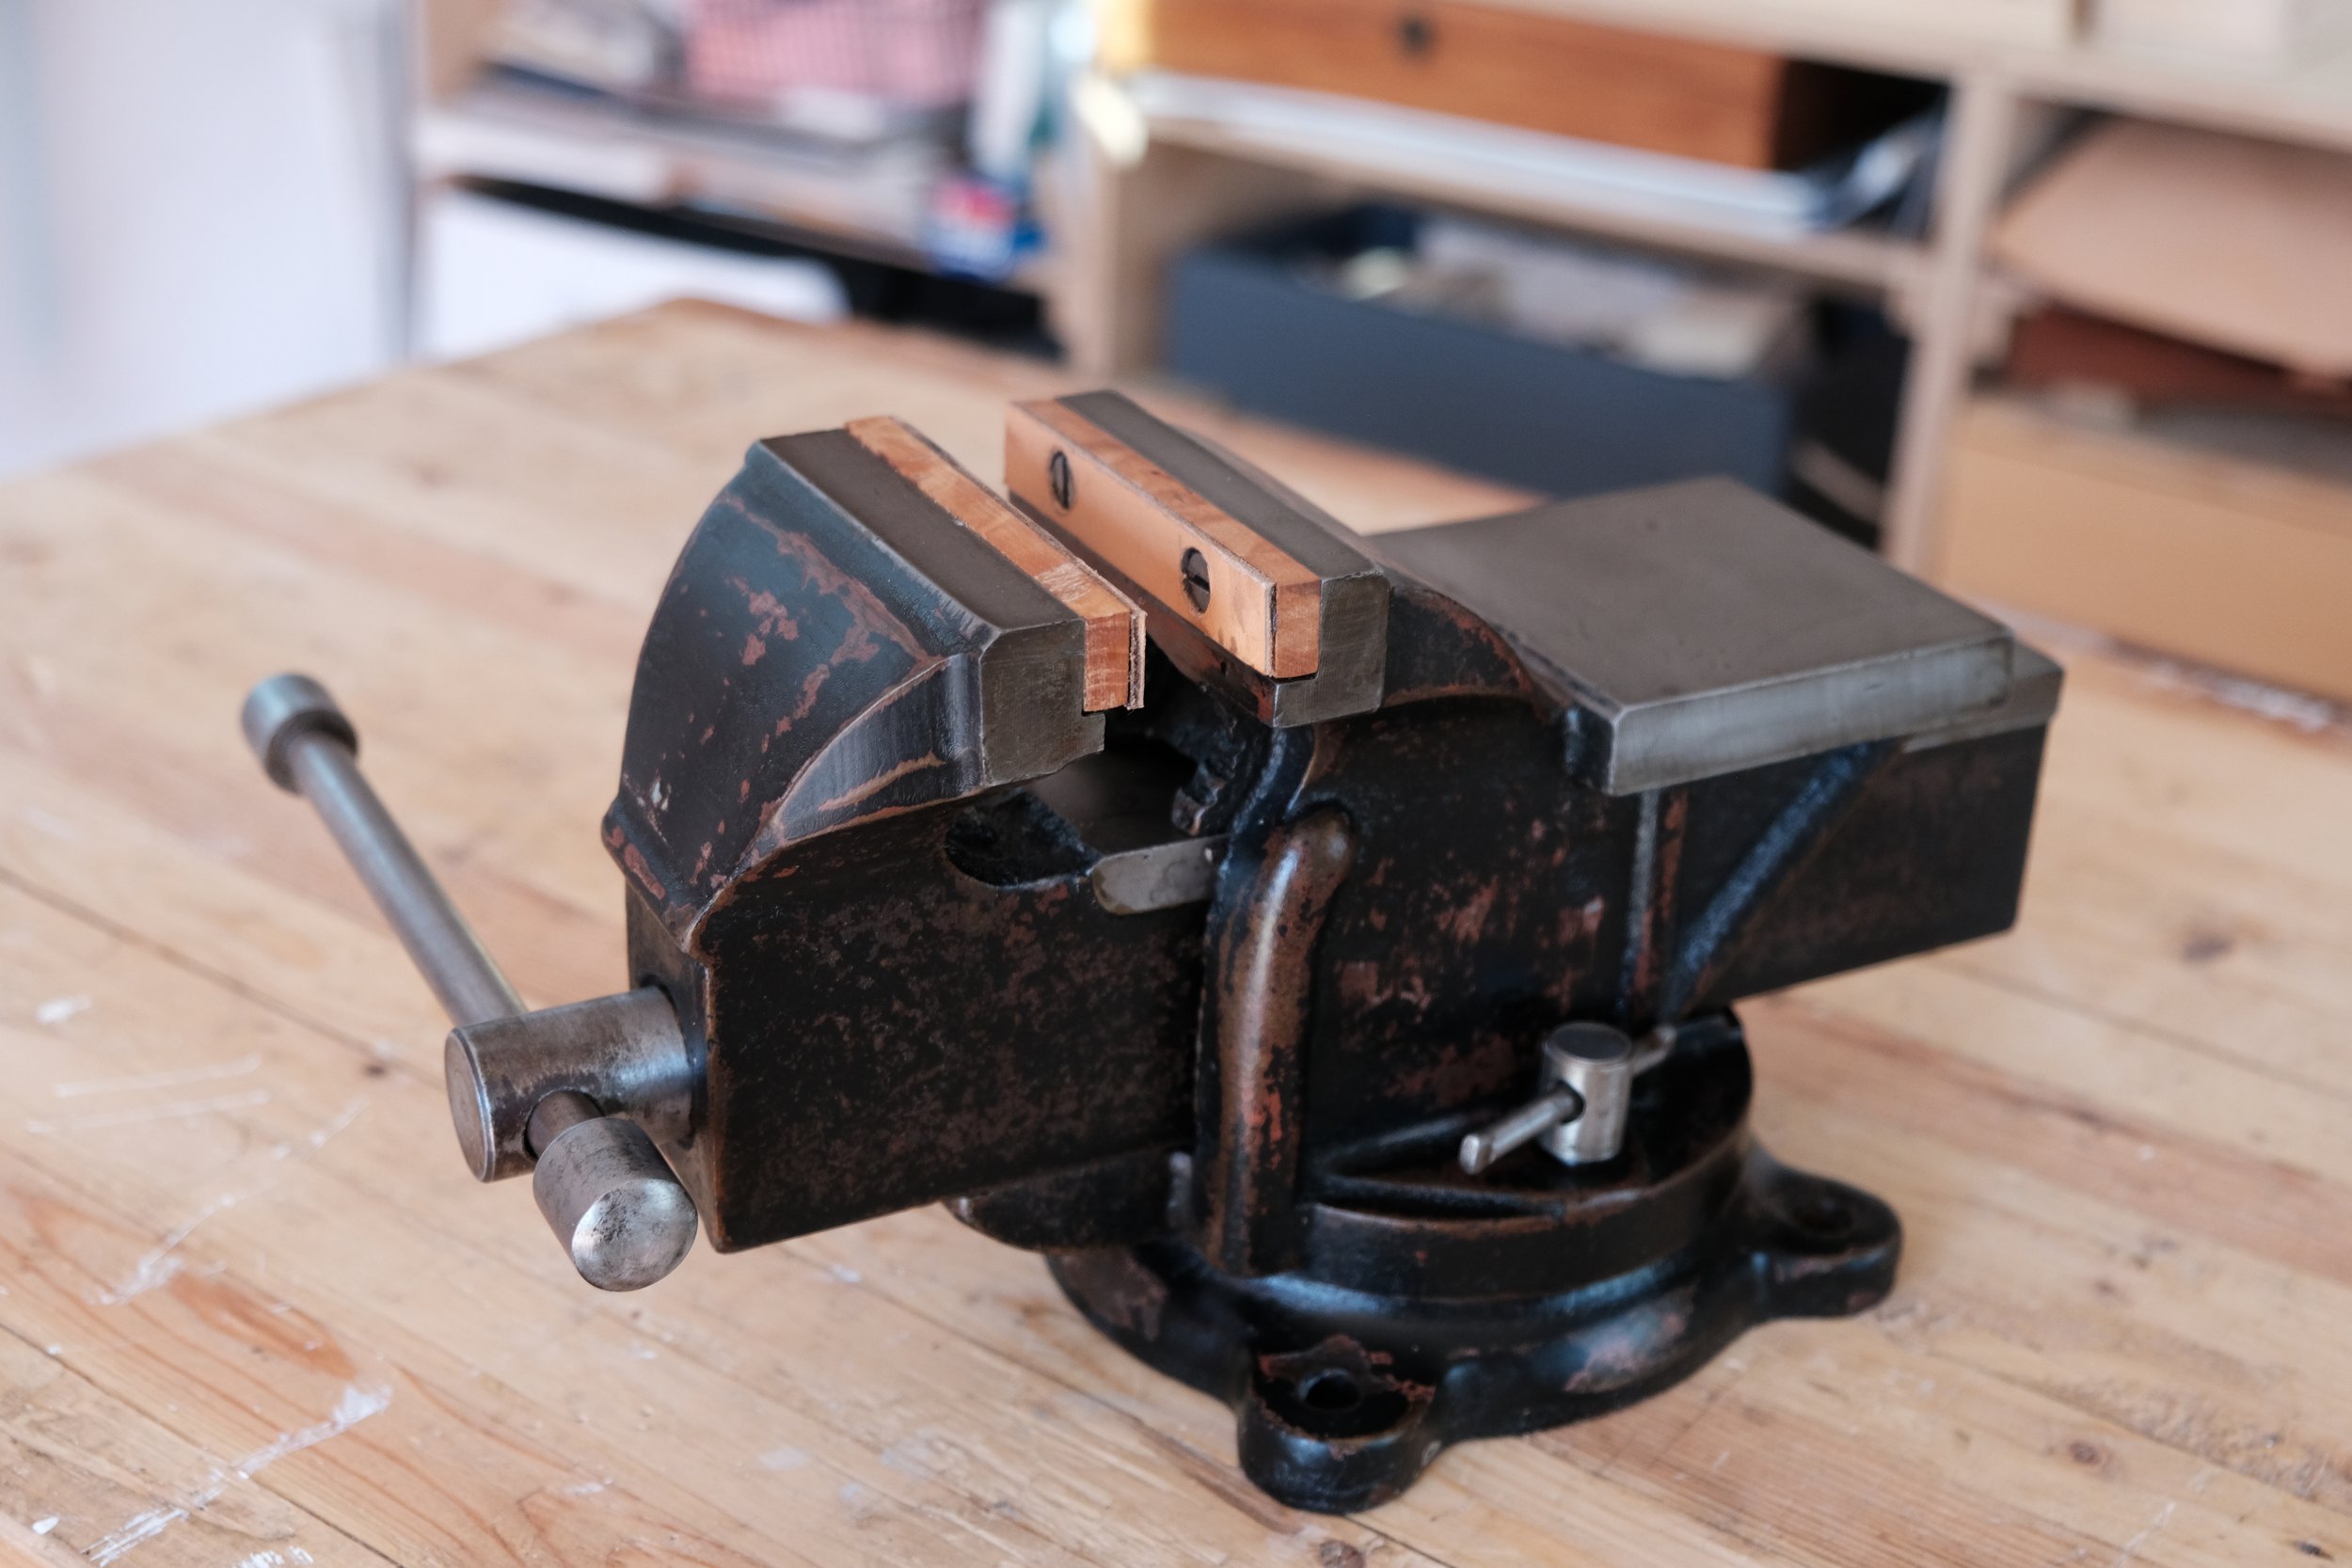
When we first moved into this house, the space where my current small workshop is located was originally a little garden shed. The previous owners left behind a bunch of stuff, most of which wasn't worth saving, howeover there was one thing which I kept: an old metal vise.
I figured it would come in handy and one day.... I would clean it up and restore it a bit. Ever since, it's been sitting on the counter, I've used it a few times, however it was quite grimy and dirty and could definitely use a good cleaning.

When we first moved into this house, the space where my current small workshop is located was originally a little garden shed. The previous owners left behind a bunch of stuff, most of which wasn't worth saving, howeover there was one thing which I kept: an old metal vise.
I figured it would come in handy and one day.... I would clean it up and restore it a bit. Ever since, it's been sitting on the counter, I've used it a few times, however it was quite grimy and dirty and could definitely use a good cleaning.

I didn't know too much about the vise. It had a small sign on it which said: "Great Neck no.hdv4". I did a little research and found a new version of it online, howeover it only made me like the old one even more.
To begin with, I took it apart as far as I could, removing all the screws, and gave everything a good scrub.
After cleaning it, it became clear that most of the areas which I thought might have been built up dirt was in fact just paint peeling a bit, so I started sanding. At first I wanted to remove as much as possible, but after a while I became satisfied with simply cleaning it up as much as possible and smoothing out any old paint.

Initially I had thought of painting over the old paint, but then I thought it might be interesting to do a forced patina instead. This is where you create a rust surface which you then neutralize and seal.
I combined 1/2 cup of hydrogen peroxiode, 1/2 cup white vinegar and 1 tsp of salt in a spray bottle which I applied on all the metal parts which I hadn't taped to protect. I ended up letting this work over night and a nice patina developed in conjunction with the black paint.
Then I rinsed with water, dried and then brushed with a combination of baking soda and water to neutralize the vinegar. After a final wash and a thorough dry, I sealed all the rusted parts with a water based polyurethane. The last step in this process was to apply our mineral oil and wax polish on all the metal before assembling back together.

After this I did get a brand new vise! I also replaced the metal jaws with wood and leather clad ones instead which I think will be more useful as I intend to use this to hold wood more than leather.
For a better perspective on this process, make sure to watch the video!
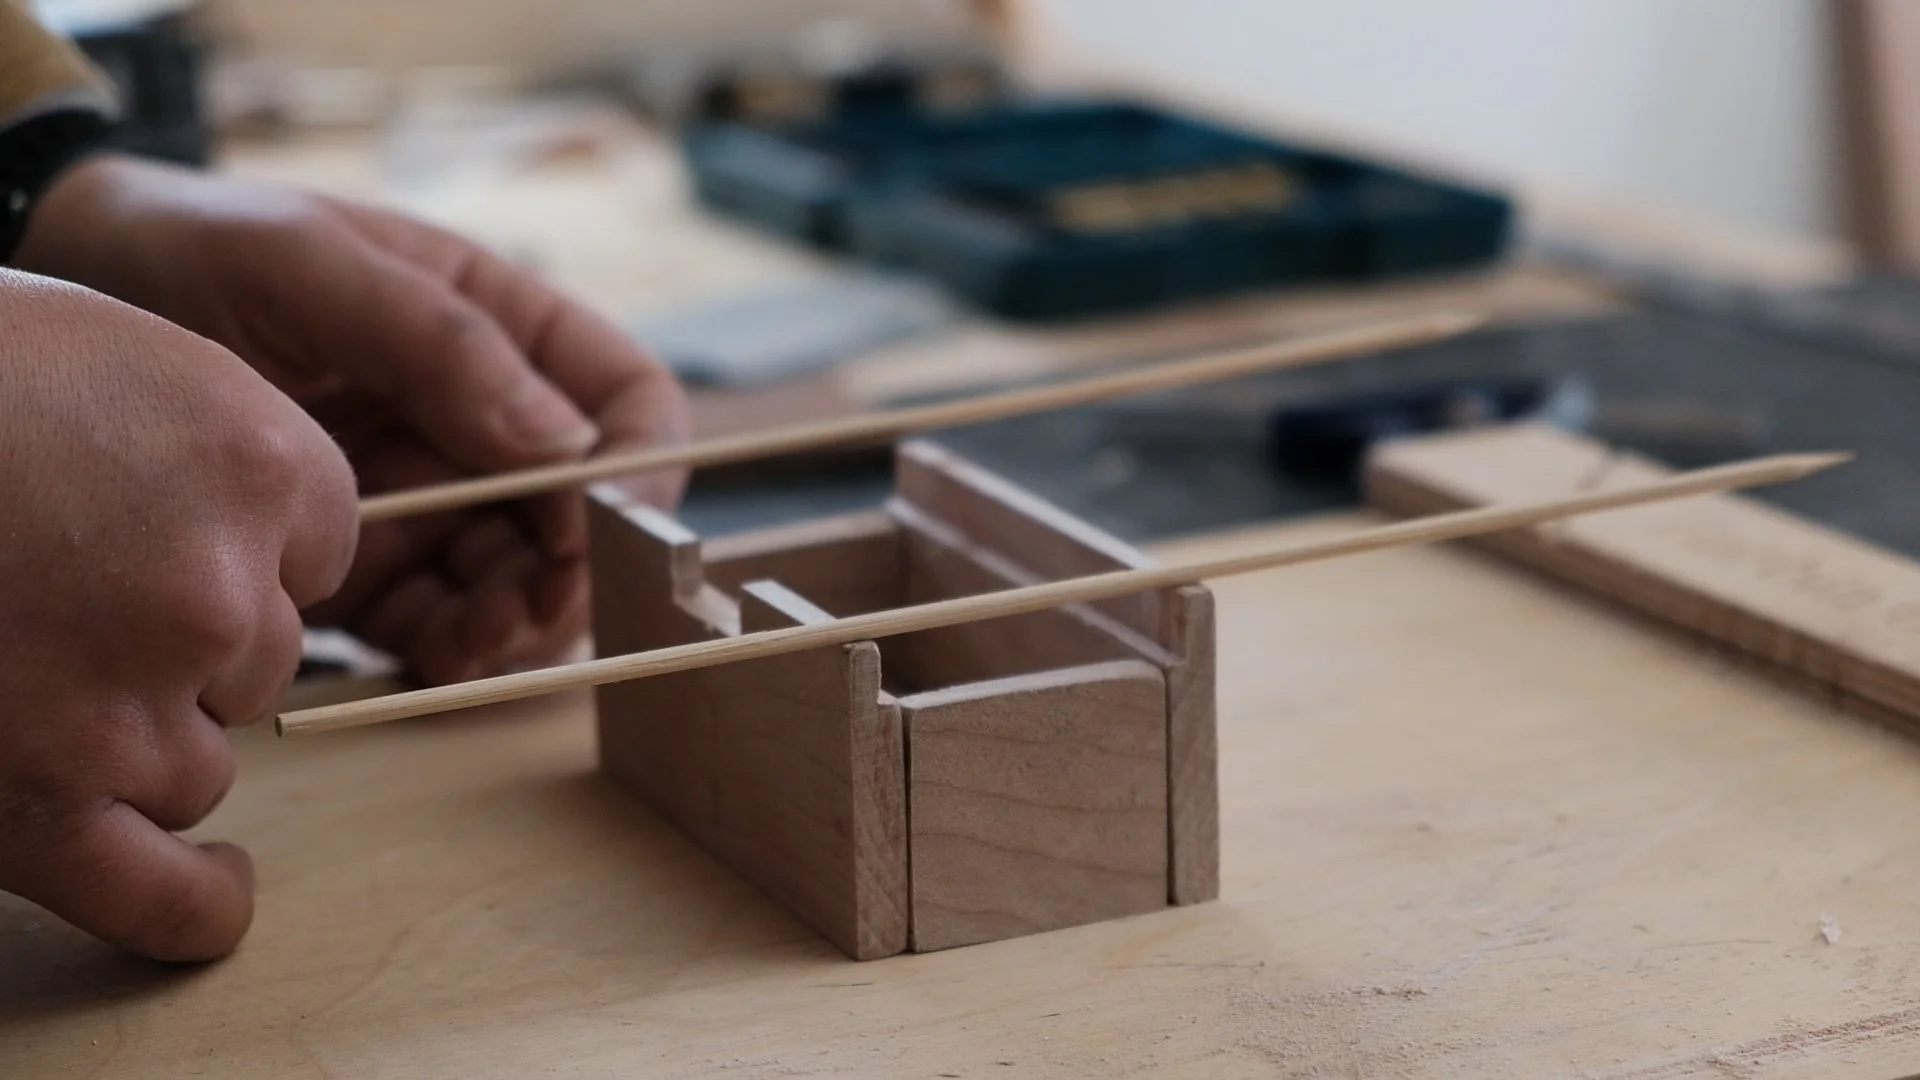
Tiny Keepsake box with Two Bamboo Hinges
After last week’s exploration with wood hinges, a couple of people suggested to me that instead of using wood dowels or metal nails, bamboo skewers might make a good substitute when it came to the pin that moves the hinge. And why not! Bamboo skewers are pretty hard and durable and quite thin too.

After last week’s exploration with wood hinges, a couple of people suggested to me that instead of using wood dowels or metal nails, bamboo skewers might make a good substitute when it came to the pin that moves the hinge. And why not! Bamboo skewers are pretty hard and durable and quite thin too.
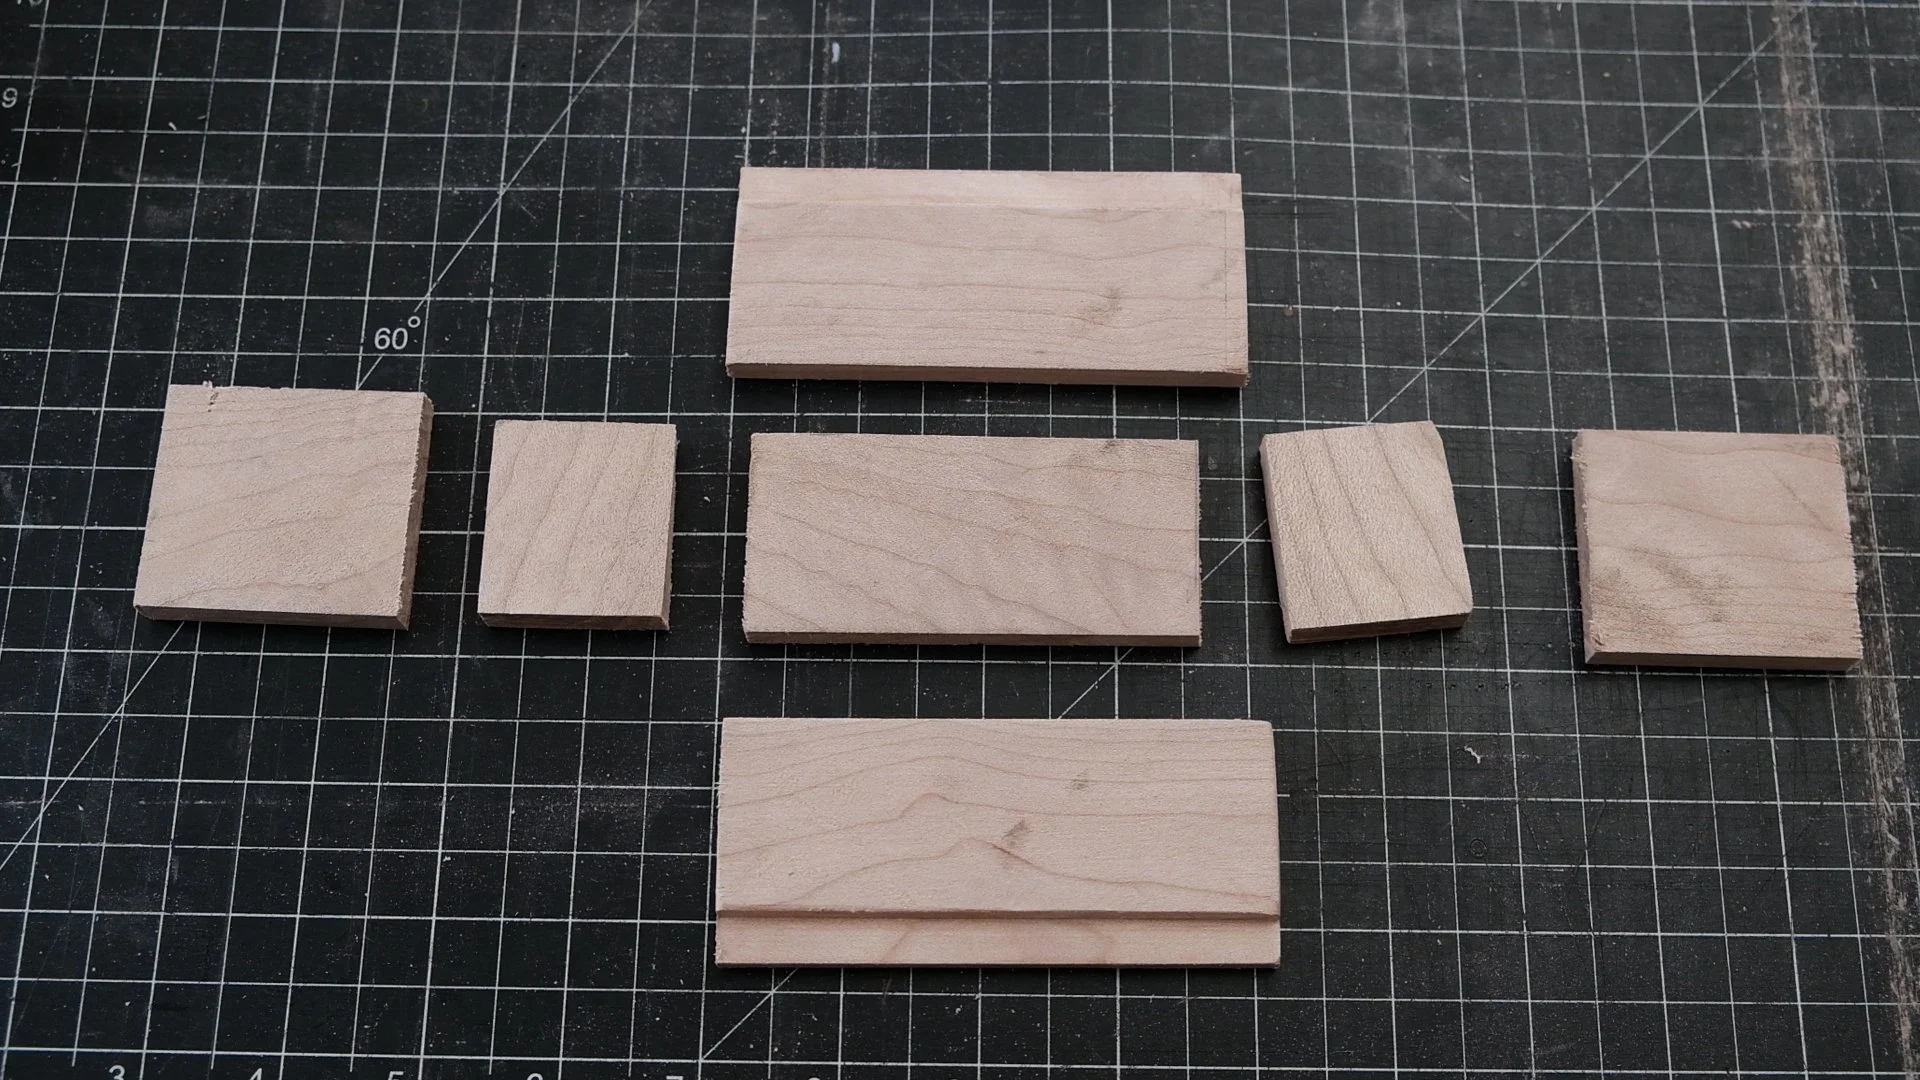
I decided to make a tiny box with some 1/4” maple I had on hand, and to really explore this hinge concept I went with two hinges, so two lids that open up. And for closure I made little handles that sit in place.
To make this design work I cut out little ledges on the sides so the lids rests on those. For construction I went with nails again, simply because I wanted to explore the lids design and make sure that worked well and not introduce any other factors that could go wrong!
All in all the little box turned out quite nice and it was a fun little experiment. I think it’s safe to say that bamboo skewers are a good option if you want to make your own hinges - certainly a better option than dowels and they provide more flexibility than nails.
For a full view of the build, make sure to check out the video!
Making Wooden Hinge Boxes
I always thought that traditional wooden boxes with metal hinges and other hardware are practical, but a little boring. Boxes that you can make on the other hand where the design itself limits hinges, clasps etc... are a bit more interesting. I'm talking sliding dado lids, fitted lids that sit on top, or wedge designs like a Japanese toolbox. None of these boxes require any external hardware, everything you need to complete the project is within the wood.

I always thought that traditional wooden boxes with metal hinges and other hardware are practical, but a little boring. Boxes that you can make on the other hand where the design itself limits hinges, clasps etc... are a bit more interesting. I'm talking sliding dado lids, fitted lids that sit on top, or wedge designs like a Japanese toolbox. None of these boxes require any external hardware, everything you need to complete the project is within the wood.

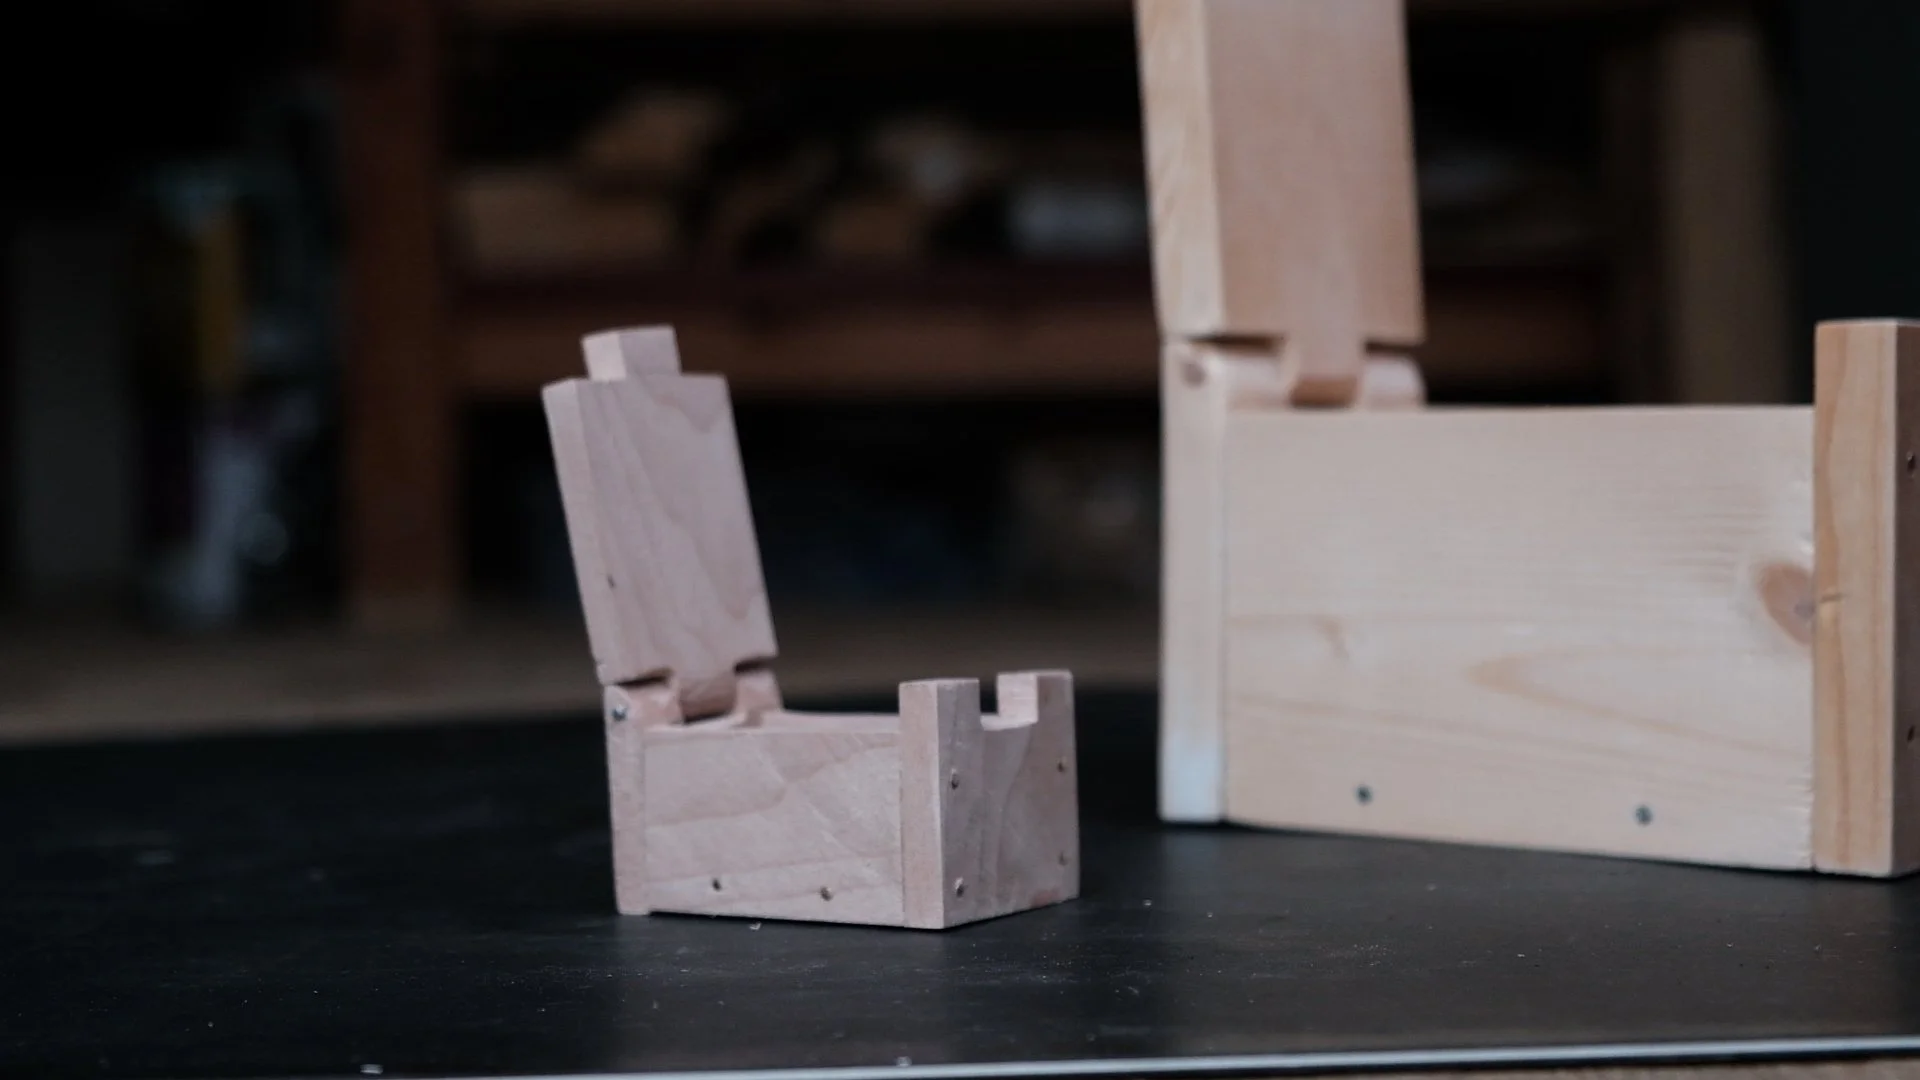
Now, the one thing about all those no-hardware boxes is the lids are loose. They don't stay attached to the box, and that's fine for the most. However now and then a lid gets lost, so I was thinking, wouldn't it be neat to make a box with no hardware, AND the lid stays attached.
There's probably a bunch of ways to do this, however I immediately thought of making a wooden hinge. And when you think about it, a hinge is pretty much box joints with a pin or rod through it.
I suppose often when you make a box, you create the sides or the main unit first, and the lid is a secondary part to concern yourself with. In this instance, I first began working on the hinge, in other words, the lid and one of the sides, and then the rest of the box was created from that.

For my first experiment I used a wooden dowel. The smallest one I had on hand was 1/4", which meant I had to use relatively thick wood, so that would be able to drill a 1/4" hole through the joint. I used basic 1x4 pine wood, and went with nails simply for the rest of the construction.
The one thing you do need to pay attention to, is rounding the corner of the joinery where the two pieces intersect. If you don't do this step, the joint won't be able to move once the pin is inserted.
The result was a undoubtedly chunky box, which was charming, although a bit on the unsophisticated side.
If the size of the pin determines the thickness of the wood, I figured I should try to go smaller. I didn't have a metal rod on hand, however I did have nails. This did mean I was limited by the length of the nail in terms of the width of the wood, so I made a rather small box out of 1/4" thick maple.
It was a bit finicky to get straight... and it made me realize that wooden hinges are kind of fun, but not very practical. I rather like them, but from a testing point of view. It's something different for sure, and it would be fun to play with this some more. For more info on this process, make sure to check out the video.
New Wood Lathe + Building a Stand (cutlist)
We recently got a new addition to the workshop - a Grizzly G0844 woodturning lathe. The main reason why I wanted to get a lathe was to make the step of sanding and finishing our spinning tops a little more efficient. The spinning tops are cut on the rotary attachment on our Avid CNC machine, and while the CNC is great for a lot of different jobs, sanding and finishing is not one of them!
We recently got a new addition to the workshop - a Grizzly G0844 woodturning lathe. The main reason why I wanted to get a lathe was to make the step of sanding and finishing our spinning tops a little more efficient. The spinning tops are cut on the rotary attachment on our Avid CNC machine, and while the CNC is great for a lot of different jobs, sanding and finishing is not one of them!


When the tops come off the machine, they have quite a lot of tool marks on them, and in order to get them smooth and balanced, quite a lot of even sanding is required. Ideally, that means the top should spin as you sand. Initially, I placed the tops in a drill chuck and sanded them that way, however it quickly became clear that solution wasn't great for sanding a larger amount of tops. What I really needed was a way to secure the tops very well (like in a chuck), in a machine that spun fast (a lathe).
So, here we are, with a new Grizzly benchtop lathe. It's a great machine with a variable speed control. Being a benchtop lathe, however meant it needed a stand. I'm actually rather partial to benchtop lathes as opposed to larger ones on legs, since a smaller machine gives you the opportunity to use the space underneath for storage.

So we decided to build a basic stand using 2x4s and plywood. It measures 27 by 41 inches, with a height of 30 inches. It has two drawers on drawer slides and 4 heavy duty wheels so you can move the stand when you need to.
Here a cutlist of the pieces for the stand:
2x4 base:

#4 @ 29 1/4" (legs)
#4 @ 16" (short sides)
#4 @ 36 3/4" (long sides)
Top & Sides (3/4" plywood)
#1 @ 41" x 27" (top)
#2 @ 13" x 20" (sides)
Two Drawers
3/4" plywood:
#4 @ 35 1/2" x 4"
#4 @ 19 1/4" x 4"
1/8" plywood
#2 @ 35 1/2" x 19 1/4" (bottom)

The drawers feature box joint construction and are glued together. The base is connected with 5 inch screws, and the top and sides are screwed down as well.
For more information as to how the base is constructed, make sure to watch the video.
Making a Mini Japanese Toolbox (out of 2x4s)
I was in the mood to get out in the shop and build something simple. For a while I'd been thinking it would be fun to dust off the hand tools and I happened to have some resawed 2x4s on hand. 2x4s obviously aren't fancy, however there is something appealing about the cleanness of the wood and the straightness of the grain. In terms of the project, there's been one type of box I've been wanting to make lately, so this seemed like a perfect opportunity - a mini Japanese toolbox.

I was in the mood to get out in the shop and build something simple. For a while I'd been thinking it would be fun to dust off the handtools and I happened to have some resawed 2x4s on hand. 2x4s obviously aren't fancy, however there is something appealing about the cleanness of the wood and the straightness of the grain.
In terms of the project, there's been one type of box I've been wanting to make lately, so this seemed like a perfect opportunity - a mini Japanese toolbox.
A couple of years ago I made a larger Japanese style toolbox. I made it out of pine and painted some parts of it a light grey. It's a bit chunky, and I kept tools in it for a while, and lately it's been holding my Moonlander Lego (another project I need to get to and reassemble.)
But! Ever since I built that box, I've been playing with the idea of exploring the concept some more, and particularly to bring it down in size.

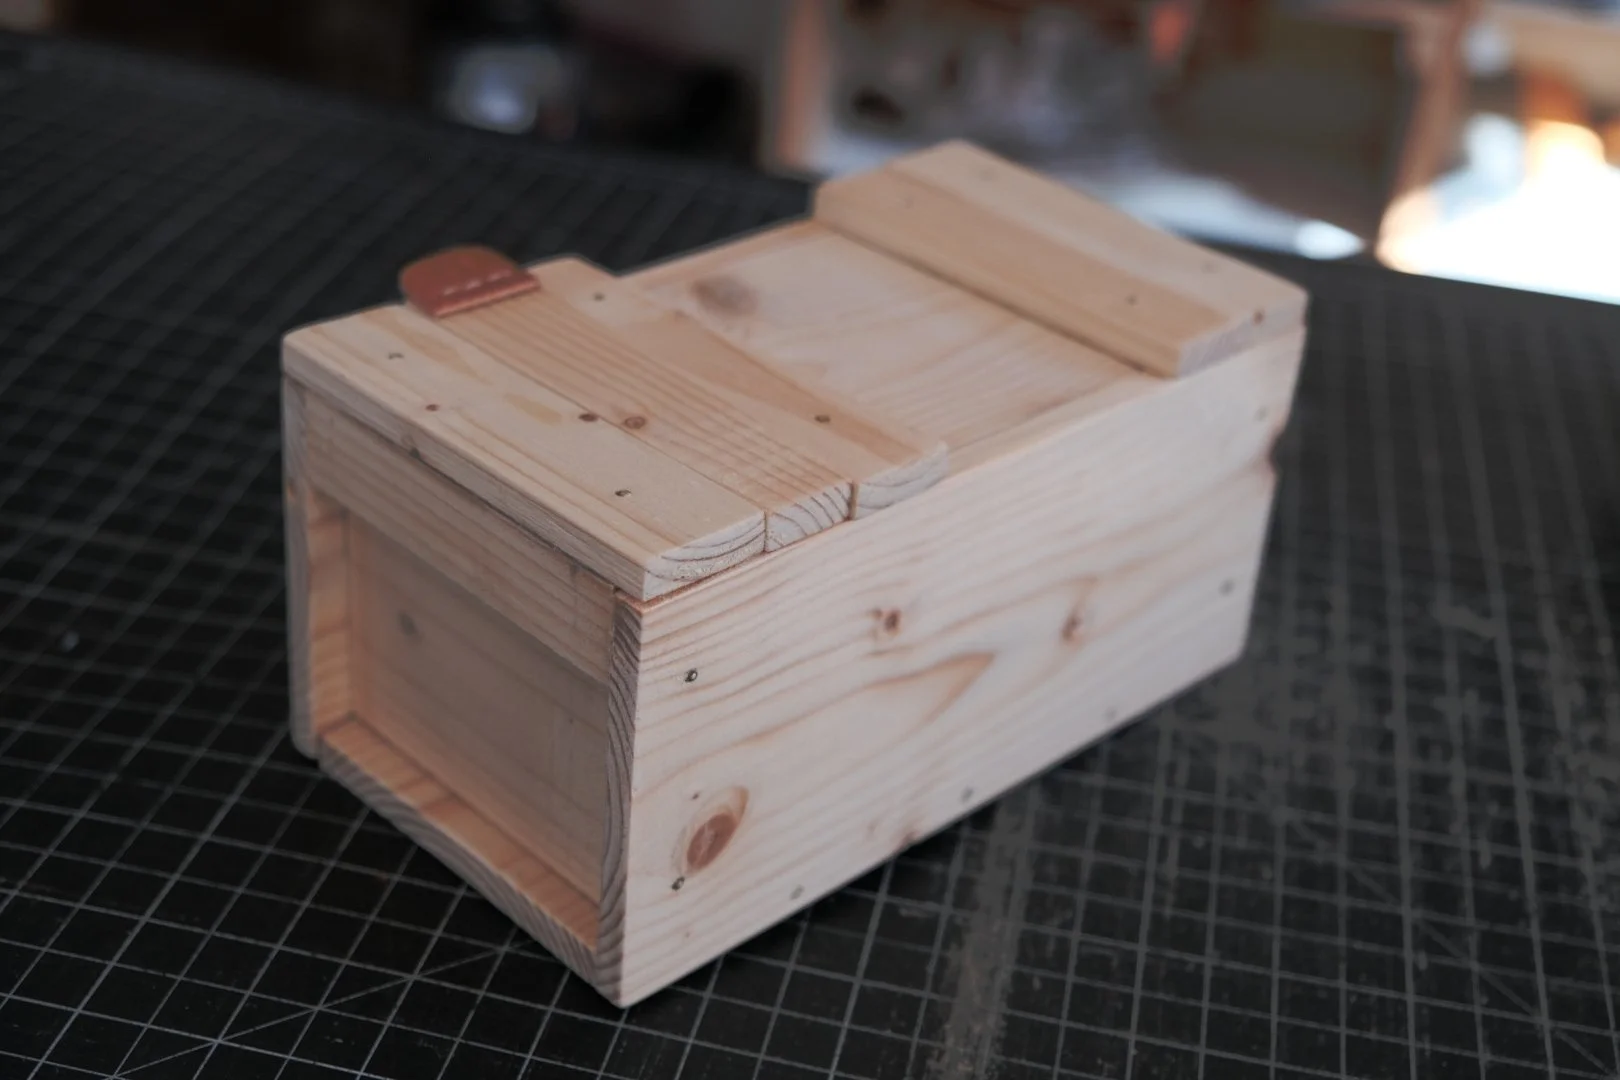
At the heart of a Japanese toolbox, we have a fascinating lid construction which ties directly in with the main box design, as it goes underneath the "brackets" attached to the sides of the top. In essense we have a wedge for a closing mechanism, but this box isn't just about a wedge, it's about how it all comes together.
The wood I was working with certainly had imperfections in it, and I really didn’t mind. Actually I think this type of wood lends itself very well to the Japanese, almost Scandinavian style where you use a lot of pine and a lot of fir. Since the wood is resawed 2x4s which feature a width of 3.5 inches, that's the size I had at my disposal. And with that as my starting point I built the design and took the measurements from that point.
Traditionally, the sides sit inset on a Japanese toolbox. You attach a handle on each side which comes flush with the long sides and that in turn creates an indention where your hands can go to hold the box. It's a rather simple detail, but I always liked it a lot and how it ties in with the lid design.
Now this wood is quite thin, about 3/8 of an inch. I was debating about the construction: in the past I used screws which I capped with dowels for my larger japanese tool box. I was thinking for a moment if I should do real joinery with through tenons, but in the end I decided to go with glue and nails, because I think simple is fitting here. It fits this box somehow. Now since the wood is so thin, I was a little concerned about splitting it, however predrilling will take care of that.
The tricky part about this project is definitely the lid. It's a precise fit, the lid is going to fit underneath the side brackets and it needs to be long enough to cover the opening, yet short enough to actually fit.
Then we need three more pieces of wood related to the lid. Two which will glue on and one, the wedge, which will be loose.
The wedge piece will fit perfectly into the opening, if everything is assembled correctly and lock the lid in place.
Now, the only negative about this design, I think, is you're left with an odd wedge piece of wood when the box is open. That's not really a problem, unless you keep the box open for some time and you forget where that odd piece of wood should go (it has happened to me once or twice)! It almost looks like a piece of scrap, right. So I was thinking, it wouldn't be a bad idea to differentiate the wedge somehow. You could certainly paint it or use a piece of contrasting wood, however I rather like the simpleness of the pine here.
So, instead I decided to sew on a little leather flap which you could pull on if you wanted, and it also just adds a nice little visual clue.
Basically, I think it's really refreshing that you can make something that has this aesthetic appeal, without using any fancy wood whatsoever.
And there we go. A very simple box, yet intriguing at the same time. Watch the video for more detail on the build.
Making Spinning Tops
The spinning top journey has been a fun one! They are now stocked in the shoppe if you’d like to pick one up, and I have a video ready all about the process thus far. When we first started playing around with the idea of making the tops, the project was centered around just that. Making different designs, cutting in different woods etc… Since then, we’ve tried out a lot of different concepts, ventured into making dishes and perfectly sized keepsake boxes,
The spinning top journey has been a fun one! They are now stocked in the shoppe if you’d like to pick one up, and I have a video ready all about the process thus far.
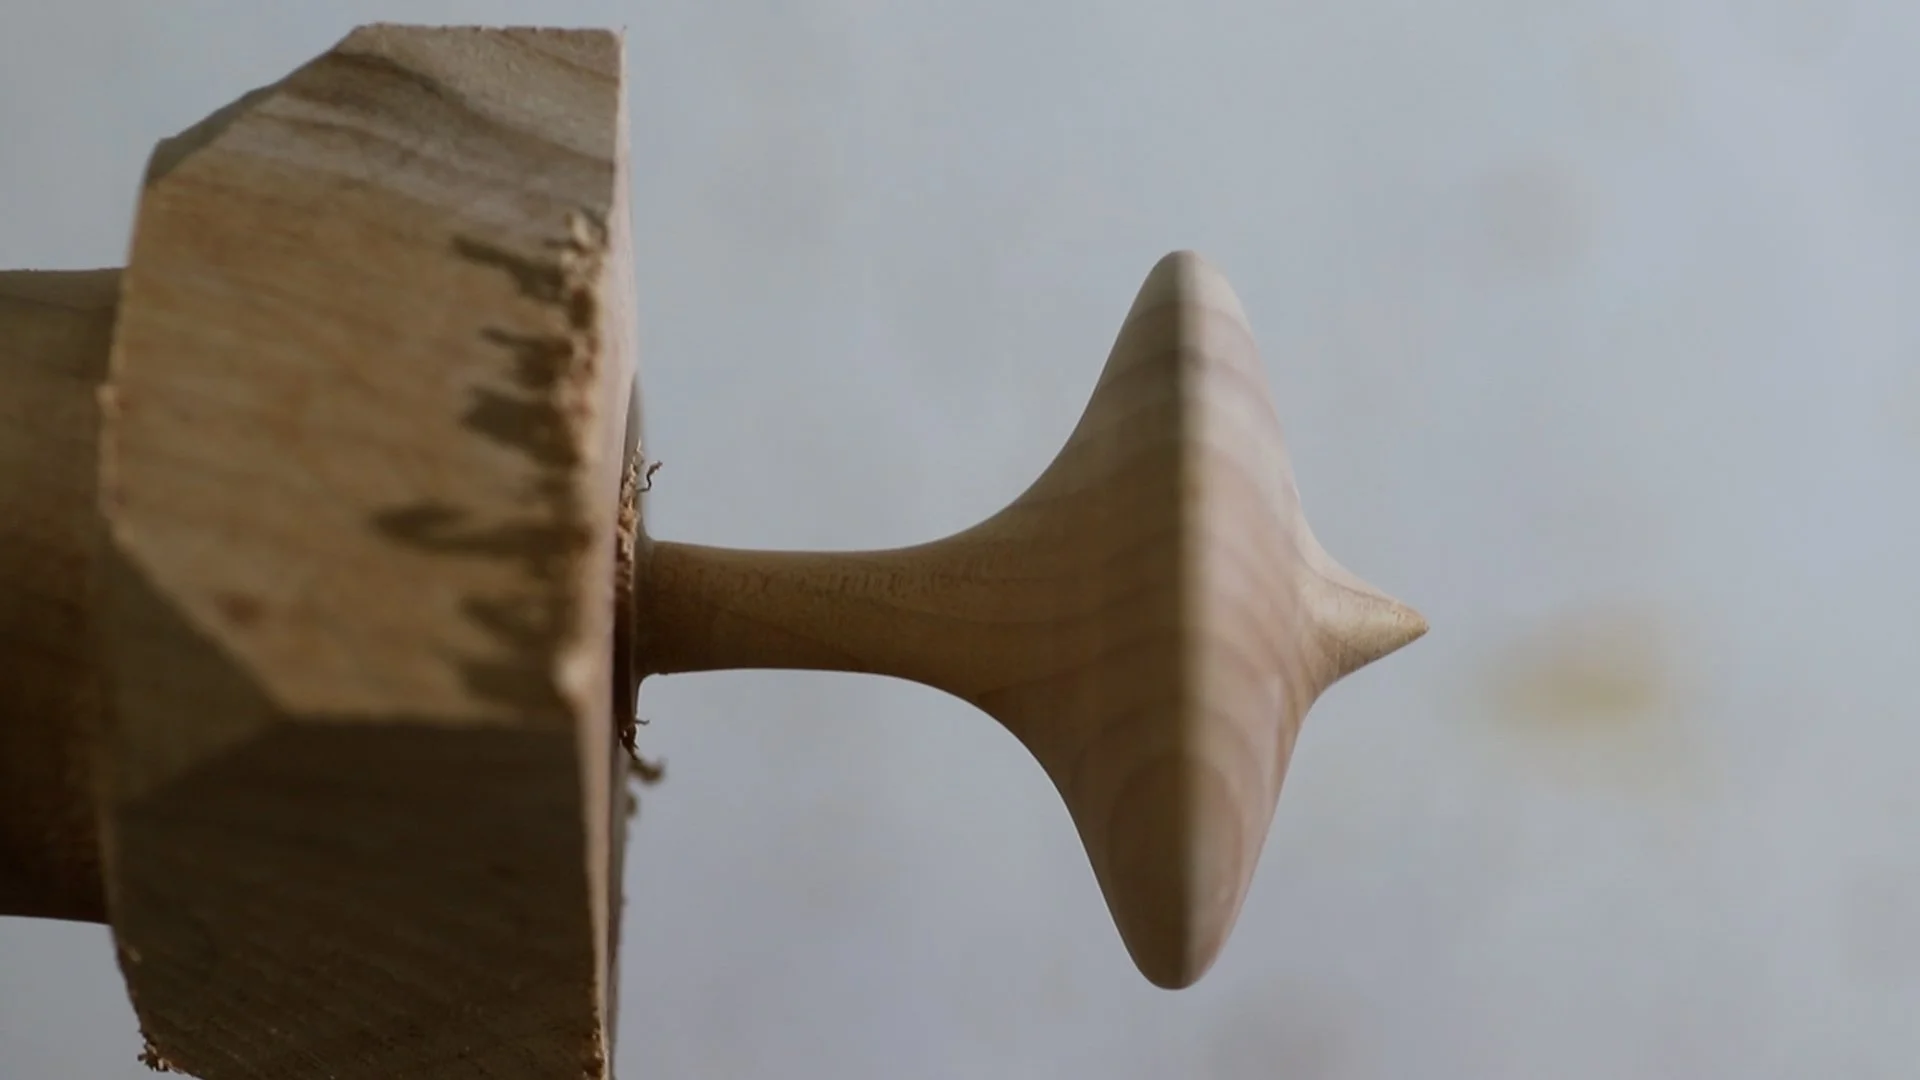

When we first started playing around with the idea of making the tops, the project was centered around just that. Making different designs, cutting in different woods etc… Since then, we’ve tried out a lot of different concepts, ventured into making dishes and perfectly sized keepsake boxes,
The process of making the tops themselves have also gone into quite a lot different directions. In terms of software I use Aspire by Vectric whenever I use the CNC. This has been great in my experience both from cutting flat things on the cnc table as well as using the rotary. However, when you design round things, there is a little bit of a learning curve and you have to think about the design in a slightly different way. Imagine you roll a piece of paper up into a cylinder. Now let's unroll that cylinder and we have a rectangle. That rectangle is what you need to design in order to actually cut something round.

In many ways, it's all about what kind of profile you want to create. The smallest change in angle or curve will create massive changes in the final project. I think one of my favorite parts of this software is how you can model designs before even cutting, so you can play with different changes and then see how it will end up looking in reality, without starting to even cut.
So it's nice to be able to test out ideas without having to actually go through the process of cutting them every time, just to get an idea of what they'll look like. Of course, in the end, there's nothing like actually cutting the piece in order to get a sense for if you like the design or not, and if it feels good in the hand.

In terms of making these, at first it started with using primarily the CNC. However, while the rotary is great for a lot of things, the one thing it doesn't do is spin really fast like a traditional lathe. So when it became time to shape the top that you hold on to (which can't really be cut too much on the CNC because then it breaks), we went through different options. My first idea was to simply hand carve each one by hand, however it's hard to get a very clean look and they're not consistent either. Next up we mounted each top in the drill in order to spin it to sand it and try to shape it. In the end we realized, the traditional lathe would probably be the best choice here. Now the lathe is great because you can mount the top very securely in the chuck, and you have a lot of control when sanding and shaping.

Once we started using the lathe however, we also realized that the order of mount the lathe properly, the best idea would be to first cut a round side on the blank on the lathe before mounting it onto the rotary on the cnc. Then you cut it on the CNC, and then put it back on the lathe, using the same rounded side that chucks up nicely in order to give you a lot of control.
Now we have a new Grizzly benchtop lathe for this purpose in the shop. It's got a new stand (which will be a project video coming out soon), and I think we're getting the process down pretty good of making these tops quite nicely.

Oh – another thing, after putting some tape on the tops to try to get a better grip when you spin, I figured that it might not be a bad idea to dip the handle part in paint. It seems to provide a better grip to get a good spin going, and it looks quite nice too!