Making Classic Wax Pots
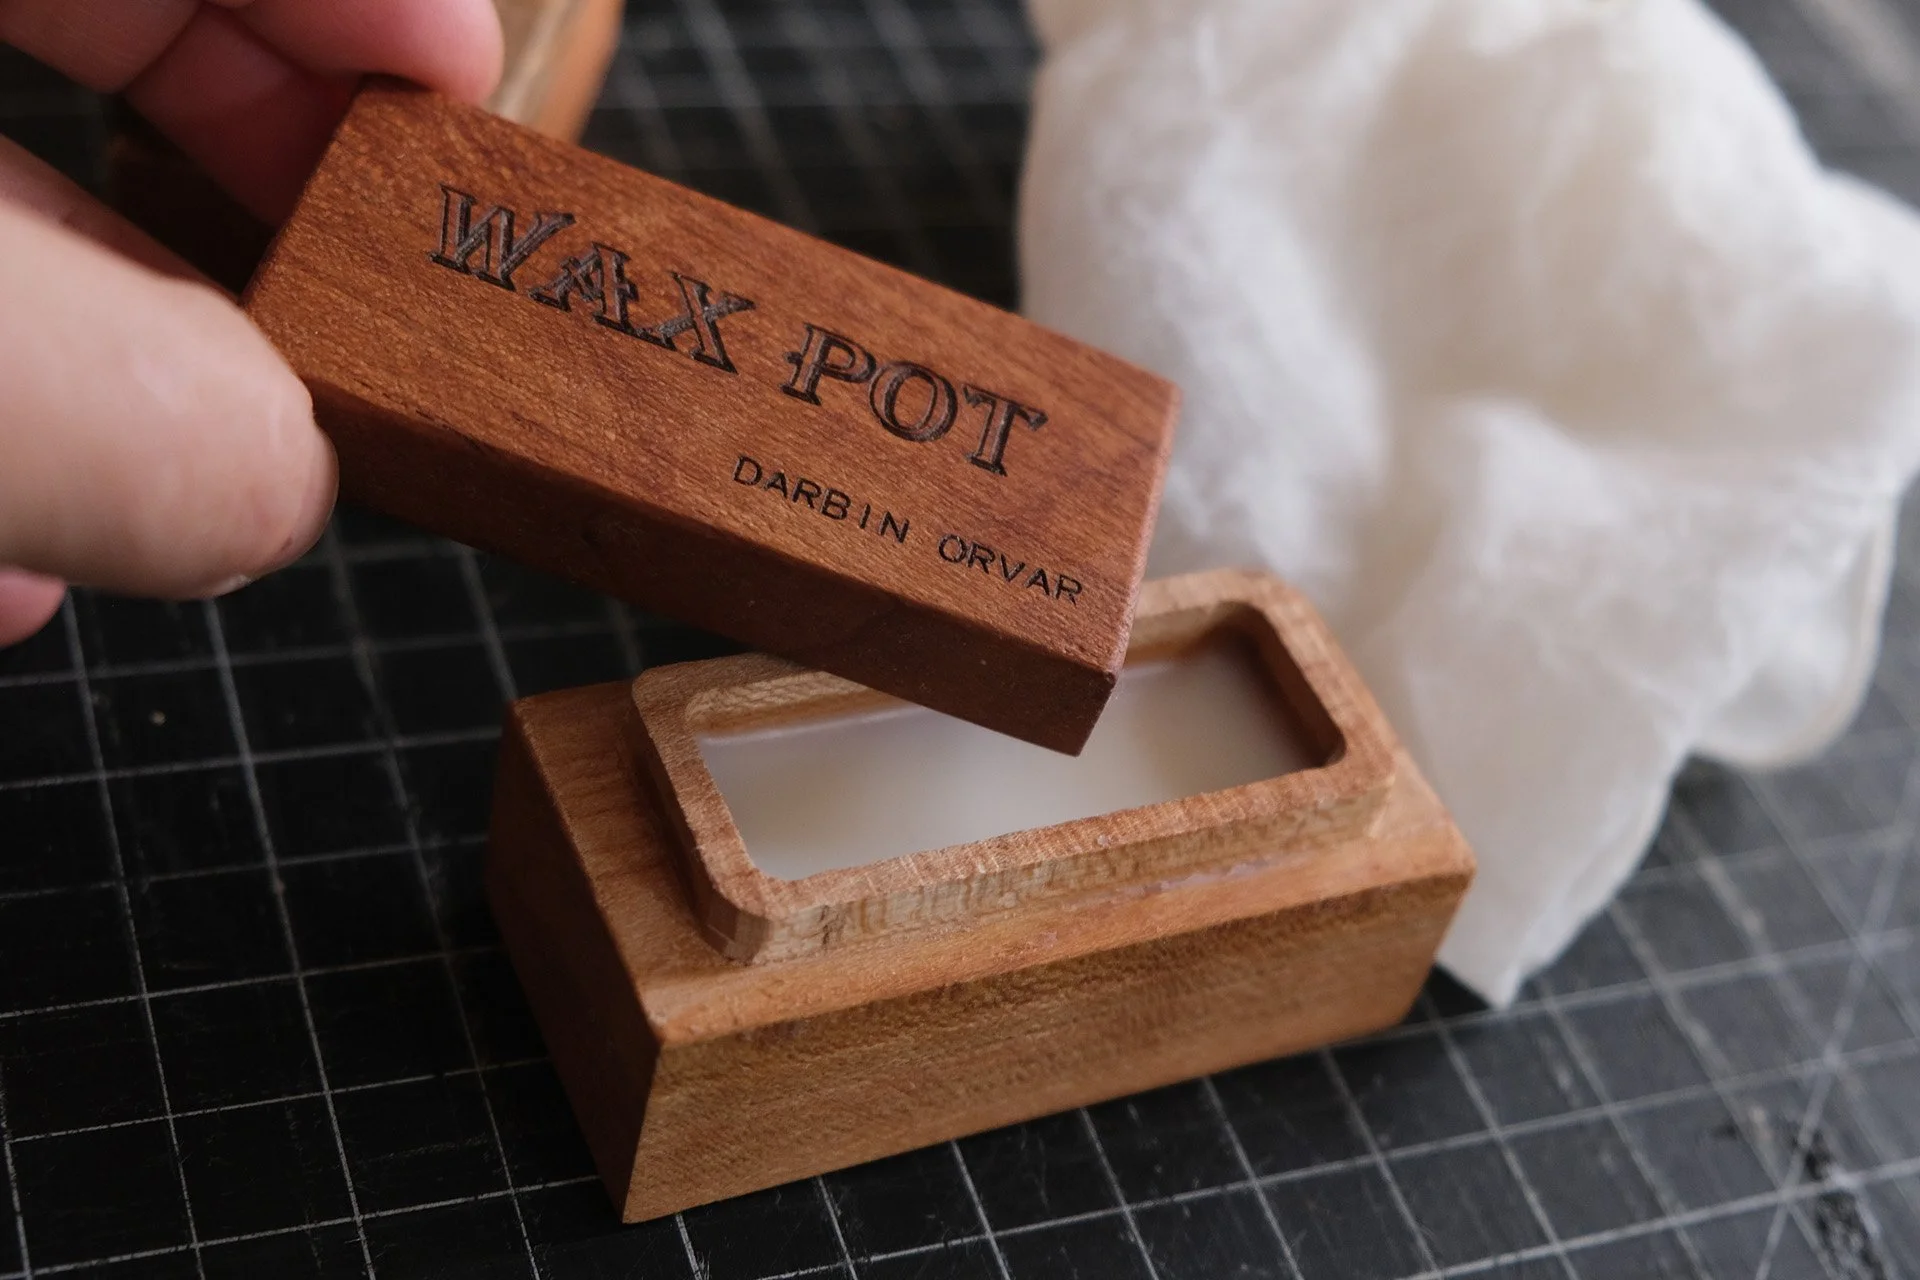
Some projects or concepts just speak to you right away. The wax pot was one of those for me If you’re not familiar, a wax pot (aka a greasepot) is an old fashioned object that the woodworker kept on the bench or in their apron. It’s a small wooden box filled with some sort of lubricant - either wax polish or tallow.
Some projects or concepts just speak to you right away. The wax pot was one of those for me. (in the shoppe here)
If you’re not familiar, a wax pot (aka a greasepot) is an old fashioned object that the woodworker kept on the bench or in their apron. It’s a small wooden box filled with some sort of lubricant - either wax polish or tallow.
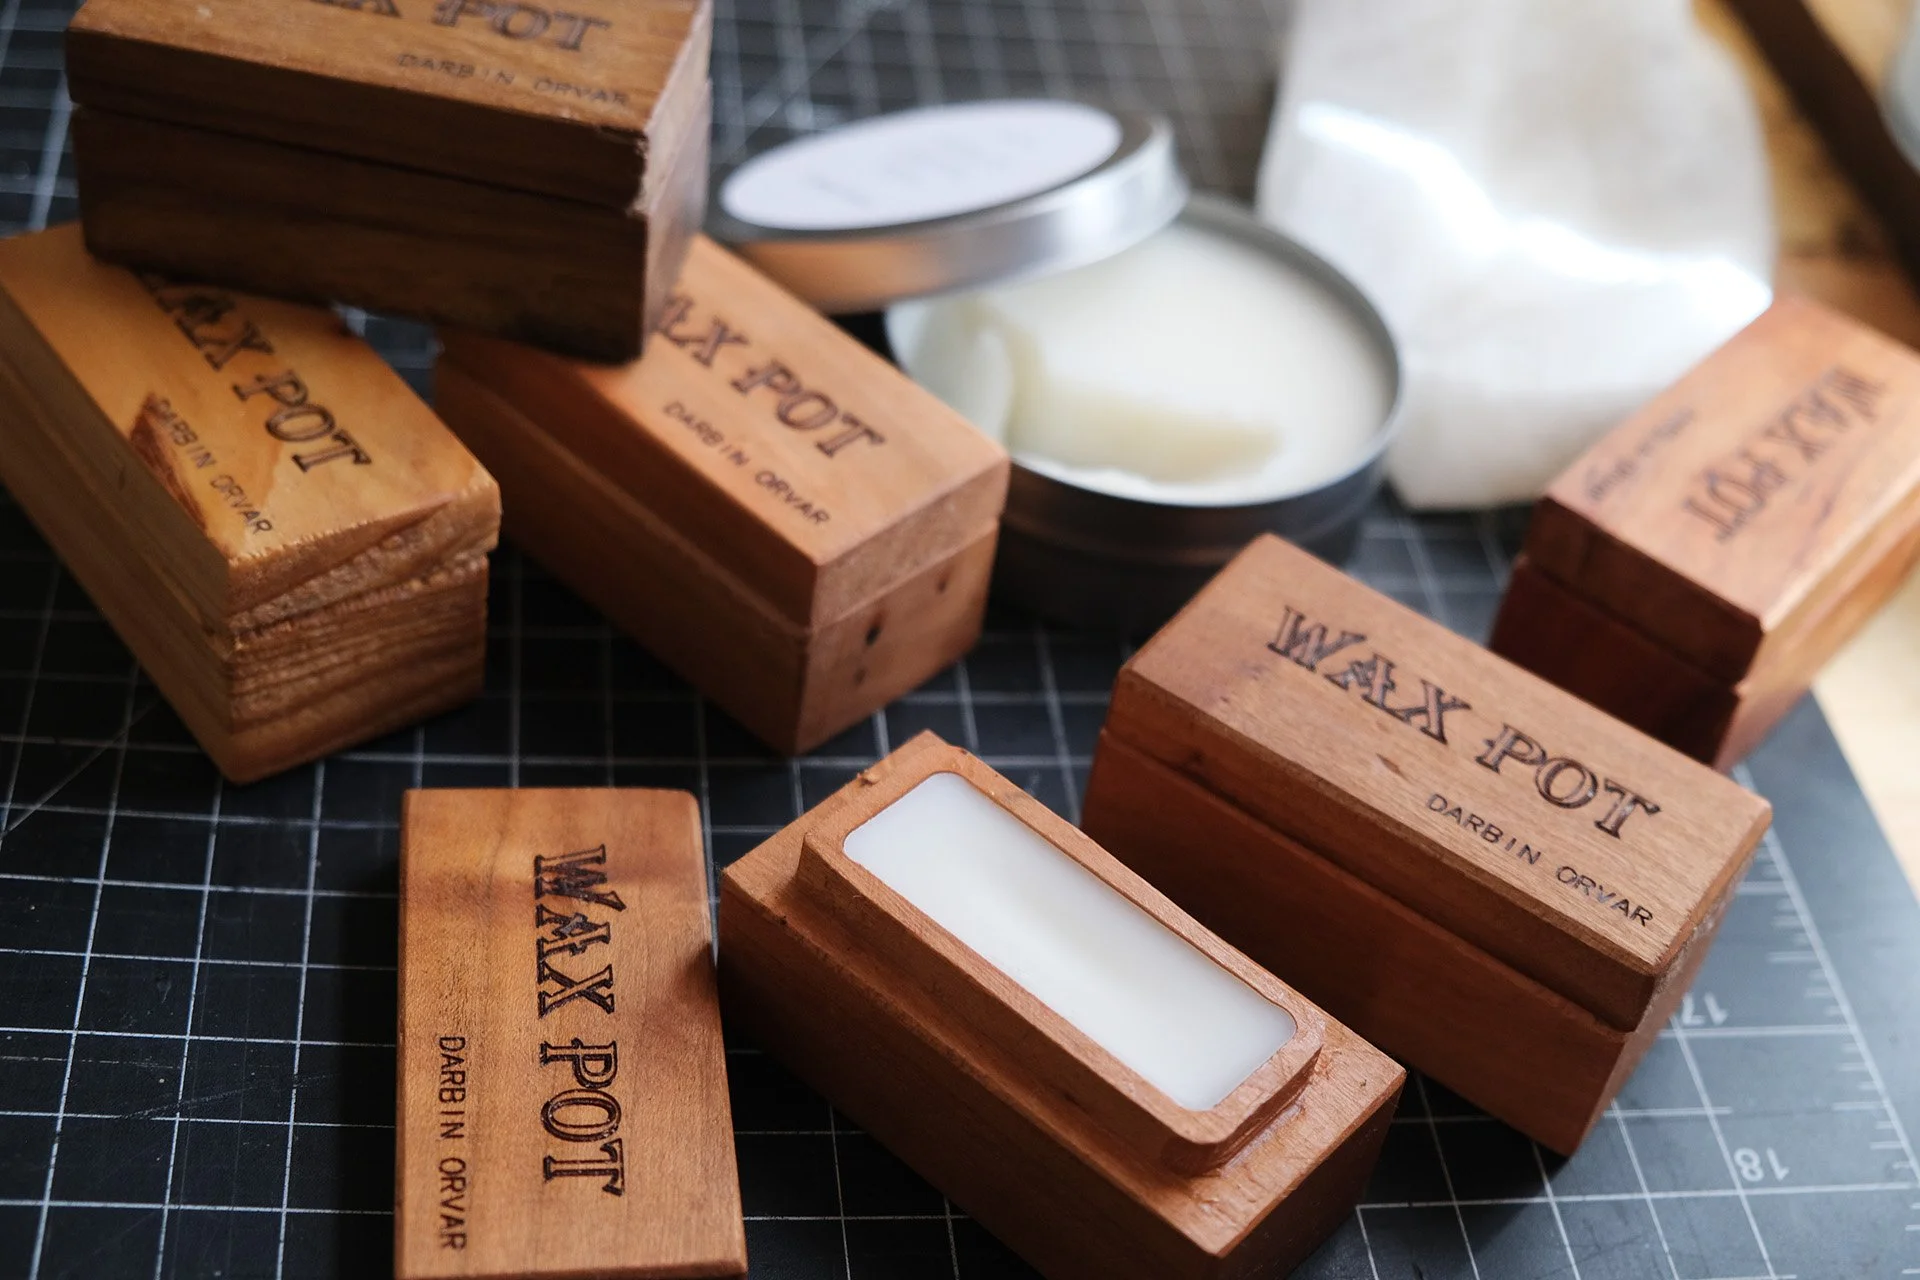
As soon as I heard of this idea I knew immediately I wanted to make a few. Seeing as we make beeswax polish that we sell, I thought it would be first of all, a really interesting project to get in to, and secondly, a great addition for our shoppe.
Now, this was something I first got into last year and I ended up selling a limited run of wooden wax pots made here in our shoppe. It was a really great experience because other people seemed as intrigued by the concept as I was, and we ended up selling every single one we made.
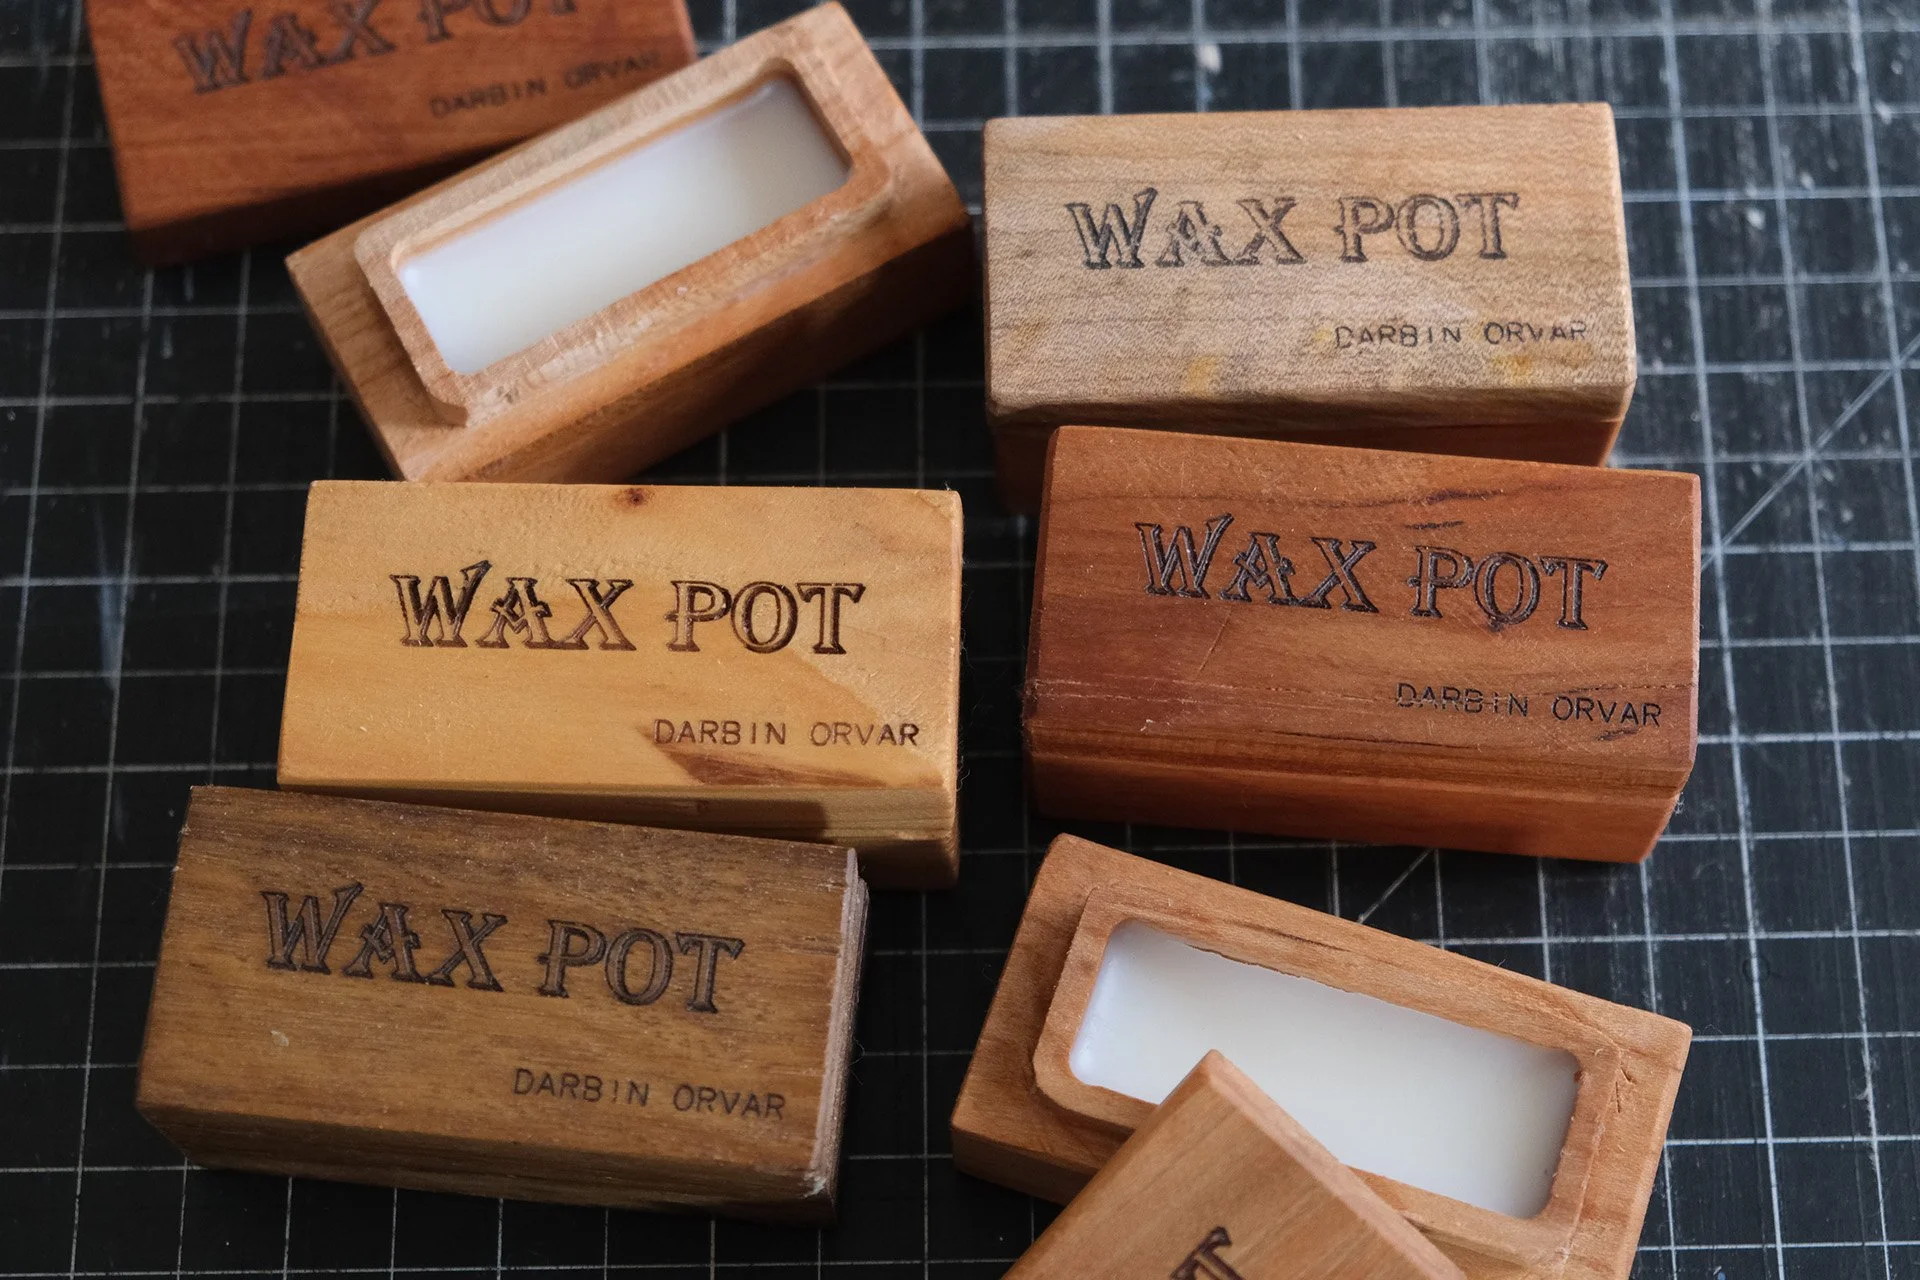
This year, for the holiday season, I thought it would be fun to revisit the concept. Last year I made all the pots in maple, but this time around I thought it would be a nice idea to offer some different kinds of wood species, so now we have them in maple but also cherry, mahogany, cedar and greenheart.
I also changed some other things around a bit including the logo and design on top of the box.
But all of those changes, including how I actually go about making these wax pots are included in my new Youtube video. Feel free to watch it and let me know if you have any thoughts or questions in the comments!
If you want to check them out in the shoppe, they’re available here: waxpots

Inside each wax pot you will find our special mineral oil wax polish, and each order also comes with an additional tin of wax polish so you can refill your pot as you use it up.
I made a small run of about 20 wax pots, and there are a select few in each type of wood. So if you’d like a special one, these are the only ones I have.
As always, I find modern concepts and techniques fascinating, but there’s nothing that beats old fashioned ideas. That definitely rings true for this wax pot! It’s a tactile, hands-on little object that belongs on your workbench or in your shop apron - or in the kitchen as the polish is perfect for refinishing cutting boards and wooden spoons.
So if this is something that speaks to you, you can pick one up for yourself, or gather inspiration and make one in your workshop!
A Small Table Out of Flooring
Are you the type of person who sometimes have projects laying around for a long time, mid way through finished? Well, I certainly am. Sometimes projects go by real fast and sometimes you get distracted, or other things take priority.

Are you the type of person who sometimes have projects laying around for a long time, mid way through finished? Well, I certainly am. Sometimes projects go by real fast and sometimes you get distracted, or other things take priority. I suppose that's one way to look at this little end table project which I just finished, however started a couple of years back.
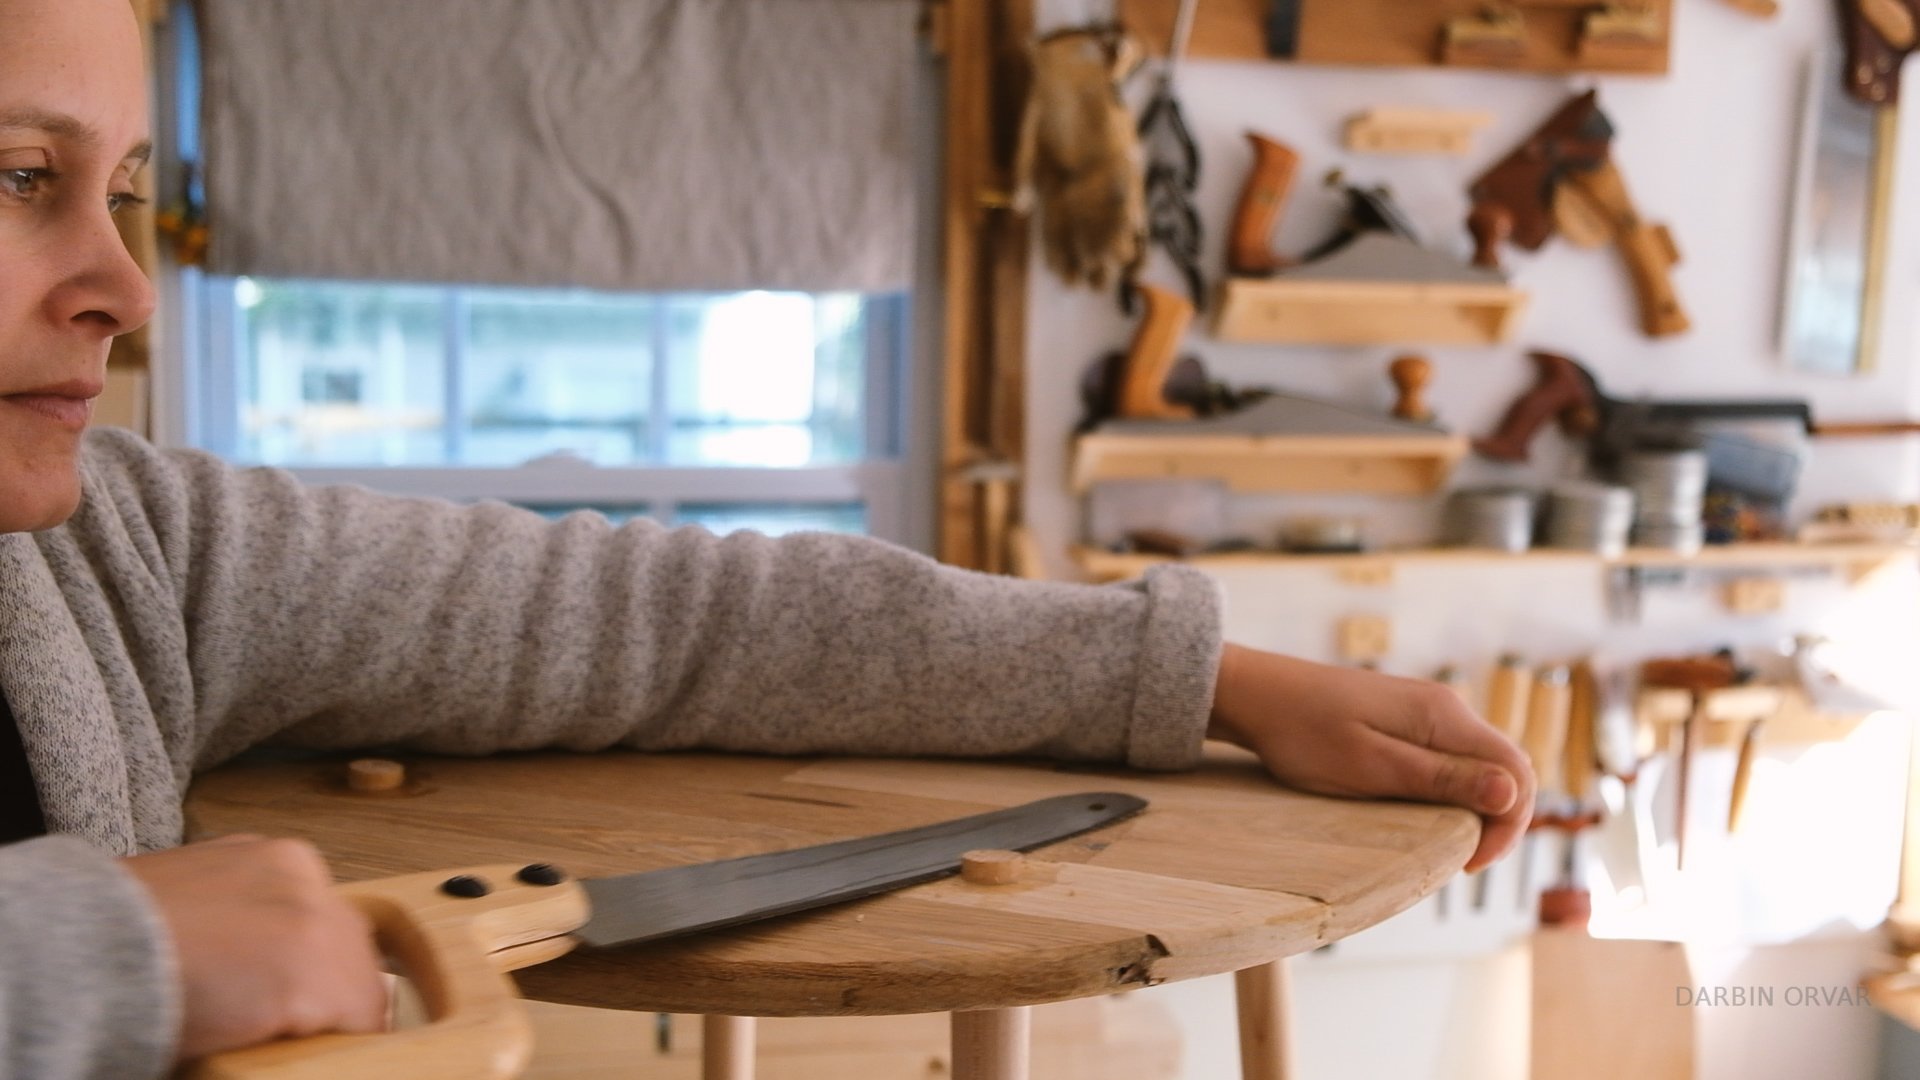
It's a round side / end / coffee table, and the top is made out of flooring. Years ago when we first moved here to Virginia we picked up a good amount of utility grade tongue and groove flooring which has been used for.... well, flooring :) as well as other projects (counter, table tops, blackboard frames and a whole bunch more).

When you think about, hardwood flooring makes a lot of sense to use for projects, if you happen to have some extra laying around. After all it already has the tongue and grooves and just needs to be glued together and maybe sanded a bit.
So a couple of years back I glued up this oak board and cut it round on the router by creating a simple jig, sanded it etc... and then it's just been sitting there in a corner of the workshop, waiting for some attention I guess.

And then the other day I was thinking about how I really need a little side table, and that's right, I forgot I had that thing sitting around the shop. So! Time to make some legs and attach them. I designed some round, slightly tapering legs and cut them out of maple on the CNC, and then spent a little time attaching them to the table top.
I love when you can see how something is constructed so I opted to drill holes right through the top and have the legs come through. It's visual and maybe not for all, but I like how utilitarian it is.
I'm glad to say that this little forgotten oak board now has been properly tended to and in its place we have a useful little table.
A Very Custom Leather and Wood Case for Coffee Equipment
If you like coffee, and the process of making coffee, then you may appreciate the opportunity of being able to set up a brewing station in different places. In other words, the ability to take out your fancy coffee equipment and set up camp whether at a park or a winery or just in the backyard.

If you like coffee, and the process of making coffee, then you may appreciate the opportunity of being able to set up a brewing station in different places. In other words, the ability to take out your fancy coffee equipment and set up camp whether at a park or a winery or just in the backyard. You may argue that you could just make coffee at home, pour it into a thermos and be on your way, but I rather like the idea of being able to do this process when out on adventure.

When I first gathered all my coffee periphenelia that I use on a day to day basis, I quickly realized, there's quite a lot of stuff to cover. We have a kettle, a gas burner, a scale, a grinder, coffee beans, water bottle, pour over system and a cup or two to drink the coffee out of. None of those things can really be scaled back on, if you want to have a flexible system where you could make more if you want to.
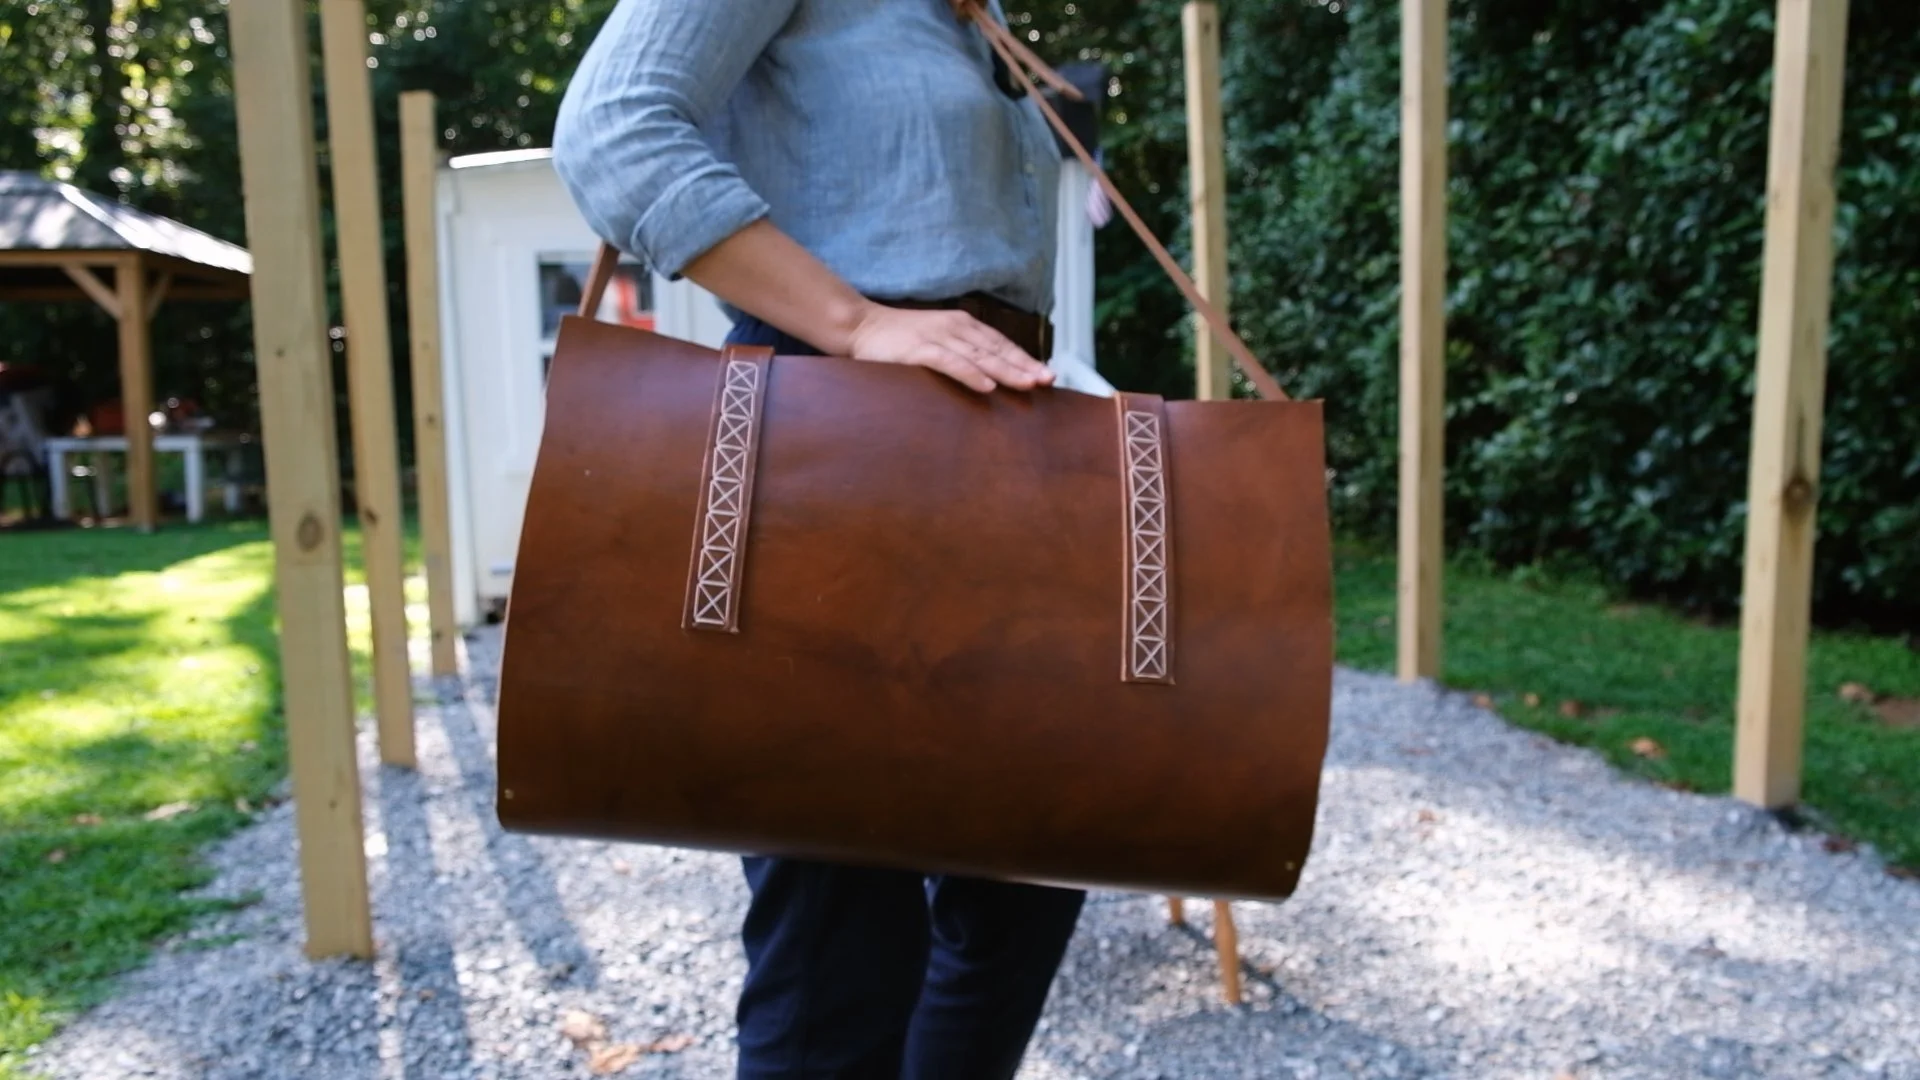
So what would be the best way to make a secure, practical system to bring everything along with you? You can obviously make a regular bag in fabric, however that feels a bit flimsy. Wood is always good, but a little heavy when you build something on a larger scale (and that you want to be portable). I always look at leather as the in between when it comes to wood and fabric. It's dense and durable, yet a lot lighter than wood. It's malleable and you can bend it into different shapes, so you have a lot of flexibility in terms of design. Now, in terms of material, leather alone can certainly be used, but I was thinking that adding some wood on the sides of this case would be a great way to add some stability and it would form the basis of the structure.
Leather

There are different thicknesses of leather, and for this project we needed a rather large and thick piece. Thicker leather obviously adds more weight, however it's also a lot less heavy than wood. The piece we're using is veg tanned, and doesn't have any added color to start. I was thinking that we're going to be using oak for the sides, so it would be neat to have some contrast in terms of color. To achieve this we ended up first applying one coat of water based dye, and then another one in a slightly different shade.
Wood
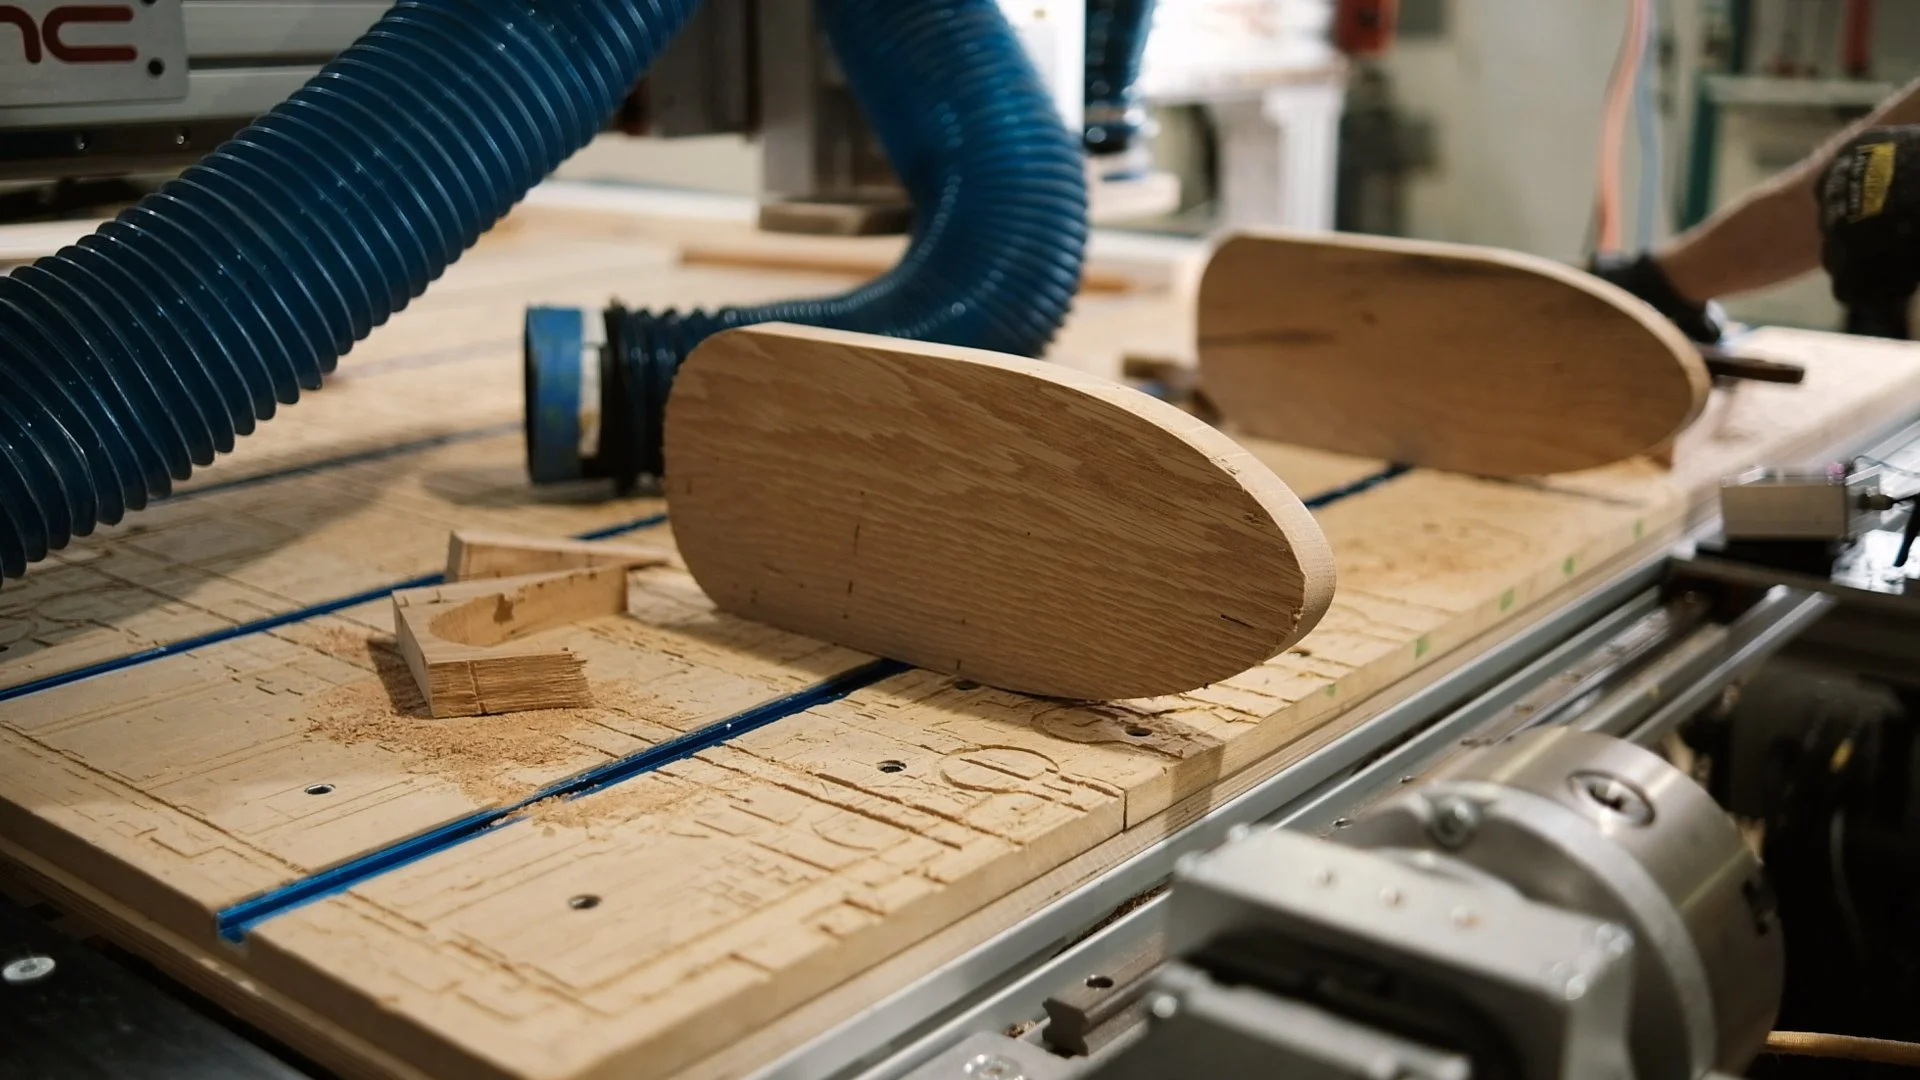
For the sides, we're adding some pieces that the leather will attach to. The wood in question is rough sawn white oak which was milled up, and then cut up into two equal pieces on the CNC. The sides are oval, but not quite even in terms of geometry, but designed for the leather to attach to. As always, I used Aspire by Vectric for software to design the pieces on, and my Avid CNC machine to cut the pieces on.
Construction
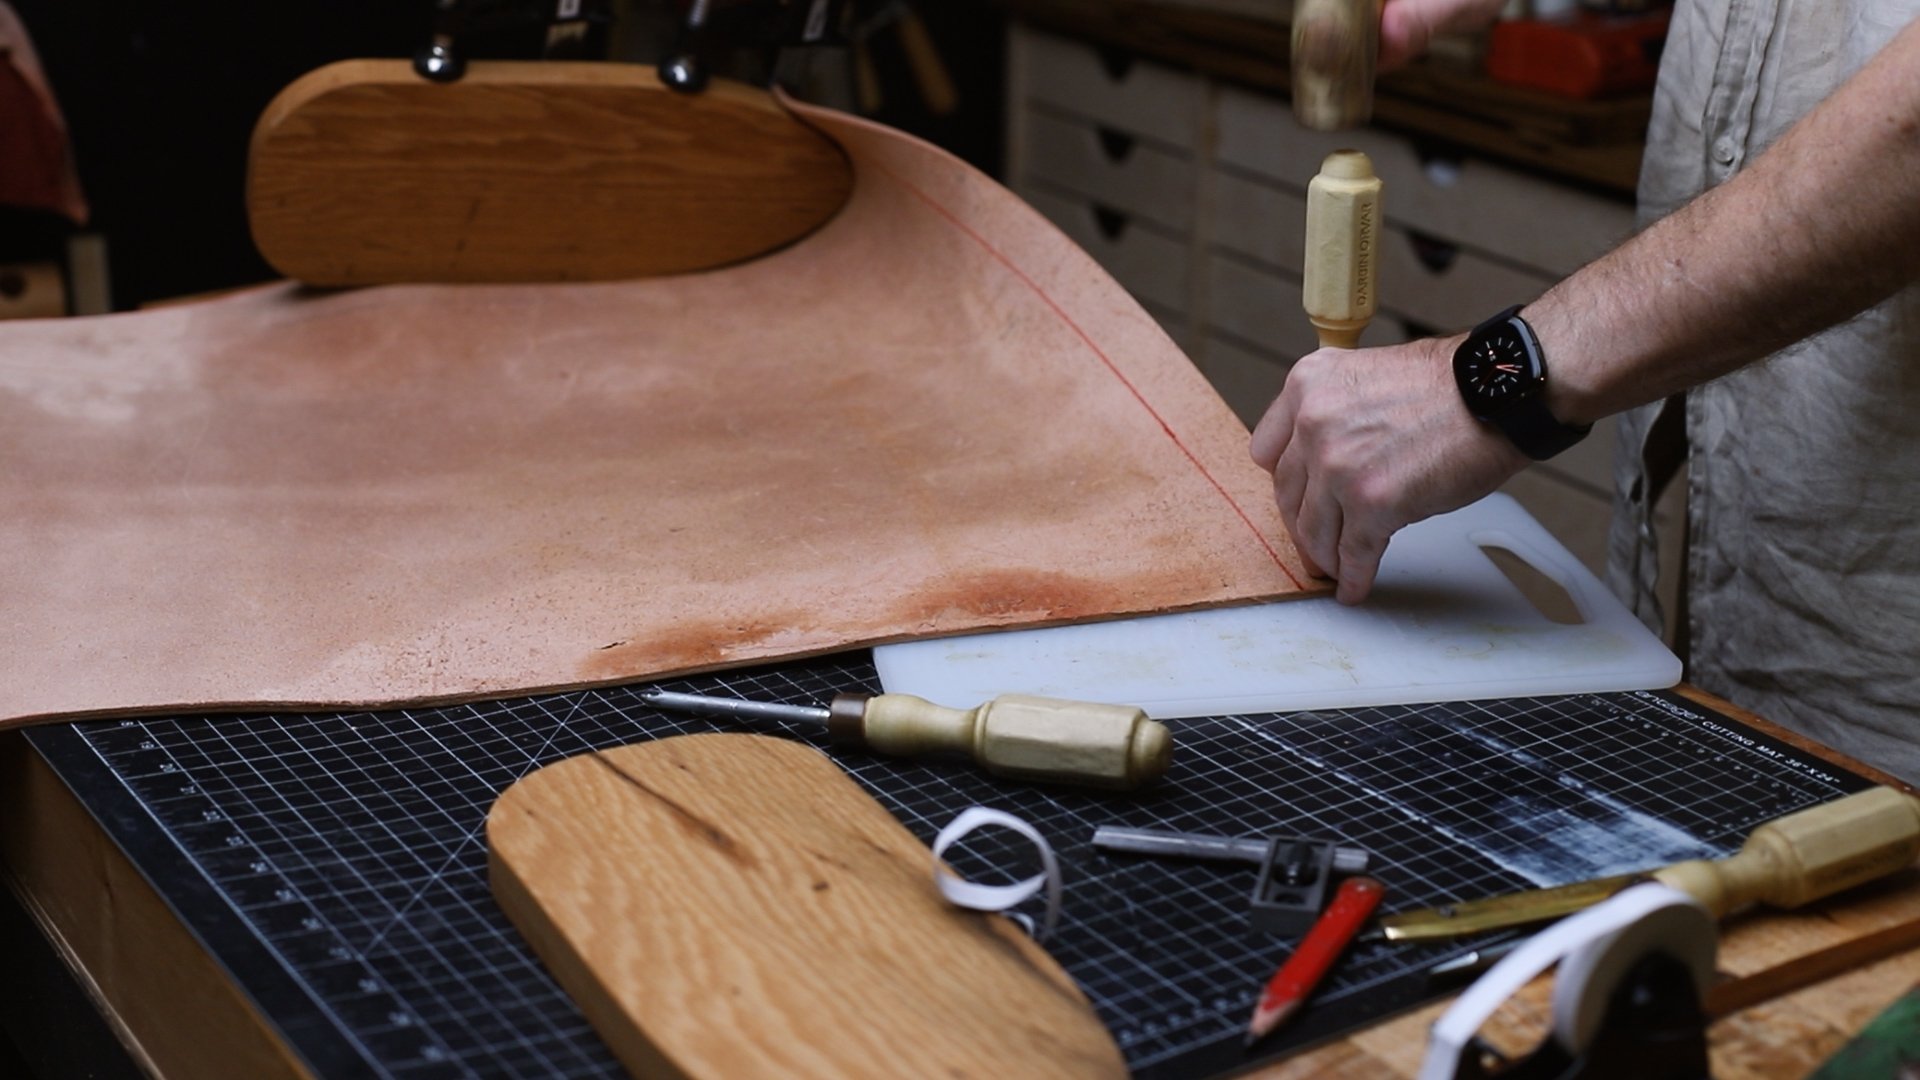
In many ways, this is an appealing project because the construction itself is quite simple in its genius sort of way. The one large piece of leather is attached on the sides to the wood which allows the leather to wrap around and be secured to itself with straps.
To secure the leather to the wood, we're drilling through the leather and the wood and putting in brass screws. Once the first piece is attached, it's repeated with the second piece, holding it in place with tape and also clamps while securing in place.
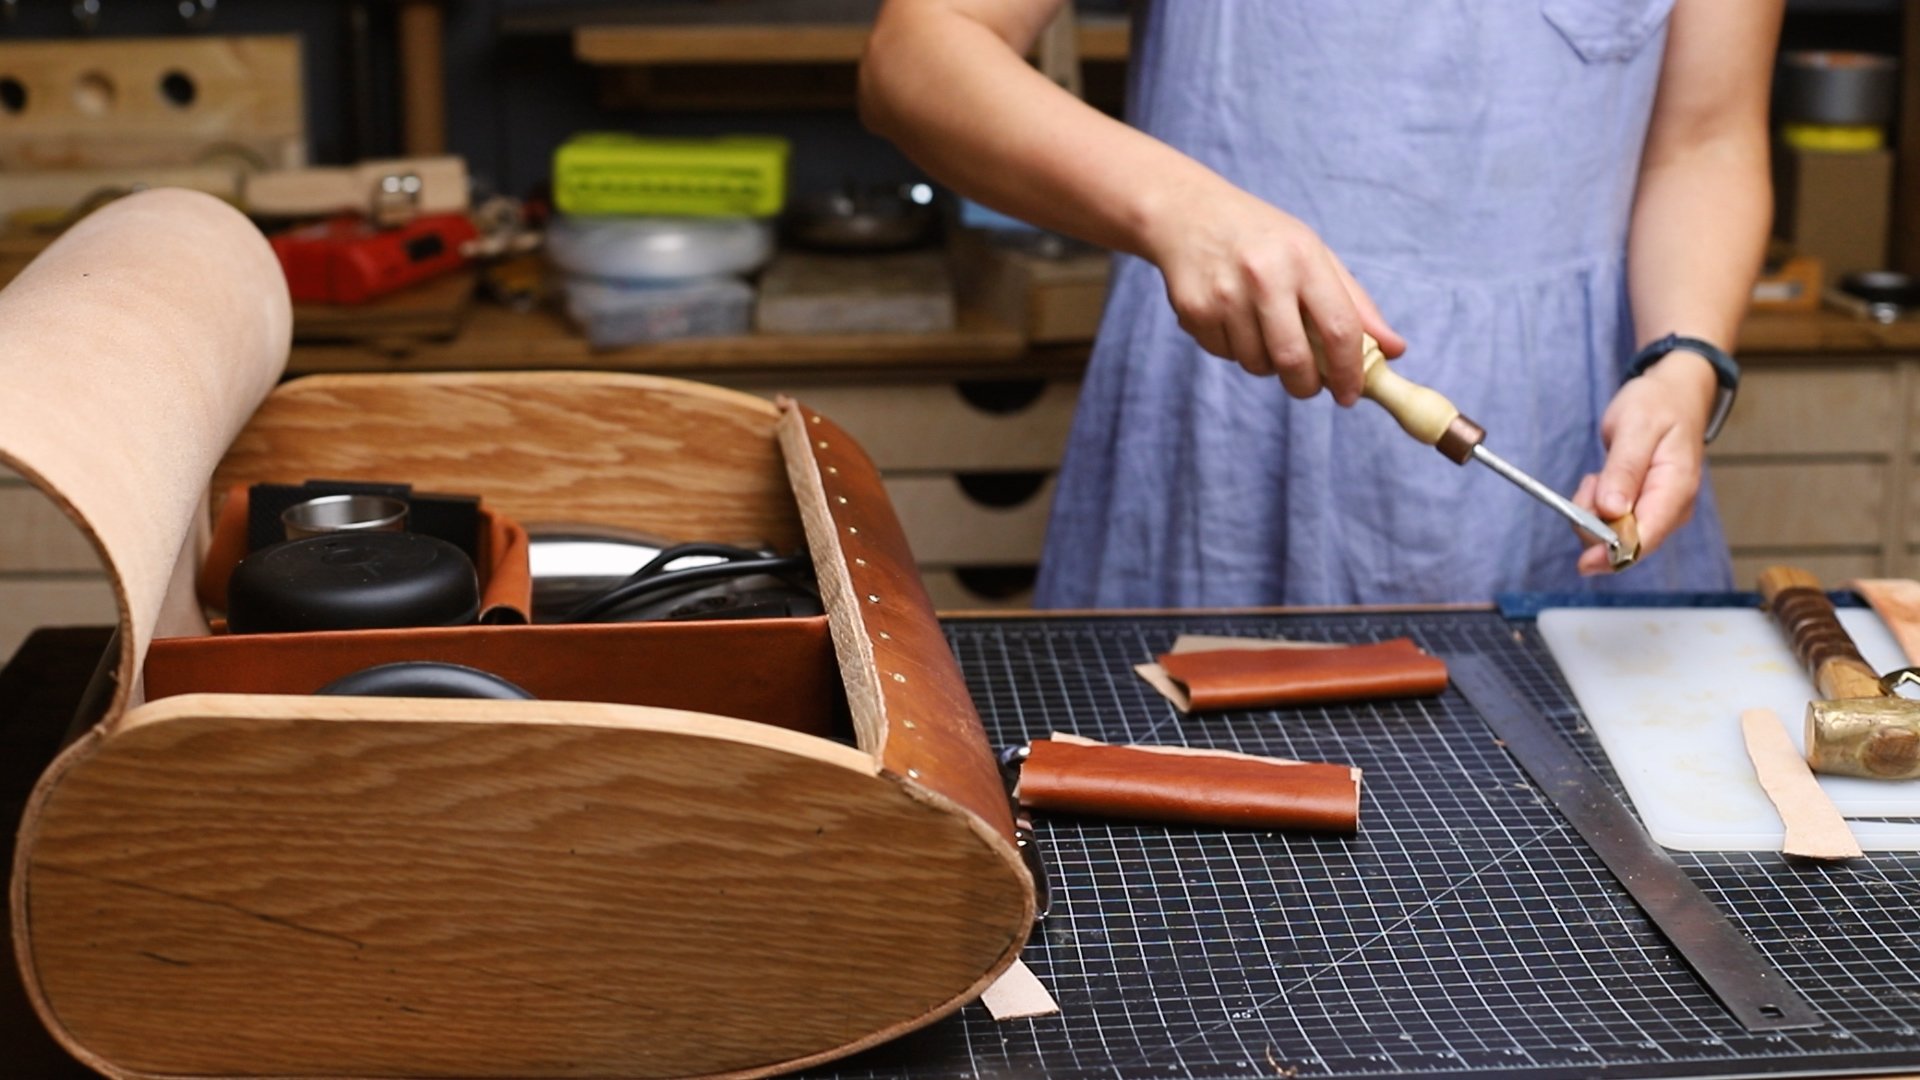
To add a little more structure to this whole case, we're also adding a piece of oak to the inside of the bottom flap where the two pieces will connect. This will give it more rigidity while also providing a space that a handle can be attached to.
To be able to close the case, we're adding straps connected to the leather which will attach to the other side with buckles. There will also be straps on the sides of the wood so you have a way to carry the case.
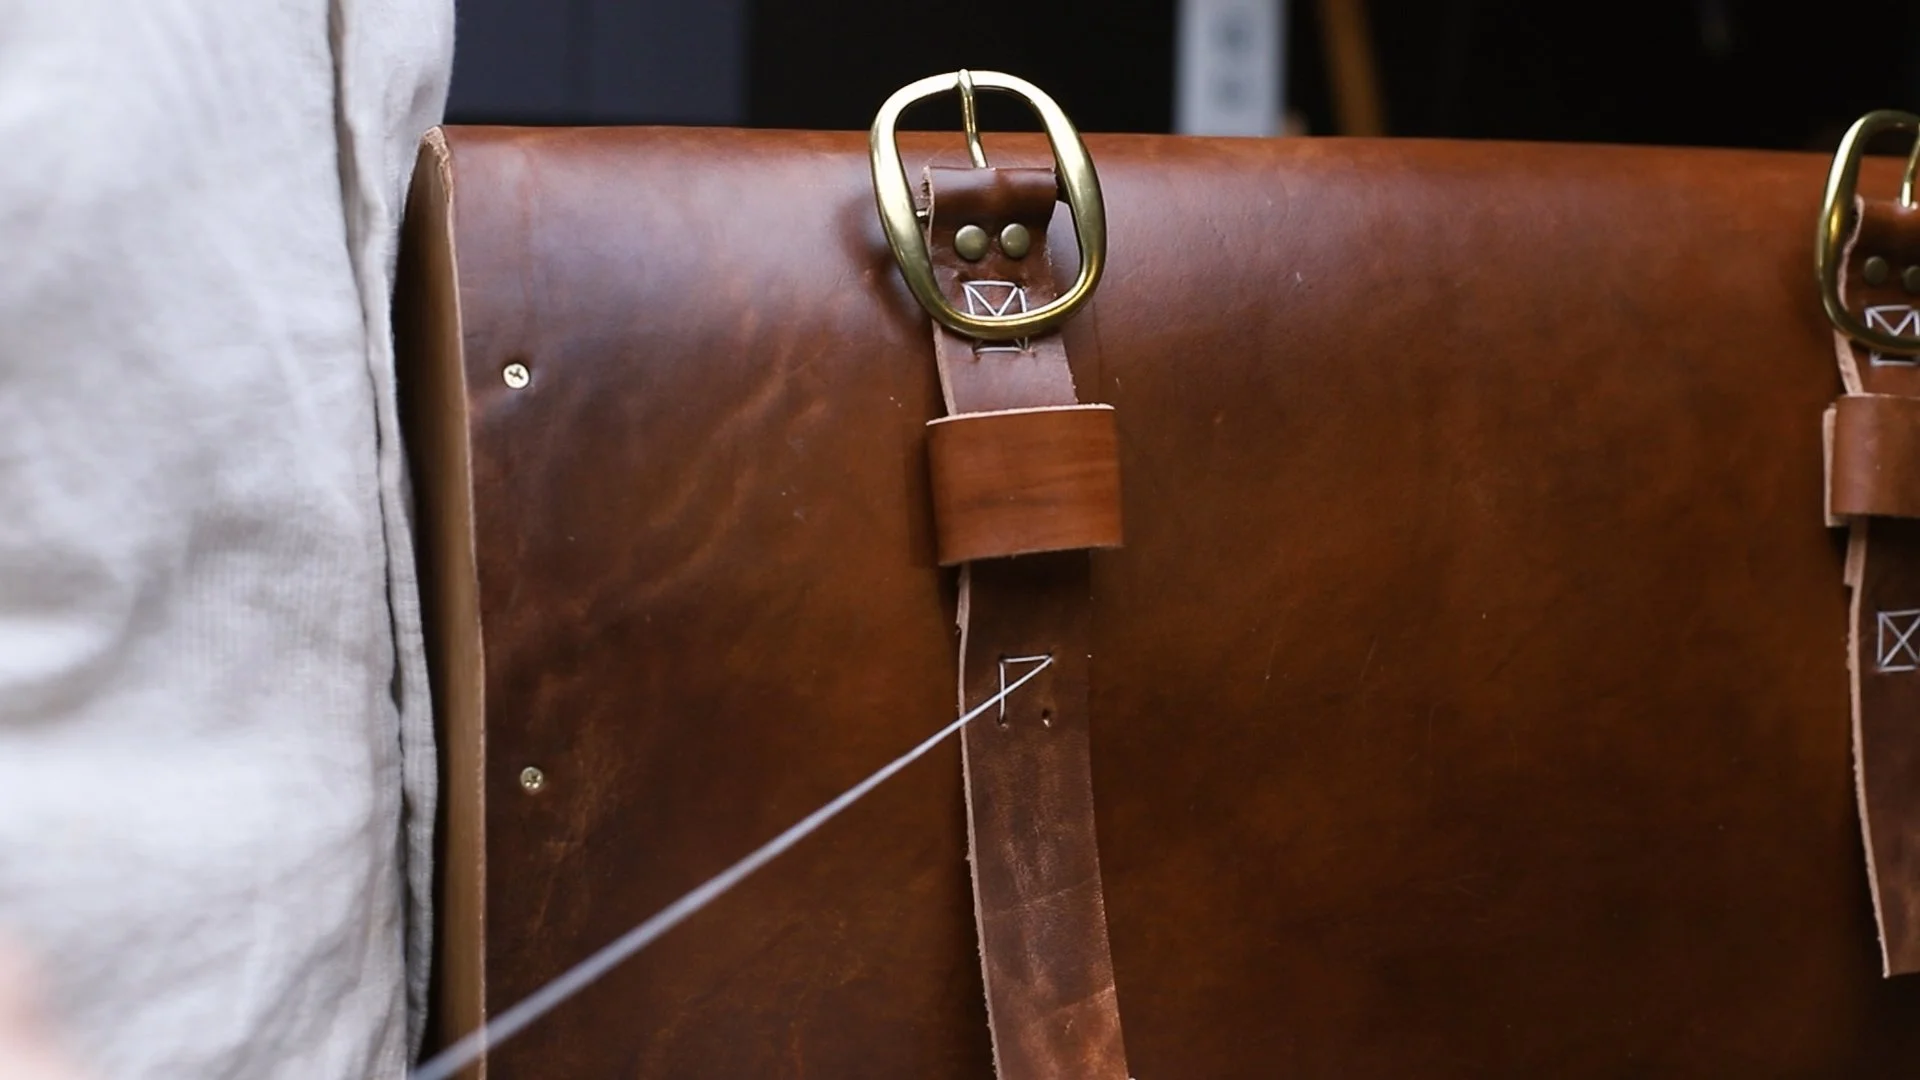
Now, once the basic case was created, we had a skeleton of sorts. But, we still needed a way to secure all the different coffee equipment inside it. You wouldn't want everything to be falling all over and scratching up the surfaces. So, to create an internal system we ended up using a thinner piece of leather, elastic straps and also added some dividers made with hardstock covered in leather, secured with glue. This whole system was glued into the bottom of the bag.
For hardware, we used some brass pieces that were secured to the bag with brass screws. We used a handles as well as buckles and it all contrasted nicely with the dark leather and oak.
Here are most of the coffee equipment pieces that fit inside the case:
Favorite coffee equipment (affiliate):
Watch the video of the project here!
Spinning Tops: The Beginning
So for the last couple of weeks, I've been working on a concept that started out quite simple, and has evolved from there into many different aspects. What is it? It's a spinning top. You know the classic toy that kids have played with for ages (quite a few adults too I may add.) It's been a rather fun object to work on, and I'm not done yet. But, let me share what's been going on with this project and where I am right now.
So for the last couple of weeks, I've been working on a concept that started out quite simple, and has evolved from there into many different aspects. What is it? It's a spinning top. You know the classic toy that kids have played with for ages (quite a few adults too I may add.) It's been a rather fun object to work on, and I'm not done yet. But, let me share what's been going on with this project and where I am right now.

I suppose in some ways, this project actually began years ago when I carved two small tops on the lathe for my then two year old son as a present. Spinning toys are after all quite amusing, there's something about trying to make it spin as long and evenly as possible, and I thought my kid would enjoy this. The designs I carved back then were quite small, and actually featured a rather different shape than what I'm working with right now.

The first spinning top made on the lathe
Those initial tops have been laying around the house since then, on the coffee table, on the desk etc... and every now and then we take them out and play with them a little bit. However, a while ago, it struck me that it would be interesting to take this concept further and develop a new design that was more substantial and that could spin longer. After all, the initial tops were neat looking, but they didn't work all that great.

You can only spin in this configuration
A few things struck me as problematic with them. The first one was quite small in size, and I was thinking it would be neat to increase the mass here dramatically, which would give you something quite chunky to play with (and after taking a brief look online, any spinning tops you may come across to buy are very small).
We also have the shape to deal with. This one, while interesting looking is rather off in terms of balance. The narrow edge needs to go on top and that's what you hold on to when you spin (not great for getting a good spin going), you can't turn it around even though it kind of looks like you could (and that was my intention initially), because the balance doesn't work then. It's kind of cute visually, but not really that functional, even though you can make it work.

The second top has a different shape but is problematic in other ways. I noticed, the distance between the point that spins and the large rounder mass around it isn’t quite large enough. That makes it so the edges of the round easily touch the table surface if you don't get a perfect spin going. You can still get spinning, but it’s a little harder.

So that was my starting point. One top that had too much of a distance between the point that touches the table and the round, and one that had too little. The other thing to notice was how these tops spun. Neither one spun especially straight, however the 2nd one did it a little better. And after playing around with different shapes, I’ve realized that some tops can spin quite straight and narrow, while others can start moving around in a circle and sometimes wander off the table. It depends on the design, and also how you spin it.
Size was something that concerned me right away. There was something appealing about having a larger top. However a larger size overall, means you need a larger piece of wood to work with in the first place. So I started looking over my wood supply trying find large pieces that would accommodate a re-design in a larger scale, and I realized I needed blocks that were at least 2 1/2 inches in diameter (quite a large piece in other words!)
In terms of tools, while it's fun to use a lathe for one off pieces, I think it's rather interesting to design something that's repeatable, and for that the rotary attachment on my Avid CNC is perfect. It's pretty much a lathe in most regards, and what you do is, design a piece of 3d dimensional software and let the spindle cut it out from there. Of course what's so appealing about this, is you can start out with a design, cut it out, try the top out, and then make small adjustments. Next up you cut out a new version etc..... and continuously improve your previous version.

Now some people could probably do this rather exactly on the lathe, but the CNC is neat because of the exactness of the design, as well as the possible repeatability.

Over the past couple of weeks now, we've been cutting a fair amount of tops in different kinds of woods, making minor changes over time. The question quickly became: how long can you make a top spin? Of course that question is not entirely simple. Every design decision regarding the top affects its ability to spin, but it almost always comes back to balance. Where is the weight located? How balanced is it? How pointy should the point touching the table be? How steep should the angle be from the larger round? What should the upper section be like where you hold on to create the spin etc.... All of those are things to consider and in the next couple of posts (and later in a detailed video) I will go into the process and the problems associated to this project.
YouTube Livestreams
Lately I've been getting into hosting livestreams on YouTube about different maker-related subjects. It's been a fun opportunity to connect with people and to explore ideas and projects in a more relaxed way.
Here are the latest ones:


SUNJOY Gazebos, Pergolas & Outdoor furniture 13% off with Discount Code "DARBINORVAR"

It's almost spring and summer and high time to start thinking about your outdoor spaces. While building a pergola or gazebo can be a fun project (I've done it! You can do it!), sometimes, you really just want to pick something up that makes life a little easier and where you just have to do some assembling.
If you're thinking about buying a gazebo, pergola, canopy or really any other outdoor furniture or structures, then I just wanted to share that I have a great discount code for ALL Sunjoy products (this code is valid on all non-sale items). The code is "DARBINORVAR" and will give a 13% discount!
I'm going to put up my own SUNJOY wood and metal gazebo in a couple of weeks, but I just wanted to share the discount code ahead of time, in case anyone else is getting started on their spring planning.
Queen Bed Cut List

Cut List
Four Main Boxes
8 - 29x12x0.75 inches (736x304x19mm) - sides
2 - 28.5x12x0.75 (724x304x19mm) - middle
4 - 31.5x12.0.5 (800x304x12mm) - backs
4 - 33x29x0.5 (838x736x12mm) - tops
8 - 15.38x3x0.5 (391x76x12mm) - bracing pieces
Four Drawers
8 - 23x10x0.75 inches (584x254x19mm) - sides
8 - 12.875x10x0.5 (305x254x12mm) - front & back
4 - 15.125x11.25x0.5 (384x286x12mm) - drawer faces
4 - 22.5x13.38x0.25 (578x340x6mm) - bottoms
Front Boxes w/ Basket Area
2 - 29x12.5x0.5 inches (736x317.5x12mm) - tops
4 - 29x12x0.5 (736x304x12) - bottoms & back
2 - 12x11.5x0.75 (304x279x19) - sides
2 - 11.5x2.2 (292x50x50) - posts
Wall Organizer
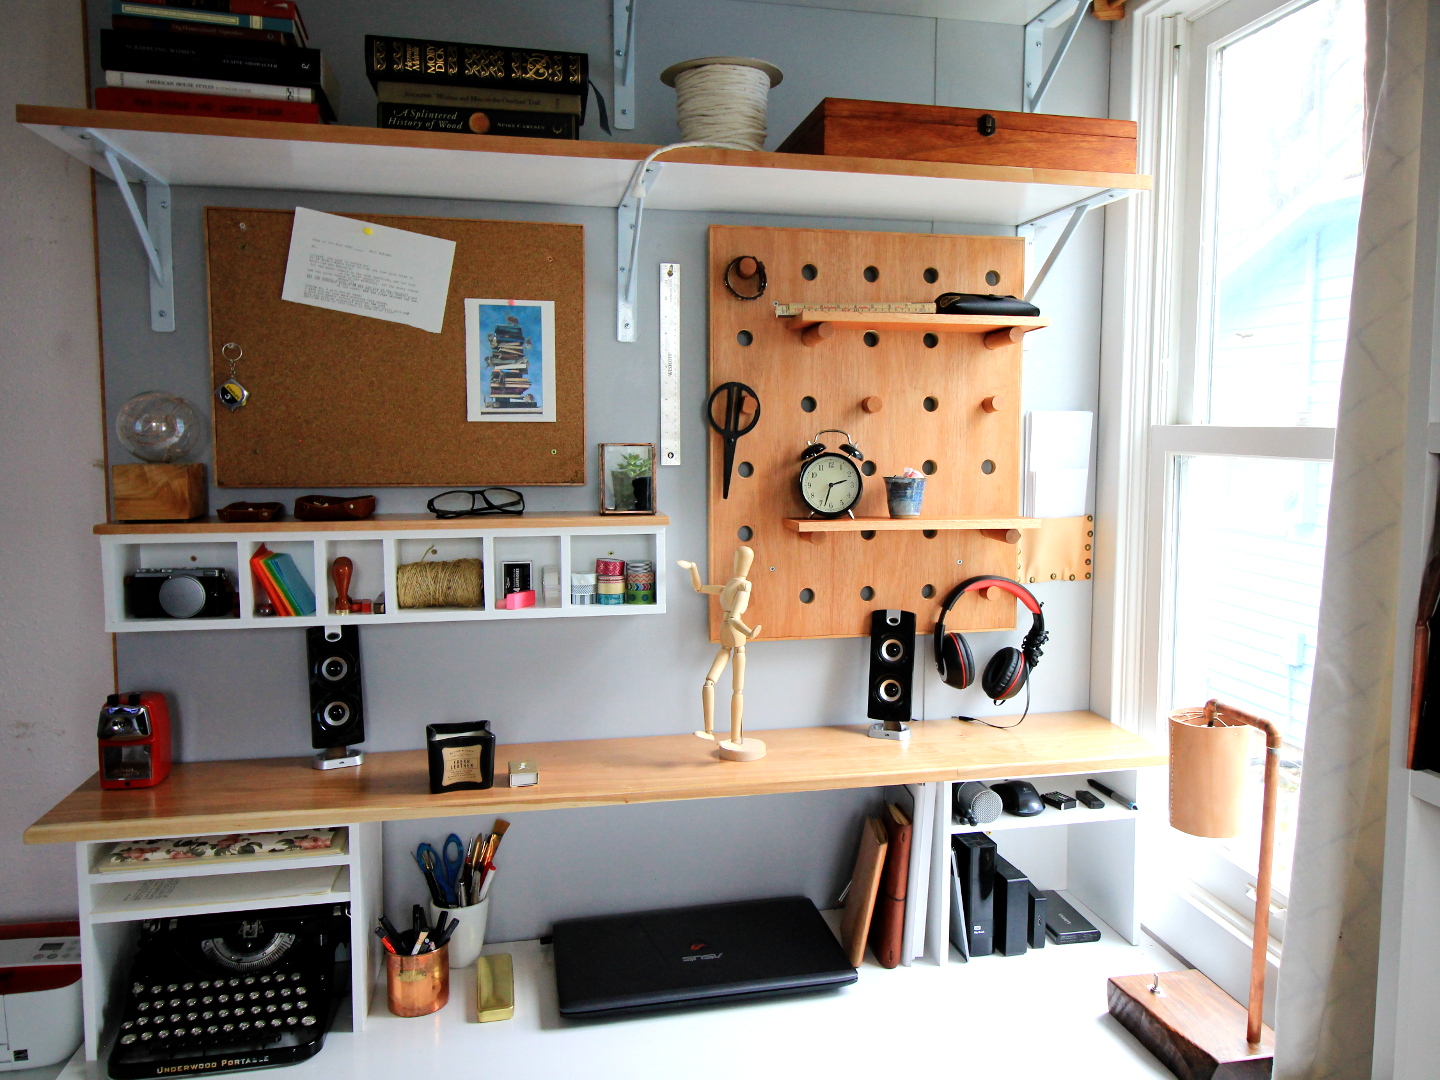
When planning out this project, I really wanted to create the ultimate home office system where various objects had a home, especially my beautiful typewriter, electronics devices, laptop and odds and ends. At the same time I wanted to make the space feel airy and light, so I decided to distribute the various shelves, cubbies etc... on the entire wall. Here are some more in-depth pictures of how it turned out.

The overall unit

The oversized pegboard or dowel board, is definitely one of my favorite pieces!
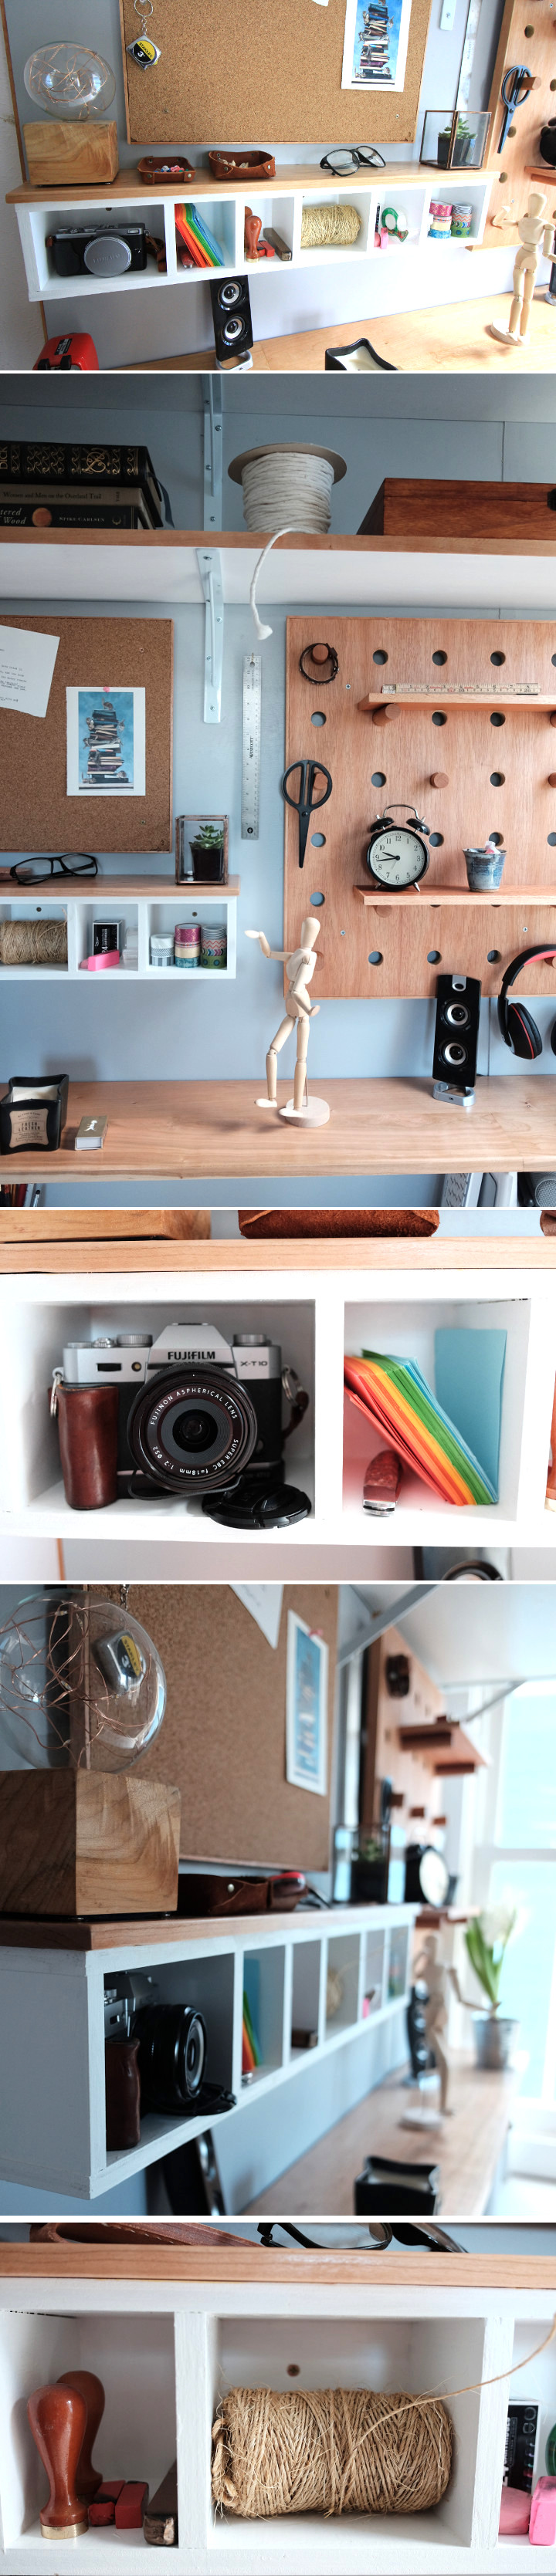
The cubby unit holds various odds and ends.
Building an Articulated LED Task Lamp
This project is all about building a useful task lamp with led strip lights that are really easy to work with. In this build I use baltic birch plywood but any wood will be fine. Below are some links to the products I either used to make this project or tools that were very helpful.
Parts Used in this Build
- LED Strip Lights - http://amzn.to/1Ubz6BC
- Remote Control - http://amzn.to/1nuiQ1F
- 12v Power Supply - http://amzn.to/1M4Y8Md
- Soldering Iron - http://amzn.to/1TIpUWV
- Variable Power Supply - http://amzn.to/1UbzMHc
- Plexiglass - http://amzn.to/22GeDI2
- Plywood - http://amzn.to/1VFWSqy
- Lamp Magnets - http://amzn.to/1VFX88P
- 6 - 2 inch 1/4" bolts
- 12 - 1/4" flat washers
- 12 - 1/4" lock washers
- 6 - 1/4" wing nuts
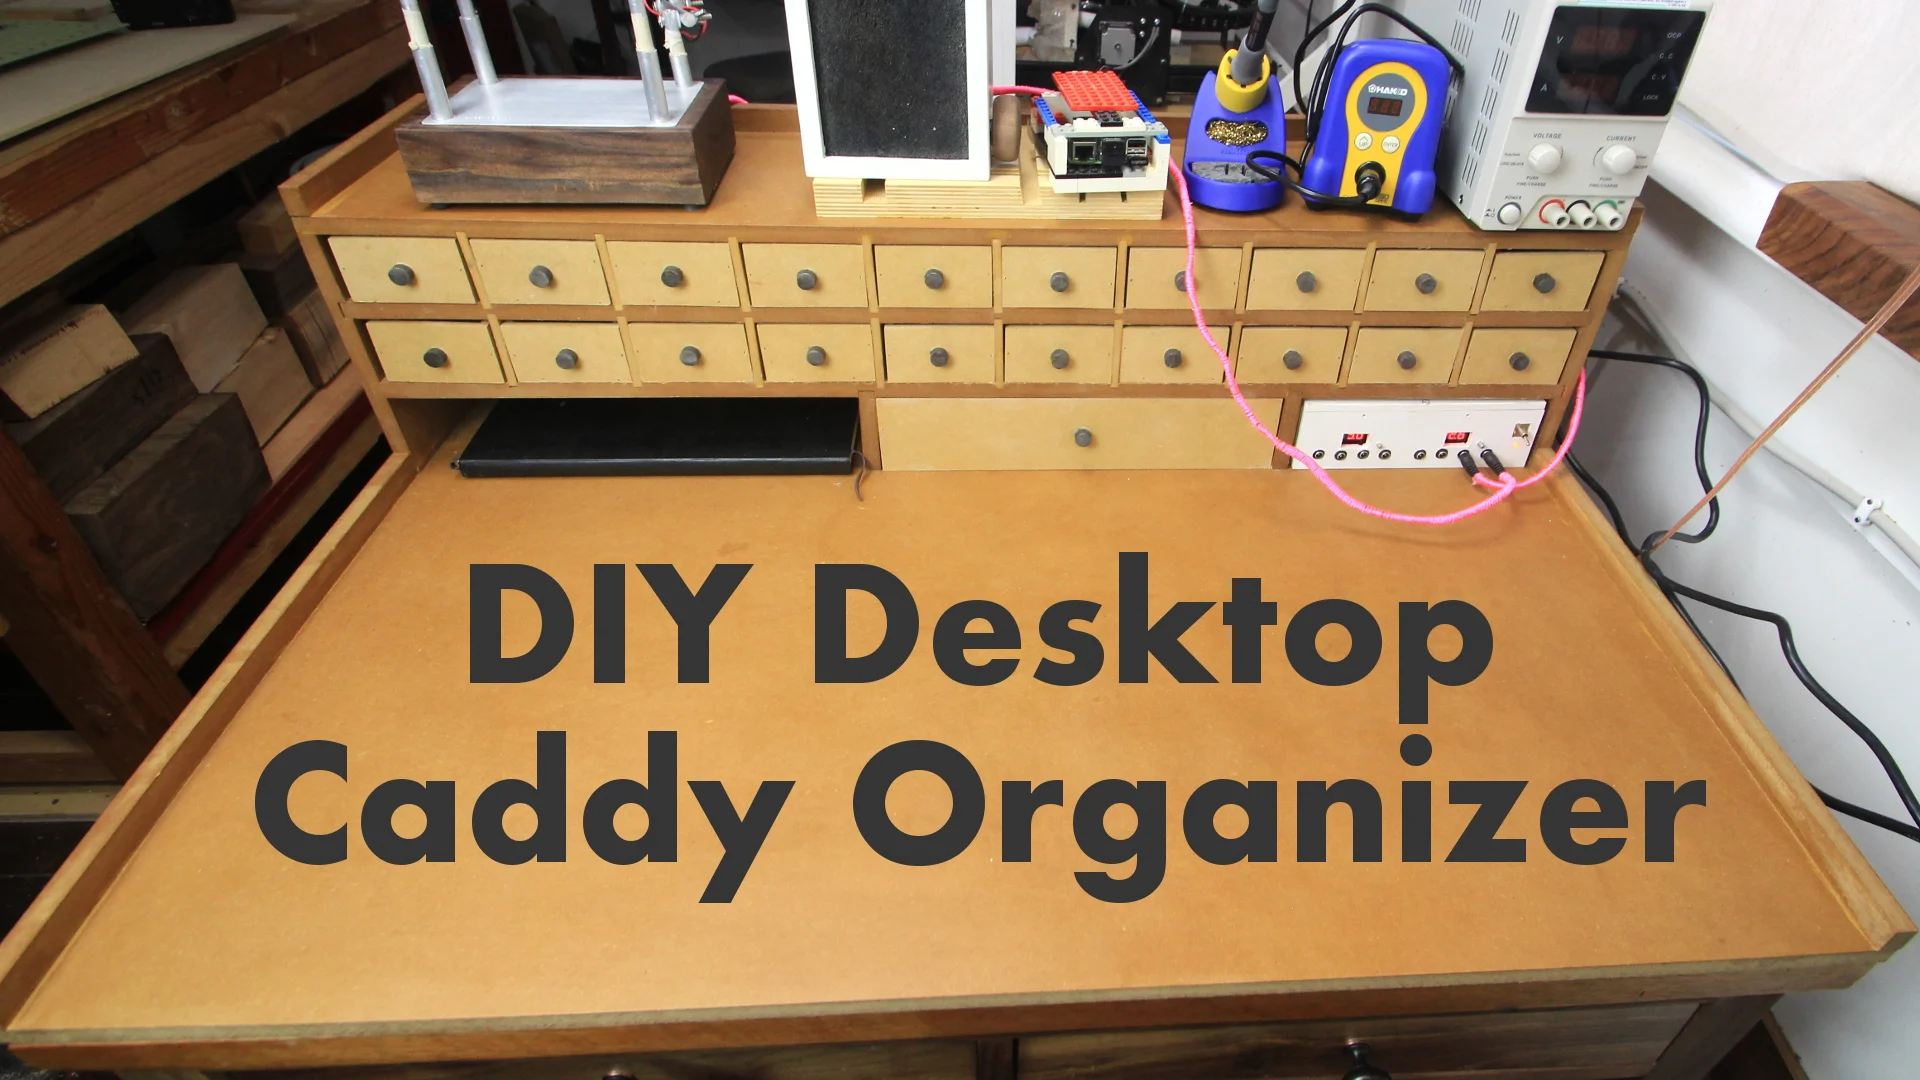
Ultimate DIY Small Parts Organization Caddy

Desktop Organizer - Parts Used (Affiliate Links)
Dewalt Table Saw - http://amzn.to/1PC1Iy7 (This is the model I use)
Dewalt 611 Router - http://amzn.to/23aS27S
23 Gauge Pin Nailer - http://amzn.to/1PC1yH8
De-Waxed Shellac - http://amzn.to/1PC1BTk
Water-Based Poly - http://amzn.to/1PmCzqT
Cut List
Using 1/2" MDF
1 @ 25" x 37" - Base
2 @ 7 1/2" x 8" - Sides
2 @ 36 1/2 x 8" - Shelves
1 @ 3/4" x 36" - Top Railing
2 @ 3/4" x 8" - Side Railings
2 @ 3/4" x 17" - Base Stops
2 @ 3" x 8" - Bottom Supports
Using 1/4" MDF
18 @ 2 1/4" x 8" - Cubbie Dividers
20 @ 2 3/4" x 7 1/2" - Drawer Bottoms
40 @ 1 7/8" x 7 1/2" - Drawer Sides
40 @ 1 7/8" x 3 1/4" - Drawer Fronts & Backs
1 @ 37" x 8 3/4" - Back of Organizer
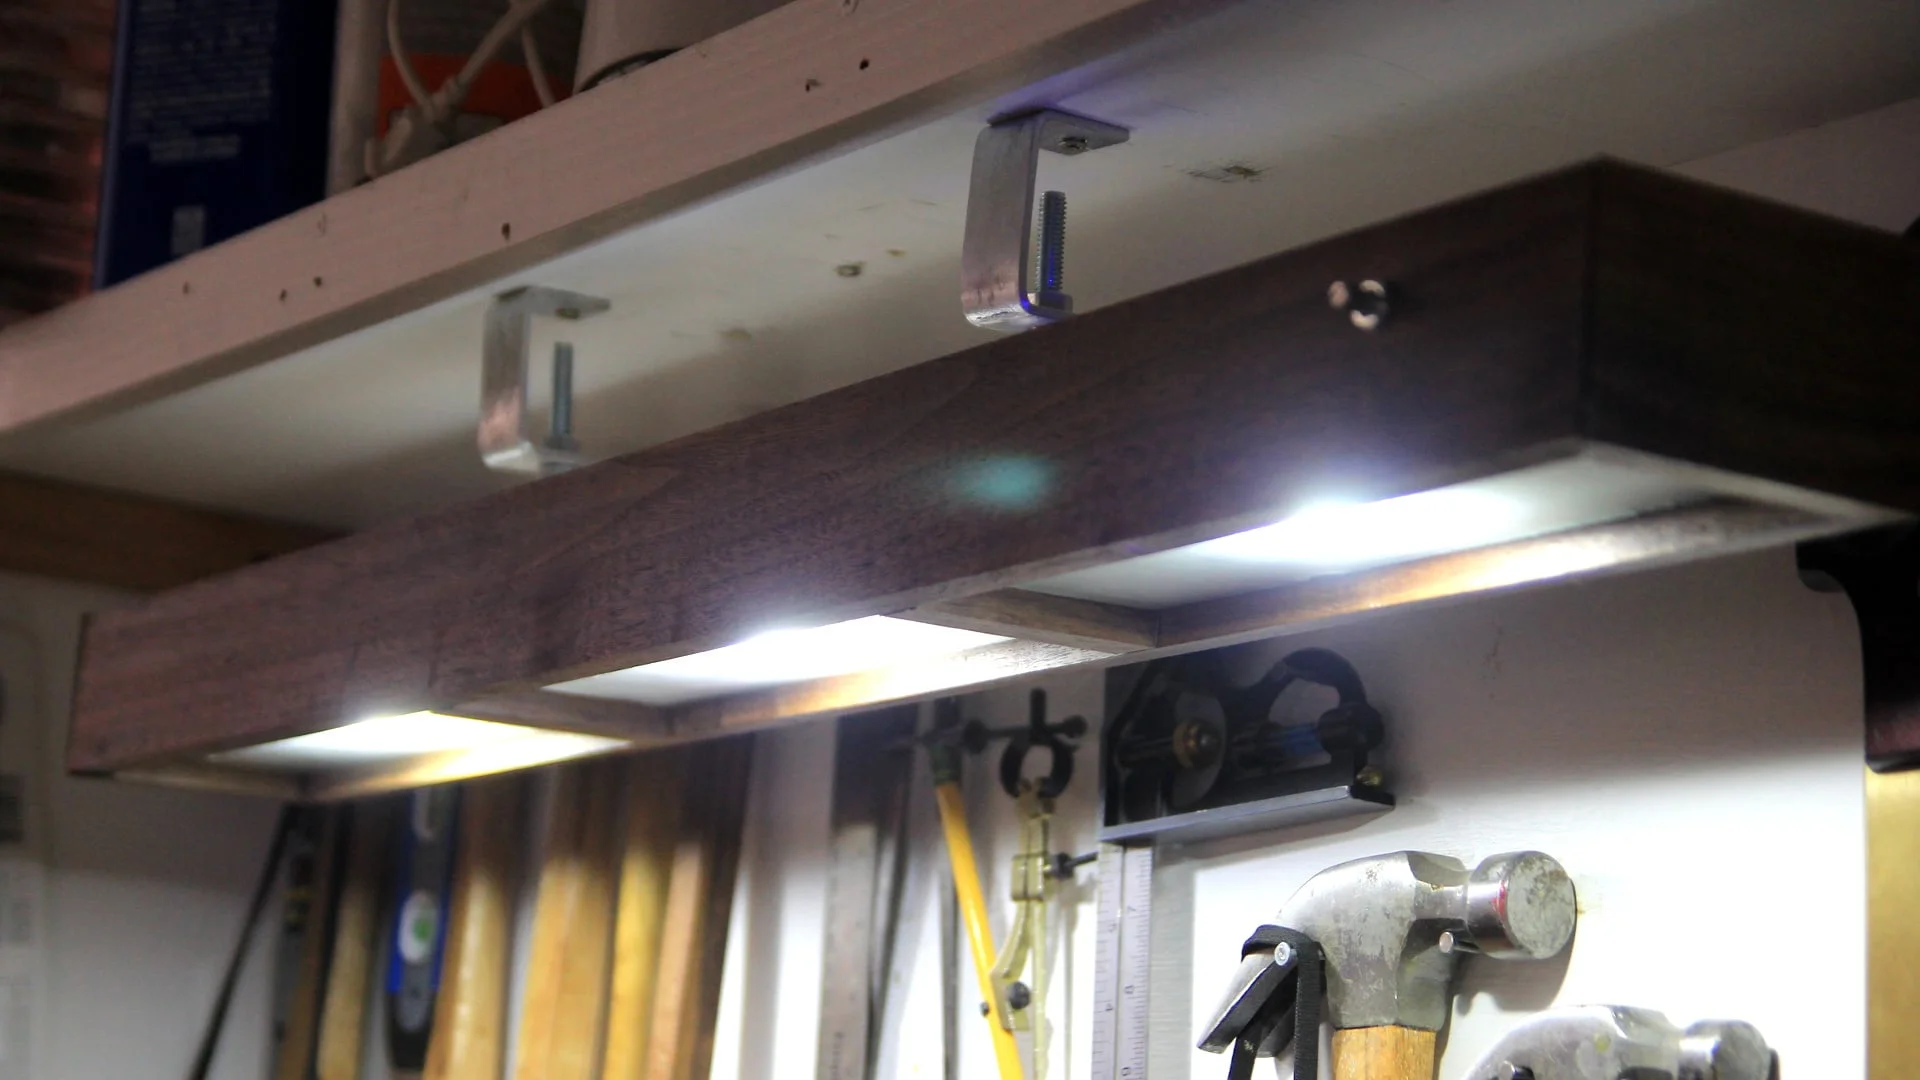
How To Make a Dimmer for a Light Fixture w/ High-Powered LEDs

With the following parts, including some aluminium and walnut I made an LED lighting fixture with a PWM dimmer switch.
The code at the bottom will run on any arduino, although I used a 5 volt Adafruit trinket running at 8 mhz to control the switching on the transistor.
LED Lighting Fixture Parts - (Affiliate Links)
- Adafruit Trinket - http://amzn.to/1UPAyYx
- LEDs - http://amzn.to/1KdHh91
- Voltage Booster - http://amzn.to/1UPAkR2
- Pigtail Connectors - http://amzn.to/1KdHwAU
- Heat Sinks - http://amzn.to/1UPAp7k
- Thermal Adhesive - http://amzn.to/1KdHAAH
- AC/DC Adapter - http://amzn.to/1UPACYb
- Circuit Board - http://amzn.to/1UPAR5z
- Tip31 Transistor - http://amzn.to/1Rm84aS
Arduino-Based Dimmer Code for the Light
const byte potIn = 2; // reads the value from the potentiometer
const byte ledOut = 0; // assigns the output to pin #0 on the trinket
int potValue;
int ledValue;

void setup() {
pinMode(ledOut, OUTPUT);
}

void loop() {
potValue = analogRead(potIn); // reads value of the potentiometer
ledValue = map(potValue, 0, 1024, 0, 255); // assigns a number relative to the voltage output
analogWrite(ledOut, ledValue); // outputs a voltage number to the led
}
Women in Woodworking (3rd Podcast)
Itunes: https://itun.es/i6Sx4jF
Sound Cloud: https://soundcloud.com/darbinorvar
RSS Feed: http://feeds.soundcloud.com/users/soundcloud:users:153407357/sounds.rss
In many ways, ever since I began woodworking seriously I have been wondering why there weren't more women involved in making things. I mean woodworking, but also building anything with metal, cnc and engineering too.
I don't think it is a surprise to anyone that women are not generally associated with woodworking. I mean there are examples, but for the most part women are bunched in with the softer crafts like sewing, cooking and home décor. If instagram is any indication though, there are a lot of women giving woodworking and design a new life that is both nuanced and practical.

I think the focus here in my mind is where are things going from here. I try not to pay too much attention to the past, I am future-oriented and am really excited to see where the new-found freedom in building, engineering and design goes. I come from one basic perspective, people behave based on what is around themselves. If you expose men and women, boys and girls to building many will be interested, if we do not then they are unlikely to think about it as a way to express themselves.
I don't agree that we should accept the concept of gender-based behaviors as they are assumed to relate to woodworking and building. I believe things are learned, learned through our environments, and our environments are vast and complicated. Lets agree there is no “building gene”, and that lots of people would benefit from the experience and pleasure of building and woodworking, if only it was presented in a way to attract more interest.
It seems like we often impose barriers to subjects on ourselves or others all the time. Many of these preferences are because of a wrong perspective, like that certain people can do math, and some cannot. Other subjects just seem more male, which can bar women from thinking about them as an option as well. It is more likely that these environments we either create ourselves or adopt from our families are just wrong. I believe that if you want to be a good example and encourage others to learn to express themselves in woodworking, making or even science you must watch out how you yourself believe about these subjects. You are really more of an influence on others than you realize.
New Podcast - Thoughts on Shop Organization
This is my shop from about a year ago...
Organizing spaces can be daunting for some, and a thrill for others. I love an organized shop. I am the type who needs to see what they have on the walls, or be able to have memorized every single item in a few specific important drawers. Some people hates shelves, some dislike drawers, I fall into the middle somewhere and try to look at the overall environment more than one specific type of organization.
I guess the first thing I think about is getting a basic overview of your tools and supplies. Generally I look at it this way, have I used that tool, or supply in the last year? This goes for any tool, like an old drill, or any scrap wood or paint that has not been used in quite a while. Most of my initial organization centers on how often I need that thing.
I like to keep my most important and often used tools right near me, usually out in the open. This includes many of my hand tools like chisels, planes and rulers. I also love to have one go-to drawer that has many small tools like utility knives, small screw drivers, measuring tapes...etc. You can see in my shop that I have exactly this setup with a wall of tools right behind my main workbench and a set of 10 drawers below that. I am always rearranging what is in some of these drawers to account for how to better use the space, but the main smaller ones I keep the same over time.
I have tried to organize my shop into little zones or areas. The first thing I designed and created was the main workbench with the tool wall and counter/drawers behind it. This is the most important area because I stand there all the time. The second most important area is the computer area with the desk and printer. While many people do not have a computer area in their shop I find it to be space put to good use. Besides designing projects on paper as well as on the computer, the x-carve needs a computer connection to operate so it has become a vital part of the shop. Another important but overlooked point is that this is a business and you need to keep contacts and company information somewhere that you can work throughout the day, so the printer and file cabinet is quite important for that type of organization.
Those two areas are the most important in my shop and were designed right off the bat. Other areas such as my new tinker area have developed over time, and are still in development. Even though my shop is very small at 12 x 16 feet I can think about it in zones to make the most out of the space. My new french cleat organization wall over the drill press bench is a good example of that. In the last year that area has changed numerous times. First I added the bench for the drill press earlier this year that had a bandsaw, then I moved out the bandsaw...you just never know what you will have to work with. Each of the previous incarnations were never considered permanent, because I know that you have to be flexible and be ready to accommodate new tools and orientations if you want to be effective.
Even my overhead camera rig has been changing locations recently. At this point it is on the tinker table because the x-carve is using my former photography table, so you just never know. It may not seem like it but in this small space I have 7 horizontal surfaces, made up of tables, benches and counters that all form these little nooks of specific tools and supplies.
One of the things I keep in mind is that your environment affects you. And that can be both positively and negatively. So I will undoubtedly be changing things once again as the need arises. It seems like I am always trying to add more to my shop, and that means if one new thing comes in, I need to get rid of something else I no longer use. A well-used shop is an constant flux and I expect more changes over the next year.
Mallet Giveaway!
To celebrate that I've hit 20,000 subscribers on YouTube I'm having a mallet giveaway!
I've been on YouTube a little over a year now and I'm so excited to reach this level with my channel. As a way to say thank you, I want to give away one of my hand crafted mallets.
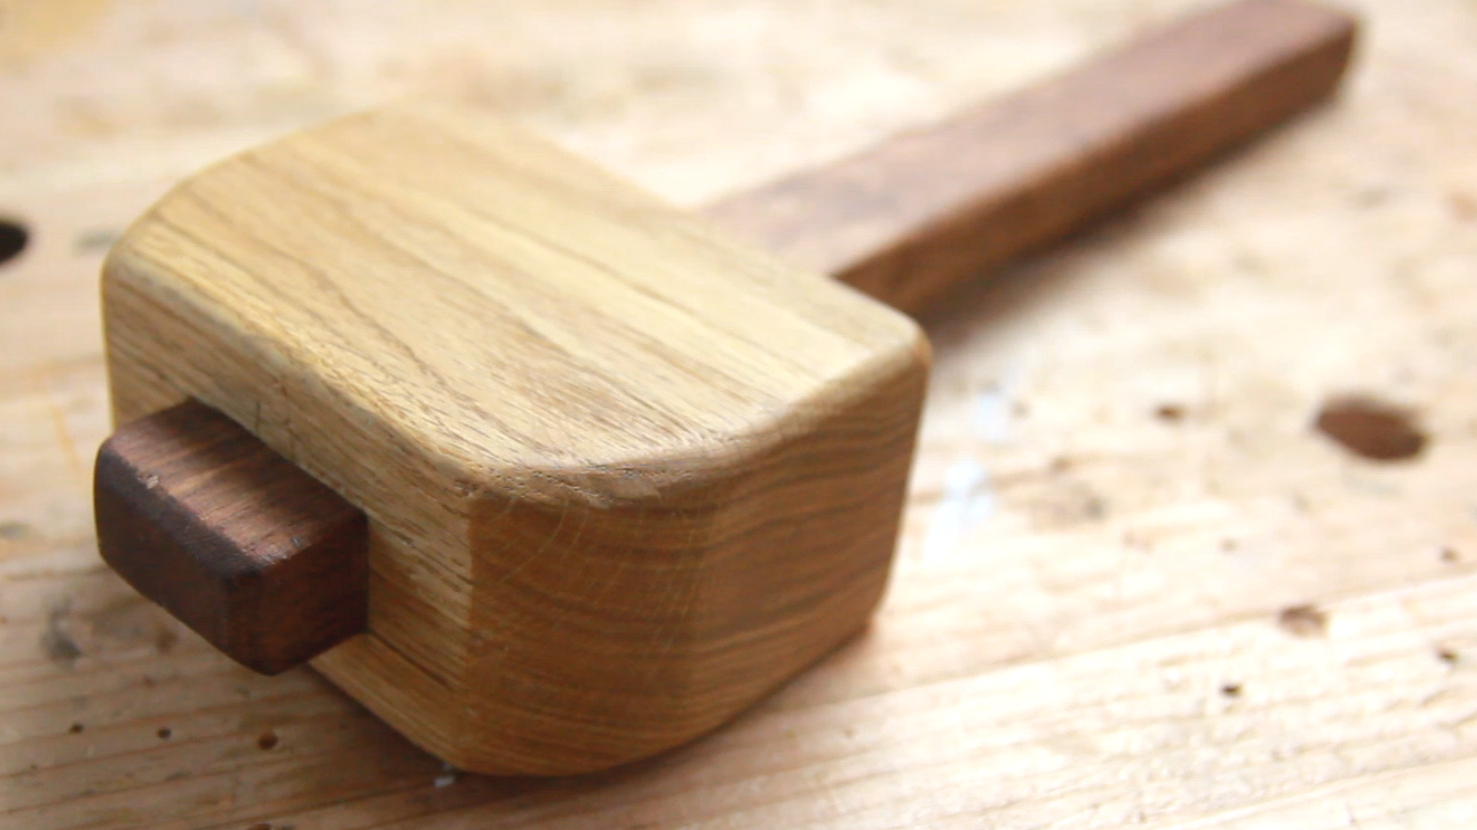
This is a medium sized mallet (perfect for just about any task) and it's made with an oak head and an ipe handle.
To enter the giveaway, please subscribe to my weekly newsletter, and make sure you're subscribed to my 2nd channel DarbinNotes. I will contact the winner by email on May 28th. This giveaway is open to the whole world.
Newsletter - Overhead Camera Rig, Popular Mechanics & Giveaway!
Hi guys!
How are things? Everything is going well here in the shop. I'm working on a couple of new video concepts and projects, and trying to perfect my editing too which is always interesting.
Did you get a chance to check out my latest video - DIY Overhead Camera Rig?

This is one of those projects that I've been meaning to make for a long time. Anyone who has ever tried to get overhead shots using a tripod knows how annoying it can be, so this set up makes it a lot easier to comfortably write and record, set up time-lapses and just photograph things from an overhead point of view.
In terms of the editing on this one, I really wanted to go very pure and simple, with instructions and no nonsense. I think it came out good, and it was featured on Instructables homepage as well as on Popular Mechanics, so that was pretty cool.

Want a little more information about my shoppe and the stuff that I'm making? In this video I go over everything that I have in the shoppe, my thoughts about working with different types of wood and more. Tour of the Darbin Orvar Shoppe Products

[sneakpeak]
I've been on YouTube a little over a year now and I'm just about to hit 20,000 subscribers! I'm quite excited about this and to celebrate I'm going to be hosting a giveaway with one of my mallets. In order to enter the giveaway, I'm asking to subscribe to this newsletter (which YOU already are!) and to make sure you're subscribed to Darbin Notes. So if you want a chance to win one of my mallets, just make sure you're also subscribed to my second channel. I will have a video out soon about this, so this is just a little update on what's to come.
Patreon
I do this full time, so your support means a lot to me! If you'd like to support what I do, then please check out my Patreon page and consider becoming a Patron for exclusive videos and inside info! http://patreon.com/darbinorvar