Building an Exterior Door w/ Framing Lumber — Part 1
Build a small exterior door from ordinary 2×6 and 2×4 framing lumber. Part 1 covers milling the frame stock, gluing floating panels, and planning the joinery with a scale model.
We’re building a small exterior door from ordinary kiln-dried whitewood framing lumber. The finished door will be about 69 inches tall and 29 inches wide, using 2×6 material for the rails and stiles and resawn 2×4s for two floating panels.
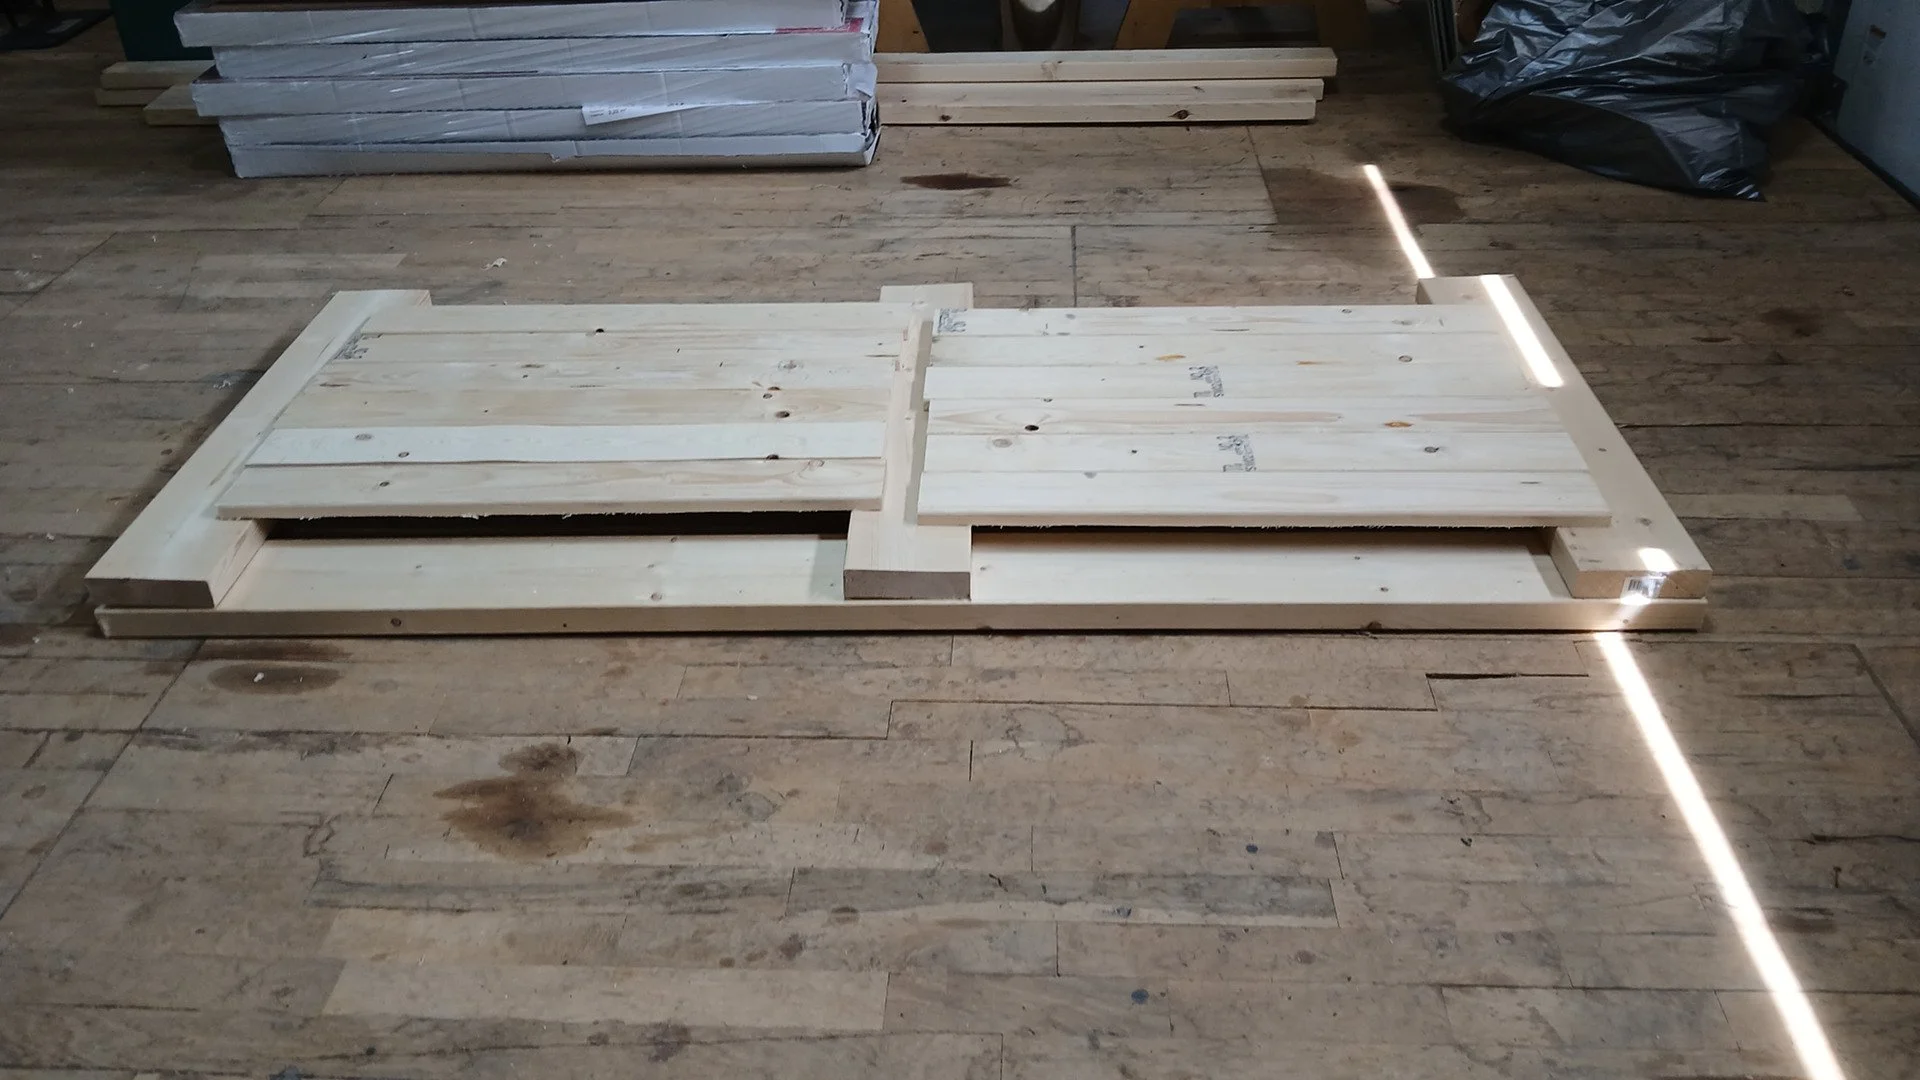
The first photo shows the main pieces laid out before the joinery is cut. Starting with readily available construction lumber makes the project affordable and easy to source, but every board first has to be flattened, straightened and brought to a consistent thickness.
Milling the Frame Stock
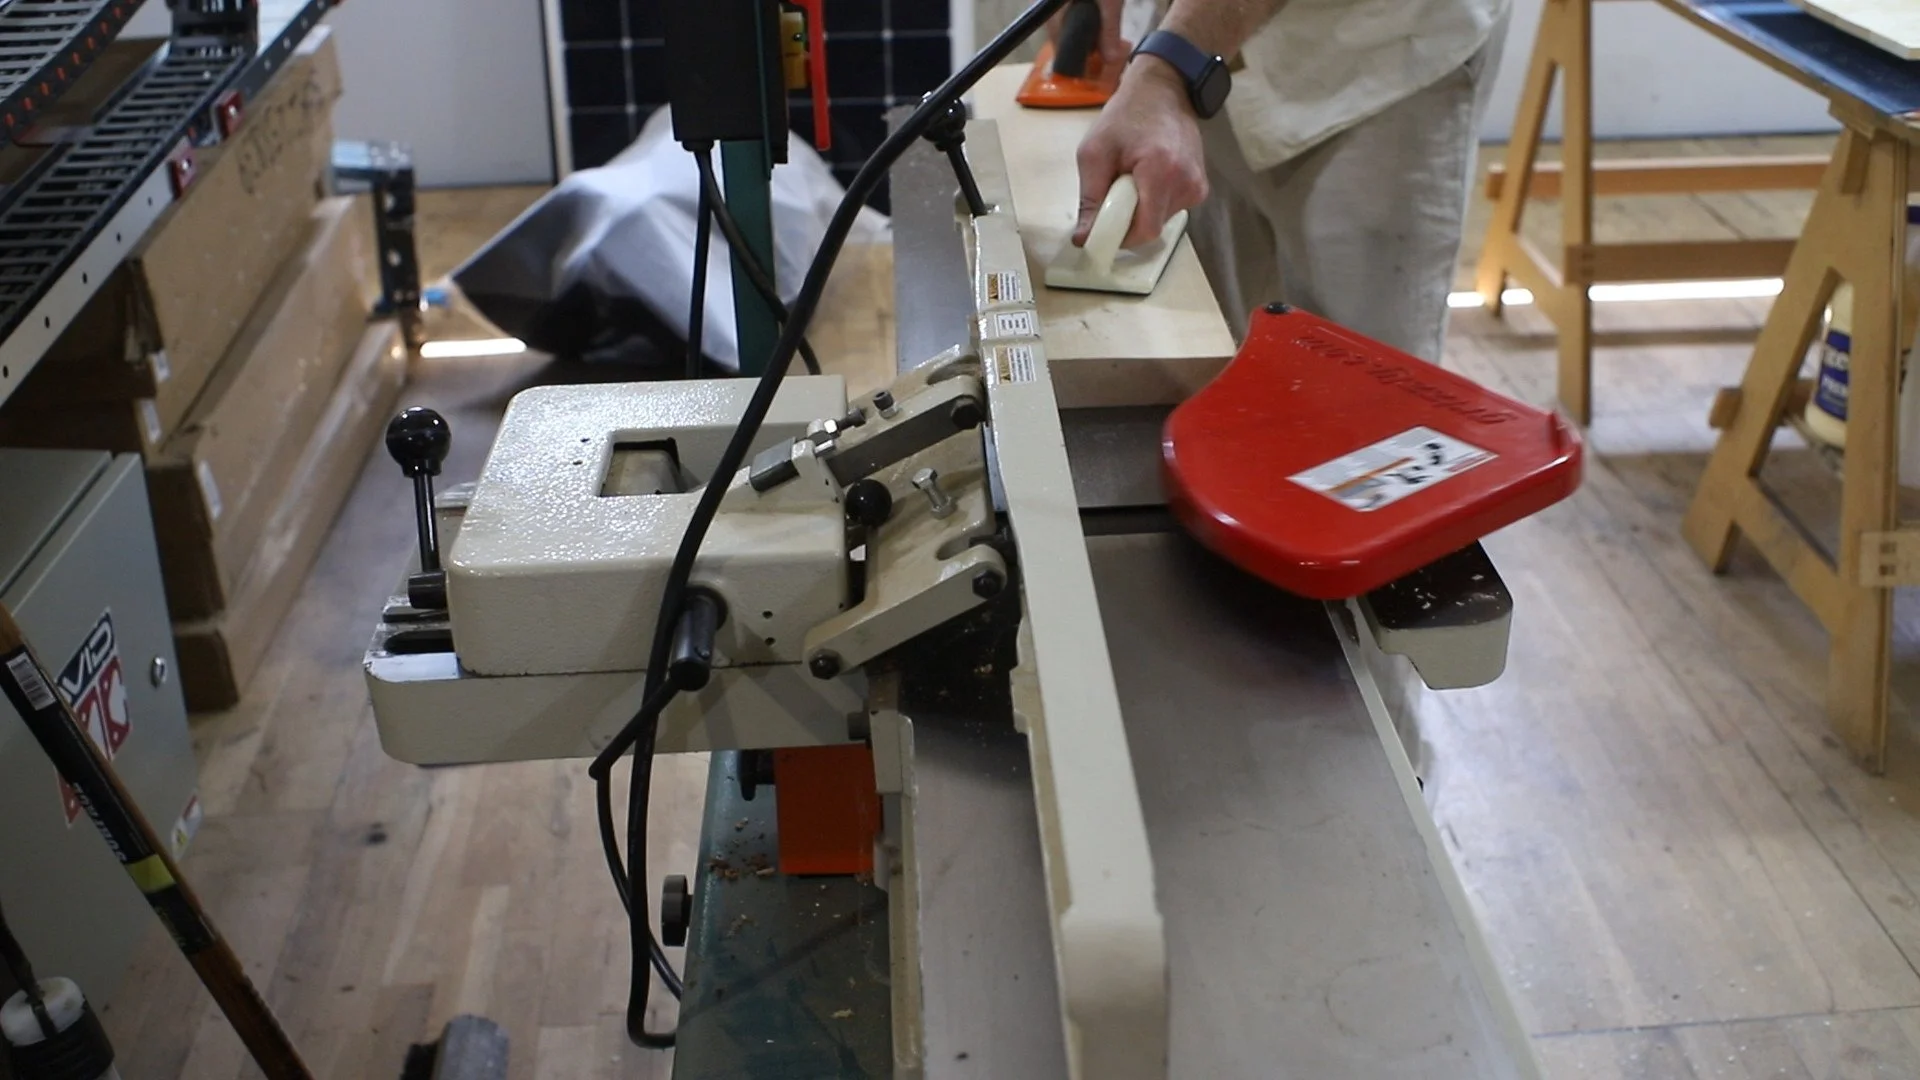
Each 2×6 was run over the jointer to establish one flat face and one straight edge. From there, the boards went through the planer until all of the rails and stiles matched.
After the twists, cups and rough surfaces were removed, the stock finished at roughly 1¼ inches thick. That is a little thinner than the existing 1⅜-inch door, but it is still substantial enough for this small exterior door and works with the hardware we plan to use.
Making the Floating Panels
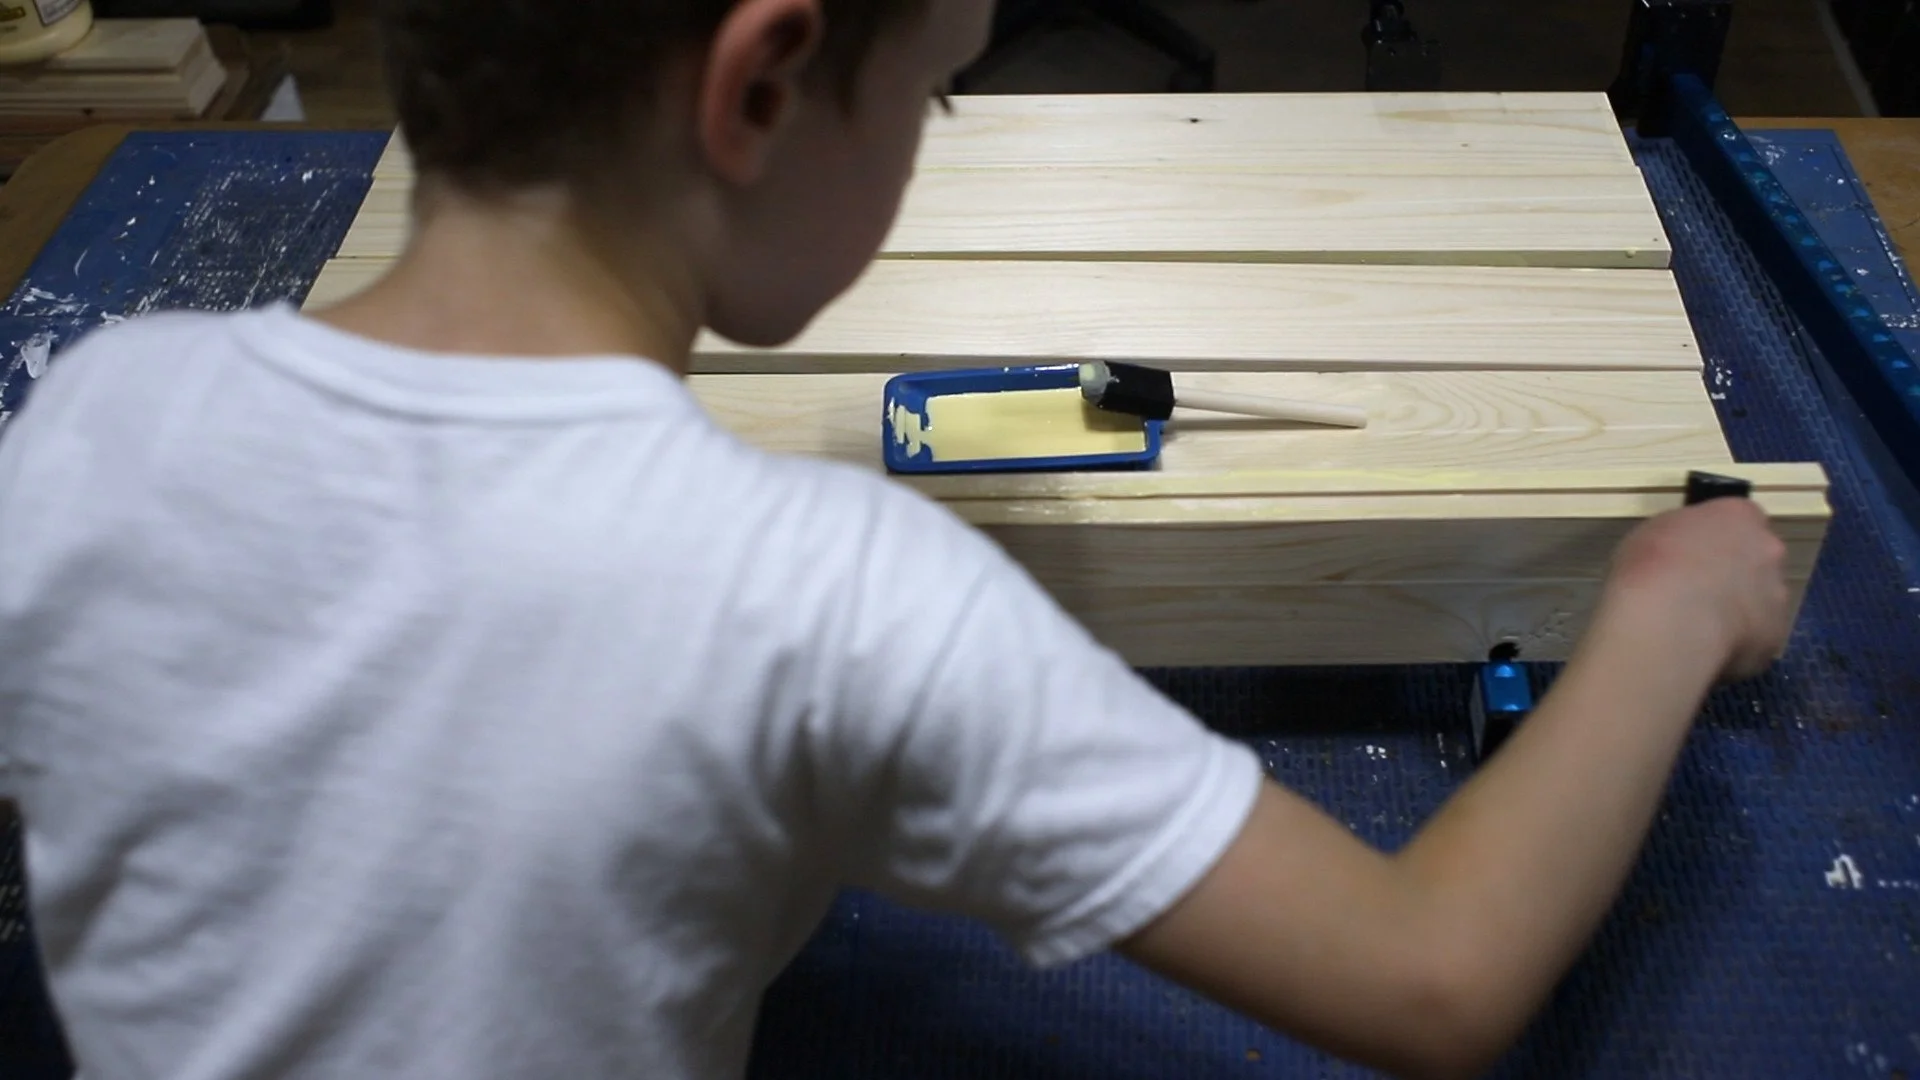
For the two interior panels, we resawed 2×4s into thinner pieces and edge-glued six pieces for each panel. The narrower boards were much easier to resaw on the bandsaw than wider 2×6 material.
The panels are not structural, so their exact thickness is less important than fitting comfortably inside the grooves in the surrounding frame. They need enough room to float as the wood expands and contracts.
Once the glue cured, we coated both faces with a thin layer of two-part epoxy. This filled small knots and voids and helped stabilize the construction lumber before the door receives its exterior finish.
Planning the Joinery with a Scale Model
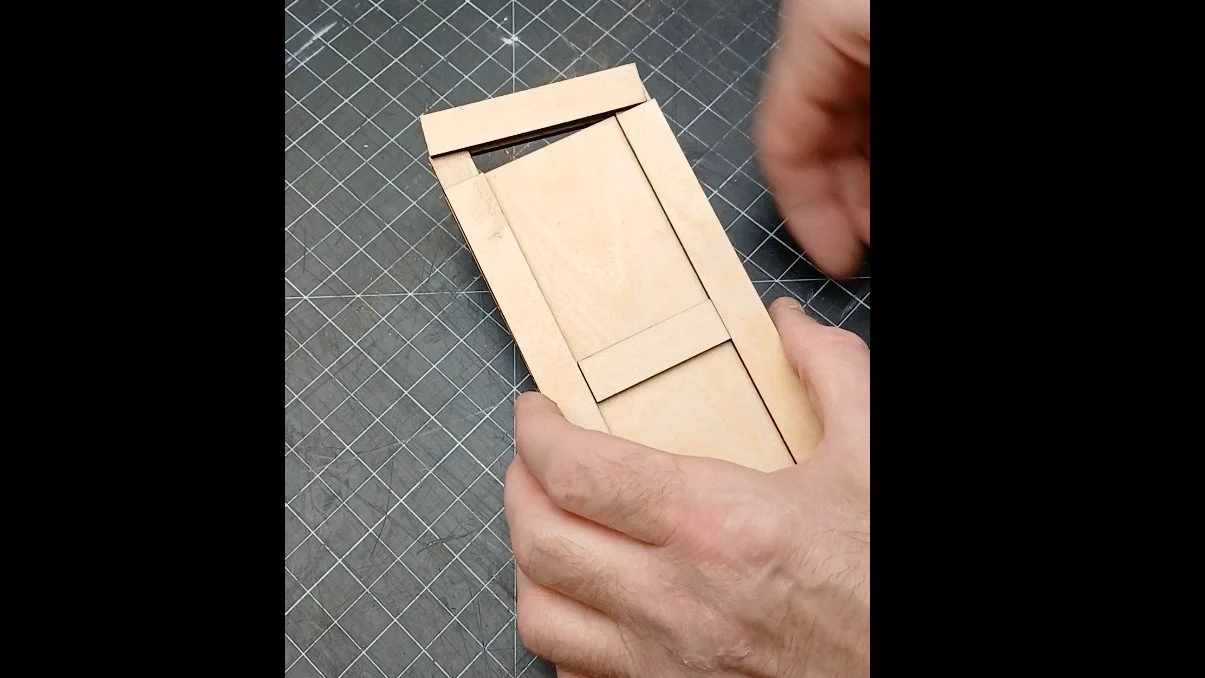
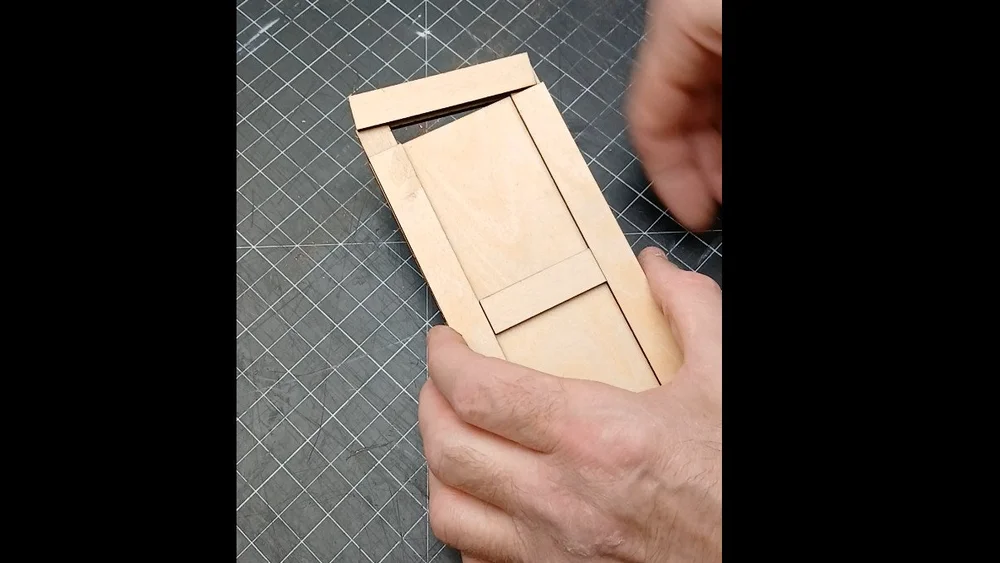
Before cutting the full-size pieces, we made a small model of the entire door from approximately 3 mm plywood at about 1:10 scale. The model makes the relationship between the rails, stiles and floating panels much easier to see, and the parts can be assembled and taken apart by hand.
The outside corners will use bridle joints, while the center rail will use mortise-and-tenon joints. The long vertical stiles carry the tongue portion of the bridle joints, and the shorter horizontal rails receive them—an orientation that also makes the full-size cuts practical on the table saw.
With the layout confirmed, the next step is cutting the joinery in the real door. That will be covered in the next post.
Making Notebooks using our DIY Bookbinding Tools
One of my favorite hobbies to come back to is always bookbinding: it’s fun, relaxing, and you end up with something tactile for yourself or others. This time I decided to make some notebooks - because they’re great for gifts, and I also feel like I can never have enough!
One of my favorite hobbies to come back to is always bookbinding: it’s fun, relaxing, and you end up with something tactile for yourself or others. This time I decided to make some notebooks - because they’re great for gifts, and I also feel like I can never have enough!
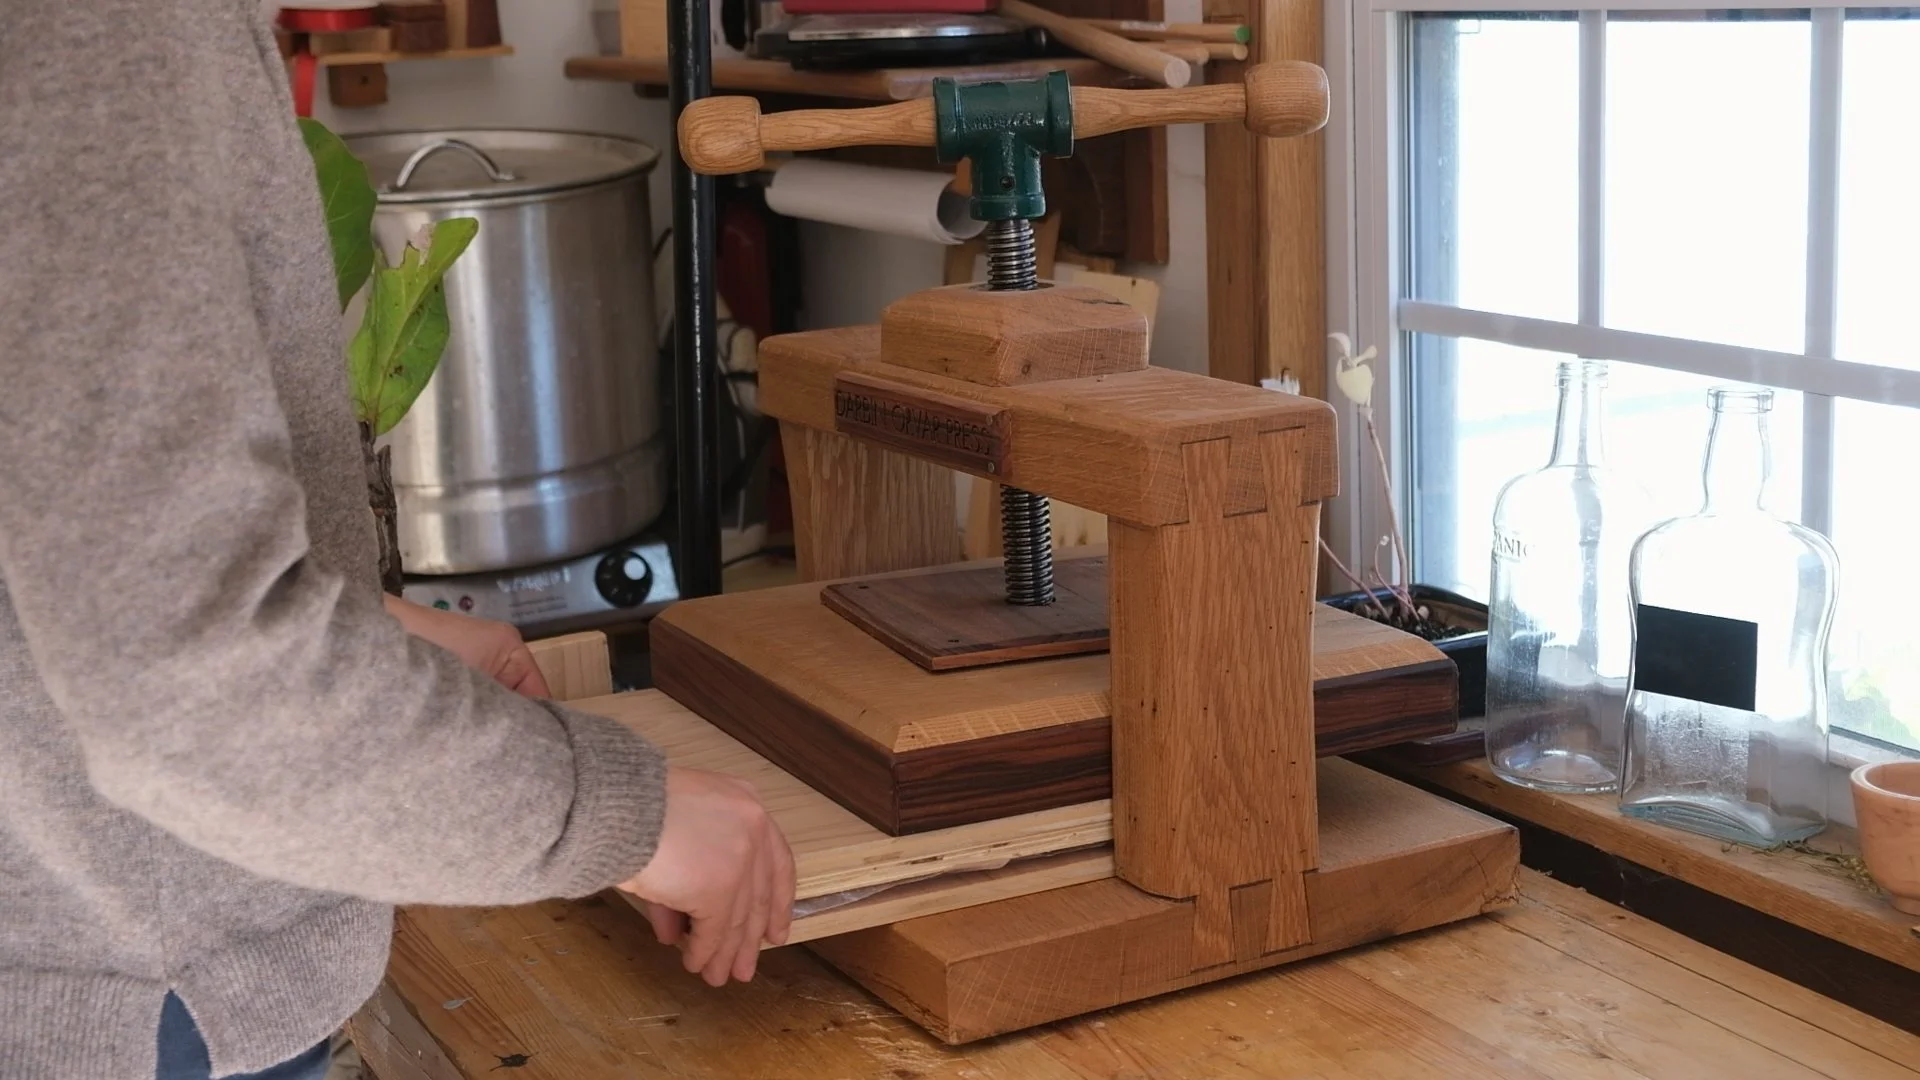
You can do bookbinding without fancy equipment at all, but it’s a real treat to use the tools we’ve built: the press, sewing frame, book vise, and plow cutter. They’re classic tools that make the whole process smoother, more efficient and you get very nice results.
If you’ve ever been interested in making tools like these yourself, I’ve put together detailed building plans for each one, along with videos showing them in use. They’re solid woodworking projects and a good fit if you enjoy traditional, practical tools.
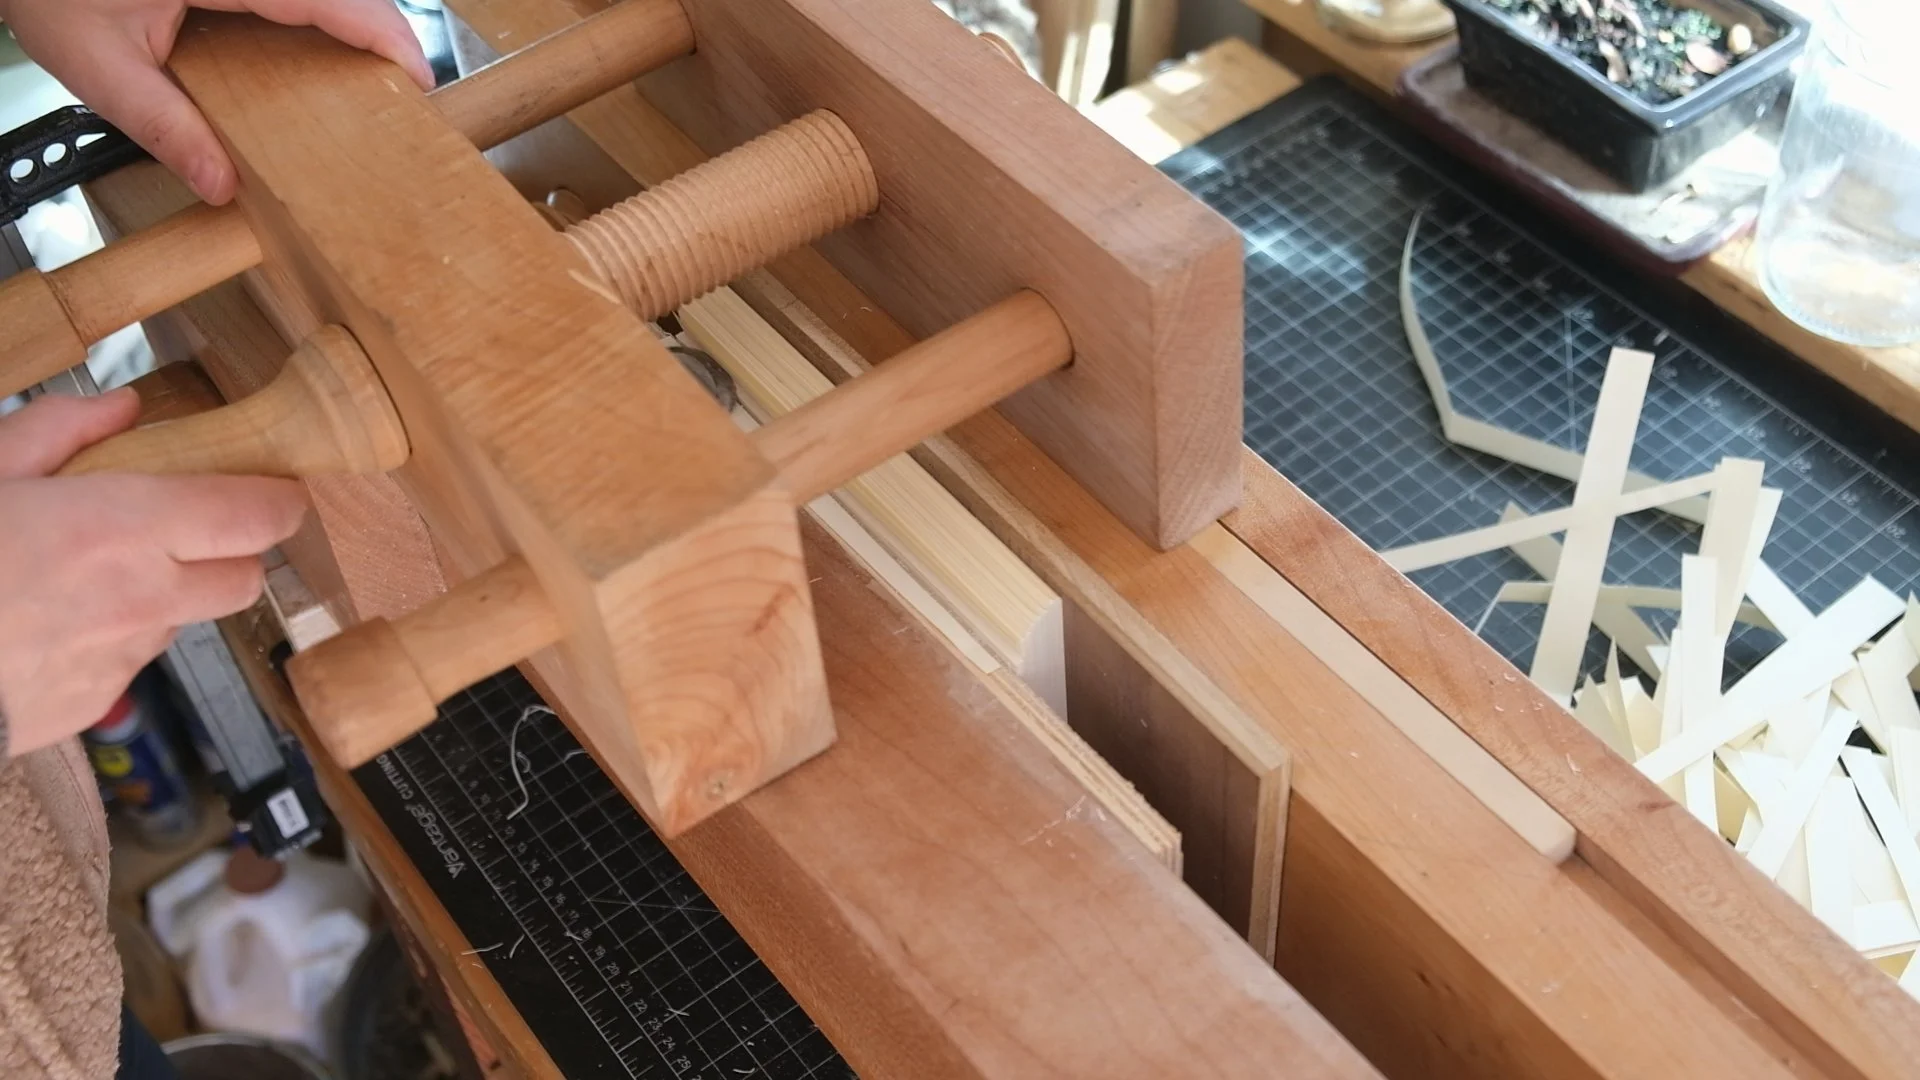
This time around I made a series of small notebooks, using marbled paper for the covers and a heavier cotton paper for the pages. Bookbinding is a craft that moves at its own pace—there’s sewing, pressing, trimming, gluing, and lots of drying time in between—but that’s part of the appeal. You settle into the rhythm and let the materials do their work.
If you’d like to see the tools in action or learn more about making them yourself, you can find the video and plans linked below. And if you end up building any of them, I’d love to see what you create.
Building a Simple Lathe Stand from 2x4s
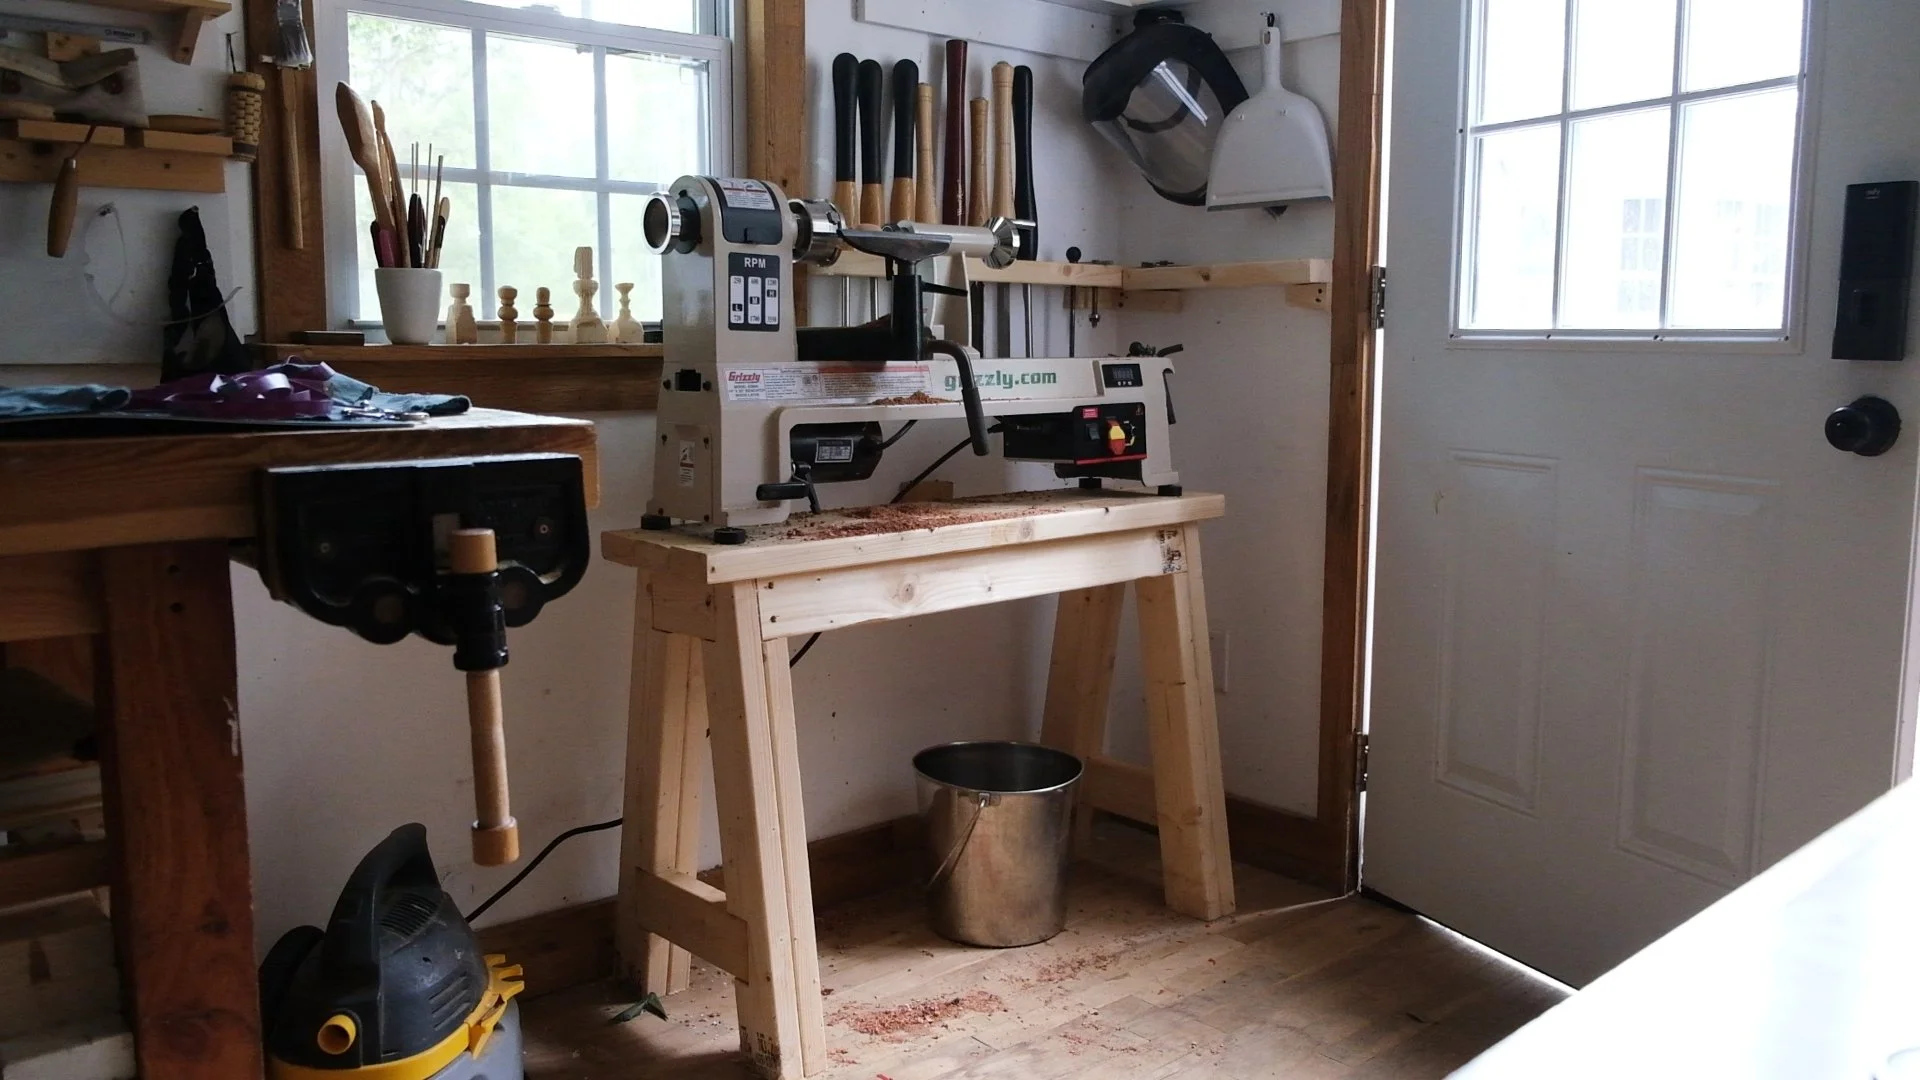
In my tiny workshop, space is always at a premium. Recently I needed to find a home for my Grizzly G0844 bench-top lathe. Instead of buying a bulky store-bought stand, I decided to build one myself — something small, sturdy, and perfectly sized for my space. The best part? It only took about five 2x4s, some glue, and a few screws used mostly as clamps while the glue dried.
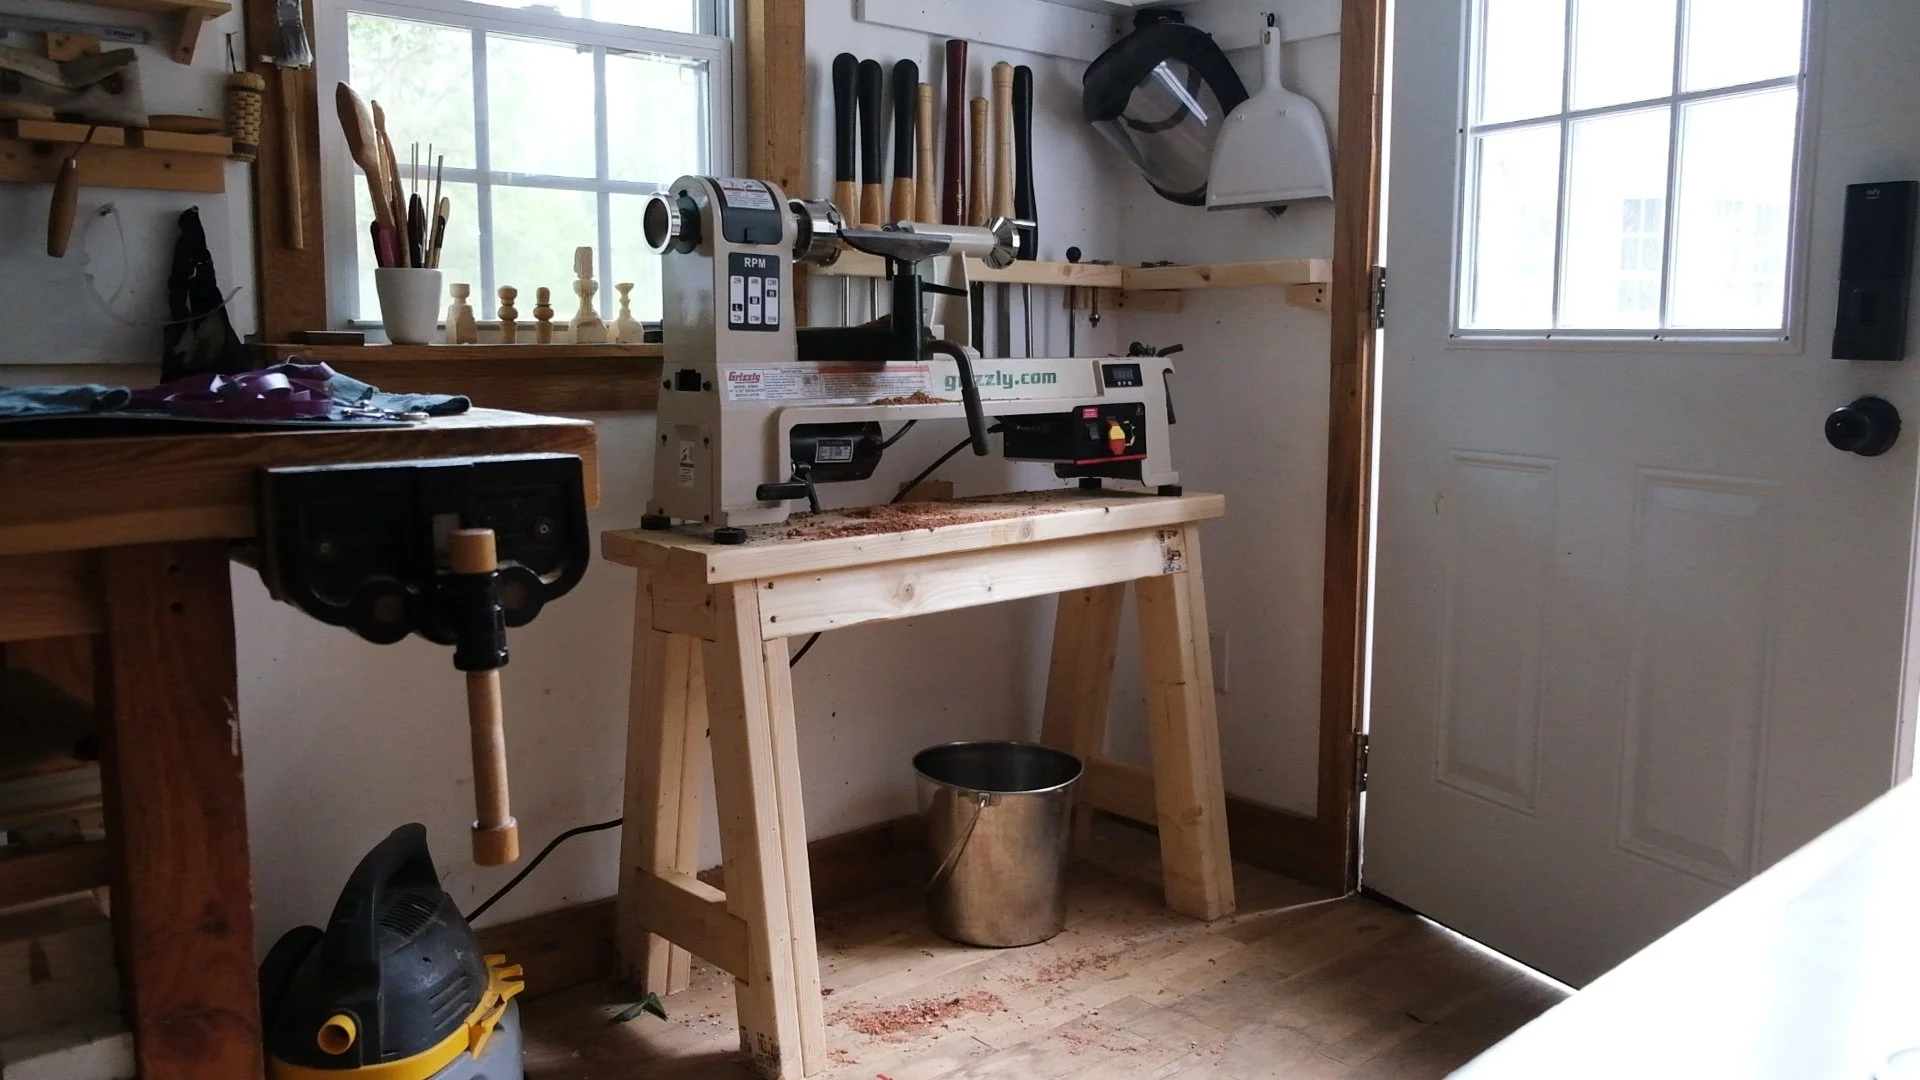
In my tiny workshop, space is always at a premium. Recently I needed to find a home for my Grizzly G0844 bench-top lathe. Instead of buying a bulky store-bought stand, I decided to build one myself — something small, sturdy, and perfectly sized for my space. The best part? It only took about five 2x4s, some glue, and a few screws used mostly as clamps while the glue dried.
This project shows how effective simple joinery can be when the weight of the tool is carried wood-on-wood.
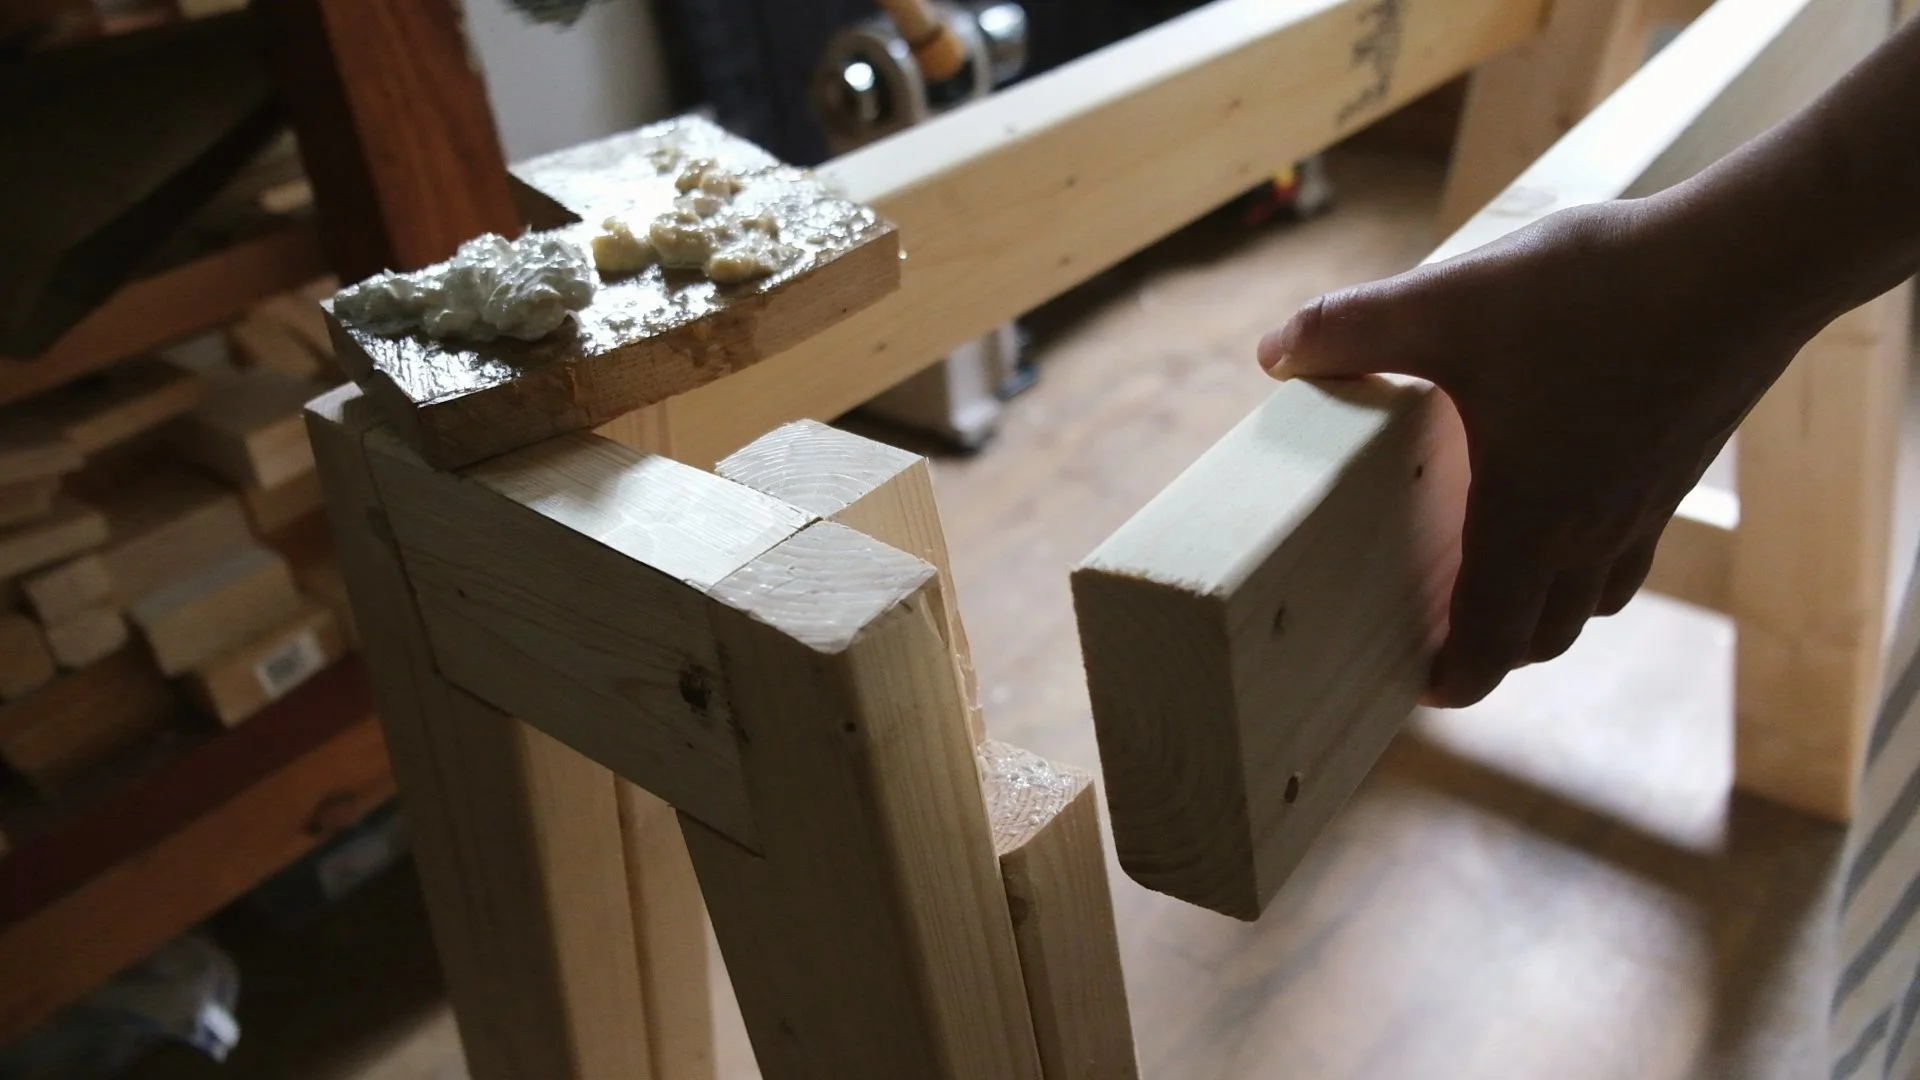
Designing the Stand
The first step was figuring out the right height. For comfort and safety, the center of the spindle should line up with your elbow when you’re standing at the lathe. For me, that worked out to about 43 inches.
I also wanted the stand to have splayed legs. A small footprint was important since the stand sits near a door, but the slight angle of the legs makes it much more stable than if they were straight.
Rather than using 4x4s, I laminated pairs of 2x4s for each leg. That made it easier to cut the necessary joinery: the inside pieces hold the long rails, while the outside pieces hold the shorter side rails. Everything locks together like a puzzle.
Why Build Instead of Buy?
A store-bought stand might work, but building your own lets you:
Size it perfectly to your height
Make it fit your workshop footprint
Keep costs low
Use simple, durable joinery that lasts
In the end, I got exactly what I wanted: a small, sturdy, and perfectly fitted stand that doesn’t waste space or wobble when in use.
If you want to see the whole process step by step, including the joinery cuts and assembly, check out the video here:
👉 Watch the Lathe Stand Build on YouTube

Building a Cyber Deck from Wood w/ a Raspberry Pi 5
building a cyberdeck with a raspberry pi 5 and an nvme with an sdr module and a high quality raspberry pi camera.

CyberDeck
I call this a CyberDeck, but the name doesn’t really fit, it's more like an all-in-one computer. Unlike a laptop, it doesn’t fold down and isn’t portable enough to fit in a bag.
This is a DIY system: I made a custom case, chose common components, and wired everything together. Many “DIY computers” just toss a Raspberry Pi or similar single-board computer into a box, and you wonder if anyone actually uses them for real tasks. I wanted something I would actually use, and even prefer over commercial alternatives.
Part of the appeal is simply building something custom, but beyond that, I wanted features I’d never found in a single device. For example, I’ve owned a Raspberry Pi High Quality Camera for years, but never found a practical, robust way to use it. The ribbon cable is delicate, the wires are exposed, and the camera is awkward to position. Manual lens focusing only added to the hassle.
I had similar frustrations with an SDR (Software Defined Radio) USB stick: I never had a reliable, repeatable setup. Integrating both devices into a custom case solved these usability issues.
Besides typical computing tasks, I also tinker with ESP32s, do programming, experiment with databases, and enjoy Linux in general. The Raspberry Pi 5 is well-suited to all these activities: it’s cheap, has accessible GPIO pins, and in my case, the 8 GB RAM model cost $80.
Basic Cost Breakdown
Item Cost
Pi 5 $80
Case Fan (4-pin) $13
USB Breakout Cable $3
NVMe Hat $13
NVMe 256 GB $27
Mouse $11
Rocker Switch $1
Right Angle USB Micro $4
USB Powered Hub $29
Buck Converter $11
USB Sound Card $8
Speakers $11
SMA SDR Cable $10
Angle Antenna $10
10" Touch Screen $50
Keyboard $20
12V Power Supply $10
Approximate Total: $311
Items I already had:
ESP32
OLED
Wires
Camera
Speaker Amp
Miscellaneous connectors
Wood
Initially, I planned to use white oak for the final version and plywood for the test version. However, after building the CyberWriter (a related project), I realized how much I liked Baltic birch plywood and used it instead.
I used an XTool 40-watt diode laser for almost all cuts (except larger pieces, cut on a table saw), designing parts in Vectric Aspire and exporting SVGs to the laser software. Construction uses plywood in various thicknesses (1/8", 1/4", 1/2") and some 1/4" MDF for internal structures. A pin nailer was used sparingly; most joints rely on yellow glue.
Cable management is the hardest part—and still a work in progress.
Building Process
Building the CyberWriter first helped me refine the design. This build was more challenging because of the number of components and their installation order. The main case is glued together, but the speakers and OLED must be installed (and wired) before the keyboard. The Pi 5 mounts to the rear of the screen (as the Pi Zero did in the CyberWriter), but it’s larger, with a heatsink, fan, NVMe hat, and drive, making mounting trickier.
The screen, while similar to the writer, is now a touch screen: it adds a delicate ribbon cable for touch input, which affects mounting. The heavier screen and thicker glass also required design adjustments.
Adding new features (HDMI breakout, USB breakout, speaker amp, camera mount, etc.), especially those affecting the case exterior, complicates the wiring and installation sequence. “Feature creep” became a real issue—I originally wanted a breadboard and Pi/ESP32 breakouts under the keyboard, but abandoned that idea after wasted effort. I focused on making SDR and camera access easy instead. The always-connected OLED (via ESP32) enables convenient programming and monitoring.
The SDR requires a sturdy USB port and adequate power. It also generates significant heat during operation, which I address with a temperature sensor and an ESP32-controlled case fan. The OLED continuously displays fan speed, case temperature, and humidity for internal monitoring.
Installation order proved critical; components couldn’t be made too permanent in case removal or servicing was needed. The power supply was particularly challenging to sequence.
Power Supply
My goal was to use a single 12V power supply for everything: Pi, screen, SDR, speakers, amp, ESP32, OLED, and camera. I wanted to avoid relying solely on the Pi’s 5V/5A supply, especially since a USB breakout might also power peripherals.
Switching from 5V to 12V required additional components. I wanted the AC/DC brick inside the case, splitting power internally, and using a standard, easily replaceable AC cord—no external brick required.
After many iterations, the final solution is as follows: a 12V 5A supply wired to four screw terminals. One terminal provides direct, always-on power (for the ESP32 and OLED), while the other three are switched (with a red-LED case switch):
5V 6A buck converter
12V powered USB hub
12V case fan (speed-controlled by the ESP32 with an ATH10 temp sensor)
The buck converter is crucial since powering a Pi 5 without its standard supply can be tricky. I soldered three 2200 μF capacitors in parallel to stabilize voltage as the 5V leaves the buck converter, and I run it at 5.25V to compensate for voltage drop along the run. Power is delivered via USB Type-C.
I also tried powering via GPIO (with fuse and voltage protection), but ran into problems. Simpler proved better for my setup. For fewer peripherals, the standard Pi supply would suffice.
Batteries
For battery use, I recommend a similar 12V-centric approach. With 18650s, configure a 4S (four cells in series, yielding 12V) and use a buck converter to step down to 5V (5.25V). Offload power-hungry peripherals to a 12V USB hub. For longer runtime, a 4S2P (four series, two parallel) pack is preferable, but weight increases—eight 18650s plus a cell balancer and wiring is significant. Still, this is a safe, effective way to run a Pi 5 on the go for a setup like this.
To fit all power components, I built a tower structure to save internal space, adding about two inches to the case depth compared to the CyberWriter. The 12V AC/DC brick is at the bottom, buck converter in the middle, USB hub on top—giving easy access to ports. The buck converter’s small size leaves room on both sides, and the power brick is mounted flush with the case wall for plug access.
Summary:
This CyberDeck is an all-in-one, custom-built computer emphasizing robust usability, internal integration of peripherals (camera, SDR, ESP32), and a carefully considered power supply strategy. Construction prioritizes modularity, with lessons learned from previous builds, and power management tailored for safe, reliable operation.
The Ingenious Design of the Japanese Toolbox (And Why I Keep Building Them)
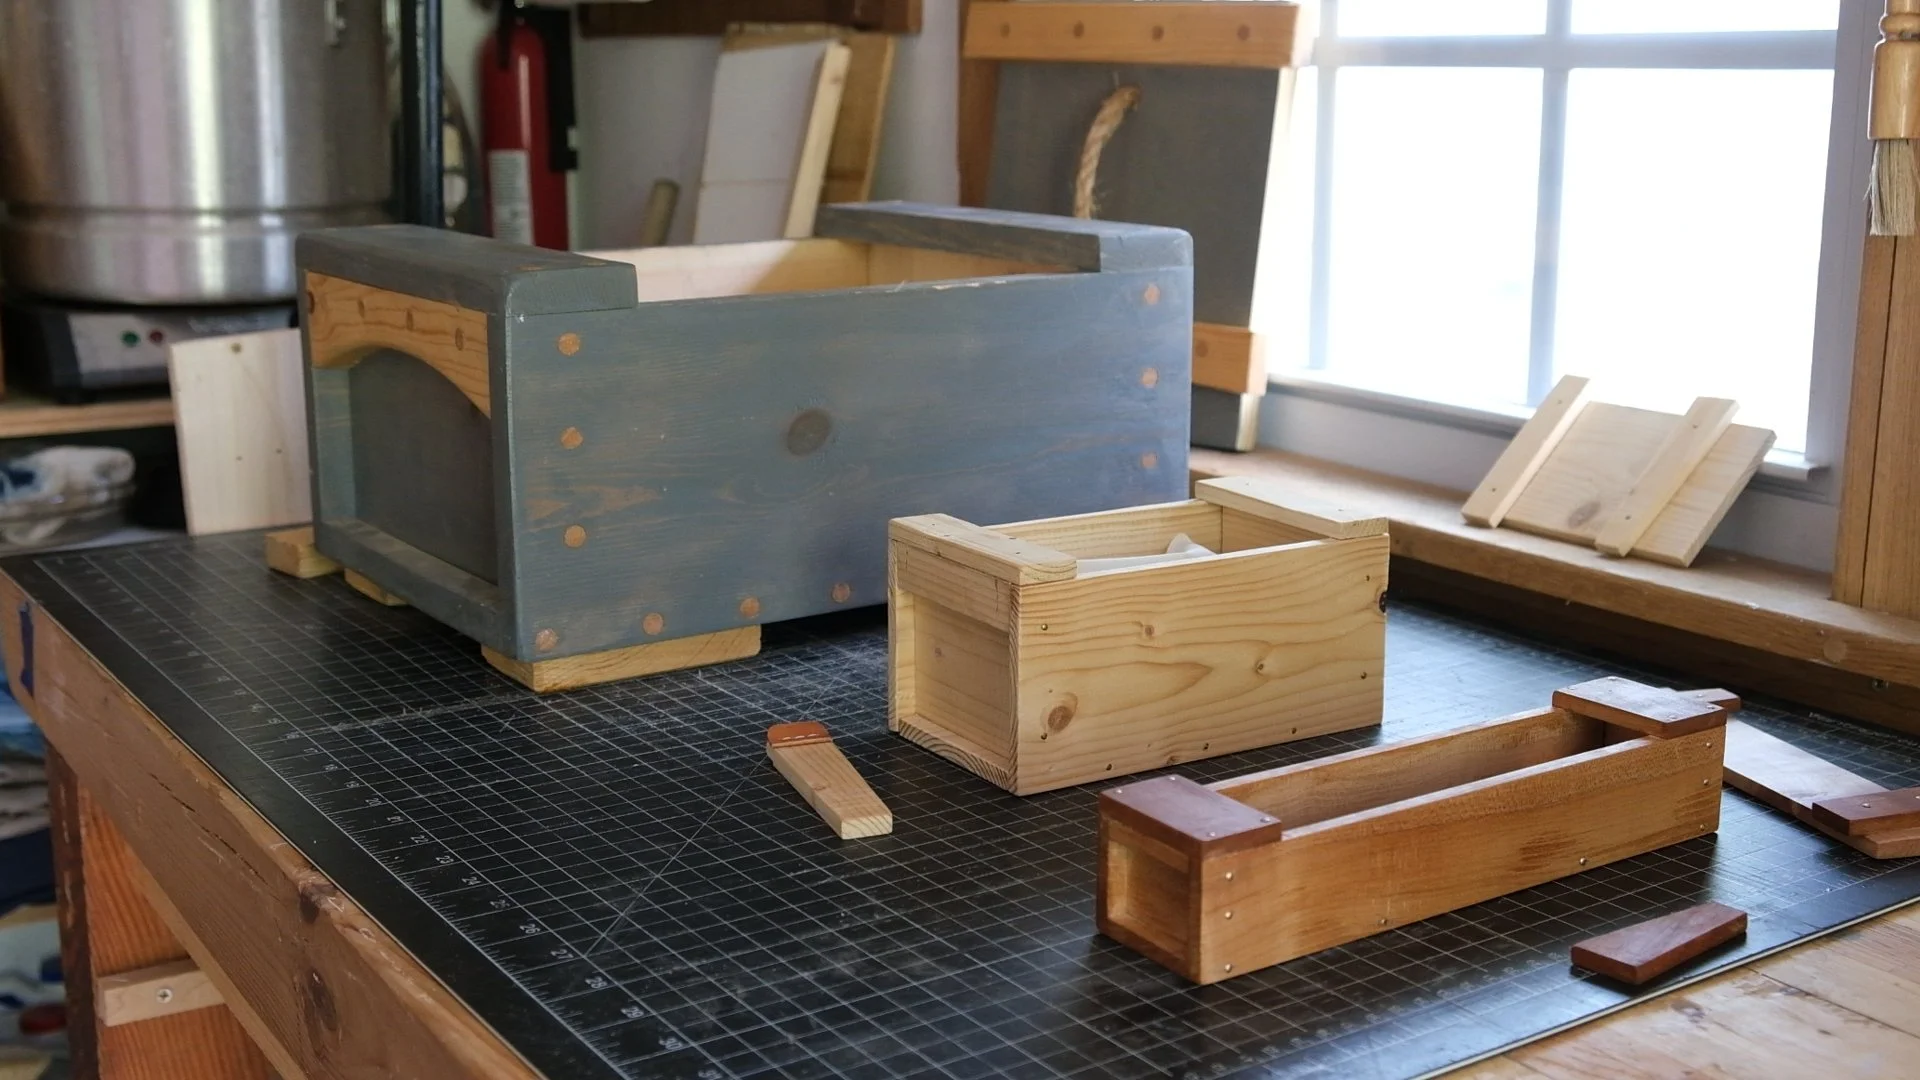
There’s something deeply satisfying about a well-designed wooden box—especially one that doesn’t rely on hardware. That’s why I’ve built multiple versions of the Japanese toolbox, a traditional design that’s both simple and brilliant.
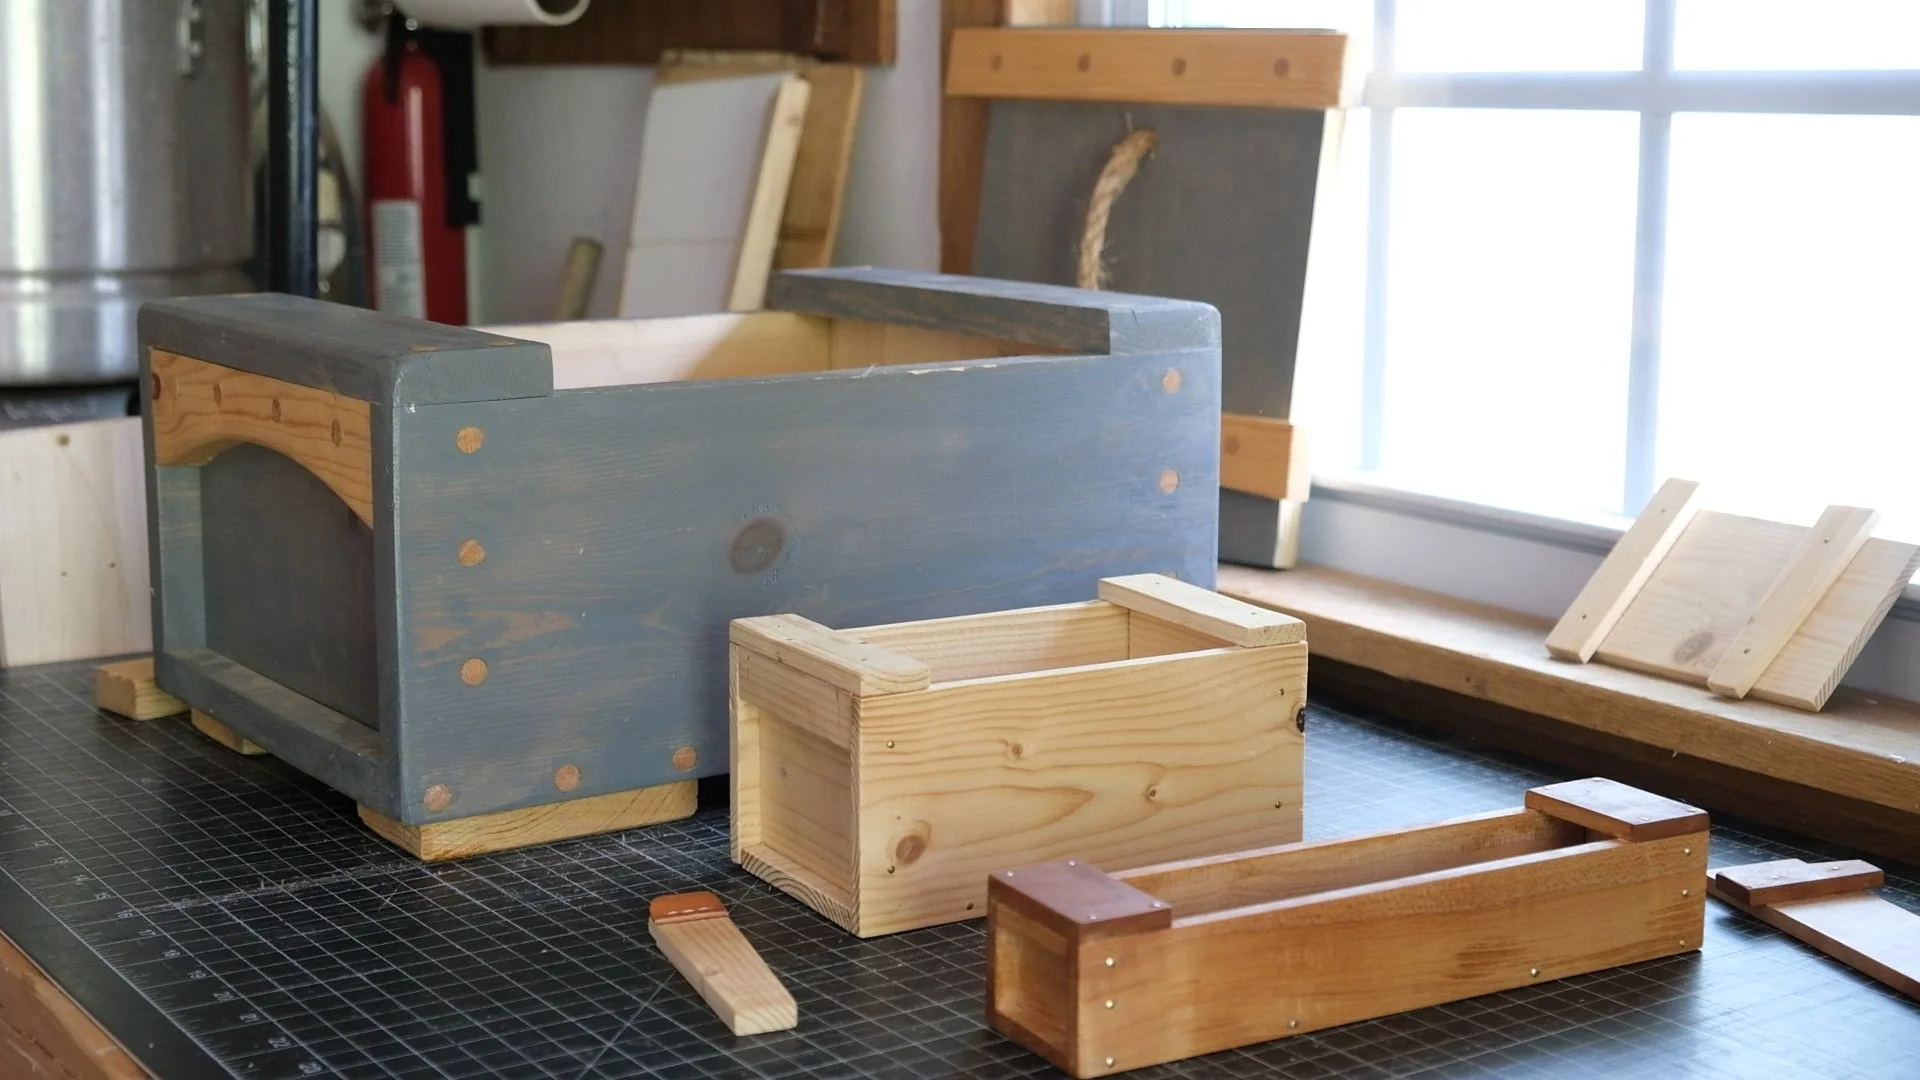
There’s something deeply satisfying about a well-designed wooden box—especially one that doesn’t rely on hardware. That’s why I’ve built multiple versions of the Japanese toolbox, a traditional design that’s both simple and brilliant.
What Makes It Special?
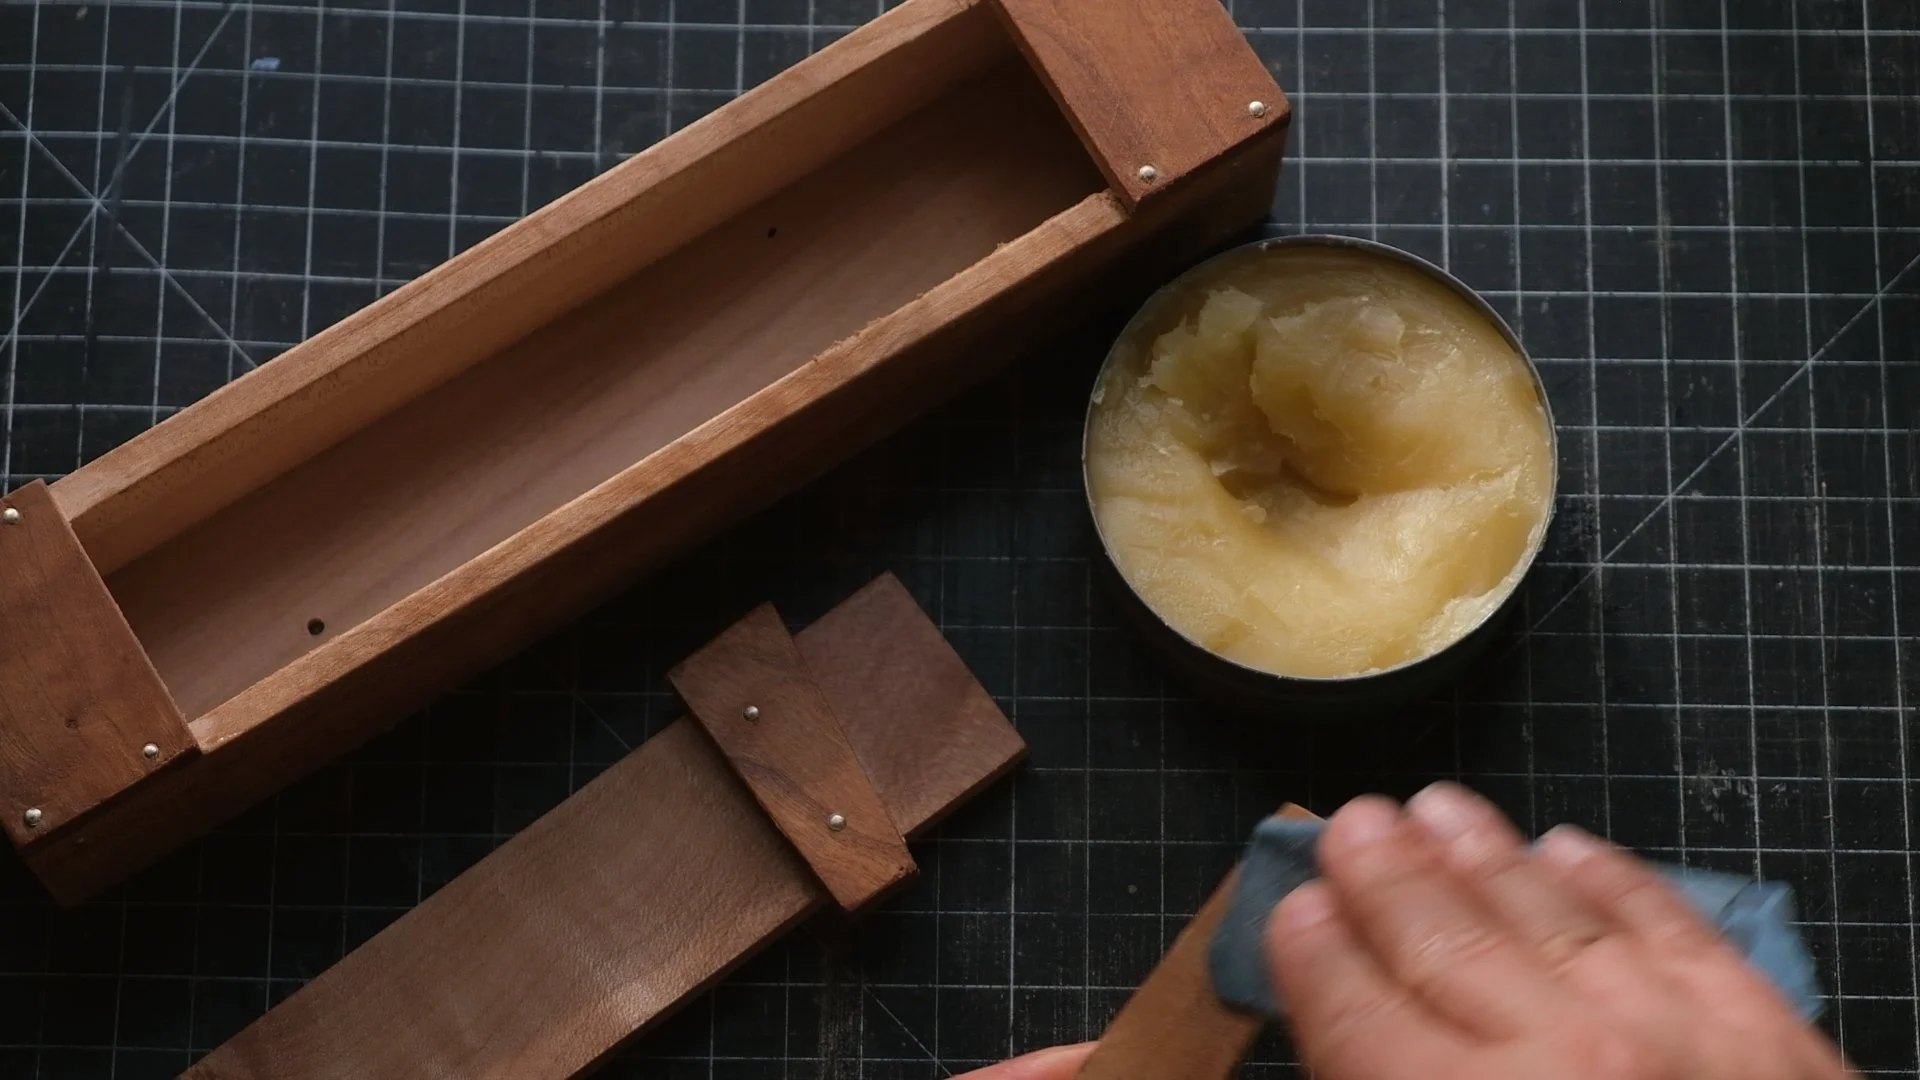
The defining feature is the lid: it slides under the sides and locks in place with a wedge. No hinges, no screws—just wood and friction. It’s a design that’s been used by Japanese carpenters for centuries, originally meant for transporting tools to job sites. But really, it works for anything: tools, pencils, random workshop clutter.
I’ve built a few of these over the years, experimenting with proportions and materials. My first was a chunky pine version (with maybe too many screws). Later, I made a bare-bones one from resawn 2x4s. Most recently, I built a small maple-and-cherry pencil box—just big enough for a handful of pencils, with a contrasting wood wedge.
Why This Design Works
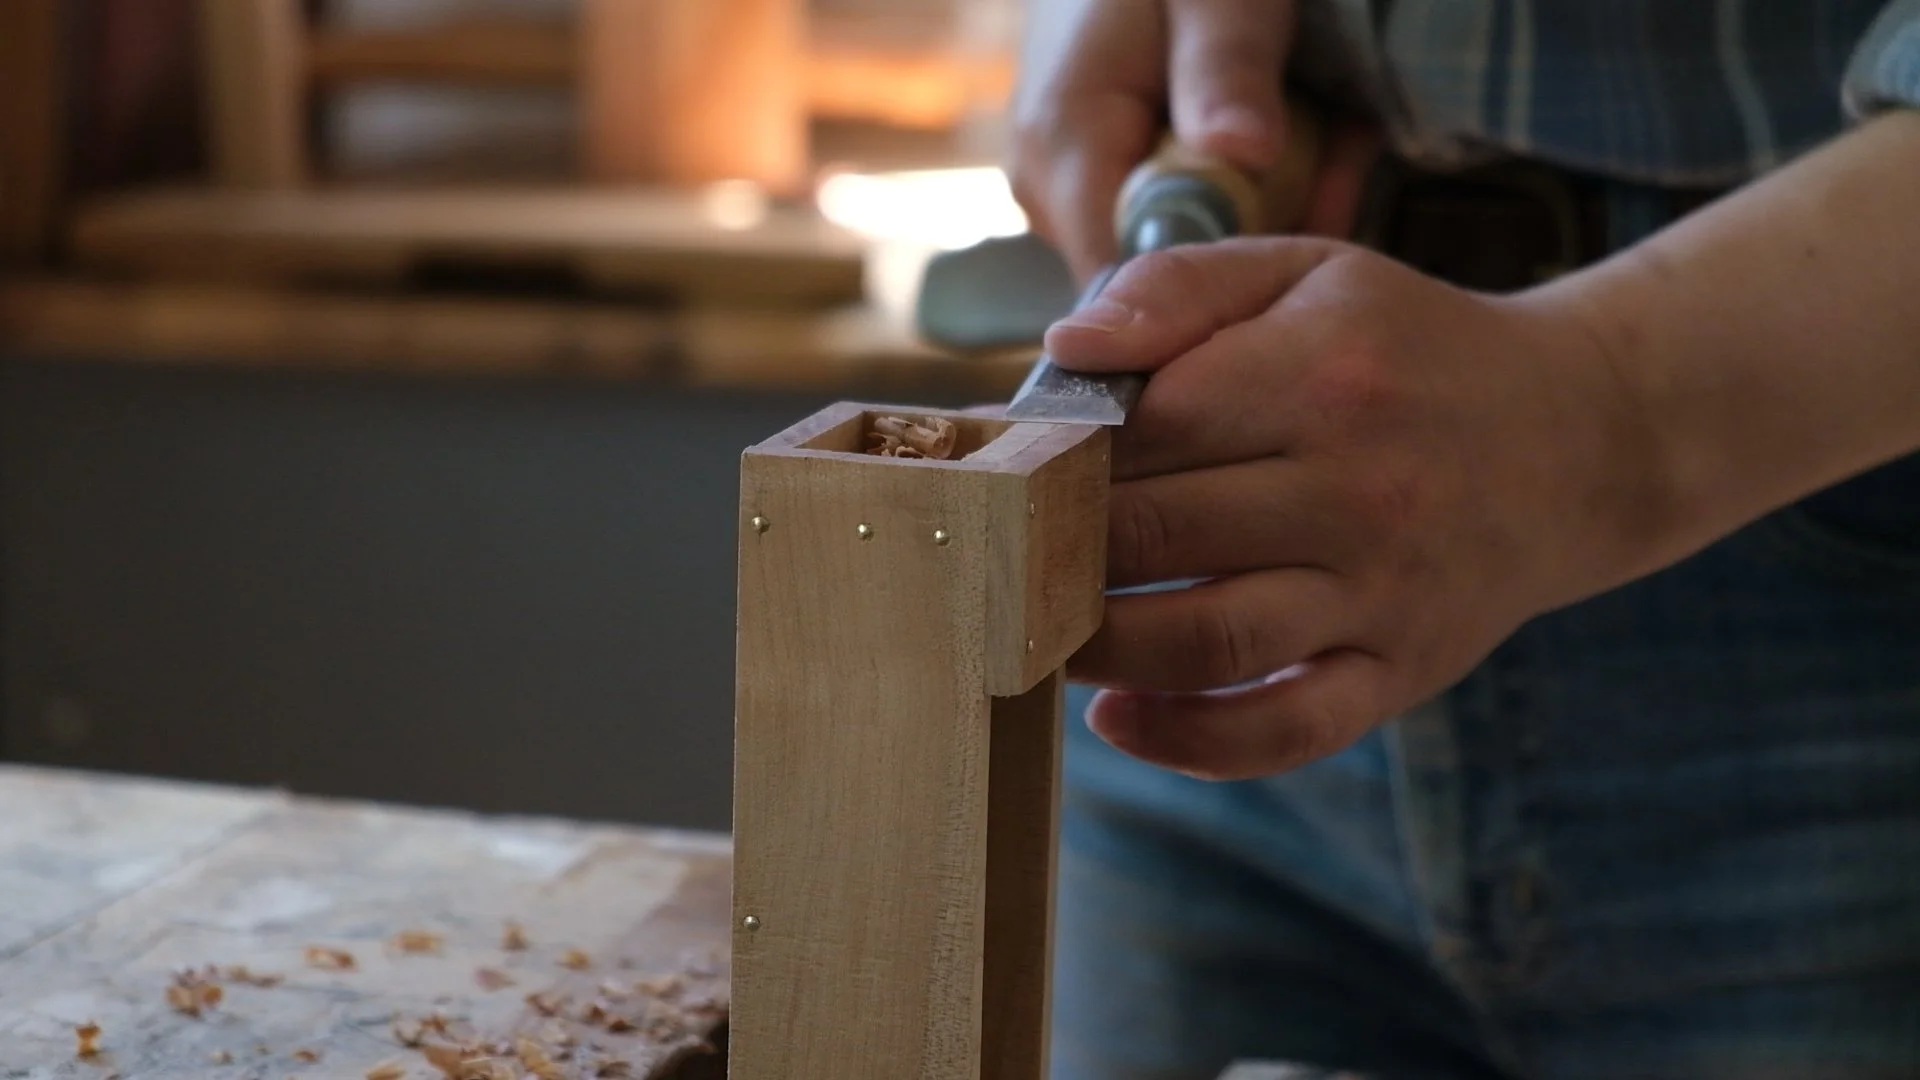
No hardware needed – Just wood, glue, and (optionally) a few nails.
Adjustable proportions – Long and narrow for tools, or compact for small items.
The wedge lock – Simple, but effective. (Though I did learn to make the wedge slightly oversized—wood moves over time.)
Built-in handles – The overhanging sides make it easy to carry.
What I Learned
The lid length is critical—too short and it won’t stay put, too long and it won’t fit. I aim for about 1/4" of play on each side.
Hardwood vs. softwood changes the feel. Pine is forgiving and rustic; maple and cherry give a more refined look.
A leather tab on the wedge helps keep it from getting lost (a problem I’ve had before).
Wood Finish
Since this is a piece that’ll get handled often—opening, closing, grabbing pencils—I wanted a finish that feels great and protects the wood without being fussy. That’s why I used our 100% Tung Oil & Beeswax Polish. It soaks in just enough to deepen the grain, leaves a smooth satin feel, and wears nicely over time. Plus, it’s all-natural, so no weird fumes or sticky residue.
Watch the Build
If you’re curious about the details, I put together a video walking through the process—especially how to get the wedge and lid just right.
👉 [Watch the Japanese Toolbox Build Here]
Final Thought
This is one of those designs that’s almost too simple—until you build one and realize how clever it really is. If you’ve got some scrap wood and a few hours to spare, I’d highly recommend trying it.
Which style would you go for? A long carpenter’s box, a chunky storage crate, or a tiny desk organizer? Let me know—I might just build another one.
Rescuing a Ryobi Electric Riding Mower: Lead-Acid to LiFePO₄
A neighbor was about to discard a Ryobi RM480EX riding mower, assuming it was only a dead battery issue. He demonstrated the blades still worked, but the drive wheels wouldn’t engage. I took the mower home and removed the stock lead-acid batteries. After testing, I found one cell well below voltage and opted to replace the entire pack with a 48 V lithium iron phosphate (LiFePO₄) battery.
YouTube Video: https://youtu.be/HhnOW3vln00

A neighbor was about to discard a Ryobi RM480EX riding mower, assuming it was only a dead battery issue. He demonstrated the blades still worked, but the drive wheels wouldn’t engage. I took the mower home and removed the stock lead-acid batteries. After testing, I found one cell well below voltage and opted to replace the entire pack with a 48 V lithium iron phosphate (LiFePO₄) battery.
YouTube Video: https://youtu.be/HhnOW3vln00
The mower itself was in excellent condition, nearly new really. I stripped off all the panels and gave it a deep clean. After installing a temporary 48 V battery, the mower still wouldn’t move, it would just twitch slightly when pressing the pedal. I began a full diagnostic process.
I hadn’t worked on an electric riding mower before, though I do own a Ryobi 40 V walk-behind model. The symptoms pointed toward a control input issue, possibly the pedal’s potentiometer. I tested it: voltage output was normal (0–5 V depending on depression). That ruled it out. I suspected either the motor controller or the motor itself. I then realized my temporary battery (a general-purpose off-grid unit) wasn't ideal for motor loads. It had a 15s configuration (max ~54 V, nominal ~48 V), not the 16s layout designed for traction systems.
I upgraded to a LiTime 48 V 100Ah LiFePO₄ battery rated specifically for golf carts. This battery can handle sustained discharge, has surge current capacity >200 A (2C 120 sec), and a profile more suitable for drive motors. The large 100Ah capacity also is basically double the 80 volt proprietary versions.
Once I replaced the motor controller (996508001 - DRIVE MOTOR CONTROLLER) that solved the drive problem and it was like brand-new, really better because of the battery was so improved over the original.
Performance Results After a full charge, I mowed roughly 1.5 acres (75 minutes) and still had 79% battery remaining. This setup could easily mow several acres or travel up to 40 miles per charge. Using the LiTime monitor mounted to the steering column, I logged detailed power usage: Without blades: draw averaged 500–800 W, with spikes to 1.5–2 kW under max pedal or uphill. With blades on but stationary: 1.5 kW spike, settling to ~1 kW. Blades engaged and driving: total draw hovered between 1–1.5 kW, maxing at 3 kW on hills with both systems running. Interestingly, the mower regenerates power during braking or downhill driving, further extending range.
Why This Model Works Well for Conversion The RM480EX originally used heavy lead-acid batteries and has a robust steel frame. Unlike modern mowers with proprietary battery packs or over-the-air connections/updates, this one allows any 48 volt battery setup so you can retrofit it easily. That makes it especially attractive for users who value long-term serviceability and dislike app-tied tool ecosystems.
Battery Chemistry Matters: NMC vs. LiFePO₄ Many new commercial 80 V riding mowers (Ryobi, Ego, etc.) use nickel-manganese-cobalt (NMC) lithium-ion packs. While energy-dense, NMC cells are sensitive to deep discharge and cold temperatures. Common problems include: BMS lockouts after deep drain or winter storage. Melted connectors/arced contacts from high current surges. Early pack death after only 2–3 seasons of use due to thermal or voltage stress. In contrast, LiFePO₄ batteries tolerate deep discharges, store well during off-season, and are thermally stable. A properly rated BMS (100 A+) ensures safe, reliable performance. While heavier and less energy-dense, they offer greater cycle life, better cold-weather performance, and reduced risk of thermal runaway.
Here's the stats for the LiTime:
EV-graded LiFePO4 Cells:
- 4,000 cycles at 100% DOD
- 6,000 cycles at 80% DOD
- 15,000 cycles at 60% DOD
That means you can charge and discharge everyday to 100% for 4000 days! That is more than 10 years! The likelihood you could even use it like that is doubtful. In essence I will never need another battery for the life of my use.
| Feature | 80 V NMC (Ryobi, Ego) | 48 V LiFePO₄ (Retrofit) |
|---|---|---|
| Nominal Voltage | 72–80 V | 48 V |
| Energy Density | High (180–250 Wh/kg) | Moderate (90–140 Wh/kg) |
| Deep Discharge Tolerance | Poor – BMS lockout risk | Excellent – recoverable |
| Winter Storage | Must maintain SOC | Stores well long-term |
| Cycle Life | 1,000–1,500 cycles | 4,000+ cycles |
| Connector Reliability | Arcing/melting common | Low risk (with good BMS) |
| Cold Weather Discharge | Poor | Reliable to –20 °C |
| Thermal Stability / Safety | Moderate (risk of fire) | Very high (inherently safe) |
Charging the Battery
The original charger that comes with the RM480EX is designed for a 48 volt lead-acid battery. This means you can't use it to charge any other chemistry. When you have a 5KWh battery like a 48volt 100Ah design it's nice to be able to charge it as fast as possible. I choose to use the LiTime 30A charger designed for LiFePO4 Batteries. Because of the high 30A charge rate I was unable to use the built-in rear port. The wiring is not designed for 30A and would be dangerous to use. I was easily able to bypass this and directly connect to the battery with the included anderson connectors and wiring provided right under the seat.
With this charger I can add about 1.5Kw and hour. That means a dead battery would take about 3 ½ hours to charge. Another way to look at it is that in a mere 45 minutes you can get enough charge to do almost an acre and a half. Even at $0.20 a kw hour you can cut your 1 acre lawn for 20 cents.
This retrofit turns the RM480EX into a highly efficient, low-maintenance electric mower with longer runtime, better battery longevity, and reduced seasonal issues. For anyone inheriting or salvaging one of these older Ryobi models, a properly matched LiFePO₄ battery may be the best upgrade possible. And you save a couple hundred pounds going from lead-acid to LiFePO4.
Parts I installed:
Battery: https://www.litime.com/products/48-volt-100ah-golf-cart-lithium-battery?variant=46077269213404
Monitor: https://www.litime.com/products/rs485-battery-monitoring-display?variant=45804662128860
Keep Tools Sharp Without Sharpening (New Video)
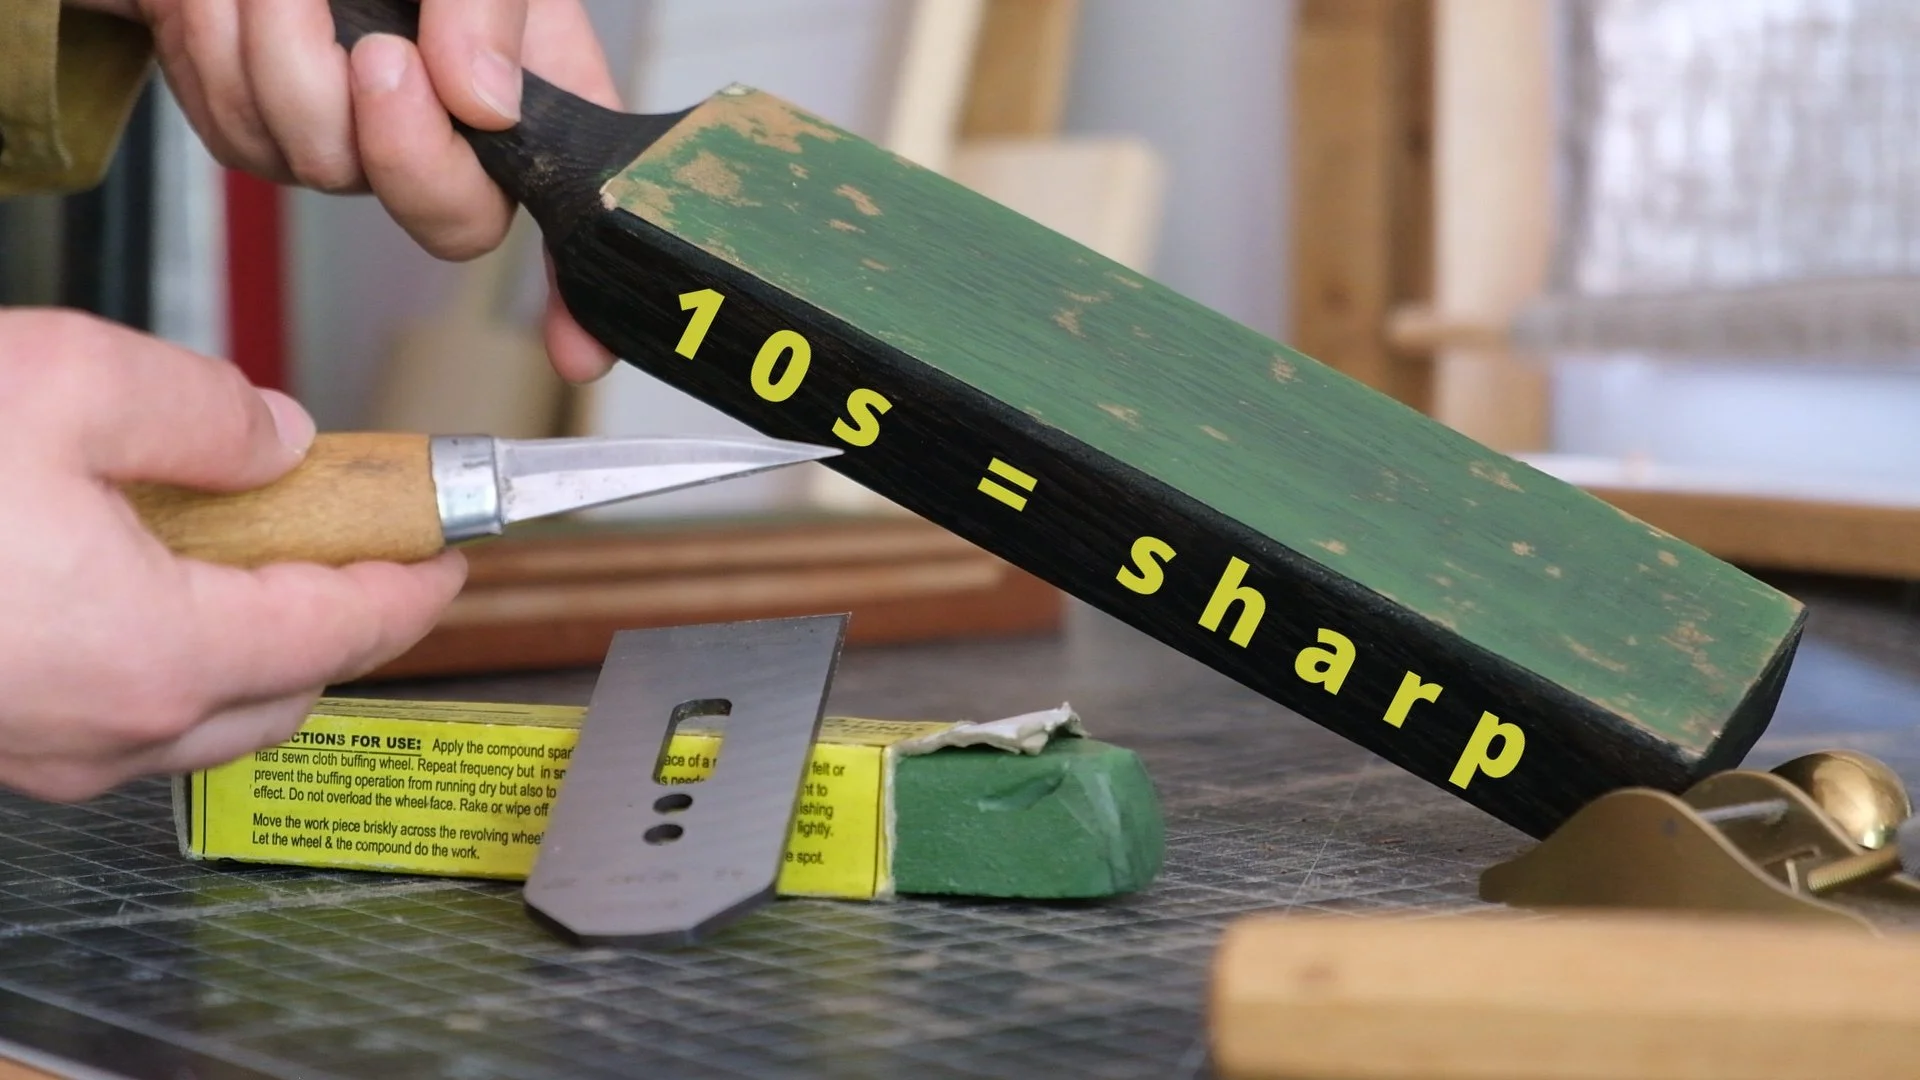
If you’ve ever sharpened a chisel or knife and found it didn’t quite hold its edge as long as you expected, there’s a good chance you’re missing one key step: stropping. Stropping is one of those techniques that quietly makes everything better. It doesn’t take much time, costs next to nothing, and extends the life of your edge significantly. I use it constantly—for woodworking tools, knives, even the occasional carving gouge—and I don’t know why it’s not more commonly talked about outside of professional shops.

If you’ve ever sharpened a chisel or knife and found it didn’t quite hold its edge as long as you expected, there’s a good chance you’re missing one key step: stropping.

Stropping is one of those techniques that quietly makes everything better. It doesn’t take much time, costs next to nothing, and extends the life of your edge significantly. I use it constantly—for woodworking tools, knives, even the occasional carving gouge—and I don’t know why it’s not more commonly talked about outside of professional shops.
I just put together a video all about it: The Strop Secret: Keep Tools Razor-Sharp Without Sharpening!
In the video, I walk through what stropping does, how I use it, the difference it makes, and a few things I wish I’d known when I started. It’s not a replacement for sharpening—but it means you’ll have to sharpen far less often. And when you do, it’ll go faster.
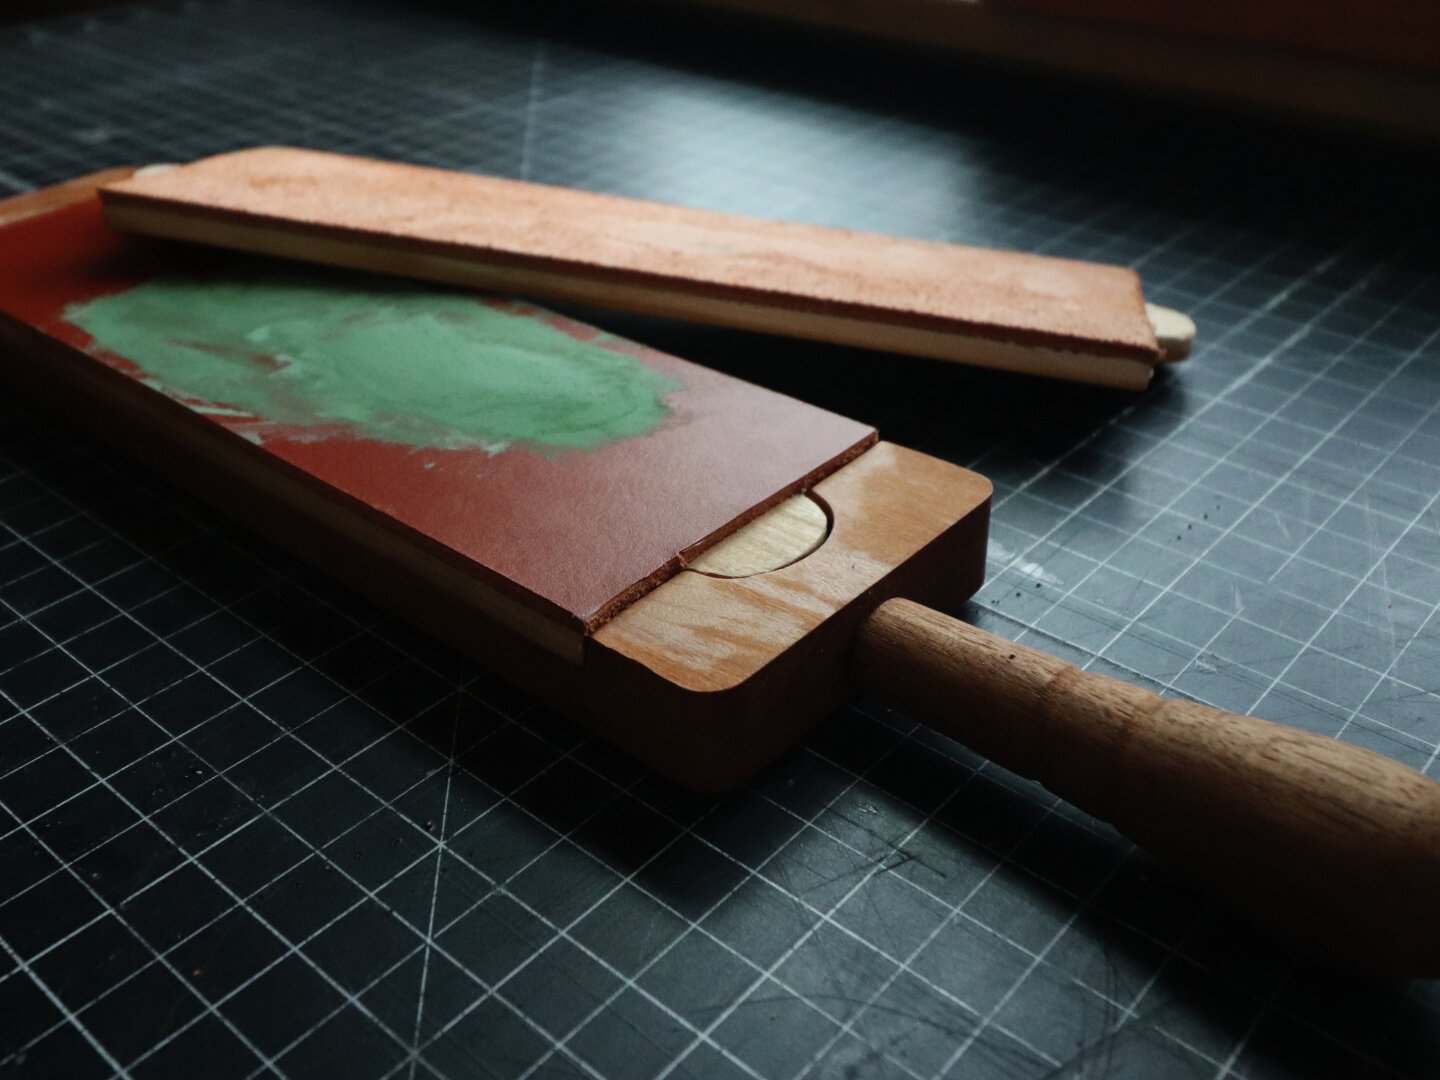
Whether you’re just getting into woodworking or have been doing it for years, it’s a small habit that pays off quickly.
Also - if you want to make your own magnetic strop, here are the plans!
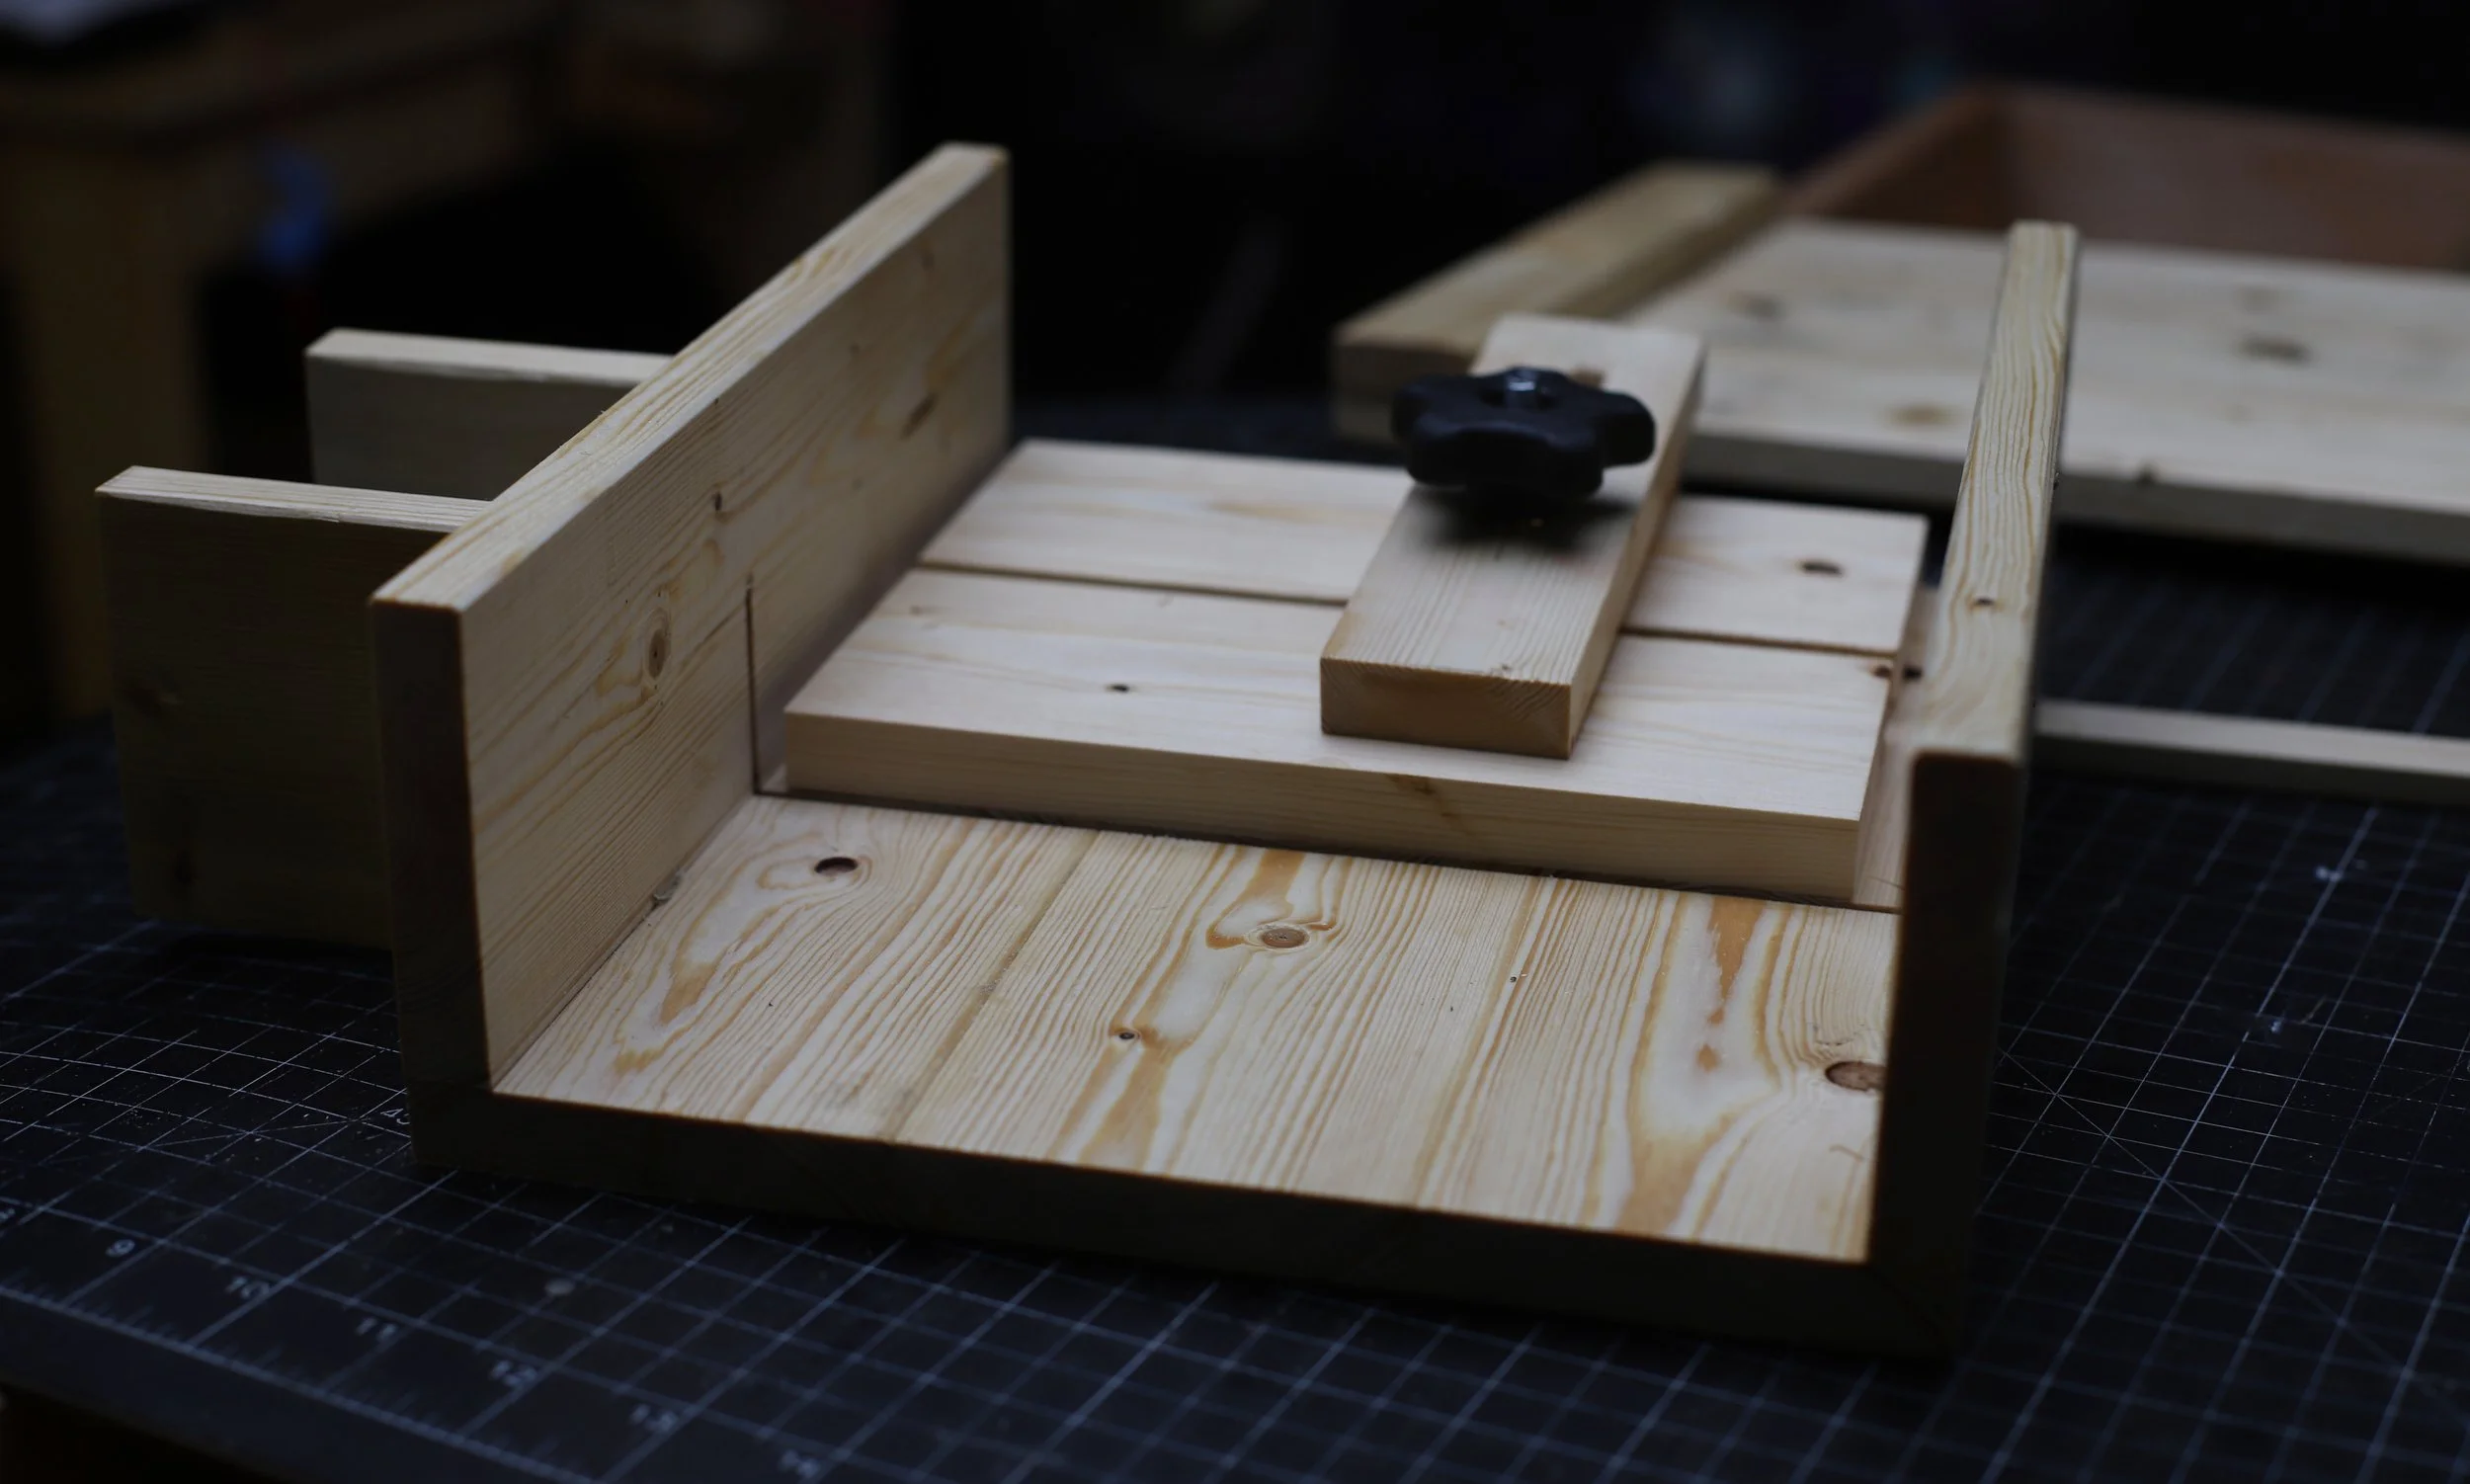
Build a Small Parts Crosscut Sled (and Bench Hook) from One 2×4
Cutting small pieces of wood on a table saw is awkward at best and downright risky at worst. A purpose‑built sled changes that. I’ve put together a step‑by‑step plan—and a full build video—to show exactly how to make a compact small‑parts crosscut sled with an integrated clamp, plus a bonus bench hook, all from one 8‑foot 2×4.
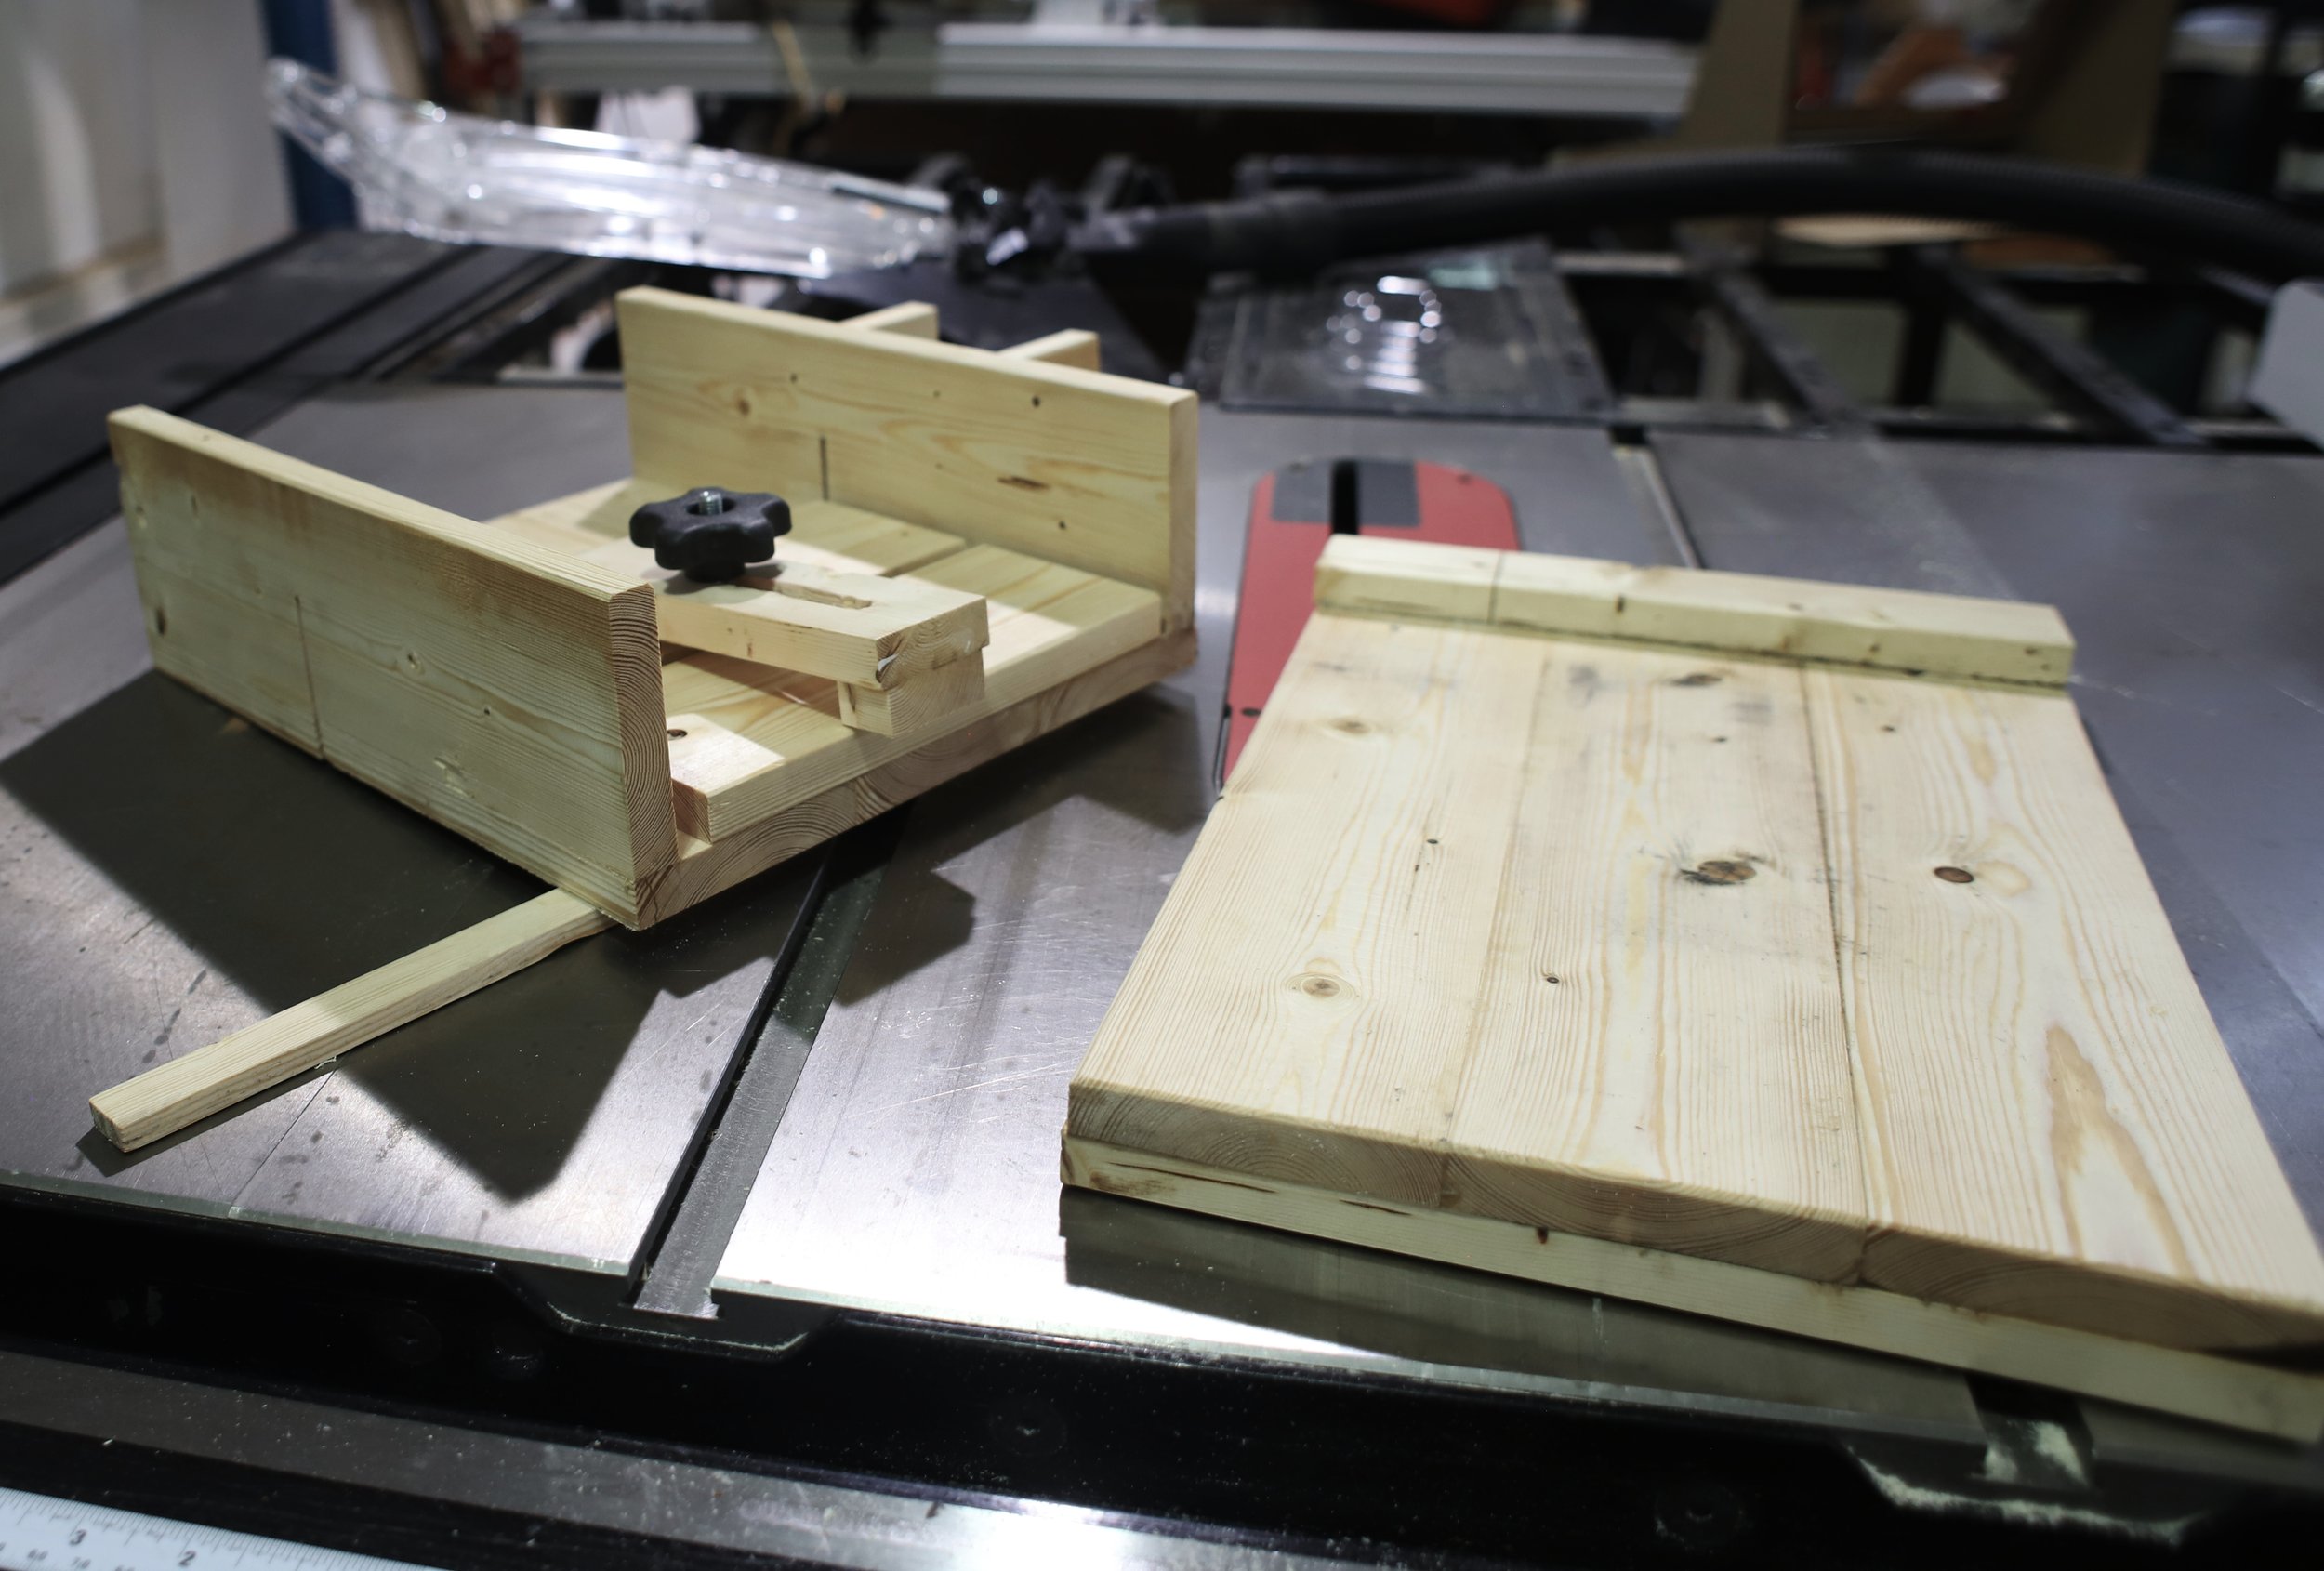
Cutting small pieces of wood on a table saw is awkward at best and downright risky at worst. A purpose‑built sled changes that. I’ve put together a step‑by‑step plan—and a full build video—to show exactly how to make a compact small‑parts crosscut sled with an integrated clamp, plus a bonus bench hook, all from one 8‑foot 2×4.
What’s in the plan?
Small‑Parts Crosscut Sled with Clamp
Holds tiny or odd‑shaped work securely.
Lets you make straight, angled, or repeat cuts without fingers near the blade.
Bench Hook
The hand‑tool counterpart for chiseling, handsawing, planing, and even sharpening.
Works as a sacrificial surface so your benchtop stays pristine.
Why build these jigs?
Safety first – The sled’s rear fence, runner, and adjustable clamp keep stock locked down and hands clear.
Accuracy on tap – Square fences and a guided runner mean repeatable, clean cuts every time.
Minimal materials – One standard 2×4 yields both projects, so cost and waste stay low.
Versatility – Perfect for models, small boxes, inlay strips—any detail work where the factory miter gauge feels sketchy.
Inside the downloadable PDF
Complete cut list and dimensioned drawings
Milling tips for getting a straight, square 2×4
Fence‑squaring tricks and runner setup
Assembly photos and finishing steps
Everyday use examples for both jigs
Watch and build
Prefer to see it done? The full build video walks through every step in real time—from rough milling to final wax polish—so you can follow along in the shop.
Grab the plan, queue up the video, and turn that spare 2×4 into two shop helpers you’ll reach for every time the parts get small.
6 Wooden Boxes You Can Build Without Hinges or Clasps
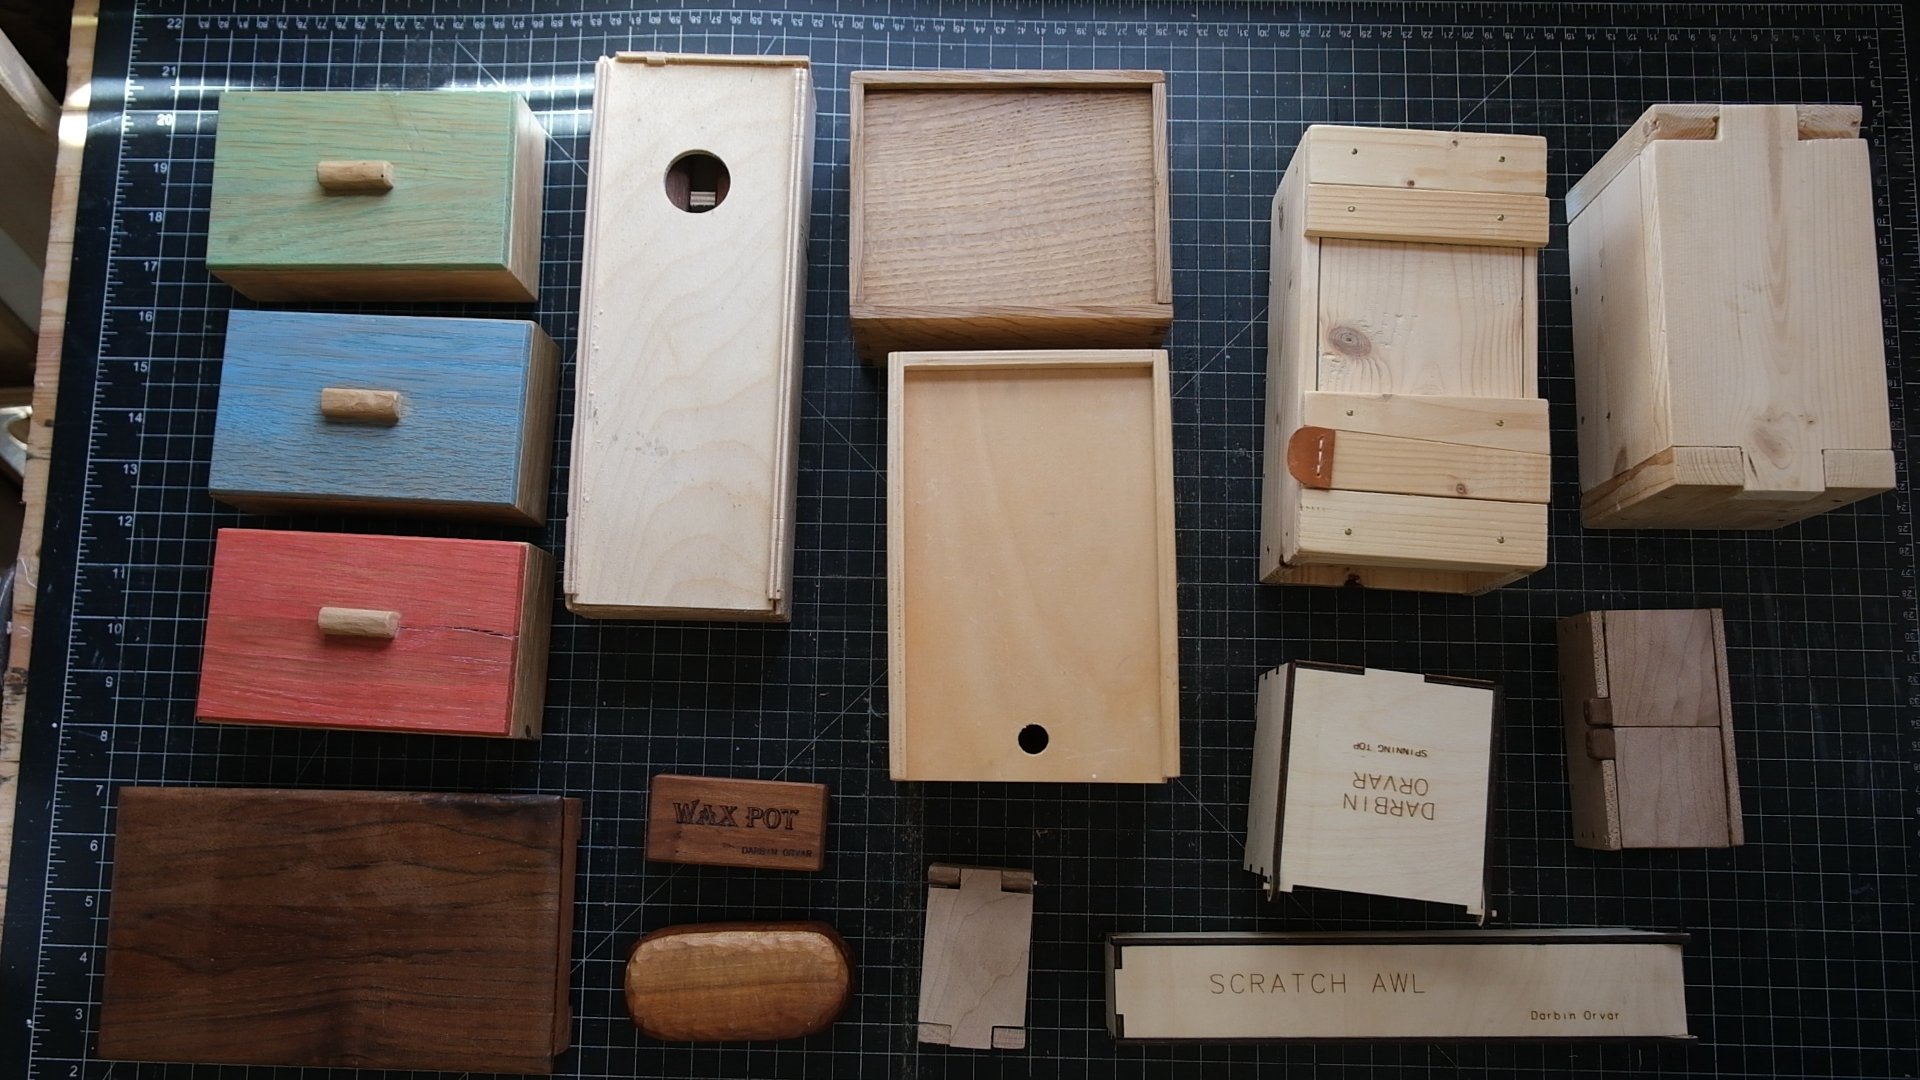
If you love woodworking, boxes are the perfect project. They’re small enough to tackle in an afternoon, endlessly customizable, and—best of all—they don’t need hardware to work beautifully. In my latest video, I break down six ways to build boxes using nothing but wood, from friction fits to clever sliding lids and even Japanese-inspired wedge systems.

If you love woodworking, boxes are the perfect project. They’re small enough to tackle in an afternoon, endlessly customizable, and—best of all—they don’t need hardware to work beautifully. In my latest video, I break down six ways to build boxes using nothing but wood, from friction fits to clever sliding lids and even Japanese-inspired wedge systems.
Why Skip the Hardware?
Metal hinges and clasps are great, but there’s something deeply satisfying about solving the “how does this stay closed?” puzzle with pure woodworking. Plus, no hardware means:
No extra trips to the store
A cleaner, minimalist look
More room to experiment with joinery
The Designs


Friction-Fit Lids
Snug, wood-on-wood contact keeps the lid in place. Pro tip: Start with a tight fit and ease it back with sandpaper or a block plane if needed. Works with any box style—mitered, dovetailed, or round.Sliding Lid Boxes
Grooves cut into the sides let the lid glide open and closed. Use a table saw, router, or even hand tools to create the channels. Bonus: Add a lip or finger hole for easier opening.Wedge Systems
Inspired by Japanese toolboxes, a wooden wedge locks the lid in place. It’s rock-solid when closed and pops open in seconds. (Just don’t lose the wedge—I added leather tabs to mine as a reminder!)Laser-Cut Precision
For intricate designs (like embedded hinges), a laser cutter ensures flawless tiny joints. Not strictly hand-tool-friendly, but proof of what’s possible with wood.Wooden Hinges
Drill straight holes, add dowels or rods, and carve out space for movement. Works with chopsticks, nails, or rods.Wedged Electronics Boxes
A niche but fun design: Use fine wedges to secure lids on boxes meant for occasional access (like storing small tools or electronics).
Why Boxes?
They’re the ultimate scrap-buster, a great gift, and a low-stakes way to practice joinery. Plus, everyone needs a box—for tools, trinkets, or just the joy of making something functional.
Check out the full video to see these techniques in action, and let me know: What’s your favorite hardware-free box design?
This Plywood Computer Does One Thing: Write
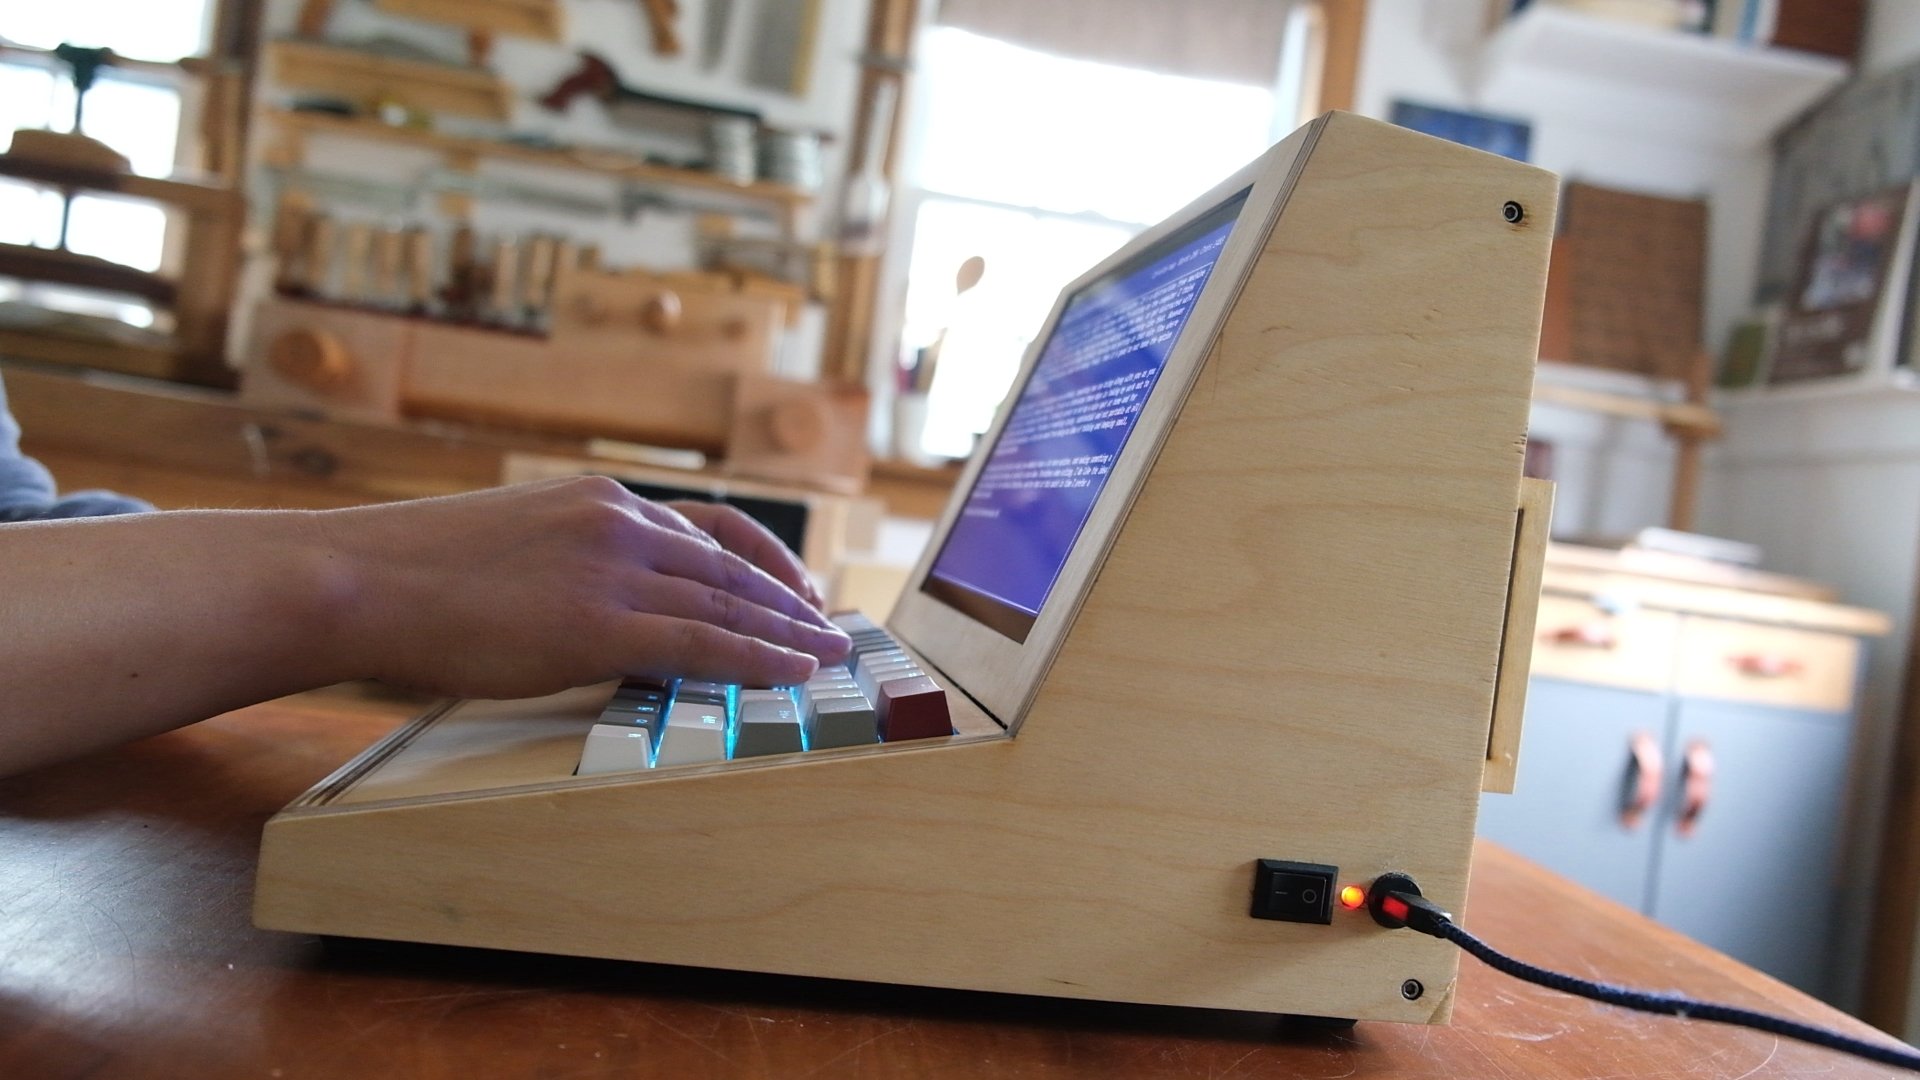
The Cyber Writer—our dedicated, writing-only machine—has been a great addition to my workflow lately. And today I published a new video where I go over all the details about this build: Why make a machine like this? How did I design and build it? What are the components like? What’s the software experience? And most importantly—what’s it like to actually work on?
In addition, I've also made a building plan with all the design .svg and .pdf files if anyone else wanted to build their own plywood computer case

The Cyber Writer—our dedicated, writing-only machine—has been a great addition to my workflow lately. And today I published a new video where I go over all the details about this build: Why make a machine like this? How did we design and build it? What are the components like? What’s the software experience? And most importantly—what’s it like to actually work on?
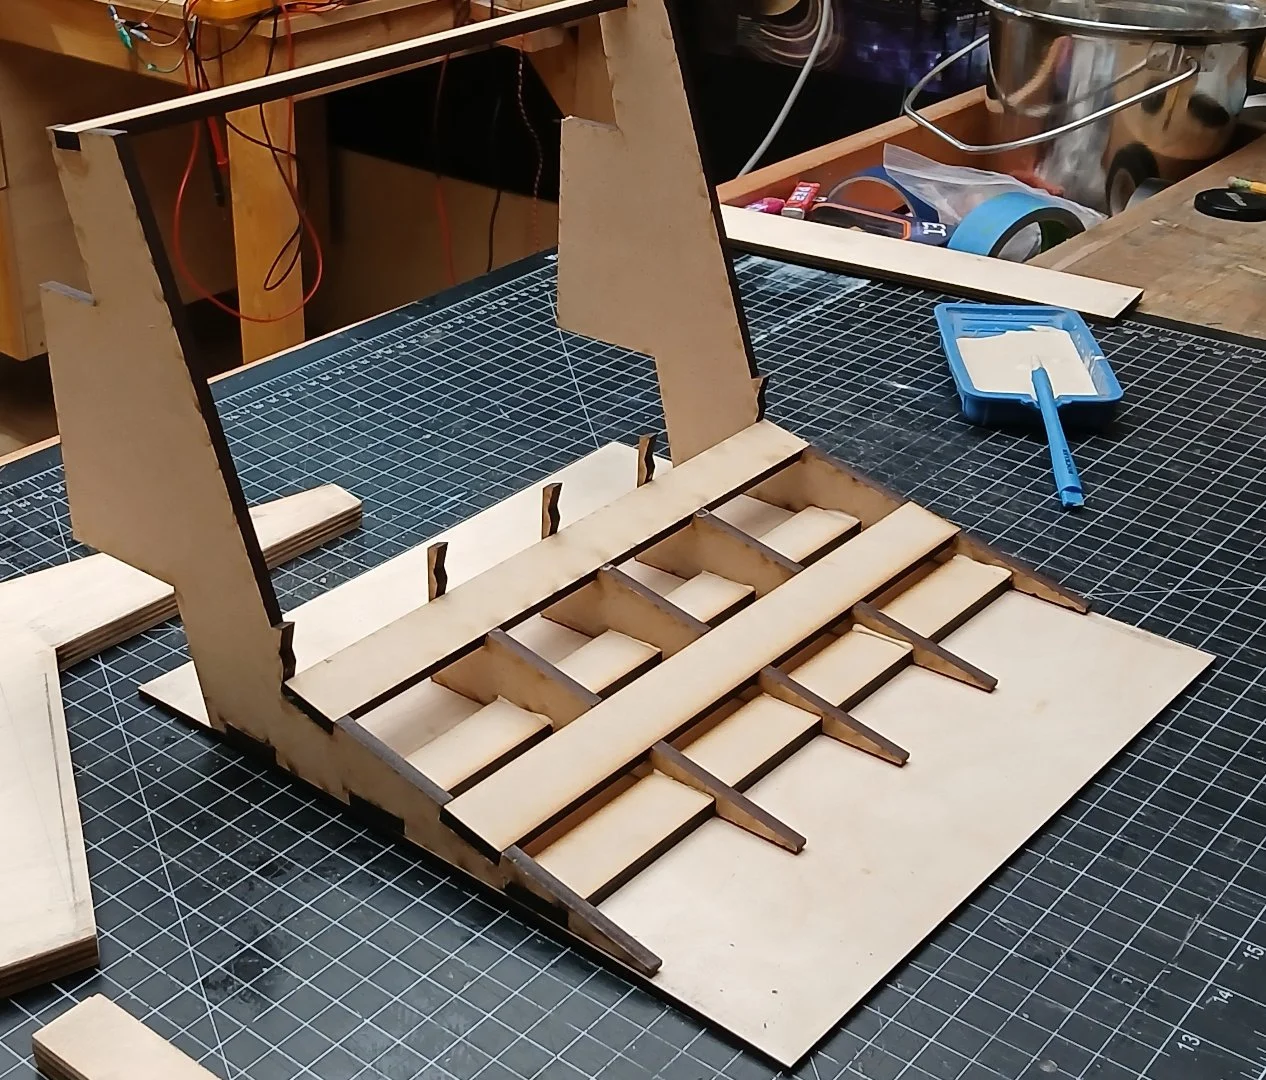
In addition, I've also made a building plan with all the design .svg and .pdf files if anyone else wanted to build their own plywood computer case. We designed it to hold a raspberry pi zero, however there's plenty of room in there so it can be used for many different things.
So in short, what's this dedicated writing machine all about?
I’ve noticed that when I sit down at the Cyber Writer, something shifts. I’m not checking messages. I’m not opening a dozen tabs “for research.” I’m writing. The blank screen feels like an invitation—not a challenge. And the fact that there’s nothing else to do on it? That’s the point.
And for something we built ourselves from laser-cut plywood and a Raspberry Pi, it’s surprisingly immersive. The keyboard is tactile and satisfying. The display is crisp but never harsh. And the custom writing software is delightfully boring—in the best way possible. It does exactly what it needs to, and nothing else.
If you’re curious about the details, check out the video—I show everything from the guts of the machine to how the writing interface works, and talk a bit about what inspired me to make it in the first place.
📖 The Secret to Crisp, Clean Book Edges (Without a Fancy Guillotine)
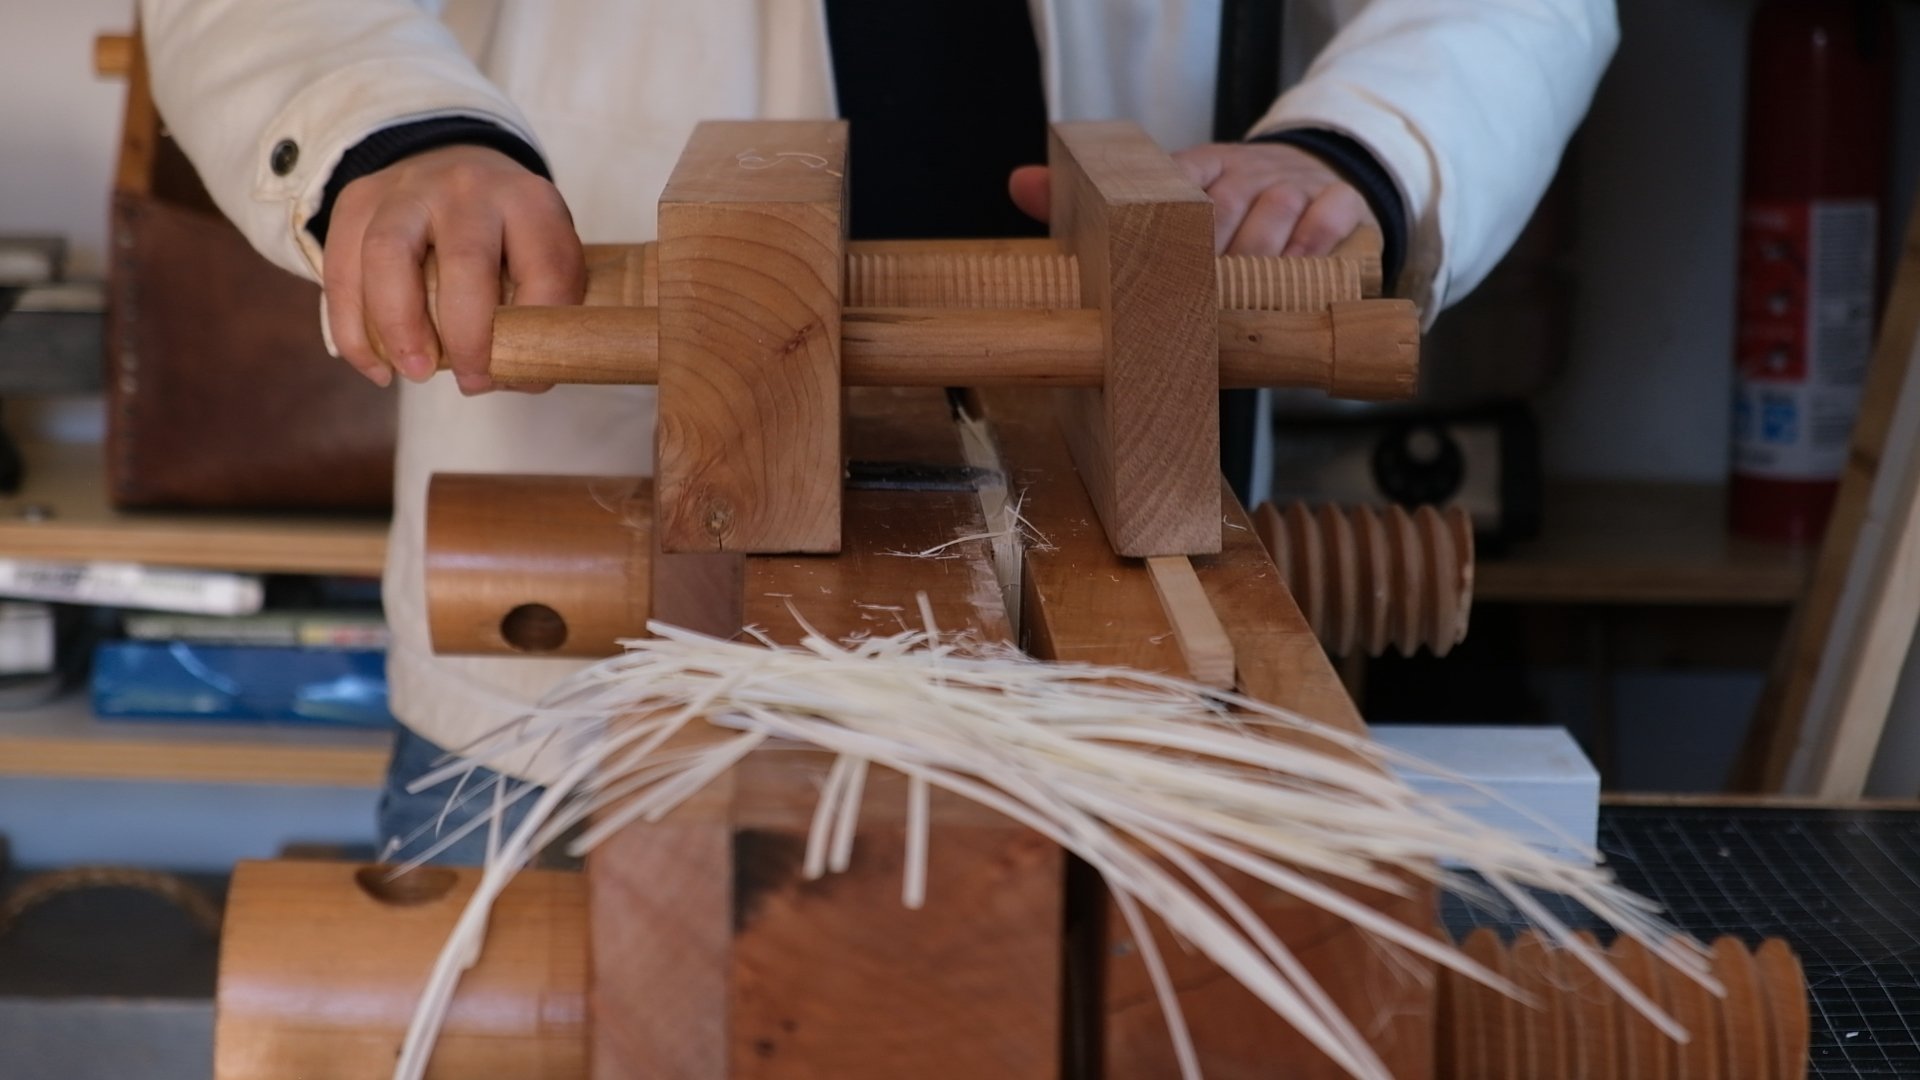
If you've ever struggled to get clean, straight cuts on a book’s edge, you’re not alone. Trimming a book block can be tricky—guillotines aren’t always precise enough, and chisels take a lot of skill to get right. But there’s a tool that solves this problem beautifully: the book plough.

If you've ever struggled to get clean, straight cuts on a book’s edge, you’re not alone. Trimming a book block can be tricky—guillotines aren’t always available, and chisels take a lot of skill to get right. But there’s a tool that solves this problem beautifully: the book plough.
A book plough is designed to trim book edges with precision, slicing through stacked pages effortlessly. It’s a tool that’s been used for centuries in fine bookbinding, and the best part? You can make one yourself. (get the plan here)

In my latest video, I walk through everything there is to know about the book plough, how to sharpen and set it up, and why it works so much better than other methods. Whether you're a bookbinder, a paper artist, or just love making things, this project is worth checking out.
What’s in the Video?

📌 A thorough walk through of the plough and its features
🔪 How to sharpen the blade for the best cuts
📏 Setting up the plough for accuracy
✂️ A cutting demo—before and after results
📖 How it compares to other cutting methods
If you’re ready to get cleaner, sharper cuts in your bookbinding projects, this video (and the building plan) will get you there.
🛠 Want to build your own? Grab the full book plough building plan here.
Introducing the Cyber Writer – A Distraction-Free Writing Experience
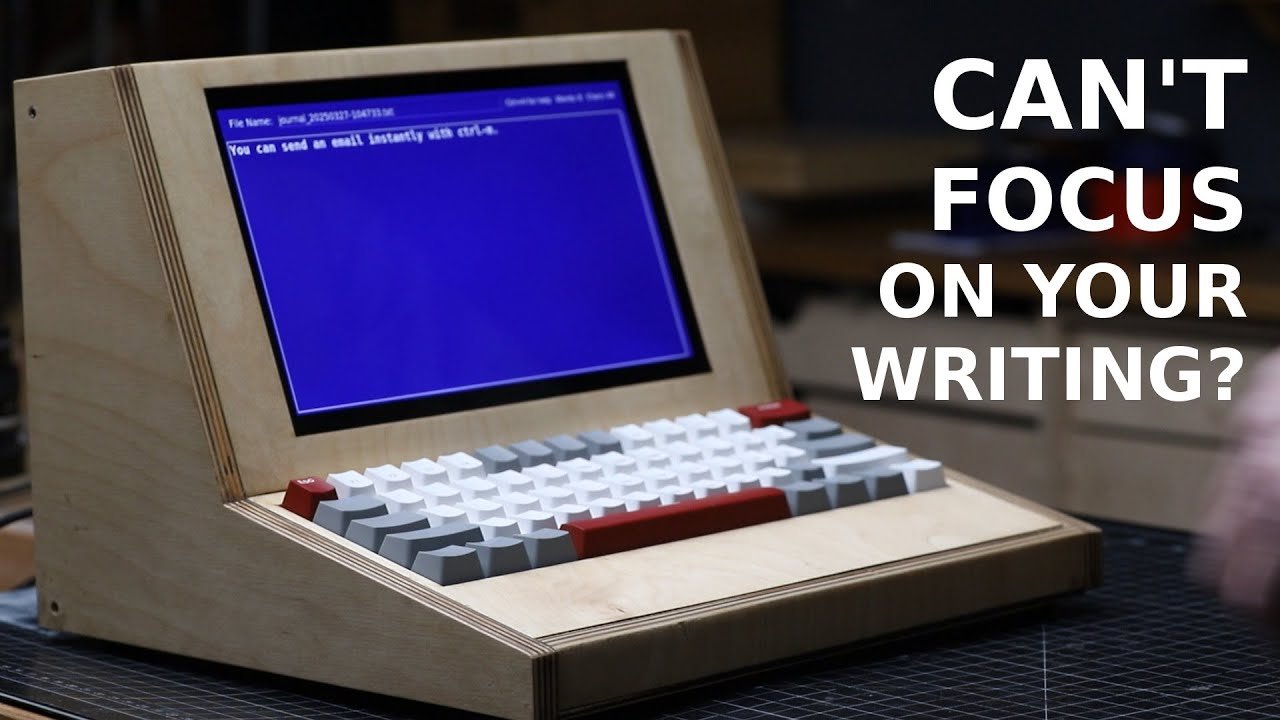
Ever sat down intending to write, only to find yourself sidetracked by emails, news alerts, or endless social media scrolling? In an increasingly connected world, true focus has become rare. Distractions are everywhere, and carving out space to think clearly and write freely has never been more challenging. Meet the Cyber Writer, a minimalist, laser-crafted writing computer designed to help reclaim your attention, keep your creativity flowing, and sharpen your focus.

Ever sat down intending to write, only to find yourself sidetracked by emails, news alerts, or endless social media scrolling? In an increasingly connected world, true focus has become rare. Distractions are everywhere, and carving out space to think clearly and write freely has never been more challenging. Meet the Cyber Writer, a minimalist, laser-crafted writing computer designed to help reclaim your attention, keep your creativity flowing, and sharpen your focus.
Crafted for Clarity and Comfort
- Clean Design: Laser-cut from elegant Baltic birch plywood and supported internally with sturdy MDF, the Cyber Writer's sleek aesthetic fits seamlessly into any workspace.
- Ready to Write: Powered by the efficient Raspberry Pi Zero W 2, it instantly boots into our custom-built minimalist word processor—no distractions, just you and your writing.
- Tactile Satisfaction: Equipped with a compact, clicky keyboard for an engaging, satisfying typing experience.
- Easy on the Eyes: A crisp 10” HDMI screen, positioned at an ideal viewing angle, offers smooth visuals and multiple customizable themes, including a Commodore 64-inspired blue-and-white mode.
Pure Simplicity, Pure Focus
- We've streamlined the software to offer just what you need:
- Word and character counts at a glance
- Keyboard-only navigation—ditch the mouse completely
- Effortless file management
- One-click email export—instantly send your work wherever it needs to go
This system is designed specifically to facilitate deep, uninterrupted focus—making the writing process less stressful and more productive. The Cyber Writer isn't just another gadget; it's your personal writing sanctuary—comfortable, reliable, and uniquely yours.



Build Smarter Bookcases: 15 Tips to Save Space, Money, and Craft the Perfect Fit
If your book collection is bursting at the seams, and you’re tired of flimsy store-bought shelves that sag, waste space, or just don’t fit, I’ve got good news: building your own bookcase is easier (and more rewarding) than you think. Watch the video here!
Hey there, book lovers and DIYers—

If your book collection is bursting at the seams, and you’re tired of flimsy store-bought shelves that sag, waste space, or just don’t fit, I’ve got good news: building your own bookcase is easier (and more rewarding) than you think.
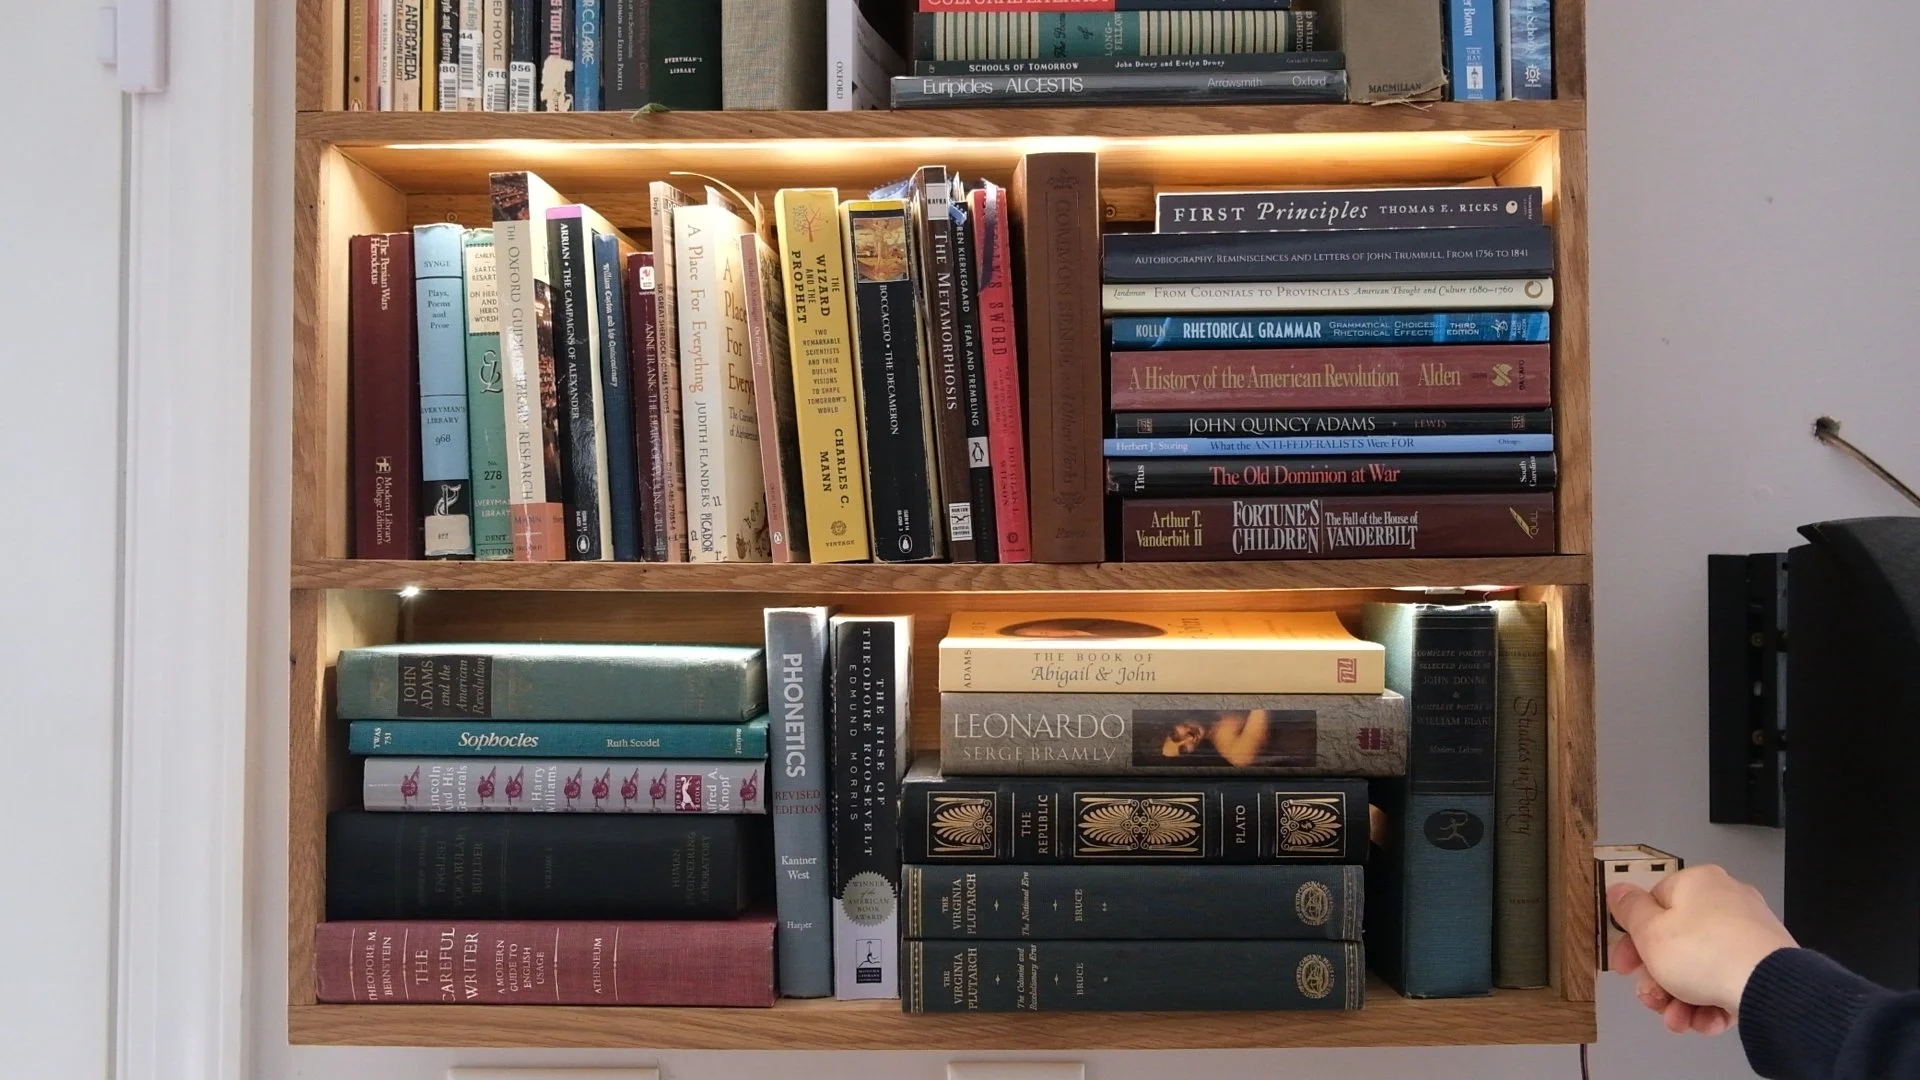
In my latest video, I break down 15 practical tips to help you design and build custom shelves that are stronger, smarter, and tailored to your space. No fancy tools or carpentry degree required—just actionable advice I’ve learned from years of trial, error, and stacking way too many books.
Why Build Your Own Bookcase?
Let’s be real: store-bought shelves are fine. But they never fit right. Here’s why DIY wins :
Maximize every inch with shelves sized for your books (goodbye, wasted depth!).
Avoid sagging with pro construction tricks (spoiler: screws can handle the weight).
Add hidden perks like lighting, outlets, or even a fold-down desk.
Save money using affordable materials like plywood (no compromising on looks!).
What You’ll Learn in the Video
Here’s a sneak peek of the 15 tips I cover:
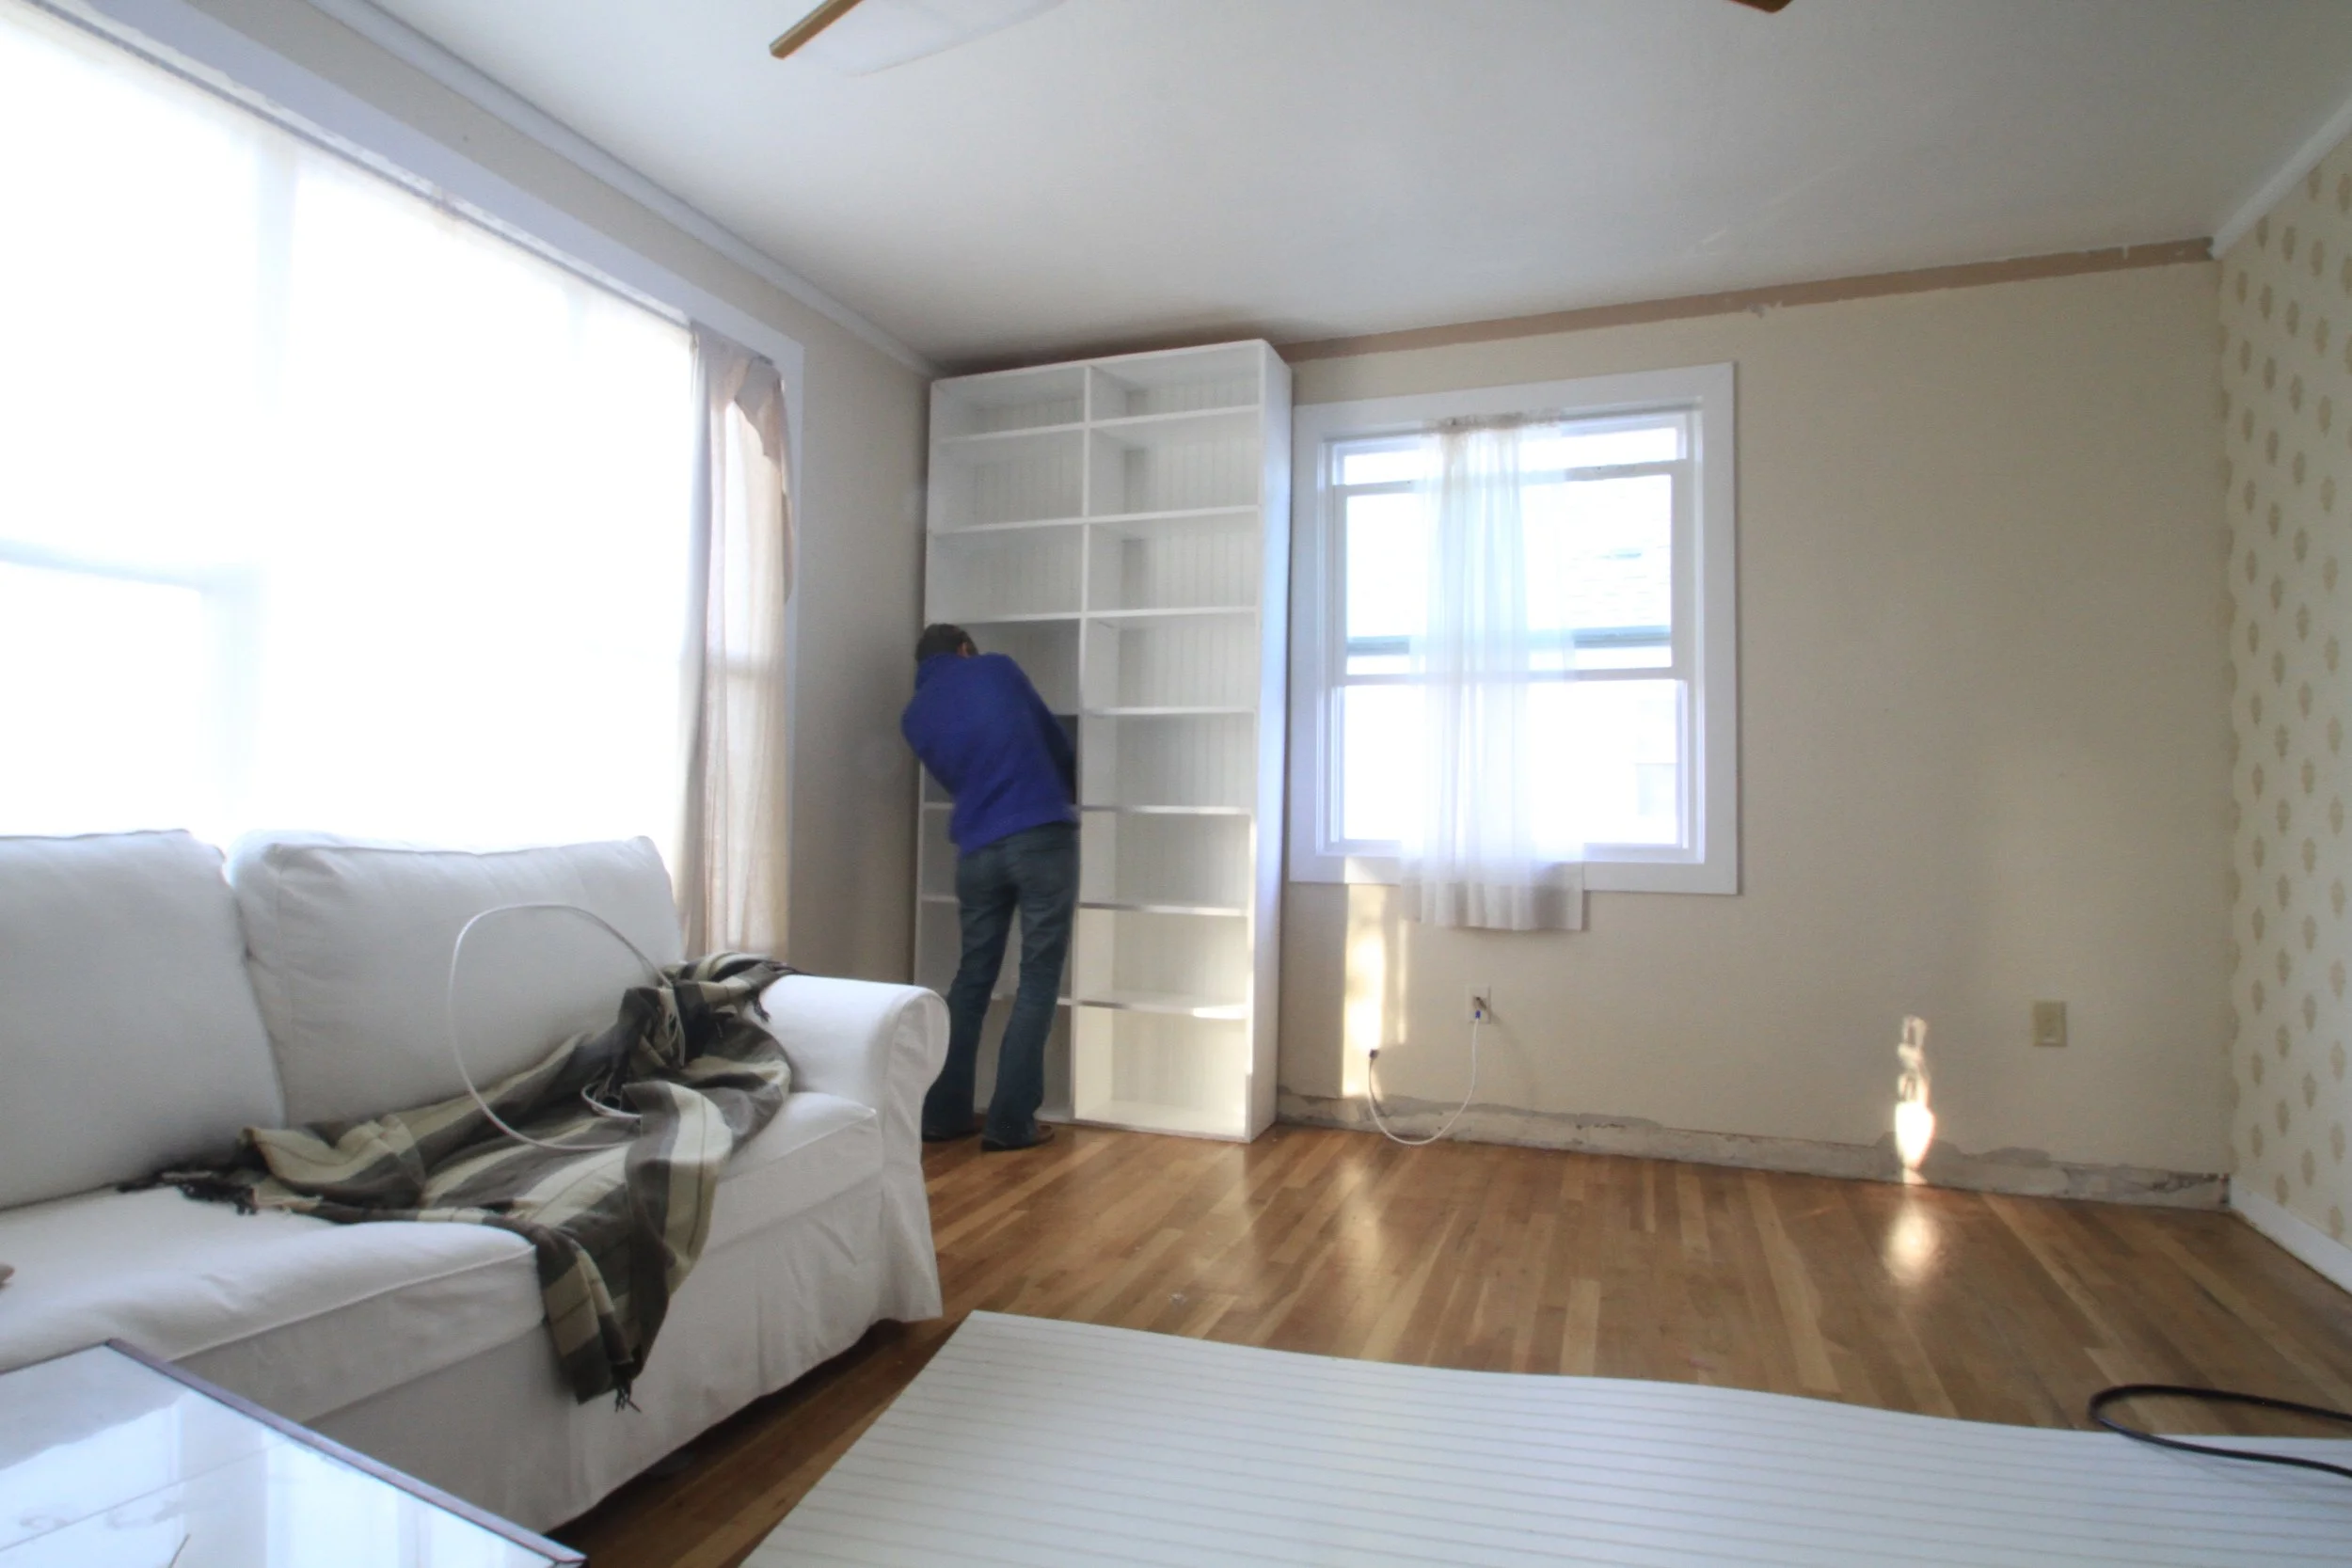
Freestanding vs. Built-In vs. Wall Units
Which style fits your space (and lifestyle)?The Fastest Way to Assemble Shelves
Glue and screws? Pocket holes? Dados? I’ll show you what works.Shelf Depth Hacks
Why 12” store-bought shelves waste space (and how to cut that depth in half for paperbacks).Lighting That Elevates Your Shelf
Warm LEDs hidden in grooves? Yes, please.Preventing Sagging (For Real)
Blocking, brackets, and why ¾” plywood is your friend.The Secret to “Built-In” Style
Trim and molding tricks to make your DIY project look like it cost $5,000.
…plus 9 more tips, including materials to avoid, finishes that won’t stick to books, and a surprising weight test (let’s just say the Oxford English Dictionary is no match).
The Best Part? You Can Start Small
No need to build a floor-to-ceiling library on day one. Try a narrow shelf for cookbooks, a wall unit for that awkward corner, or even a desk-bookcase hybrid (my personal favorite).
Whether you’re a seasoned DIYer or a total newbie, you’ll walk away with the confidence to build shelves that are actually functional.
P.S. Got a quirky space or a burning shelf-building question? Drop a comment on the video! I’d love to hear what you’re working on.
🔨 Loved this? Forward it to a friend who needs better shelves!
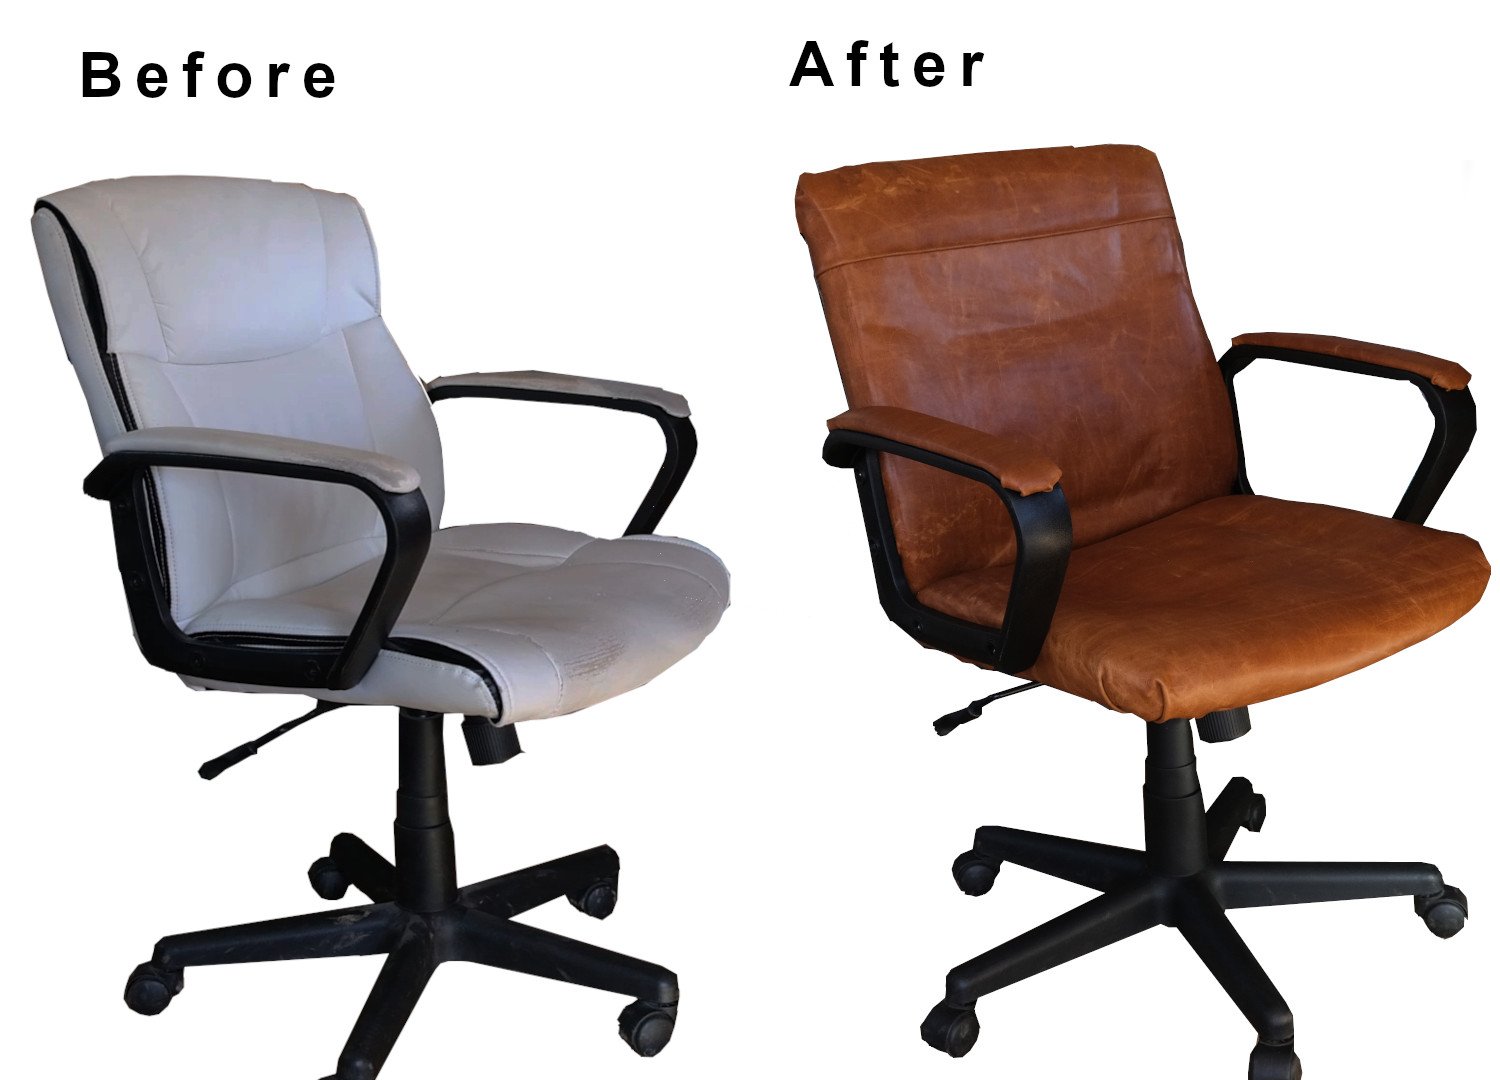
Transform Your Old Office Chair with Leather: A Step-by-Step Guide
If you’ve ever stared at a sad piece of furniture and thought, “I could fix that,” this project is for you. I’ve put together a step-by-step guide and a YouTube video to walk you through reupholstering with leather, even if you’ve never touched a staple gun.
We’ve all got that one piece of furniture—comfortable but worn-out, functional but forgotten. For me, it was an old office chair with peeling pleather and a wobbly base. Instead of tossing it, I decided to give it new life with a material that ages beautifully: leather. The result? A chair that looks like it cost ten times more, made with thrifted scraps and basic tools.

If you’ve ever stared at a sad piece of furniture and thought, “I could fix that,” this project is for you. I’ve put together a step-by-step guide and a YouTube video to walk you through reupholstering with leather, even if you’ve never touched a staple gun.
Why Leather?

Durable & Timeless: Unlike bonded leather or fabric, real leather softens with age and hides wear gracefully.
Sustainable: Use thrifted jackets, bags, or remnant scraps to keep materials out of landfills.
Surprisingly Approachable: No industrial machines or expensive hides required.
What You’ll Learn

Working with Scraps: How to patch holes, sew mismatched pieces, and stretch leather over curves.
The Right Tools: A staple gun, contact cement, and a utility knife will handle 90% of the job.
Finishing Touches: Techniques for clean edges and hidden seams that look professional.
Watch the Process
In my video tutorial, I show every step—warts and all. You’ll see:
How to disassemble an office chair (without losing your mind).
The easiest way to glue and stretch leather over awkward shapes.
Tips and tricks to get great results.
No filters, no fancy gear—just real-world problem-solving.

Who This Is For
DIYers on a budget: Skip the $1,000 “luxury” office chairs.
Eco-conscious makers: Salvage leather, reduce waste, and avoid fast furniture.
Absolute beginners: If I can do this, so can you.
Grab the Guide
The full guide dives deeper, with:
Tips for choosing the right leather thickness.
How to work with leather.
Pattern-making tricks for upholstering different types of furniture.
Your Turn
Got an old chair, stool, or bench gathering dust? Give it a weekend. Worst case, you’ll learn a new skill. Best case, you’ll end up with a piece that feels entirely yours.
Watch the video, try the project, and tag me @darbinorvar with your results. I’d love to see what you create.
—
P.S. Prefer written instructions? The guide has detailed photos, tool lists, and templates to keep you on track.
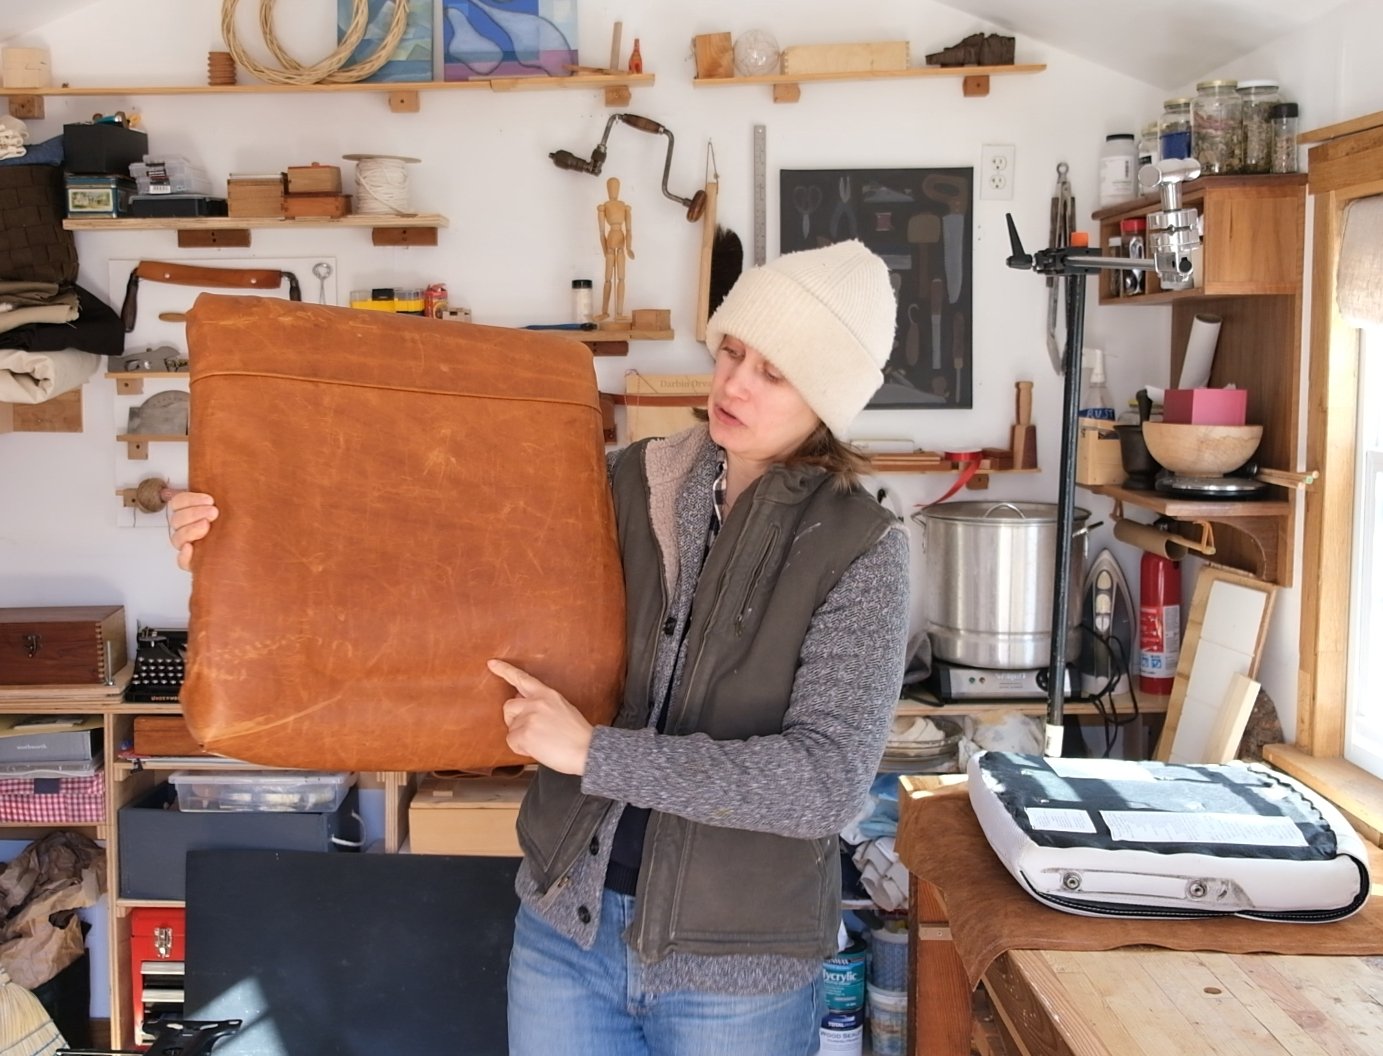
Give Your Old Office Chair a Leather Makeover (Video Launching Tomorrow)
Tomorrow, I’m sharing a free video tutorial where I transform a worn-out chair using thrifted leather scraps, basic tools, and simple upholstery techniques. No prior experience needed—just a weekend and a staple gun.

Got an old office chair that’s seen better days? Instead of tossing it, let’s turn it into something you’ll actually want to show off.
Tomorrow, I’m sharing a free video tutorial where I transform a worn-out chair using thrifted leather scraps, basic tools, and simple upholstery techniques. No prior experience needed—just a weekend and a staple gun.
What You’ll See in the Video:
An amazing transformation from trash to luxury
How to disassemble and prep an old chair (without losing screws).
Stretching leather over curves and corners for a snug fit.
Hand-stitching tips for seamless repairs.

The Full Guide:
For those who want every detail, I’ve put together a step-by-step guide with:
Leather thickness recommendations and pattern templates.
Tool lists (budget-friendly and pro options).
Complete step by step process
Want First Access?
Join my newsletter, and I’ll send you:
A direct link to the video + guide the moment they go live.
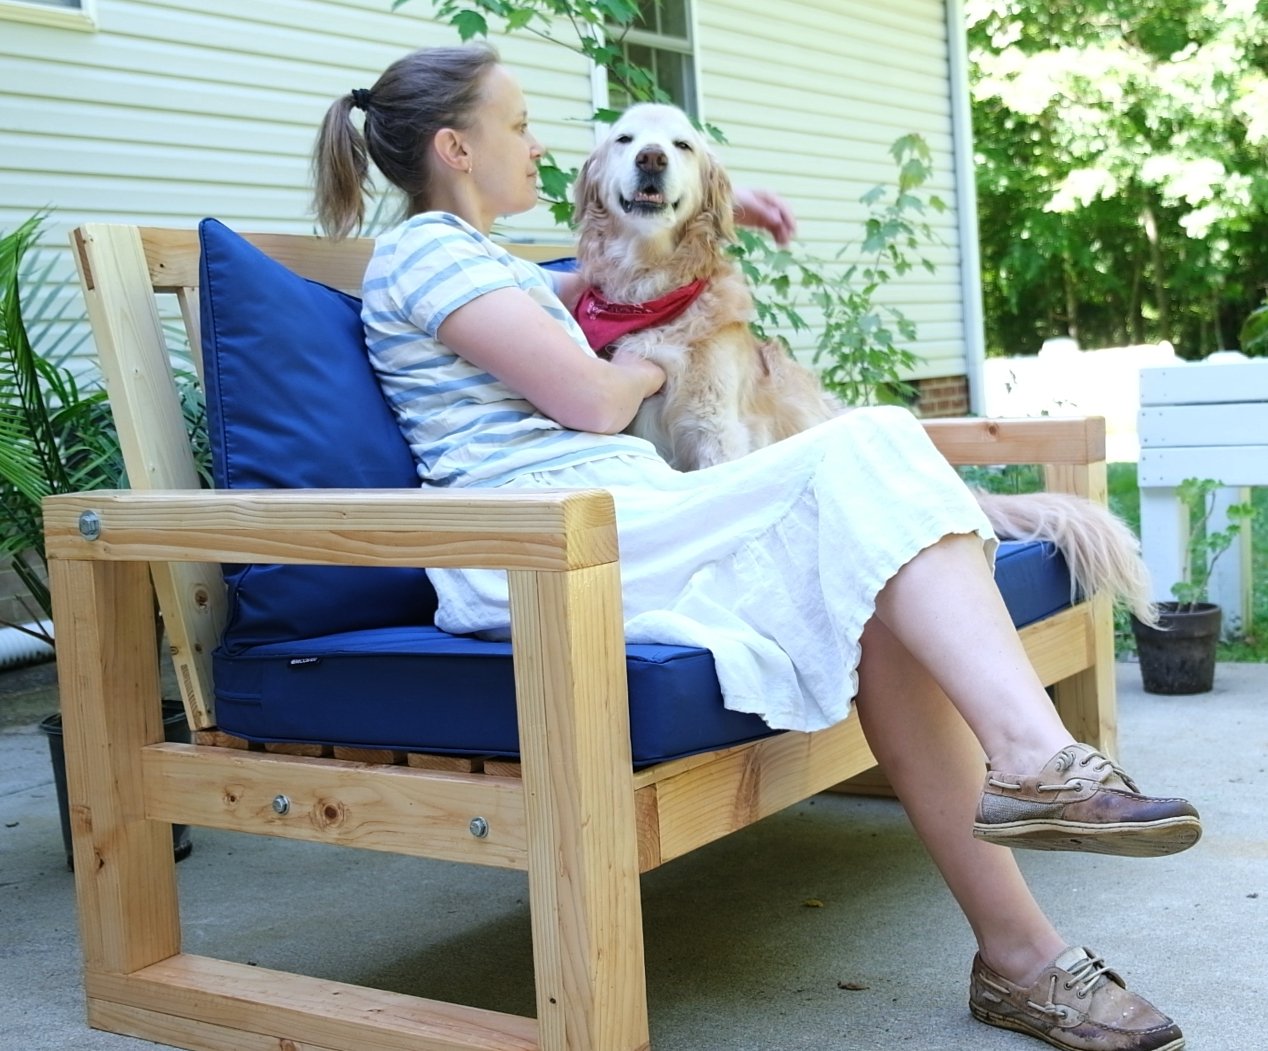
Spring is Here—The Perfect Time for an Outdoor DIY Sofa Project!
The days are getting longer, the weather is warming up, and that means it’s time to start planning our outdoor projects! If you’re looking for an affordable, beginner-friendly build that will transform your patio, I’ve got the perfect one for you.
The days are getting longer, the weather is warming up, and that means it’s time to start planning our outdoor projects! If you’re looking for an affordable, beginner-friendly build that will transform your patio, I’ve got the perfect one for you.
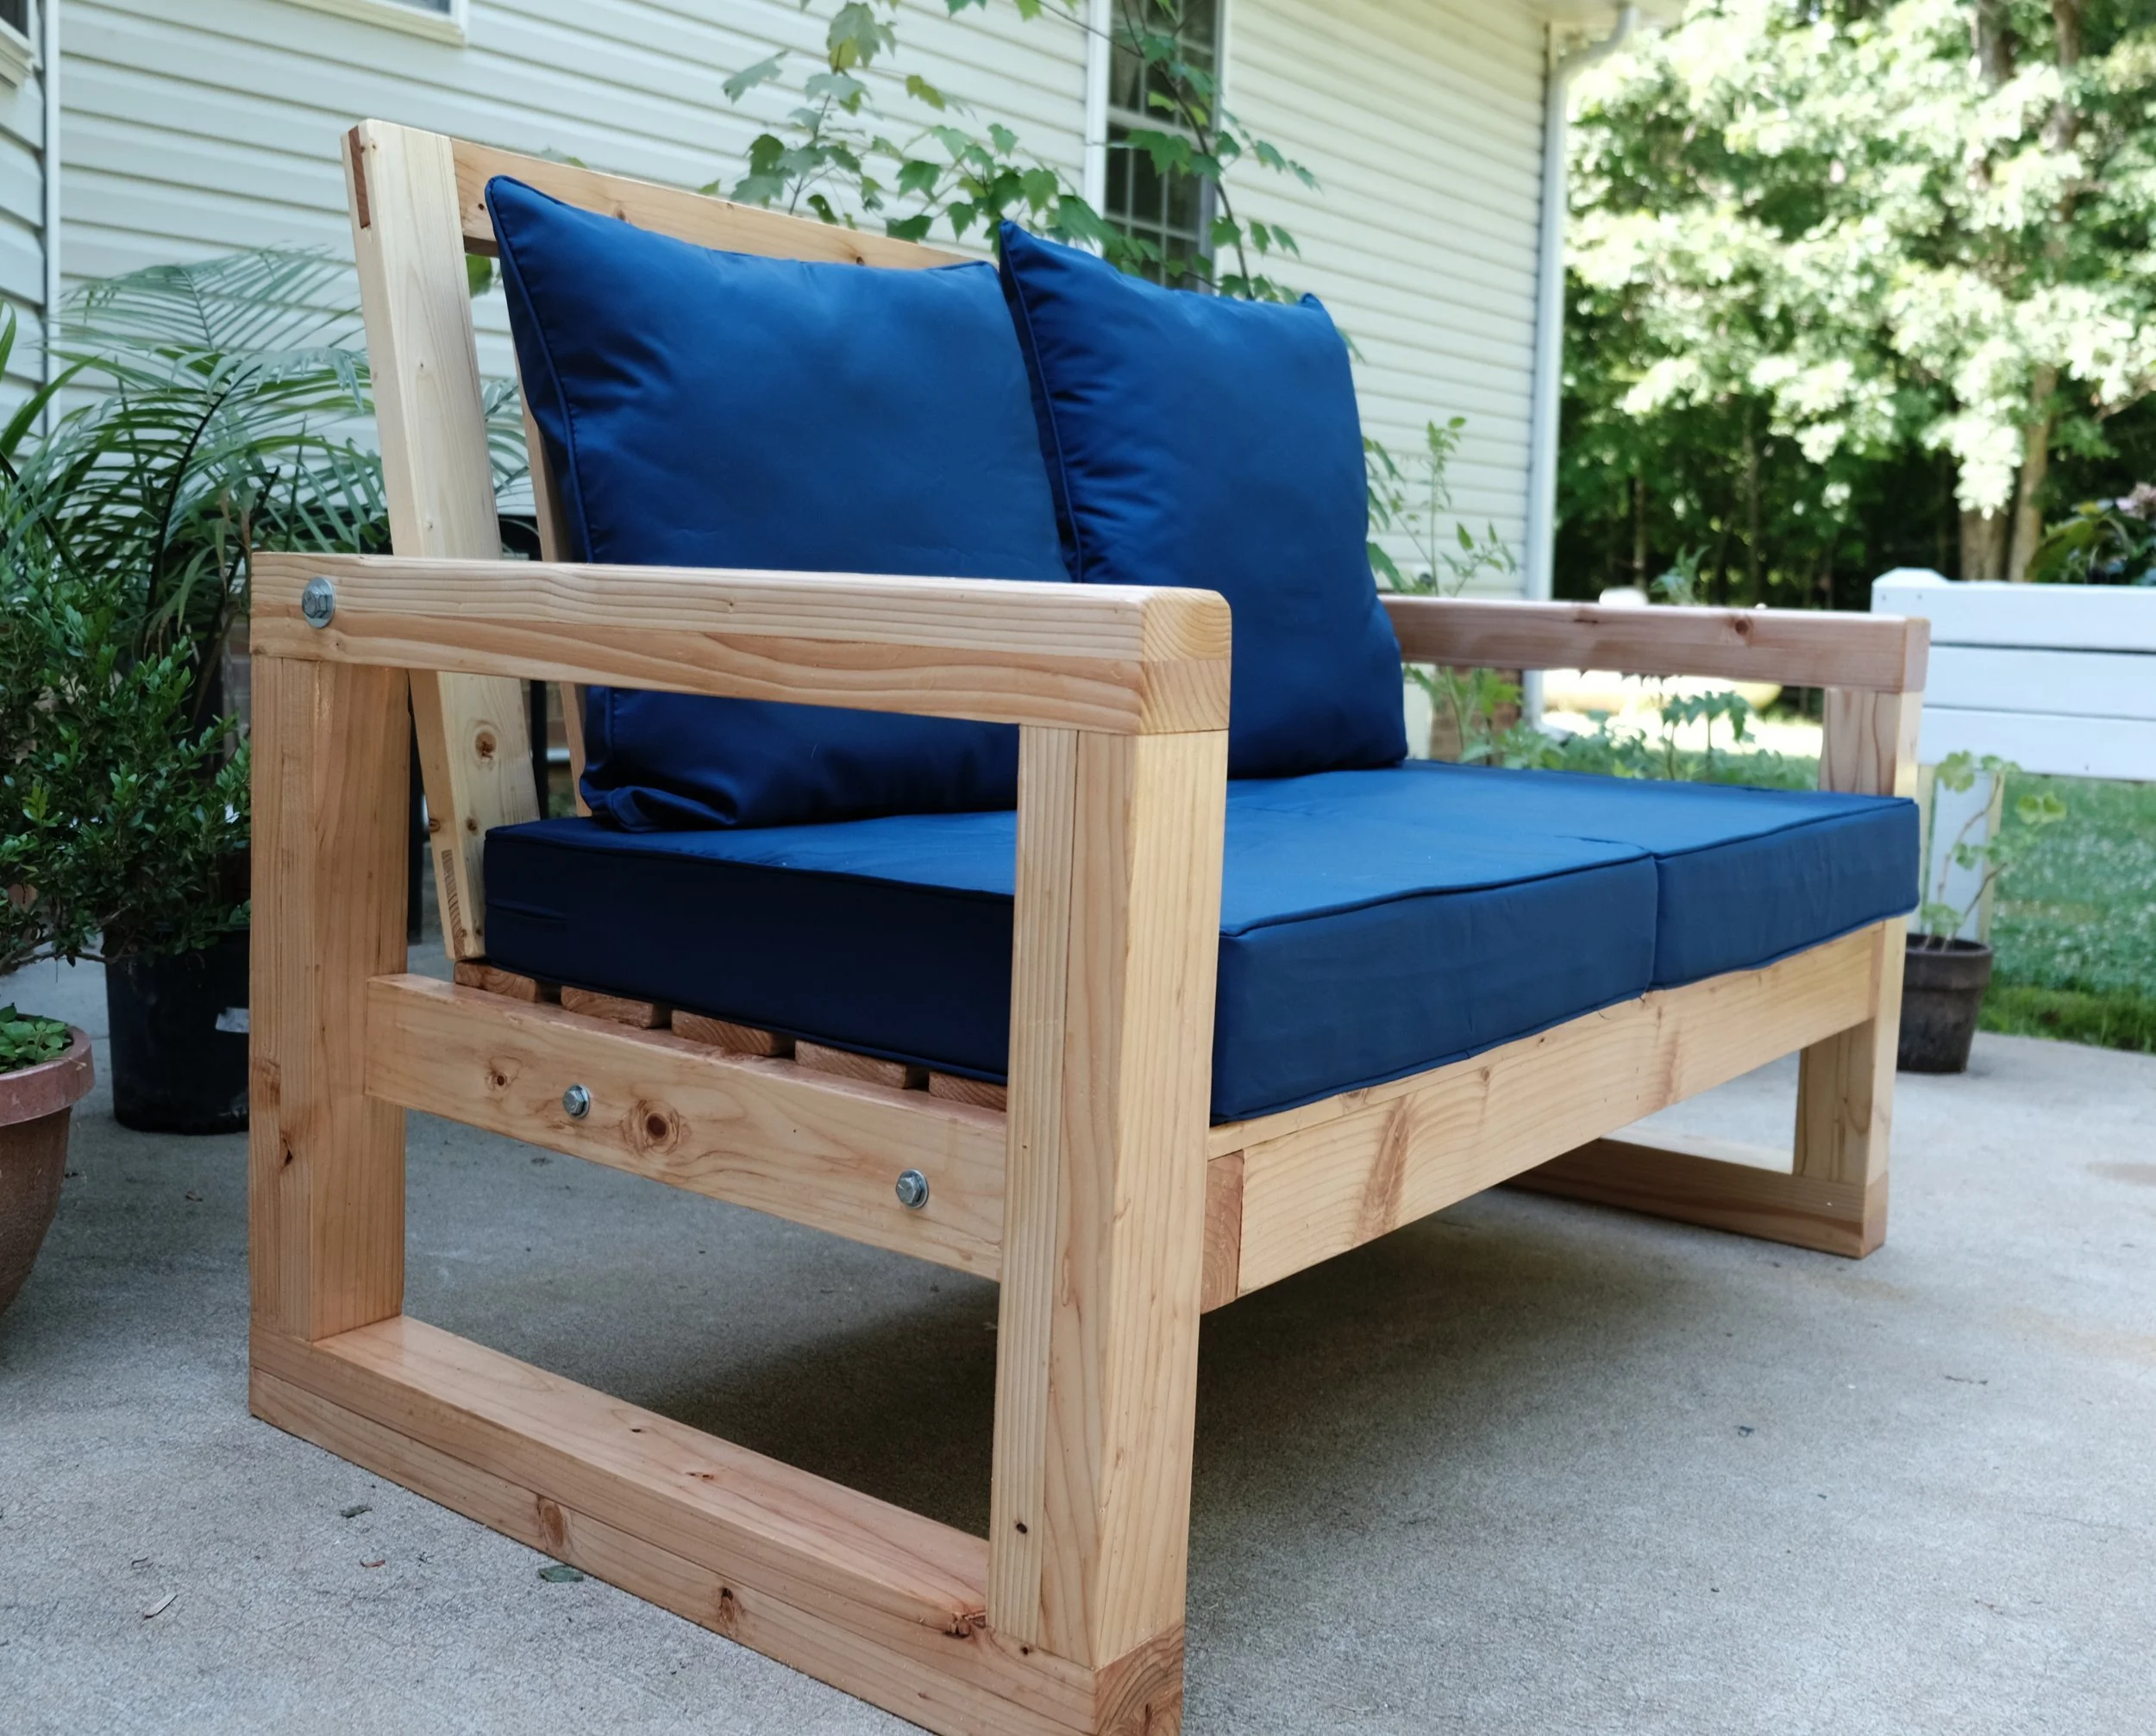
Last year, we built an outdoor sofa, and it instantly became one of our most-used outdoor pieces. Whether it was for relaxing with coffee in the mornings, hosting summer gatherings, or just making our patio more functional, this project proved its worth over and over again. And the best part? You can build it too!
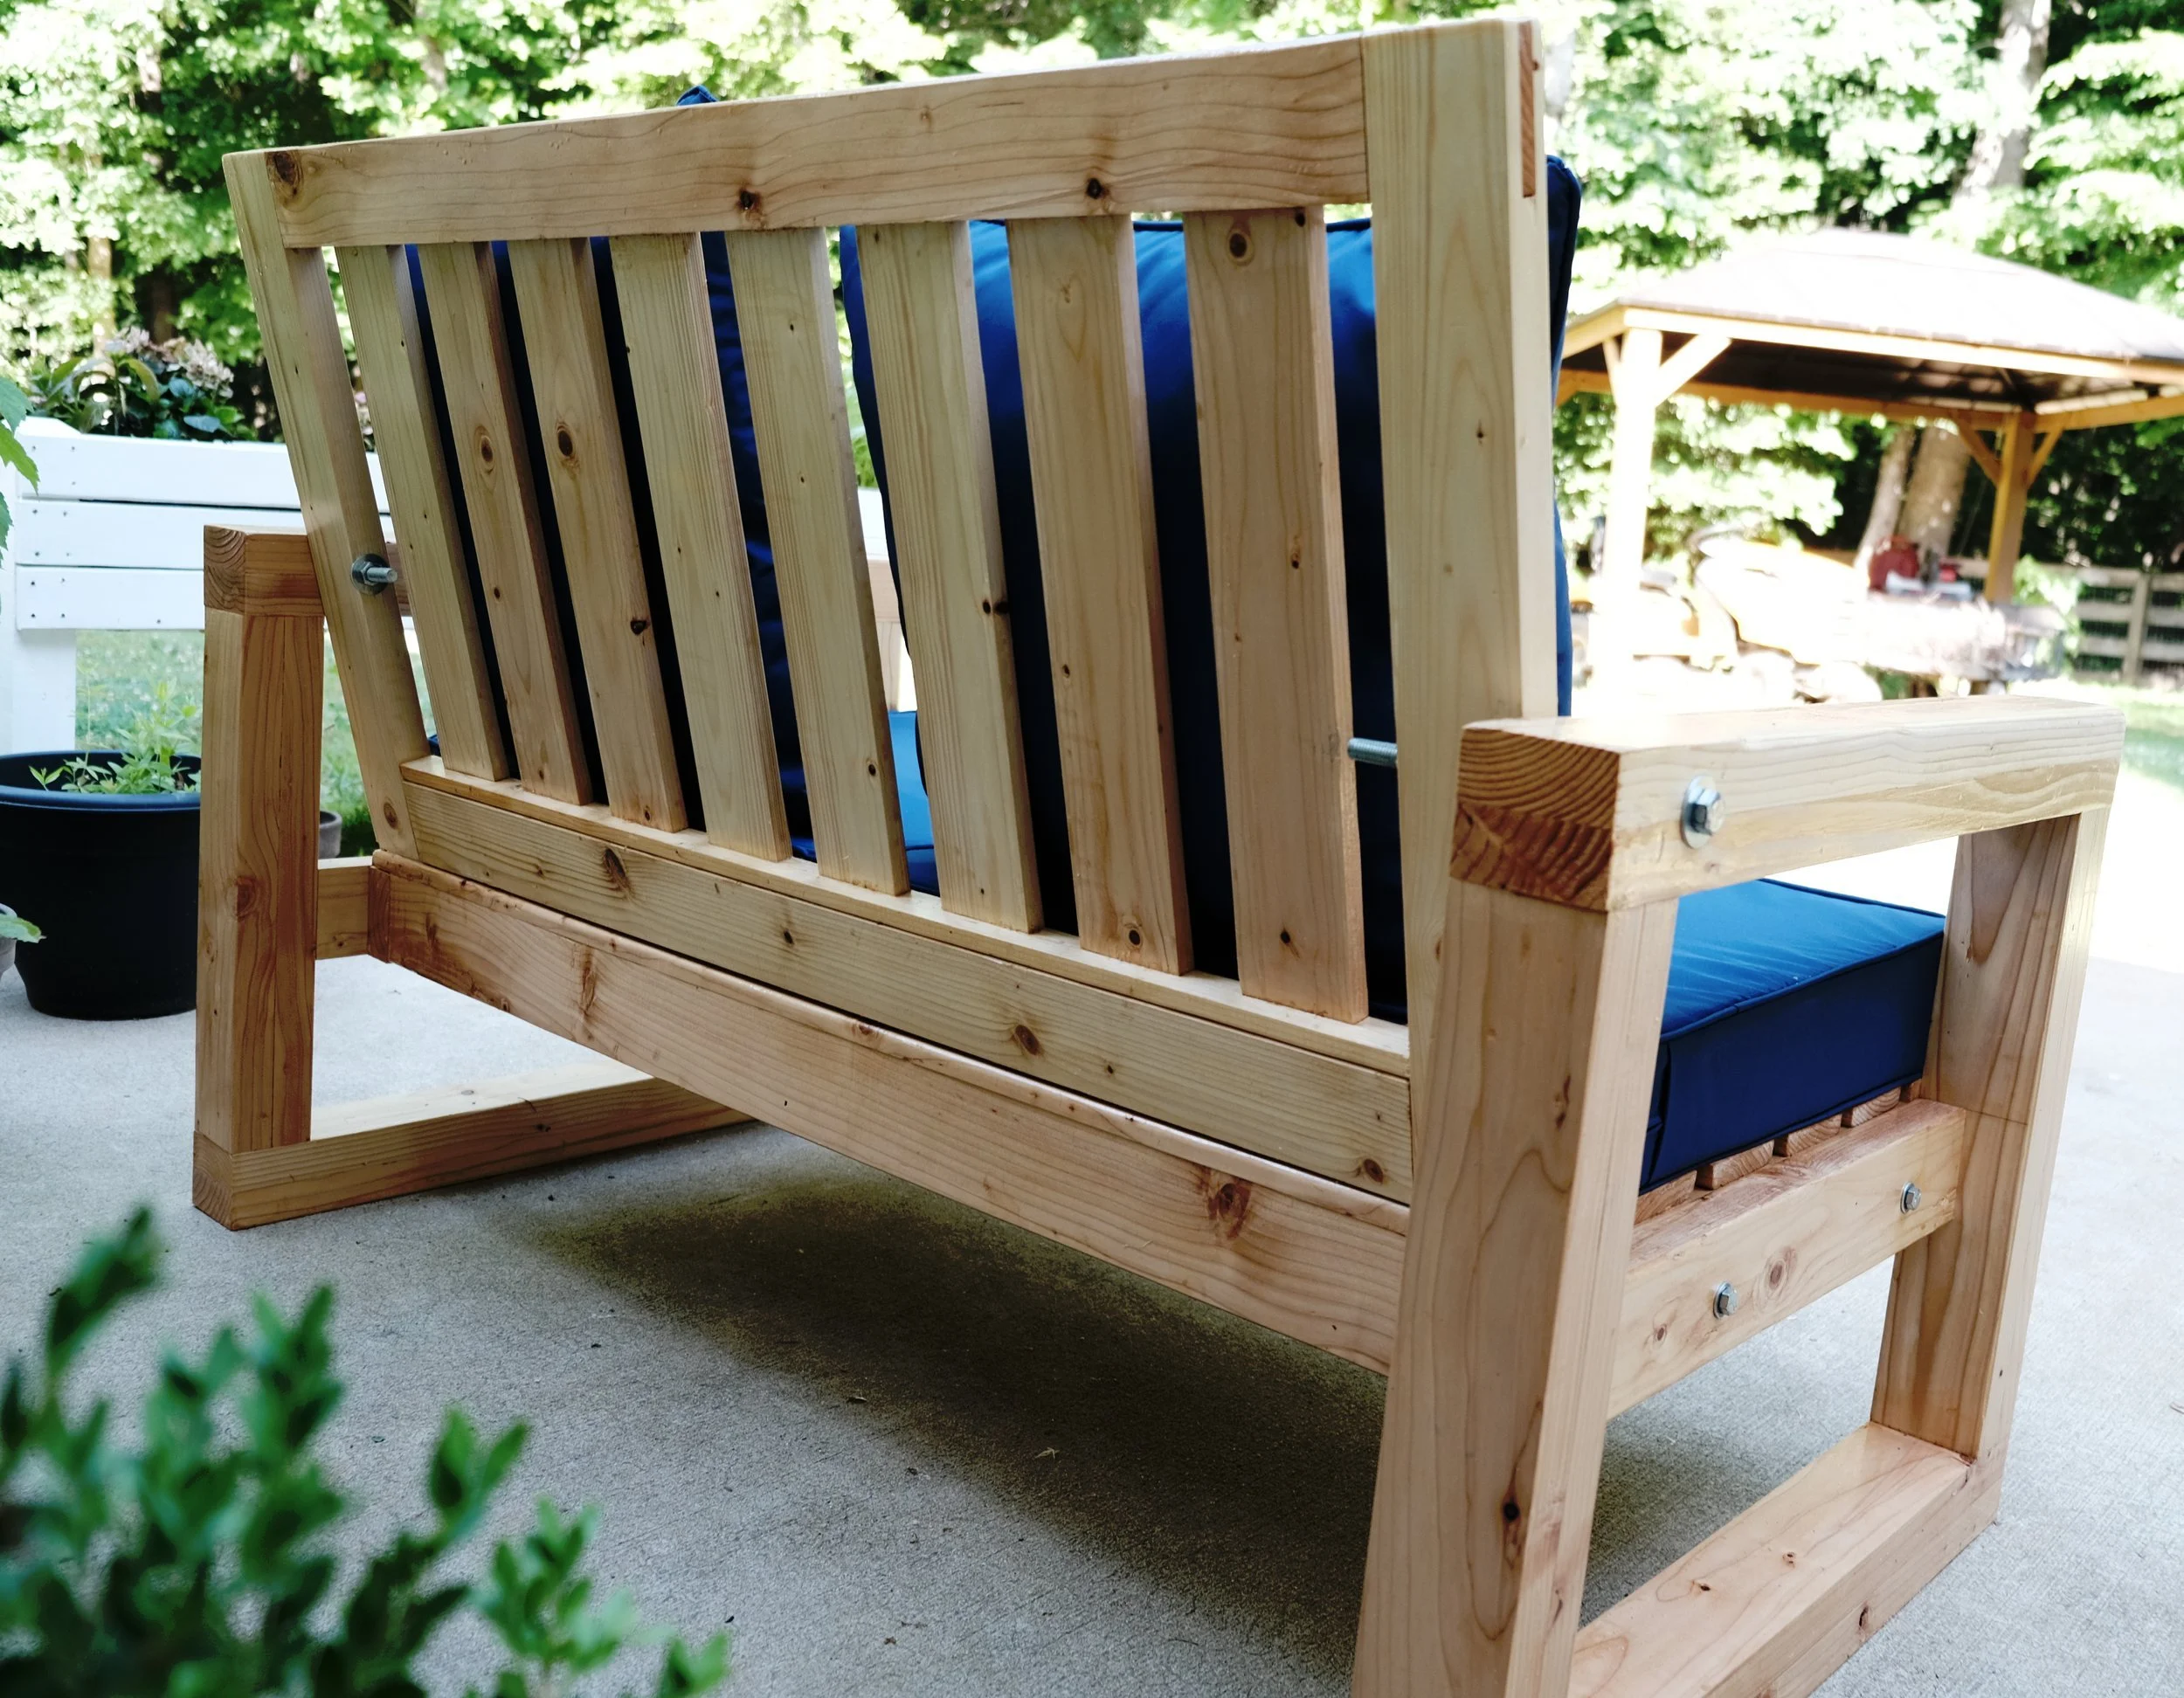
I’ve put together a detailed, step-by-step building plan so you can easily recreate this project for your own space. The plan includes:
✔ Complete materials list – Know exactly what you need before you start.
✔ Clear, easy-to-follow instructions – No guesswork involved.
✔ Detailed diagrams and measurements – Perfect for beginners and experienced builders alike.
Why This Project is a Must-Build
✅ Budget-Friendly: A high-impact upgrade without the high price tag.
✅ Simple & Fast to Build: Perfect for a weekend project.
✅ Designed for Everyday Use: Whether you're entertaining or relaxing, this piece will be a staple in your outdoor space.
If you're ready to build a project that you’ll actually use and love, grab the plans today and get started!
👉 CLICK HERE TO GET THE BUILDING PLANS 👈
Spring is the perfect time to tackle DIY projects, and this one is guaranteed to add both function and style to your patio. Don’t wait—start building now!
To get a complete sense of the project, make sure to watch the building video!

What If You Had 200 Years to Get Good at Life?
Let’s start with a weird question: If you lived for 200 years, would you actually become a genius? Or would you just… be you, but older? That’s the thought experiment that’s been rattling around my head lately. We all like to imagine that immortality would turn us into polyglot violinists who’ve read every book and solved cold fusion. But deep down, I wonder: Would I really learn Mandarin in Year 87? Or would I just keep rewatching The Office forever?

Let’s start with a weird question: If you lived for 200 years, would you actually become a genius? Or would you just… be you, but older?
That’s the thought experiment that’s been rattling around my head lately. We all like to imagine that immortality would turn us into polyglot violinists who’ve read every book and solved cold fusion. But deep down, I wonder: Would I really learn Mandarin in Year 87? Or would I just keep rewatching The Office forever?
This question nagged at me. We often assume endless time guarantees growth, but what if it doesn’t? What if effort, not years, is what actually changes us?
So I tested it. I spent a week learning three things I’d dismissed as “not for me”:

Rubik’s Cube (a puzzle I’d avoided for years)
Poetry (which always felt like decoding riddles)
Long Division (a math gap I’d shrugged off since grade school)
The goal wasn’t perfection. It was to see if leaning into the discomfort of learning could shift something in how I think.
What I Learned:
Rubik’s Cube taught me patience. Solving it felt less like genius and more like untangling headphones—repetitive, frustrating, then suddenly satisfying.
Poetry surprised me. Sitting with a single poem (A Coat by Yeats) for days, I realized how much we miss by skimming surfaces. Words I’d glossed over started clicking into place.
Long Division was humbling. Schools may skip it now, but there’s value in wrestling with the “why” behind the steps.
The goal wasn’t mastery. It was to see if deliberate, awkward effort could crack open my brain a little.
The bigger takeaway? Growth isn’t passive. It’s not about waiting for time or talent to kick in. It’s about choosing the struggle—the kind that feels awkward, slow, and utterly unglamorous.
If you’ve ever wondered whether you’re “stuck” as the person you are now, I shared the full experiment in this video. No flashy tricks or life-hacks—just a candid look at what happens when you trade “I can’t” for “I’ll try.”

The Quiet Little Tool That Taught Generations to Read
Picture this: A small wooden paddle, covered with animal horn and etched with the alphabet. For over 300 years, this unassuming tool—called a hornbook—was the gateway to literacy for millions of children.
It’s a piece of history most of us have never heard of, yet it shaped the minds of thinkers like Isaac Newton, Shakespeare, and even early American pioneers. Today, I want to introduce you to this fascinating relic—and explore why its simplicity might hold lessons for our tech-saturated world. (And of course we’ll build one as well!)
Picture this: A small wooden paddle, covered with animal horn and etched with the alphabet. For over 300 years, this unassuming tool—called a hornbook—was the gateway to literacy for millions of children.
It’s a piece of history most of us have never heard of, yet it shaped the minds of thinkers like Isaac Newton, Shakespeare, and even early American pioneers.
Today, I want to introduce you to this fascinating relic—and explore why its simplicity might hold lessons for our tech-saturated world. (And of course we’ll build one as well!)

For over 300 years, this simple wooden paddle—no bigger than your hand—taught children their ABCs. It was sturdy, portable, and focused entirely on the basics: letters, sounds, and a short text to memorize. No apps, no videos, no distractions. Just a child, a teacher (often a parent or sibling), and this humble tool.
By the middle of the 19th century, it vanished from classrooms. But as we navigate today’s world of buzzing screens and packed curriculums, there’s something quietly fascinating about how it worked.
What Made the Hornbook Special?
Simplicity: One page of essentials. Mastery came from repetition, not rush.
Durability: Covered in horn or epoxy, it survived generations of use.
Focus: In an era without distractions, learning was slow, steady, and tactile.
It wasn’t glamorous, but it built strong foundations. Wealthy or poor, many children learned to read by tracing those letters daily—including thinkers who shaped history.
A Modern Question
Today, we have more tools than ever to teach reading. Yet literacy rates lag, attention spans shrink, and classrooms feel chaotic.
This isn’t about blaming technology or romanticizing the past. It’s about asking: What can we learn from a tool that prioritized focus and simplicity?
What’s in the Video
In my latest video, I explore:
The hornbook’s quiet role in history (and why it disappeared).
Why how we learn matters as much as what we learn.
A DIY project to recreate a hornbook—no 16th-century tools required.
You’ll also see how its principles—repetition, tactile learning, minimal distractions—might still apply today.
Why Watch?
This isn’t a call to abandon modern tools. It’s an invitation to reflect.
Maybe there’s wisdom in slowing down. Maybe strong foundations still matter. Or maybe you’re just curious about a piece of history that’s been hiding in plain sight.
Either way, if you’ve ever wondered how children learned to read before textbooks (or TikTok), you’ll find this story quietly fascinating.
👉 [Watch here] to see the hornbook in action—and decide for yourself.

18 Surprising Uses for Wax Polish + A Perfect Gift Idea
Wax polish might be one of the most versatile finishes you can keep in the shop—or even the kitchen! Whether you use it on wooden projects to enhance their beauty, on metal to prevent rust, or for any of the myriad other uses, wax polish is an incredibly handy item to have on hand.
Wax polish might be one of the most versatile finishes you can keep in the shop—or even the kitchen! Whether you use it on wooden projects to enhance their beauty, on metal to prevent rust, or for any of the myriad other uses, wax polish is an incredibly handy item to have on hand.
Because of its versatility, I think a tin of wax polish makes a fantastic gift—for yourself or someone else. It’s also a perfect stocking stuffer.

In our shoppe, we offer three kinds of wax polish: raw linseed oil, 100% tung oil, and food-grade mineral oil, all made with pure, natural beeswax. Each batch is handmade in our workshop with care. We also offer a wax pot, which is a small wooden box with a snug-fitting lid containing our mineral oil polish. This set also comes with an extra tin, making it a practical gift option.
If you’re planning to give a tin as a gift, keep in mind that the last day to order to ensure delivery before Christmas (within the US) is December 15th!

Now, you might be thinking: Great—I know I can use this on my wooden projects, but what else can it do? Well, I’ve got you covered. I just put together a video sharing 18 different uses for our wax polish. These range from practical solutions to everyday annoyances to tips for achieving a stunning finish on your projects.
If you’ve found another clever use for wax polish, I’d love to hear about it.
Making Christmas gifts on the laser engraver
Every year around this time, I dive into making Christmas-related projects and presents. There’s just something fun about creating gifts from scratch—and this year, I’ve been putting my laser engraver to good use.

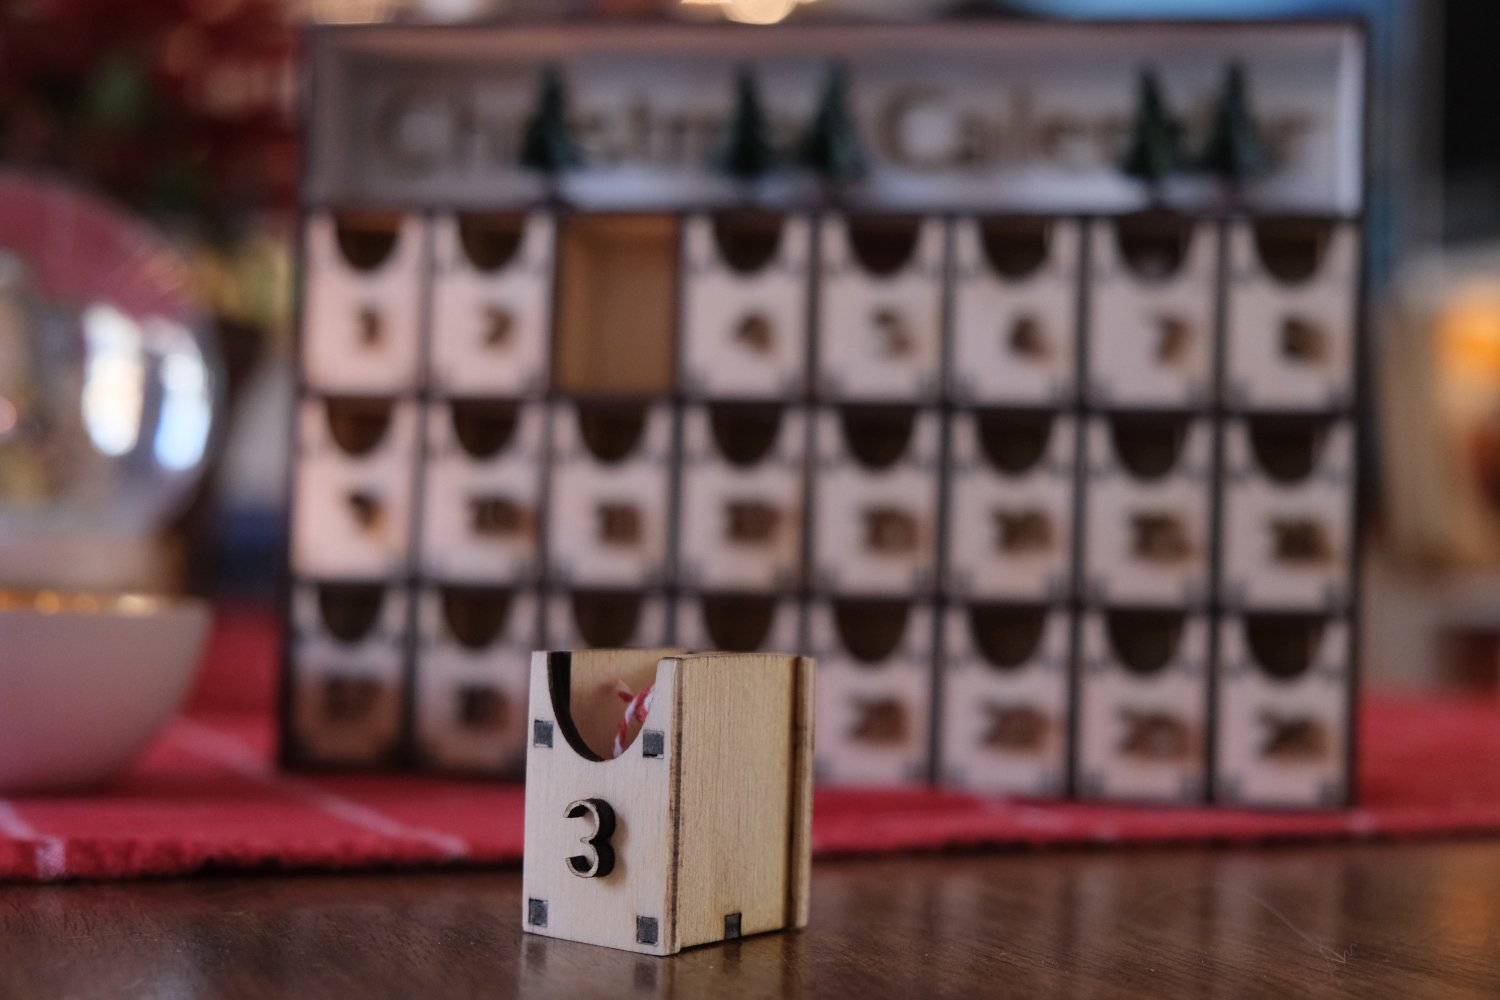
Every year around this time, I dive into making Christmas-related projects and presents. There’s just something fun about creating gifts from scratch—and this year, I’ve been putting my laser engraver to good use. It’s been the perfect tool for two projects I’ve been working on: a wooden advent calendar and personalized leather eyeglass cases, and in my latest youtube video I share these two projects and the process of making them.

A Wooden Advent Calendar with Mini Note Boxes
Advent calendars are a classic holiday tradition, but I wanted to do something a bit different this year. Instead of trinkets, I designed a wooden advent calendar with tiny boxes for little notes.
Find the plan (svg, pdf, eps, dxf and crv formats) here if you want to make your own.
Using the laser engraver, I cut out panels and pieces to assemble the calendar, giving it a clean, detailed look. The boxes are just big enough to hold little messages—things like poems, verses, or small pieces of candy. It’s a simple way to add a personal touch to the countdown to Christmas.
The precision of the laser engraver made it easy to get clean cuts and intricate details, which would have been much harder (and way less fun) by hand. I stuck with a natural wood finish and also added some raised letters and numbers as well as little cut out painted Christmas trees.
Leather Eyeglass Cases with a Personal Touch

The second project on my list was leather eyeglass cases—practical, customizable, and great for gifts. I designed a simple pattern, cleaned it up in the computer, and added the holes for punching, as well as the cutting of the leather. For closure, I went with small magnets, a rather clean and practical choice which ensures you don’t have to push down too hard on the case to close it. If you’d like to cut out your own eyeglass case (whether by hand or by a cnc or laser engraver), I have it here: leather eyeglass pattern
To watch these two projects come to life, make sure to check out the video!