Paint a Tabouret with Chalk-Style Paint

Finished Tabouret
Chalk-Painting the Tabouret
For our next project, we decided to go for chalk paint. Chalk paint has become quite popular these last couple of years, however it's not a new concept at all. In fact, many old-fashioned milk paint recipes contained chalk which blur the lines between chalk paint and milk paint.
Chalk paint is not one thing - it's a concept. You can either buy pre-made chalk paint, or you make your own. The fundamental principle is to use flat latex paint and add a chalk component to produce a thicker paint that coats surfaces easily.
Why are people liking this type of paint so much? Well, it goes on most surfaces very easily, even furniture that hasn't been sanded or primed. That makes it an ideal candidate for old pieces, kitchen cabinets, or other projects where you want to eliminate the sometimes great amount of prep work. The chalky nature of chalk paint also produces a very matte finish which creates an interesting, antique-style look.
In terms of the chalking material you have a couple of different options such as Sodium BiCarbonate, Calcium Carbonate, Plaster of Paris and Grout to choose from. Each material produce a slightly different result:
- Sodium BiCarbonate (baking soda) is a common household supply. Sodium BiCarbonate dissolves in water (or latex paint). In paint, that results in a chalky or sandy finish which is easy to sand down.
- Calcium Carbonate is what common drawing chalk is made of. It's normally sold as a fine powder, and is what historically was used when creating this type of paint. Calcium carbonate makes a great chalk paint, which doesn't harden and is easy to work with. The one downside with Calcium Carbonate is that it can be a little tricky to find. Order it online, or check out your local home brewing supply store. You could also buy a few packs of regular chalk sticks and smash them up in a mortar and pestle, or use a plastic bag and a hammer (it's important to create a fine powder.)
- Plaster of Paris is a commonly available substance used in construction and patching up walls. The one downside with Plaster of Paris is that it hardens when it comes in contact with water, so your mixed paint can harden rather quickly depending on how much water you add to the slurry. Tip - make smaller batches of paint, if you're working on a big piece of furniture.
- Grout is also commonly available at your home improvement store. It's a slightly more coarse material and is similar to Plaster of Paris in that it hardens when it comes into contact with water. Again, start out with mixing smaller amounts to avoid having your paint harden before you finish your project.
Materials Needed:
- 2 different colored flat latex paints of your choice (paint samples works great for smaller projects)
- Chalk component (either Calcium Carbonate, baking soda, Plaster of Paris or grout)
- Calcium Carbonate: 1:1 mix worked well for us.
- Baking Soda: 2 parts paint 1part soda seems to work well or try a slurry or baking soda and a little water then mix in paint
- Plaster of Paris: 2 parts plaster and 1 part paint, but mix a slurry first
- Grout: use unsanded and try a 2:1 mix with a slurry
With all these choices it is in your interest to experiment and try it out on a scrap piece of wood.
- Two small containers to mix paints in
- Small whisk or stir stick
- Nylon brush
- Fine Sandpaper 220 grit
- Rag for cleaning
- Clear wax (steel wool or rag for applying)
- Dark wax
Method:
Creating Chalk Paint
For our project we used Calcium Carbonate. Your ratios depend on what your surface is like and how much coverage you're looking for (the ratios will be different if you go for baking sofa, Plaster of Paris or grout, see above).
For our first coat we combined 2 parts Calcium Carbonate to 3 parts paint. This created a paint that resulted in a nice, chalky surface, however it didn't go on that thick. For our second coat we combined equal parts Calcium Carbonate to flat latex paint to create a thicker paint.
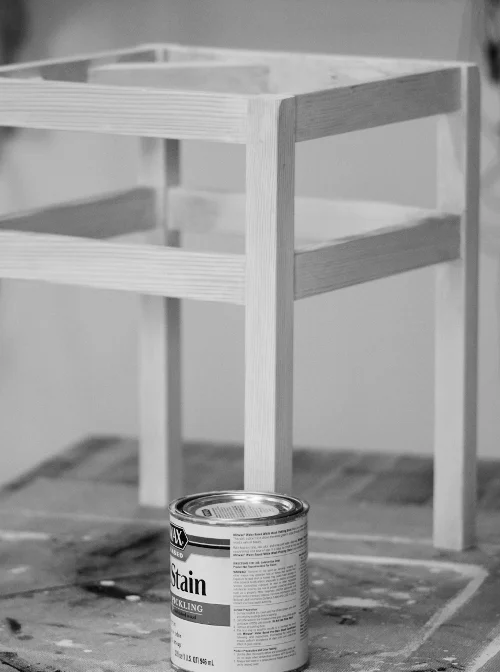
Make sure you start with a clean surface, especially if using an old piece of furniture. We started with a primed and sanded stool to ensure a really good base coat. Even though priming always ensures a better surface for any paint to grip on to, when it comes to chalk paint you can often get away with skipping this step.
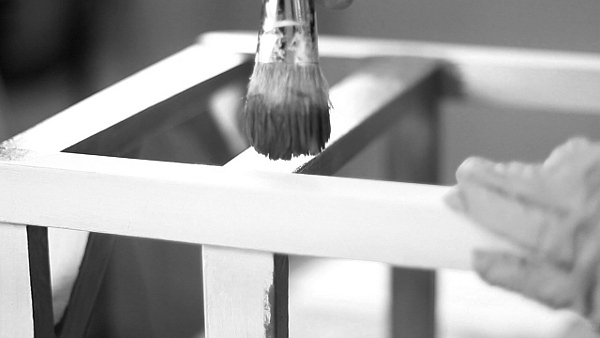
For the first coat of paint, we used a dark red color. Chalk paint dries quickly and chalky, so you can re-coat within an hour or so.
For our second coat we used a lighter turquoise paint which covered the red surface nicely. If you're looking to achieve a layered look, make sure your two different colors are different enough to create a contrast.
Coverage:
Since chalk-paint contains such fine particles, it does a great job in getting into all the little nooks and crannies in a furniture finish. In other words - it's easy to accomplish a really nice surface. You don't have to be too concerned about putting on a perfect coat. Unlike glossy paint, your brushstrokes don't show up much, and since sanding is part of the design it furthers smooths out the surface.
Sanding:
Once your paint has dried, bring out some fine sandpaper and lightly go over your whole piece to smooth it down. If you're looking to create a more layered look, start sanding the edges and corners to reveal some of the underneath coat. How heavily you sand is a matter of taste. Some people prefer a rather heavily distressed finish while others prefer a more subtle look.
Top Coat
Since chalk paint is so flat and chalky, it's imperative that you protect the surface in some way. Wax has become the go-to finish for many people who use chalk paint and wax is easy to apply and looks great, however it's not that durable. If you're finishing a piece of furniture that will be handled a lot - such as a table top or seat for example, it can be a good idea to first apply a coat of polyurethane or shellac to add further protection. You can always add wax on top of that. If you only apply wax on a finish that gets worn a lot - be prepared to reapply the wax every so often to provide protection.
Wax
We decided to go the classic route and use two waxes - one clear and one dark. When applying wax, you cover your piece with it, then let it penetrate the surface of the wood, and then you wipe off the excess. Wiping off the excess is an important step which will create a smooth finish and avoids any build-up of unwanted finish.
For the first coat of wax, we applied it with 0000 (fine) steel wool to further work it into the finish and create a smooth texture. After a few minutes, it's time to buff off the excess with a clean cloth.
Wax applies easier if it's warm, so for our second coat we warmed a lump of dark wax in the hand covered with a cloth. Once the wax turned soft and slightly warm, you wrap the cloth around it into a small ball. With the softened wax inside the cloth, you can easily apply the wax all over your piece.
Dark wax adds additional dimension to the design and fills in nooks and crannies, further creating a layered look. Once the wax dries off, buff off the excess for a smooth and beautiful finish.
Design:
Using chalk paint is a great way to go if you're looking to add more character and depth to your piece. It's a nice option, no matter whether you're refinishing an old piece, or you're finishing a brand new piece. Also, if you haven't worked with chalk paint, you'll be pleasantly surprised how lovely it is to use - the coverage is great, it dries quickly and you have so much flexibility in creating a unique look. If you decide to go for a wax finish, you'll also appreciate the silky smooth finish this method produces.