Building a Cyber Deck from Wood w/ a Raspberry Pi 5
CyberDeck
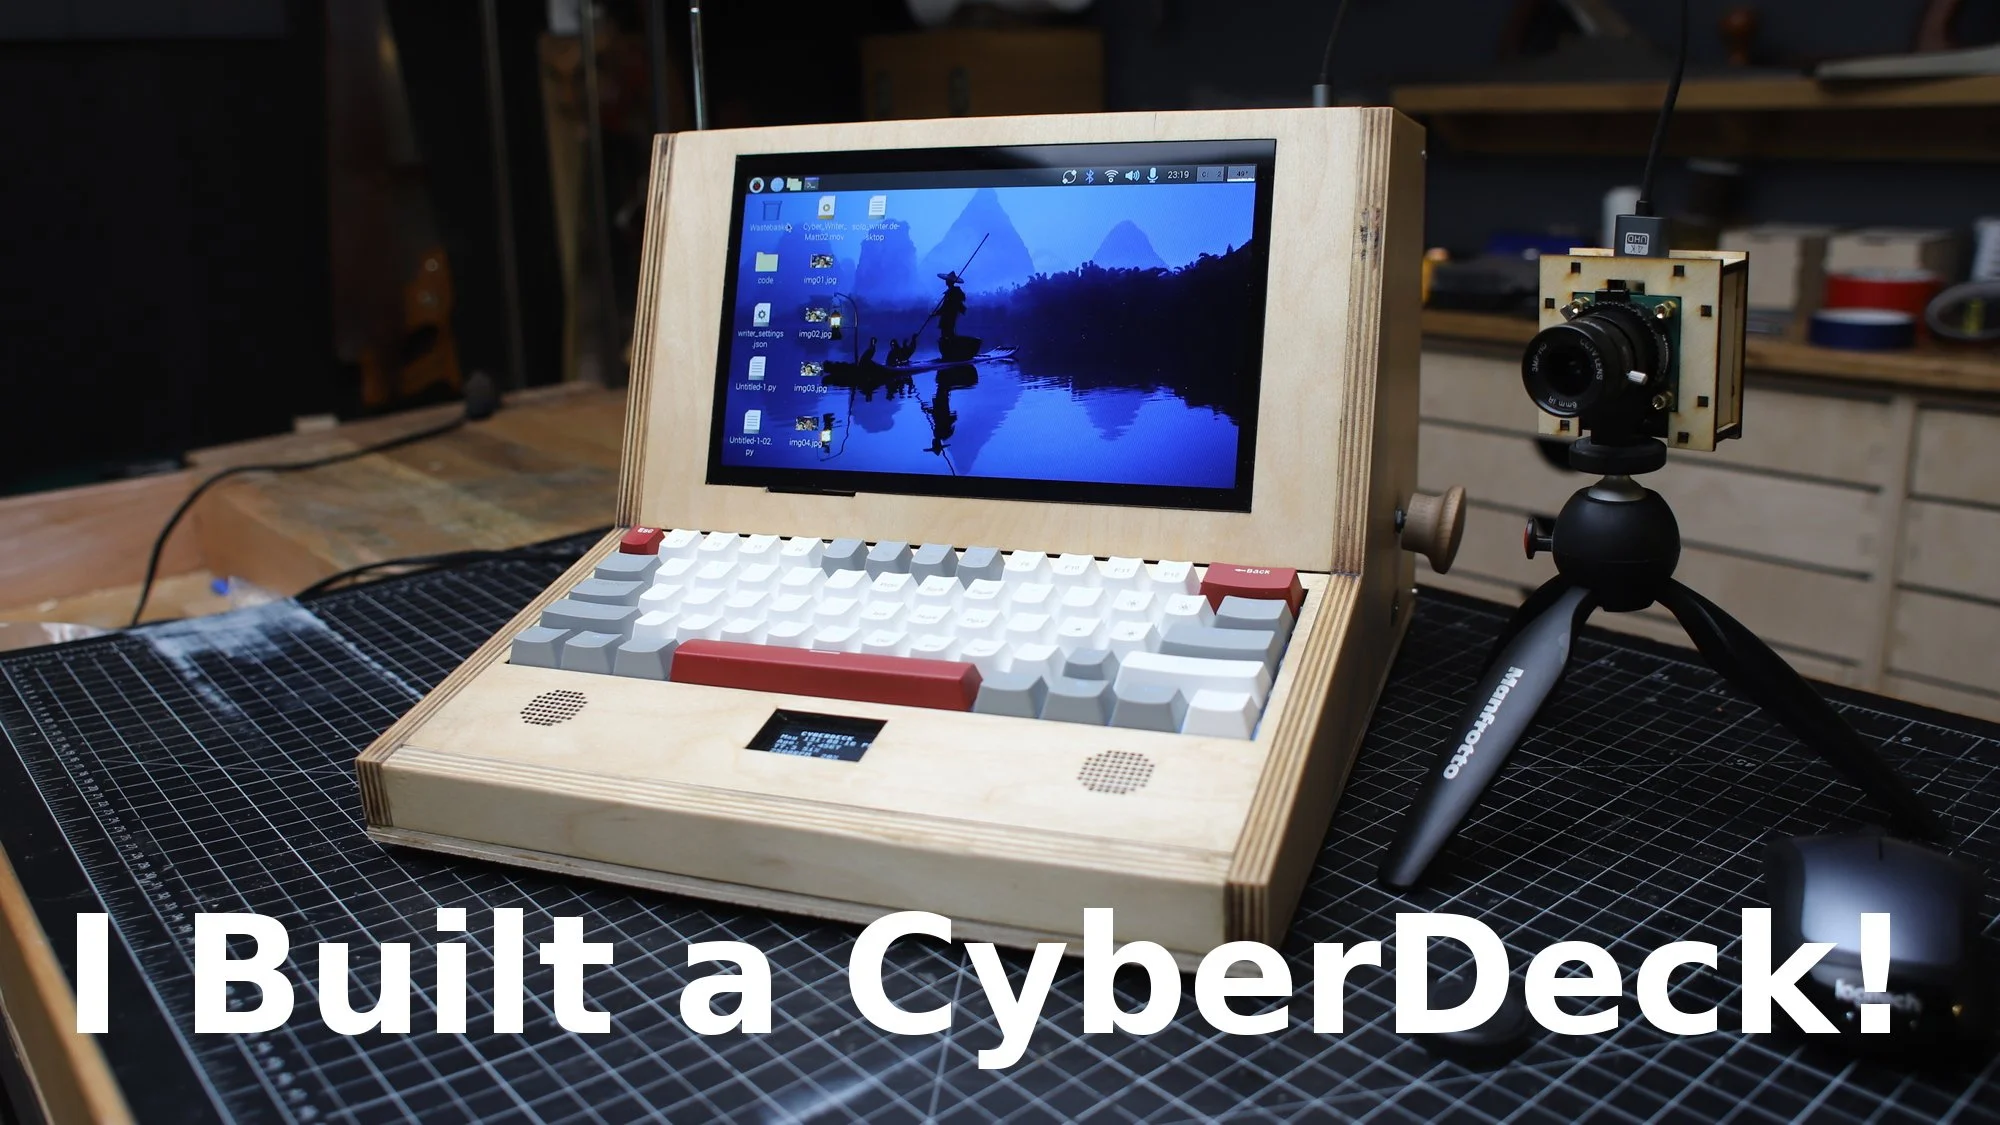
I call this a CyberDeck, but the name doesn’t really fit, it's more like an all-in-one computer. Unlike a laptop, it doesn’t fold down and isn’t portable enough to fit in a bag.
This is a DIY system: I made a custom case, chose common components, and wired everything together. Many “DIY computers” just toss a Raspberry Pi or similar single-board computer into a box, and you wonder if anyone actually uses them for real tasks. I wanted something I would actually use, and even prefer over commercial alternatives.
Part of the appeal is simply building something custom, but beyond that, I wanted features I’d never found in a single device. For example, I’ve owned a Raspberry Pi High Quality Camera for years, but never found a practical, robust way to use it. The ribbon cable is delicate, the wires are exposed, and the camera is awkward to position. Manual lens focusing only added to the hassle.
I had similar frustrations with an SDR (Software Defined Radio) USB stick: I never had a reliable, repeatable setup. Integrating both devices into a custom case solved these usability issues.
Besides typical computing tasks, I also tinker with ESP32s, do programming, experiment with databases, and enjoy Linux in general. The Raspberry Pi 5 is well-suited to all these activities: it’s cheap, has accessible GPIO pins, and in my case, the 8 GB RAM model cost $80.
Basic Cost Breakdown
Item Cost
Pi 5 $80
Case Fan (4-pin) $13
USB Breakout Cable $3
NVMe Hat $13
NVMe 256 GB $27
Mouse $11
Rocker Switch $1
Right Angle USB Micro $4
USB Powered Hub $29
Buck Converter $11
USB Sound Card $8
Speakers $11
SMA SDR Cable $10
Angle Antenna $10
10" Touch Screen $50
Keyboard $20
12V Power Supply $10
Approximate Total: $311
Items I already had:
ESP32
OLED
Wires
Camera
Speaker Amp
Miscellaneous connectors
Wood
Initially, I planned to use white oak for the final version and plywood for the test version. However, after building the CyberWriter (a related project), I realized how much I liked Baltic birch plywood and used it instead.
I used an XTool 40-watt diode laser for almost all cuts (except larger pieces, cut on a table saw), designing parts in Vectric Aspire and exporting SVGs to the laser software. Construction uses plywood in various thicknesses (1/8", 1/4", 1/2") and some 1/4" MDF for internal structures. A pin nailer was used sparingly; most joints rely on yellow glue.
Cable management is the hardest part—and still a work in progress.
Building Process
Building the CyberWriter first helped me refine the design. This build was more challenging because of the number of components and their installation order. The main case is glued together, but the speakers and OLED must be installed (and wired) before the keyboard. The Pi 5 mounts to the rear of the screen (as the Pi Zero did in the CyberWriter), but it’s larger, with a heatsink, fan, NVMe hat, and drive, making mounting trickier.
The screen, while similar to the writer, is now a touch screen: it adds a delicate ribbon cable for touch input, which affects mounting. The heavier screen and thicker glass also required design adjustments.
Adding new features (HDMI breakout, USB breakout, speaker amp, camera mount, etc.), especially those affecting the case exterior, complicates the wiring and installation sequence. “Feature creep” became a real issue—I originally wanted a breadboard and Pi/ESP32 breakouts under the keyboard, but abandoned that idea after wasted effort. I focused on making SDR and camera access easy instead. The always-connected OLED (via ESP32) enables convenient programming and monitoring.
The SDR requires a sturdy USB port and adequate power. It also generates significant heat during operation, which I address with a temperature sensor and an ESP32-controlled case fan. The OLED continuously displays fan speed, case temperature, and humidity for internal monitoring.
Installation order proved critical; components couldn’t be made too permanent in case removal or servicing was needed. The power supply was particularly challenging to sequence.
Power Supply
My goal was to use a single 12V power supply for everything: Pi, screen, SDR, speakers, amp, ESP32, OLED, and camera. I wanted to avoid relying solely on the Pi’s 5V/5A supply, especially since a USB breakout might also power peripherals.
Switching from 5V to 12V required additional components. I wanted the AC/DC brick inside the case, splitting power internally, and using a standard, easily replaceable AC cord—no external brick required.
After many iterations, the final solution is as follows: a 12V 5A supply wired to four screw terminals. One terminal provides direct, always-on power (for the ESP32 and OLED), while the other three are switched (with a red-LED case switch):
5V 6A buck converter
12V powered USB hub
12V case fan (speed-controlled by the ESP32 with an ATH10 temp sensor)
The buck converter is crucial since powering a Pi 5 without its standard supply can be tricky. I soldered three 2200 μF capacitors in parallel to stabilize voltage as the 5V leaves the buck converter, and I run it at 5.25V to compensate for voltage drop along the run. Power is delivered via USB Type-C.
I also tried powering via GPIO (with fuse and voltage protection), but ran into problems. Simpler proved better for my setup. For fewer peripherals, the standard Pi supply would suffice.
Batteries
For battery use, I recommend a similar 12V-centric approach. With 18650s, configure a 4S (four cells in series, yielding 12V) and use a buck converter to step down to 5V (5.25V). Offload power-hungry peripherals to a 12V USB hub. For longer runtime, a 4S2P (four series, two parallel) pack is preferable, but weight increases—eight 18650s plus a cell balancer and wiring is significant. Still, this is a safe, effective way to run a Pi 5 on the go for a setup like this.
To fit all power components, I built a tower structure to save internal space, adding about two inches to the case depth compared to the CyberWriter. The 12V AC/DC brick is at the bottom, buck converter in the middle, USB hub on top—giving easy access to ports. The buck converter’s small size leaves room on both sides, and the power brick is mounted flush with the case wall for plug access.
Summary:
This CyberDeck is an all-in-one, custom-built computer emphasizing robust usability, internal integration of peripherals (camera, SDR, ESP32), and a carefully considered power supply strategy. Construction prioritizes modularity, with lessons learned from previous builds, and power management tailored for safe, reliable operation.